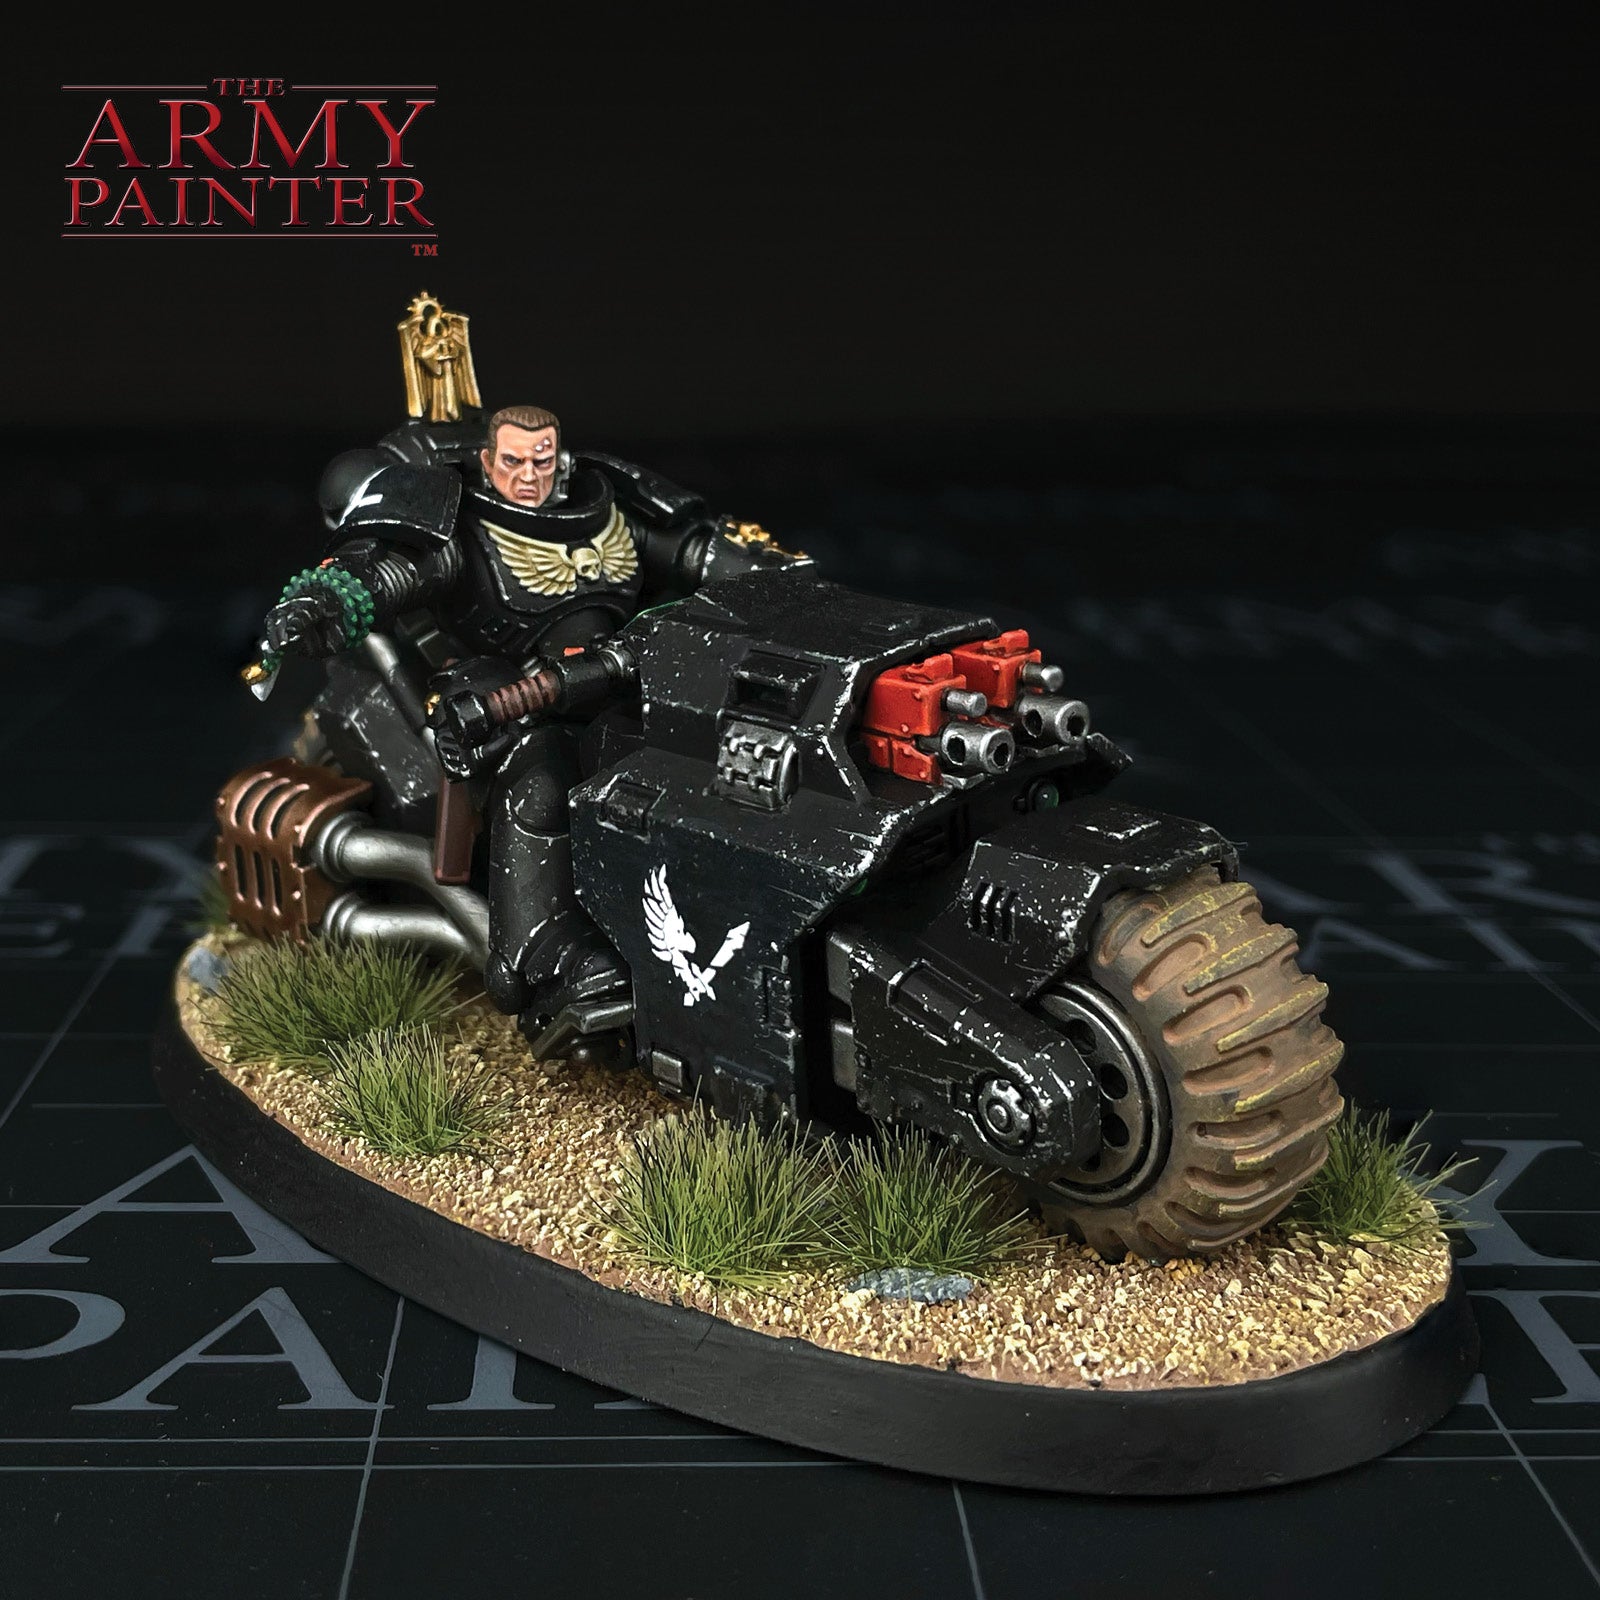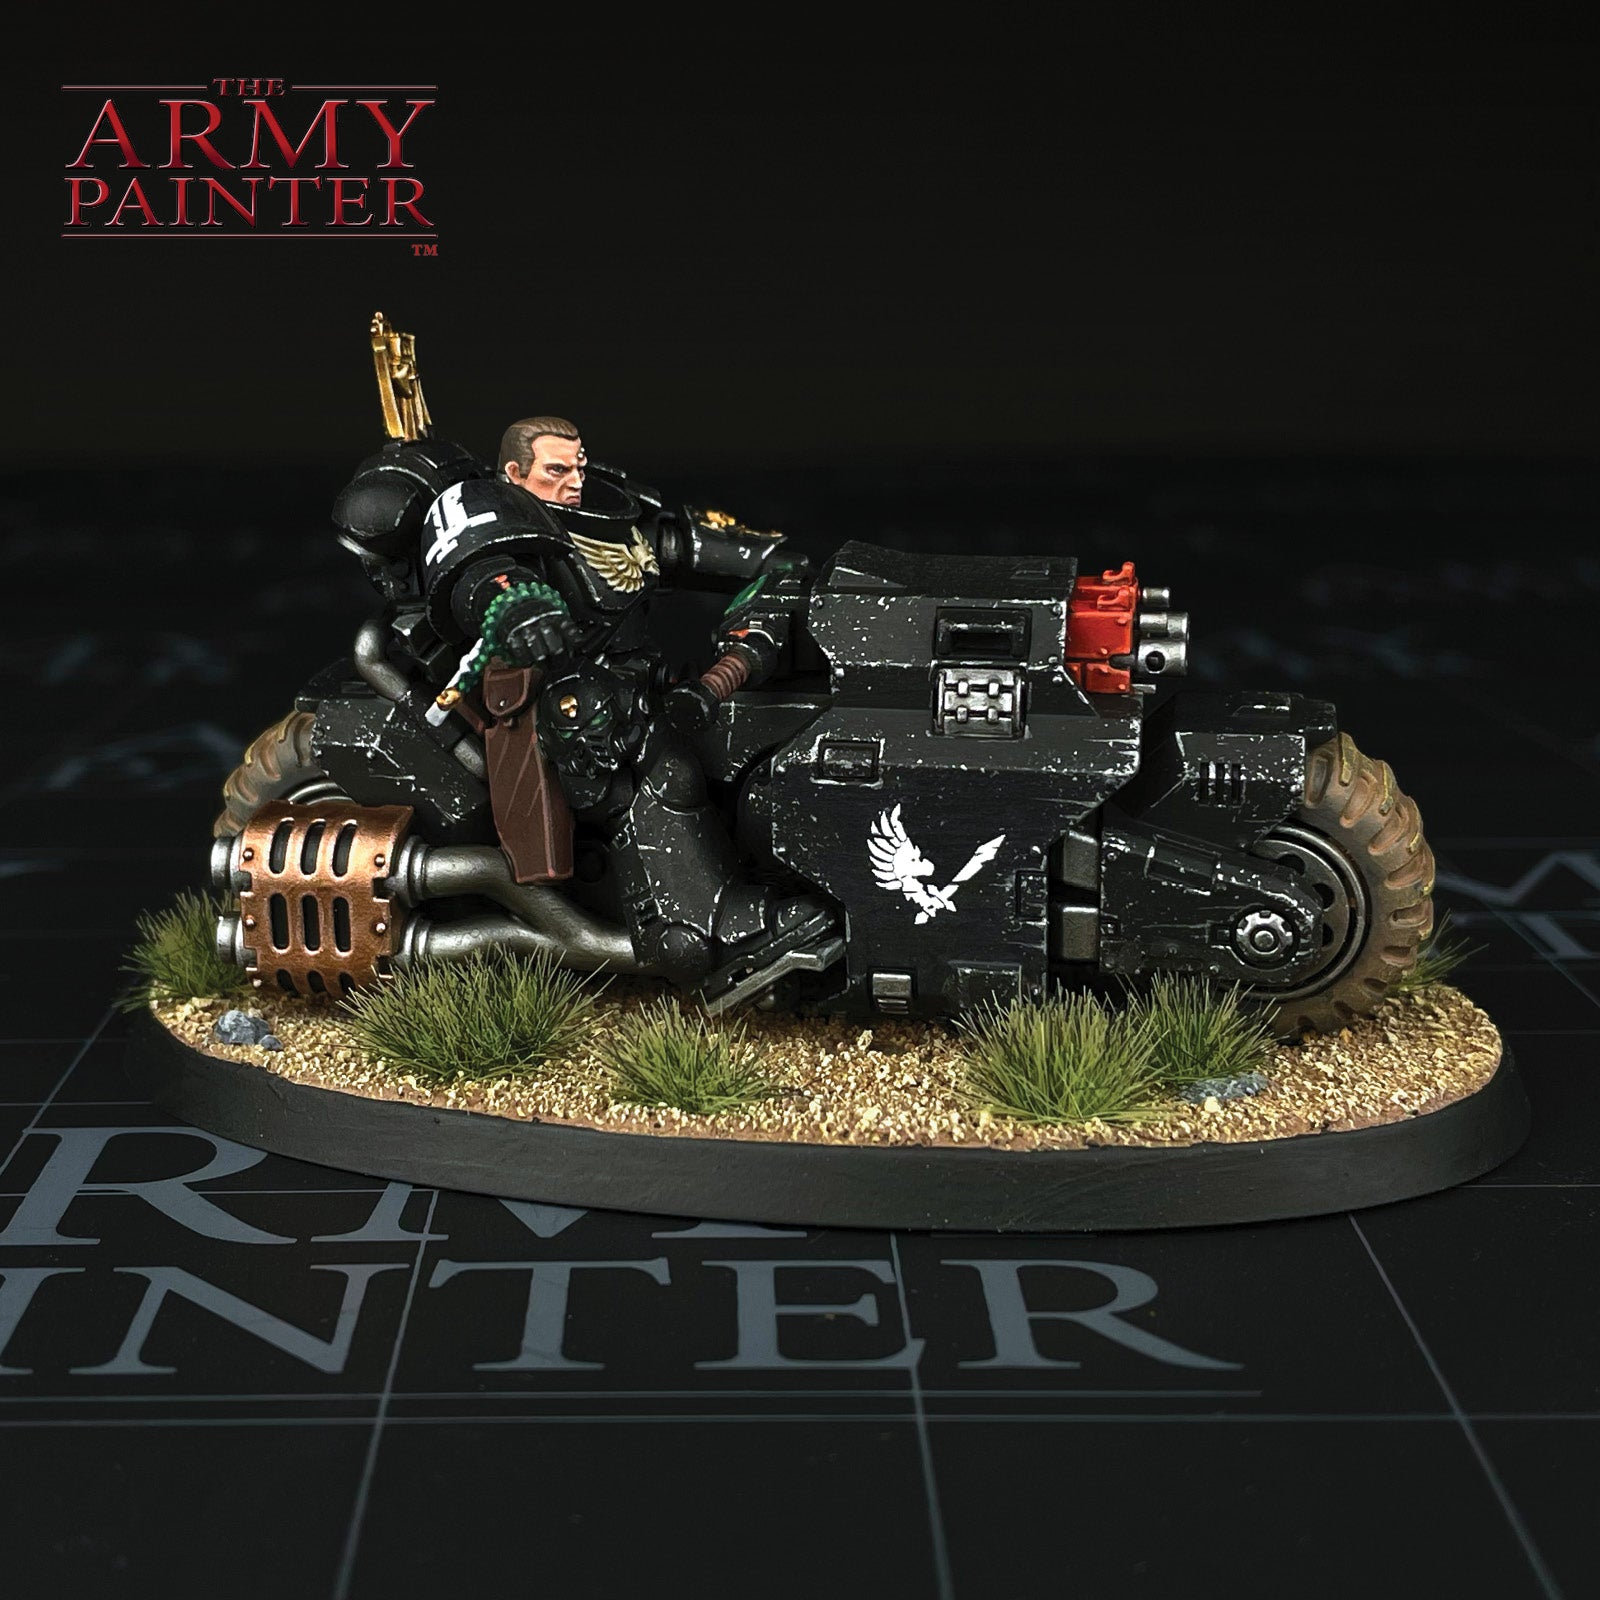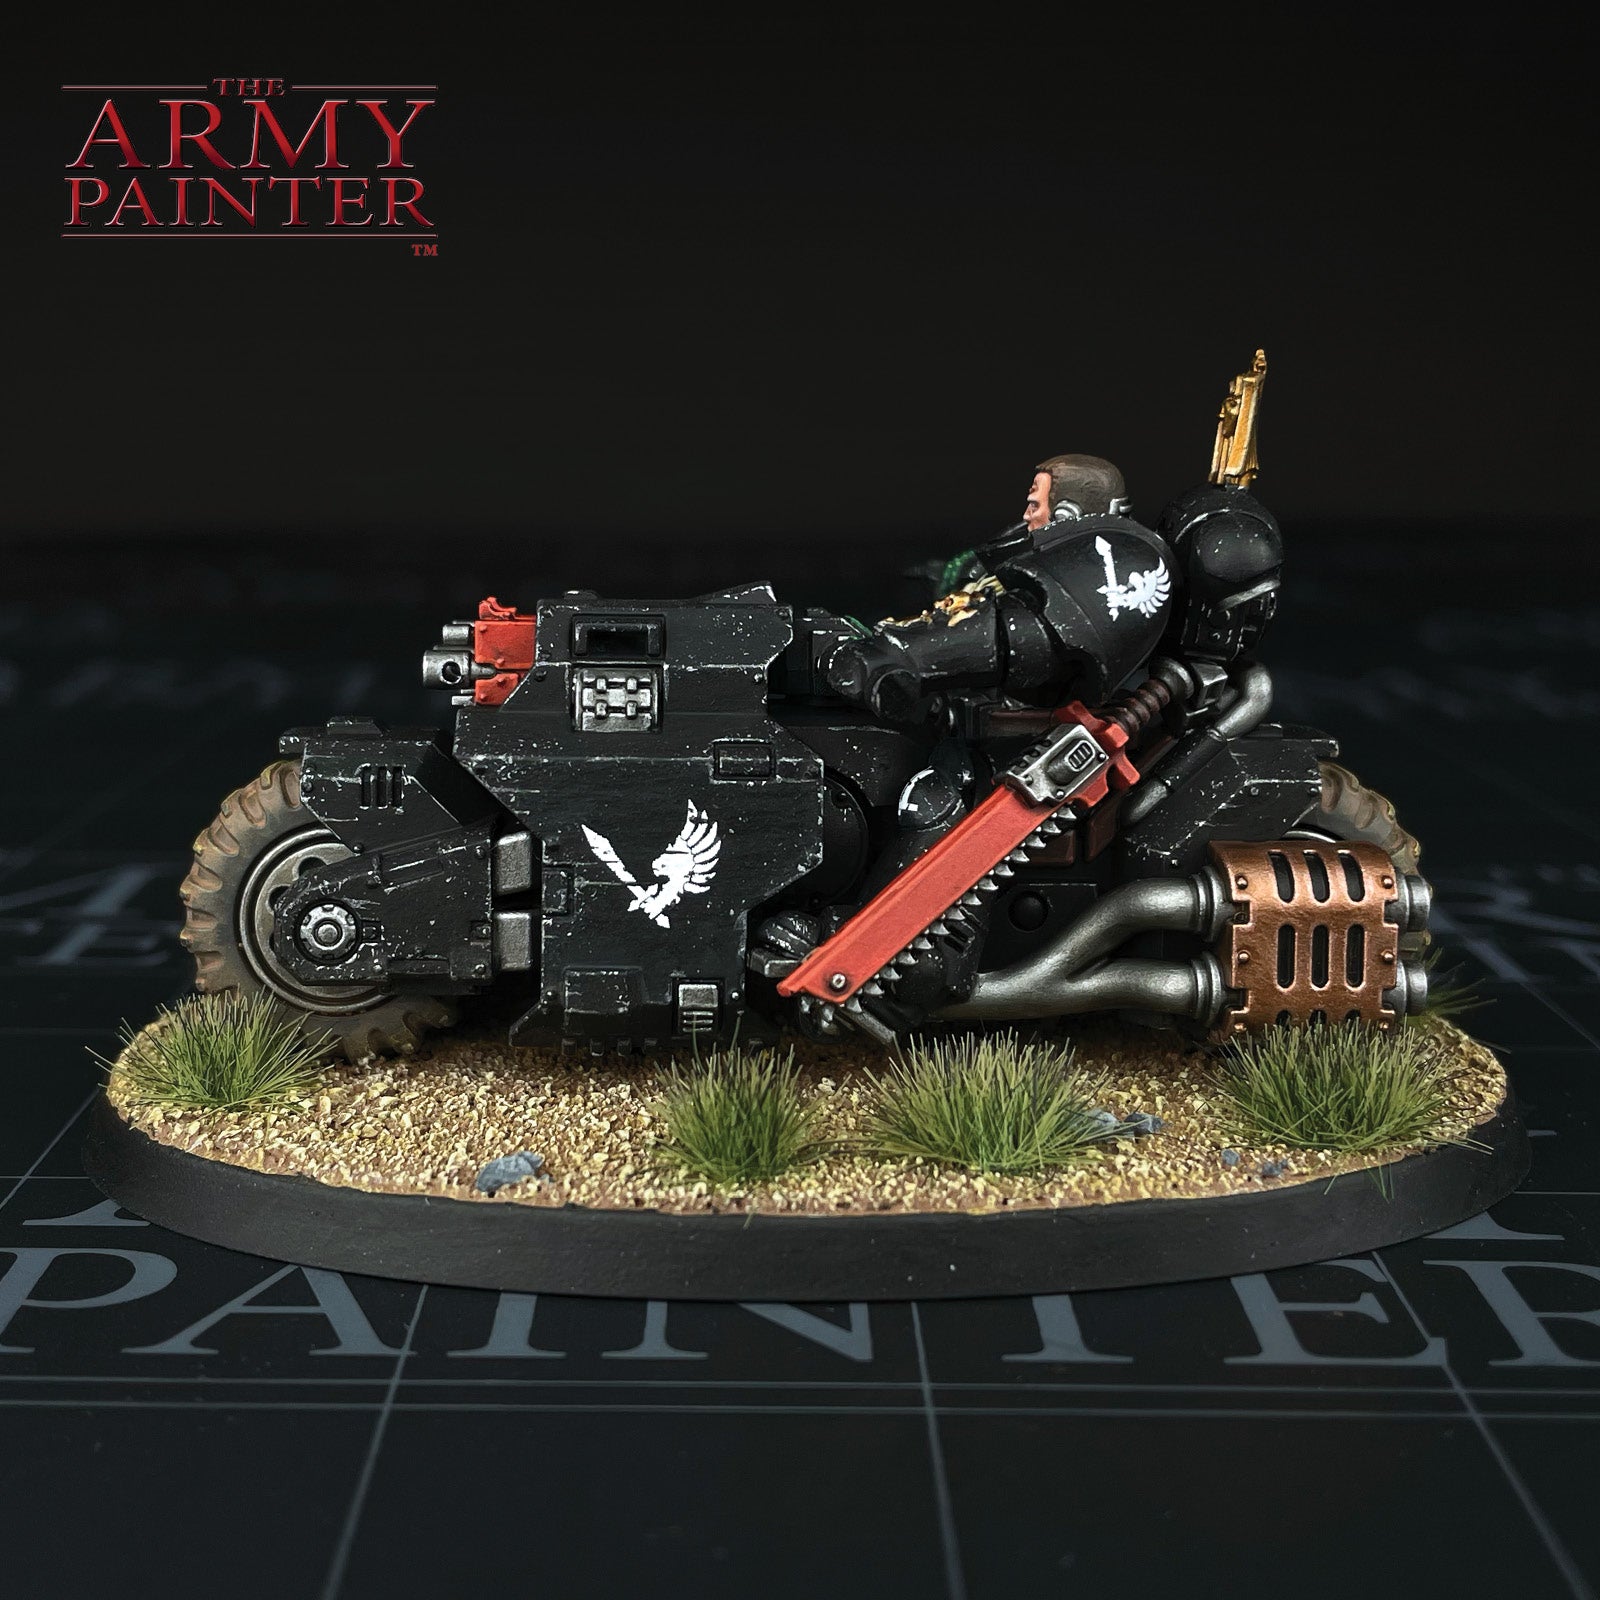
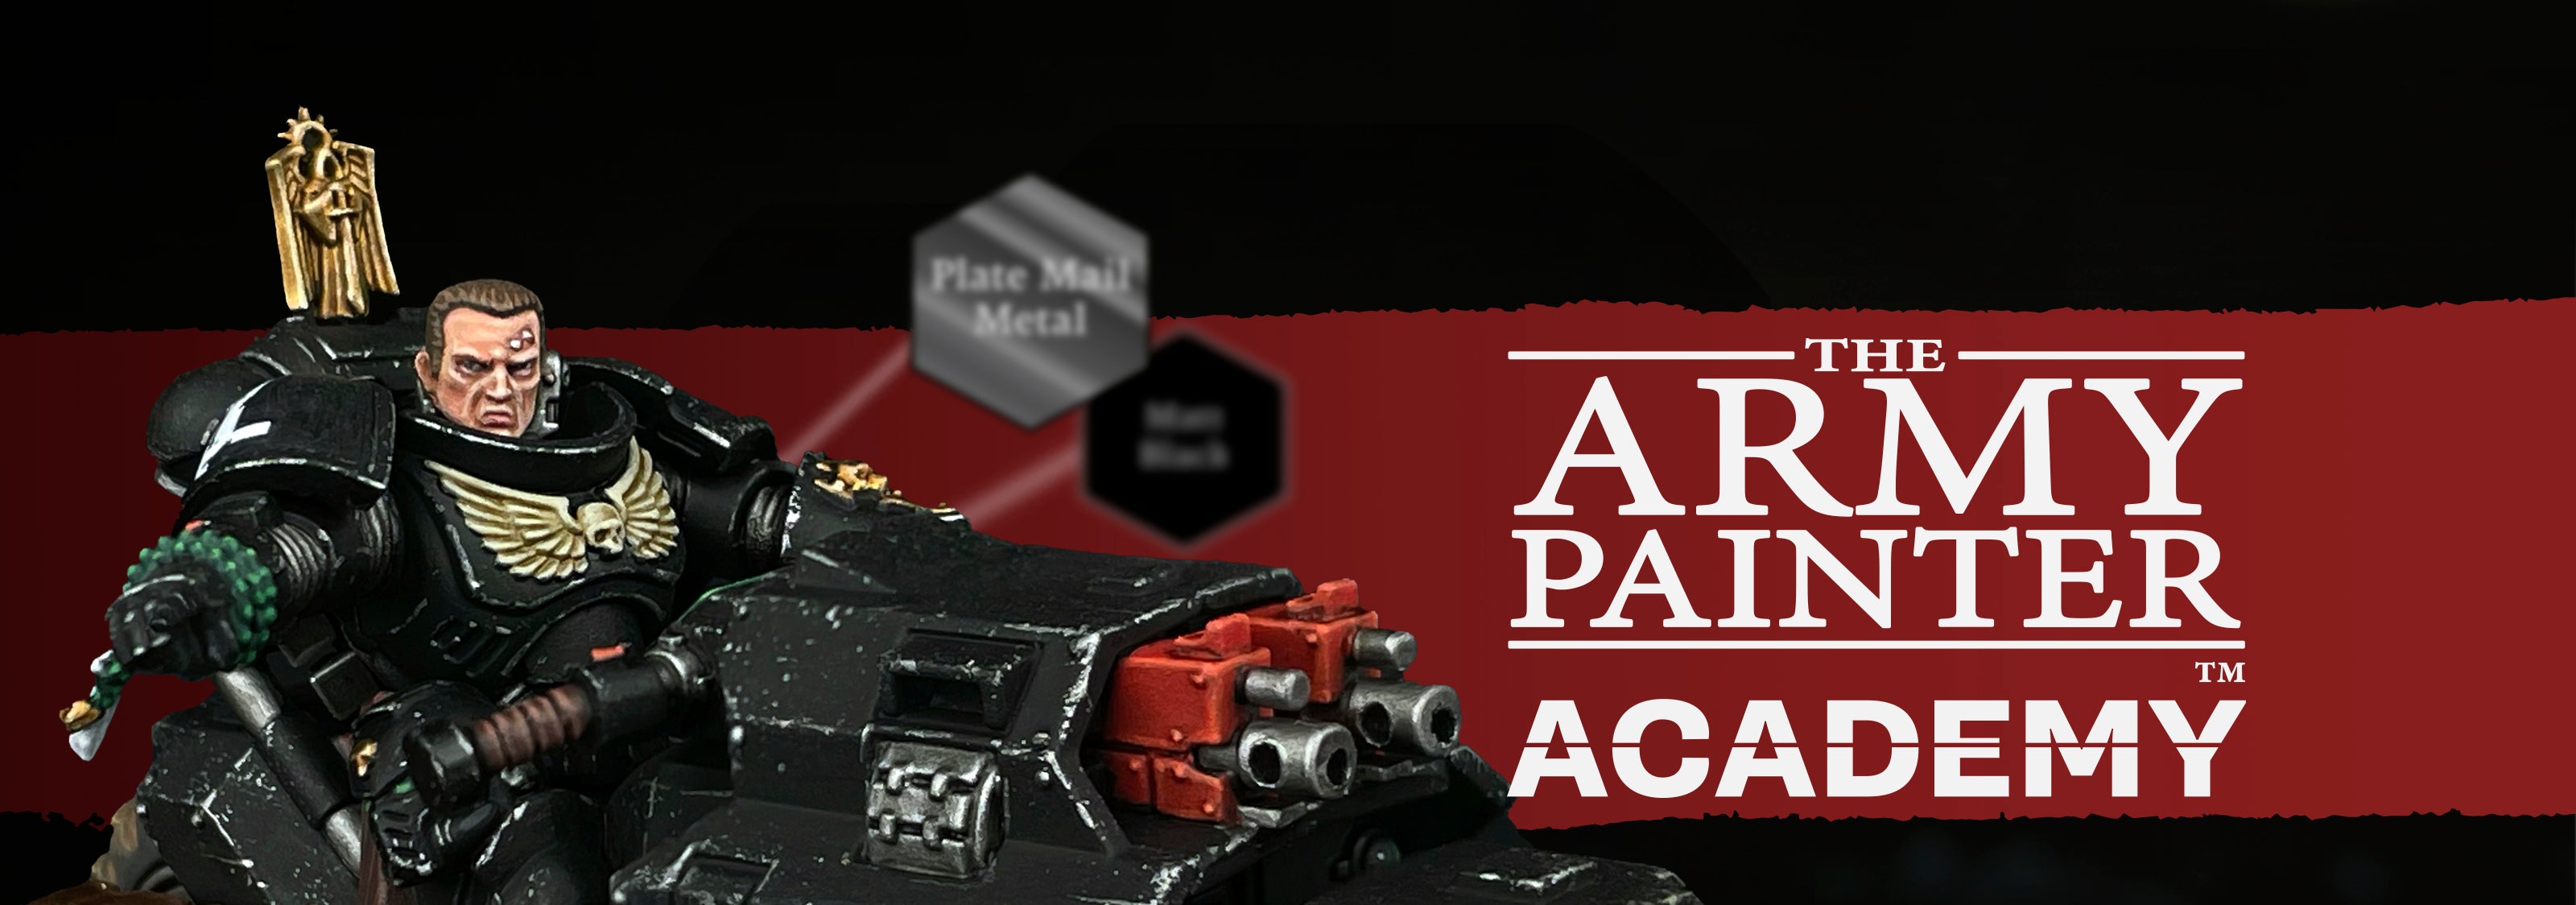
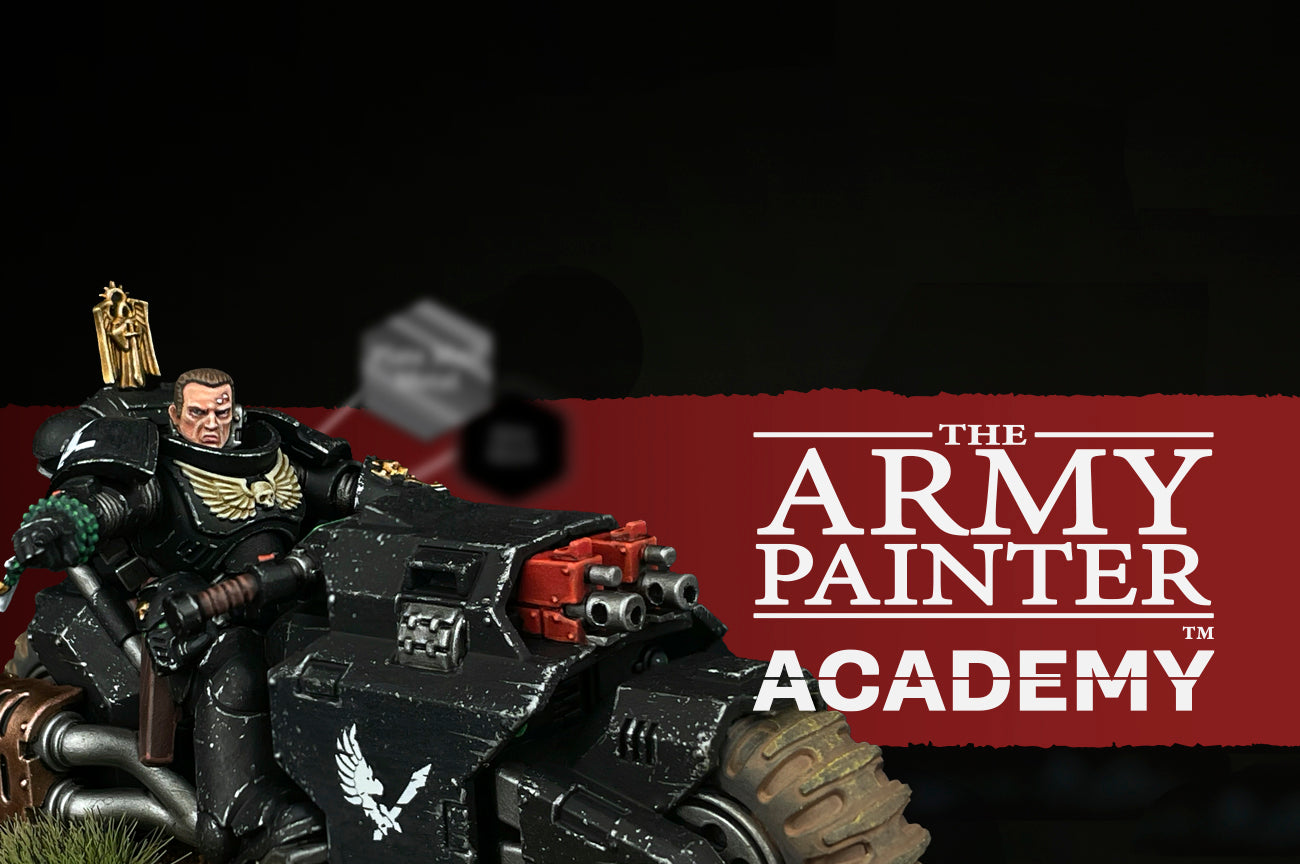
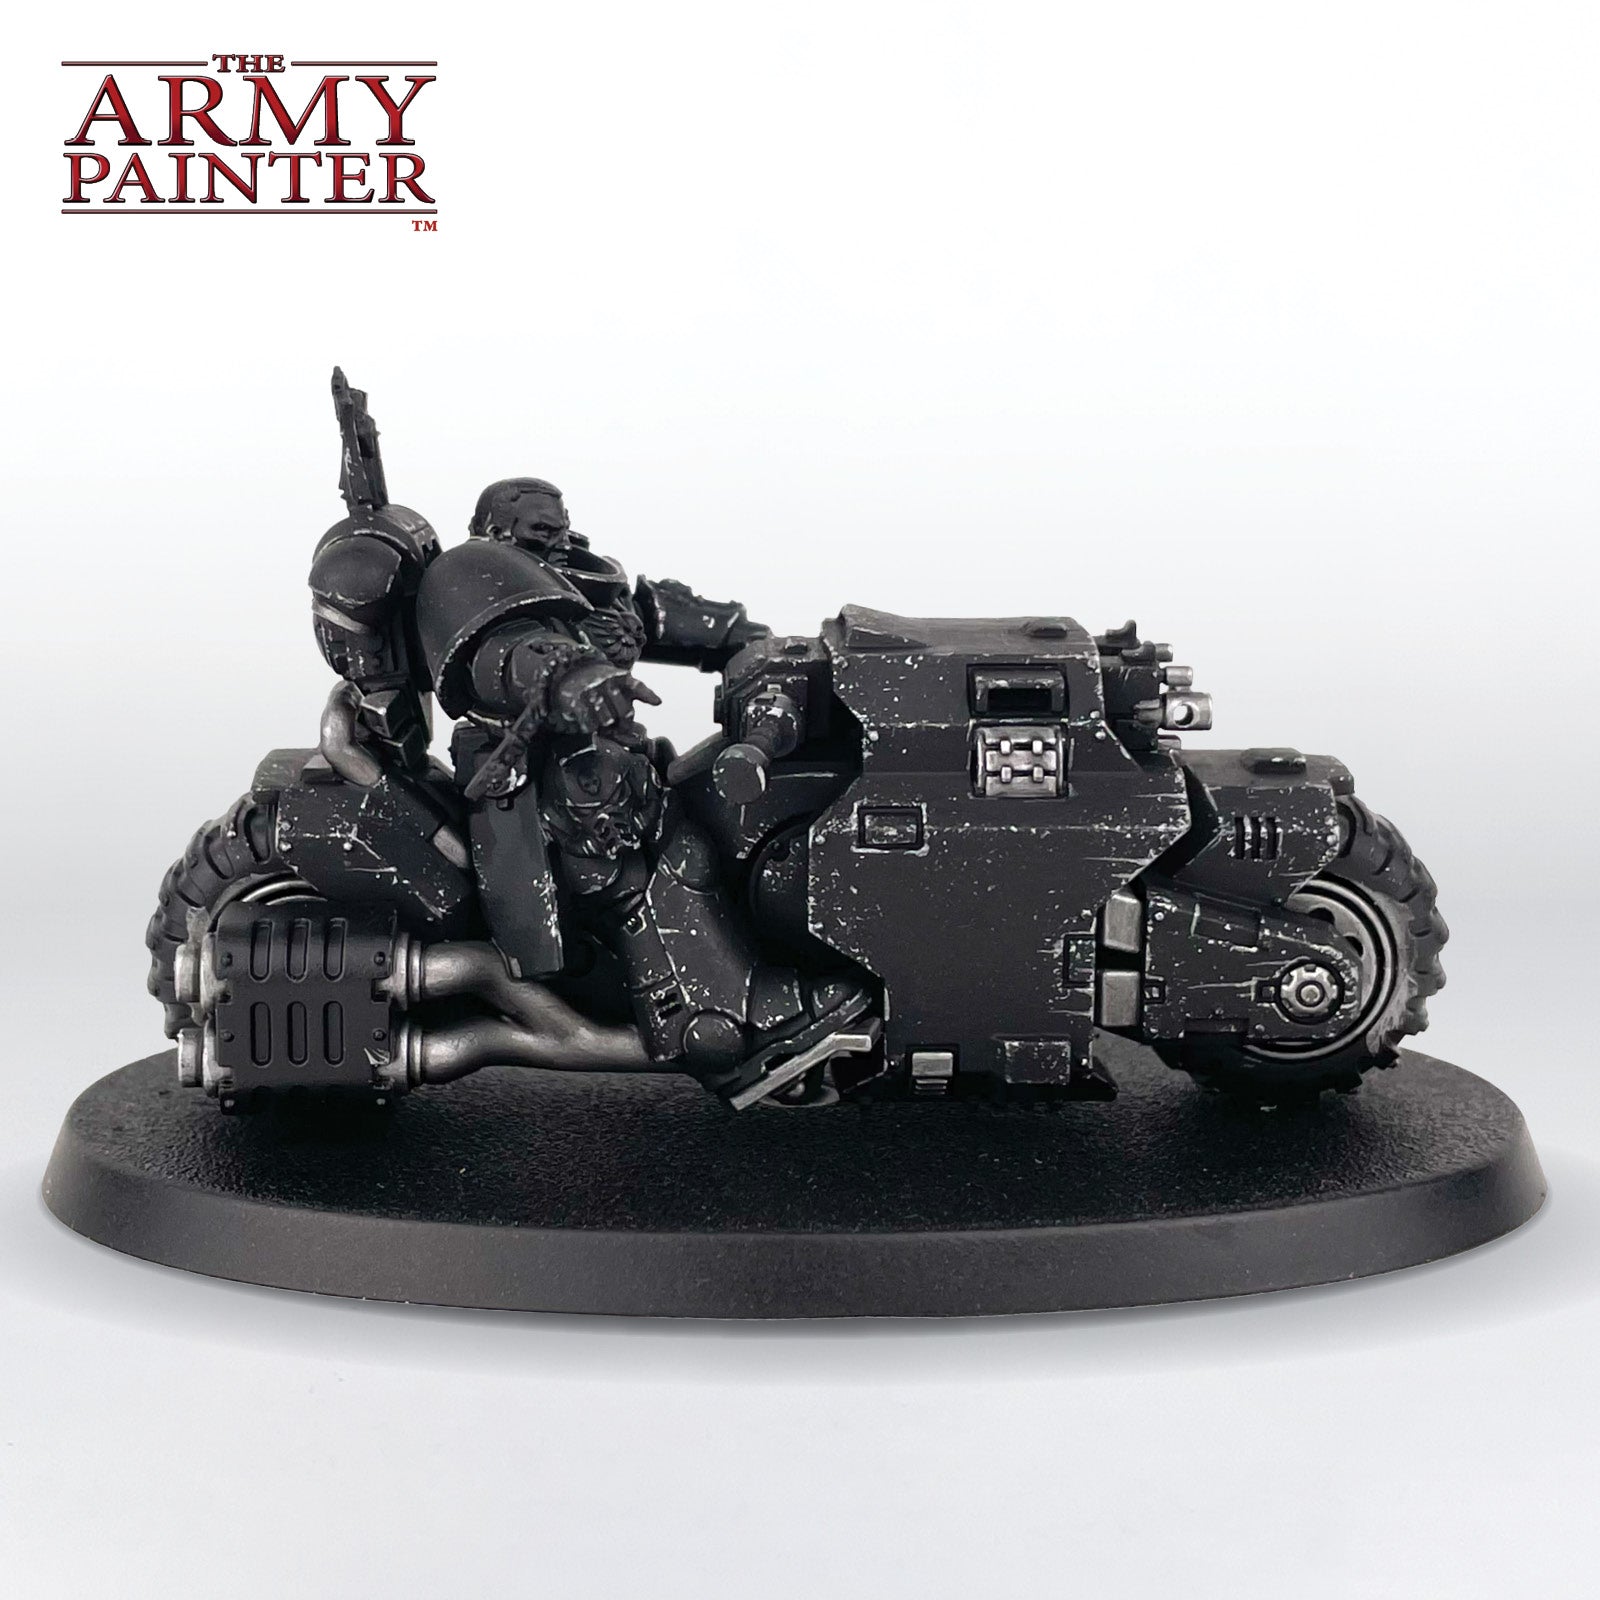
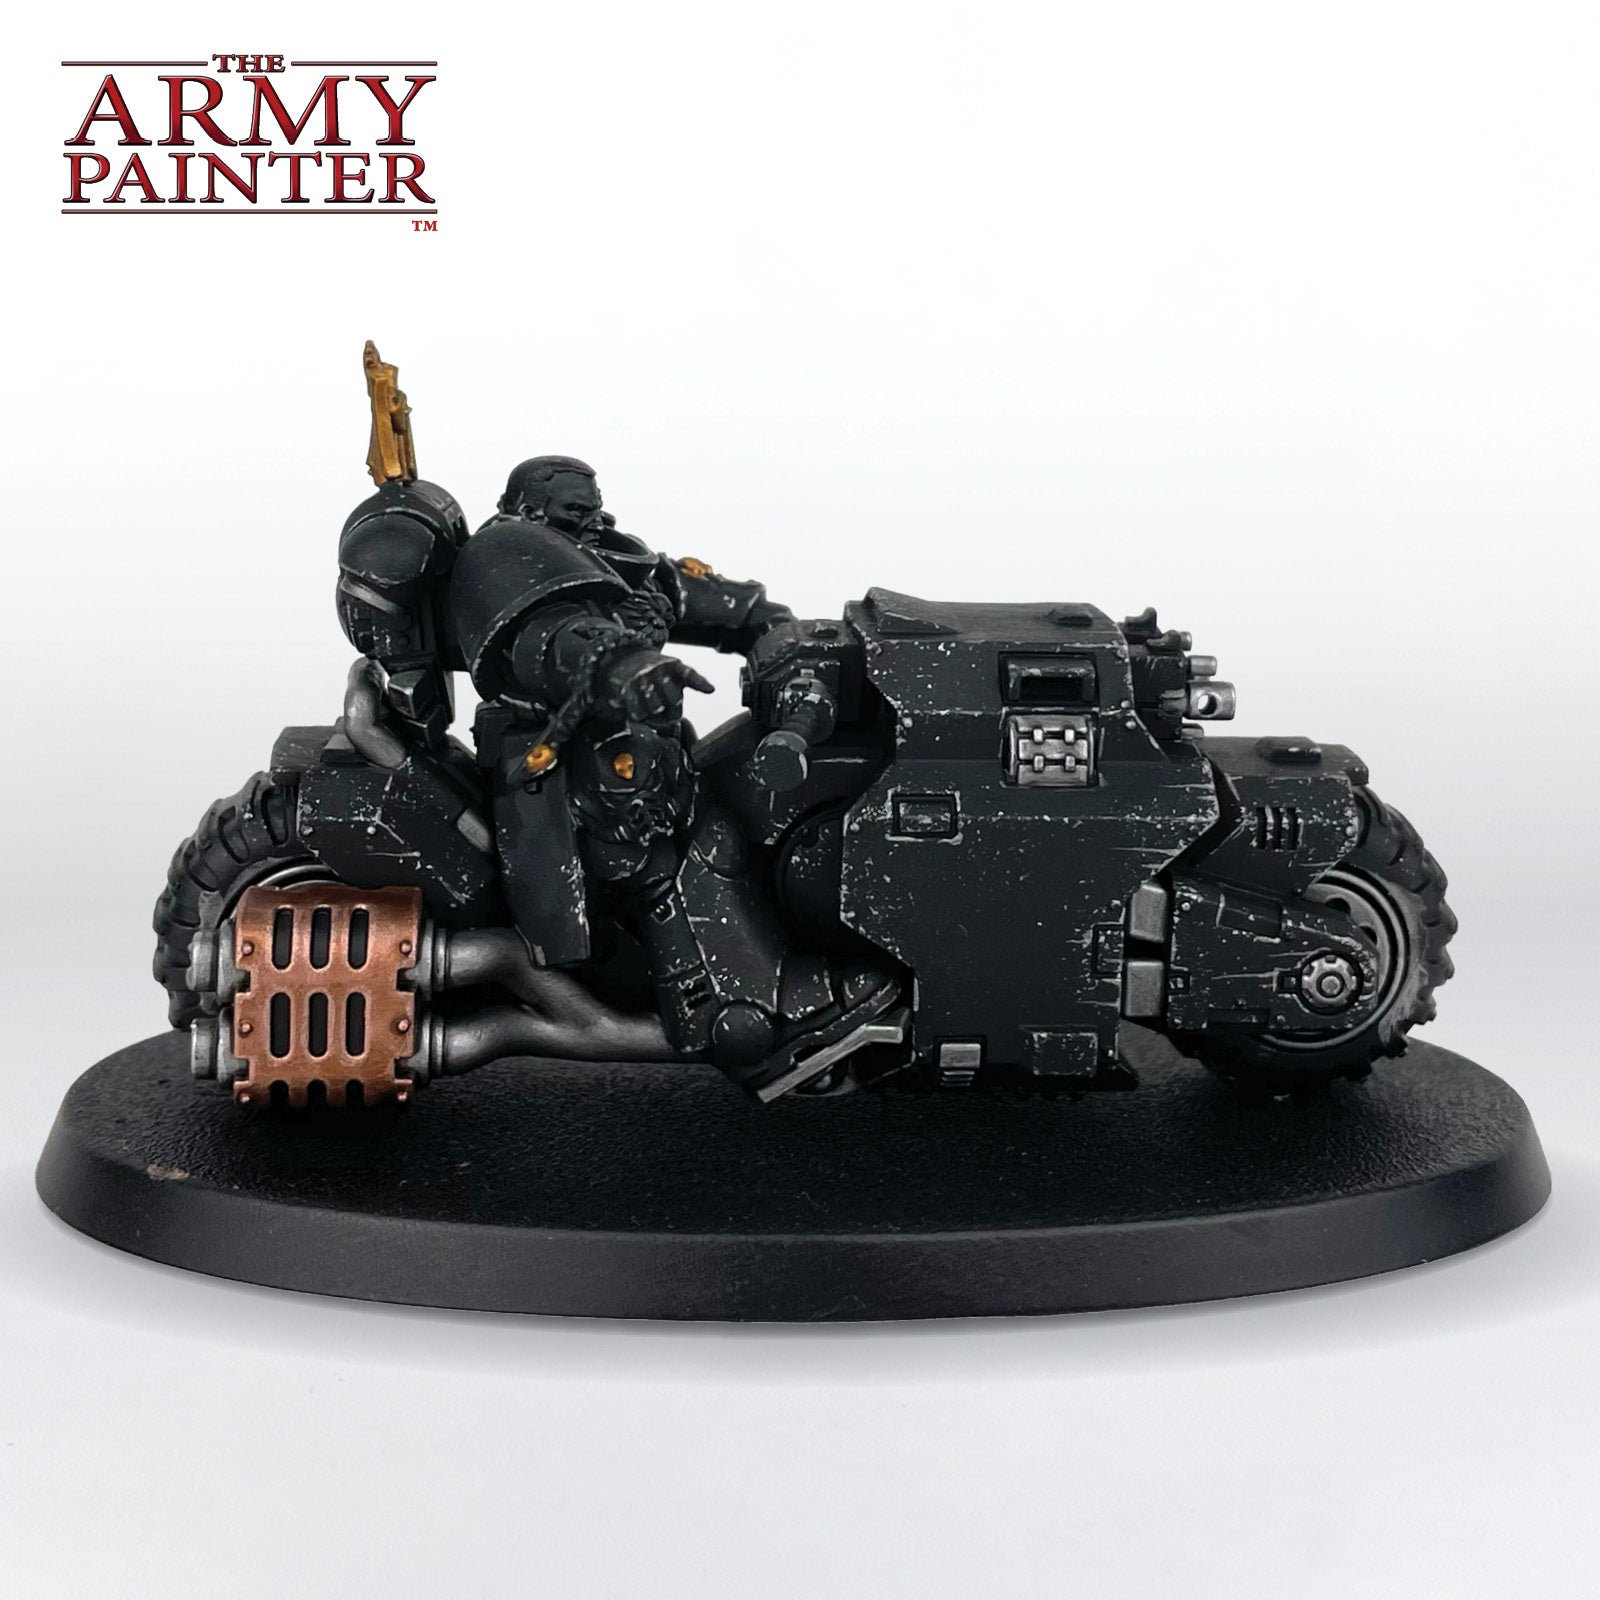
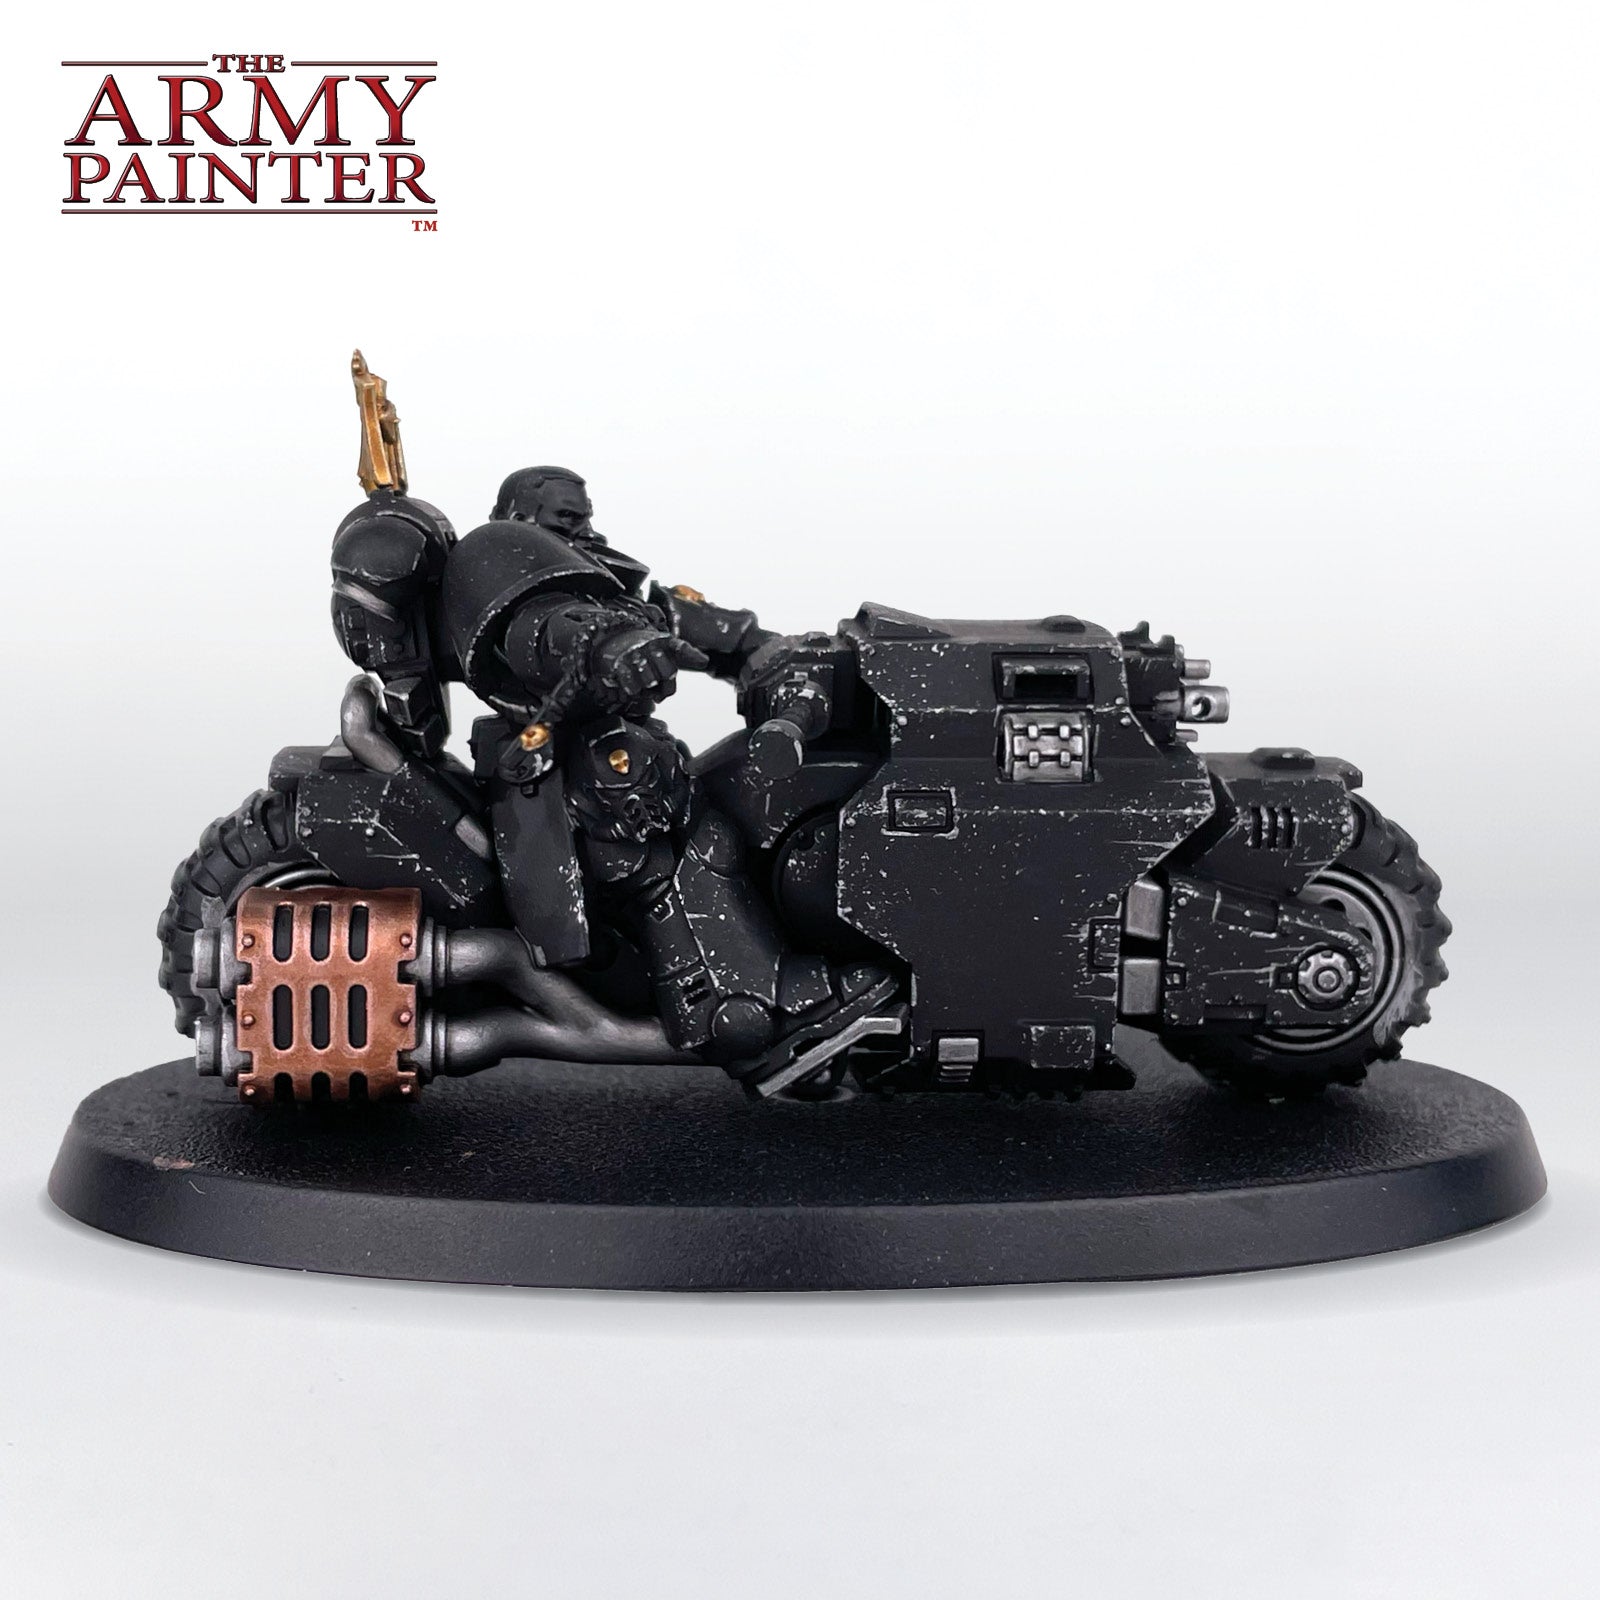
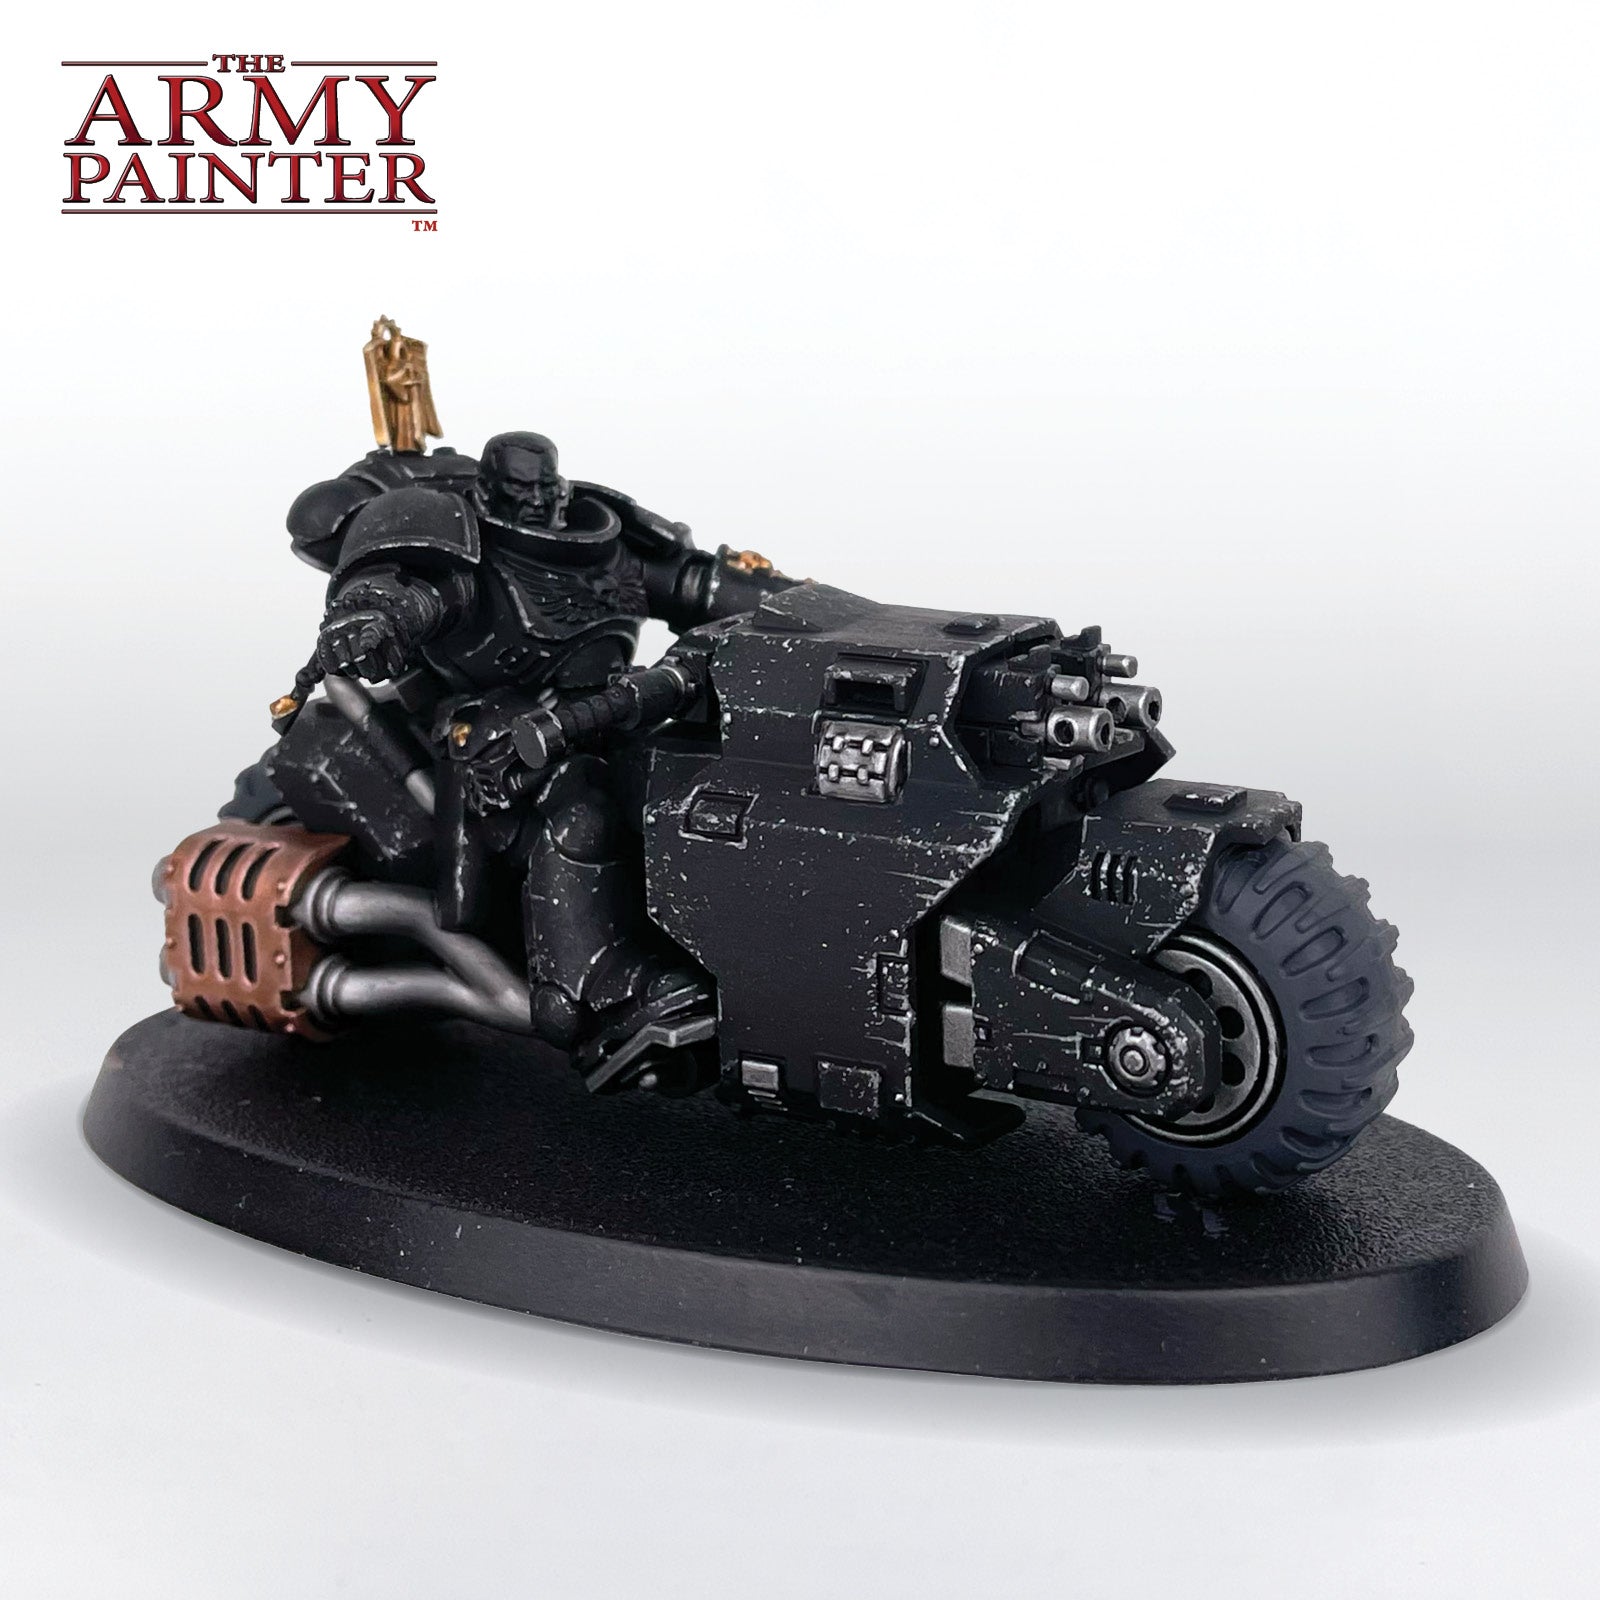
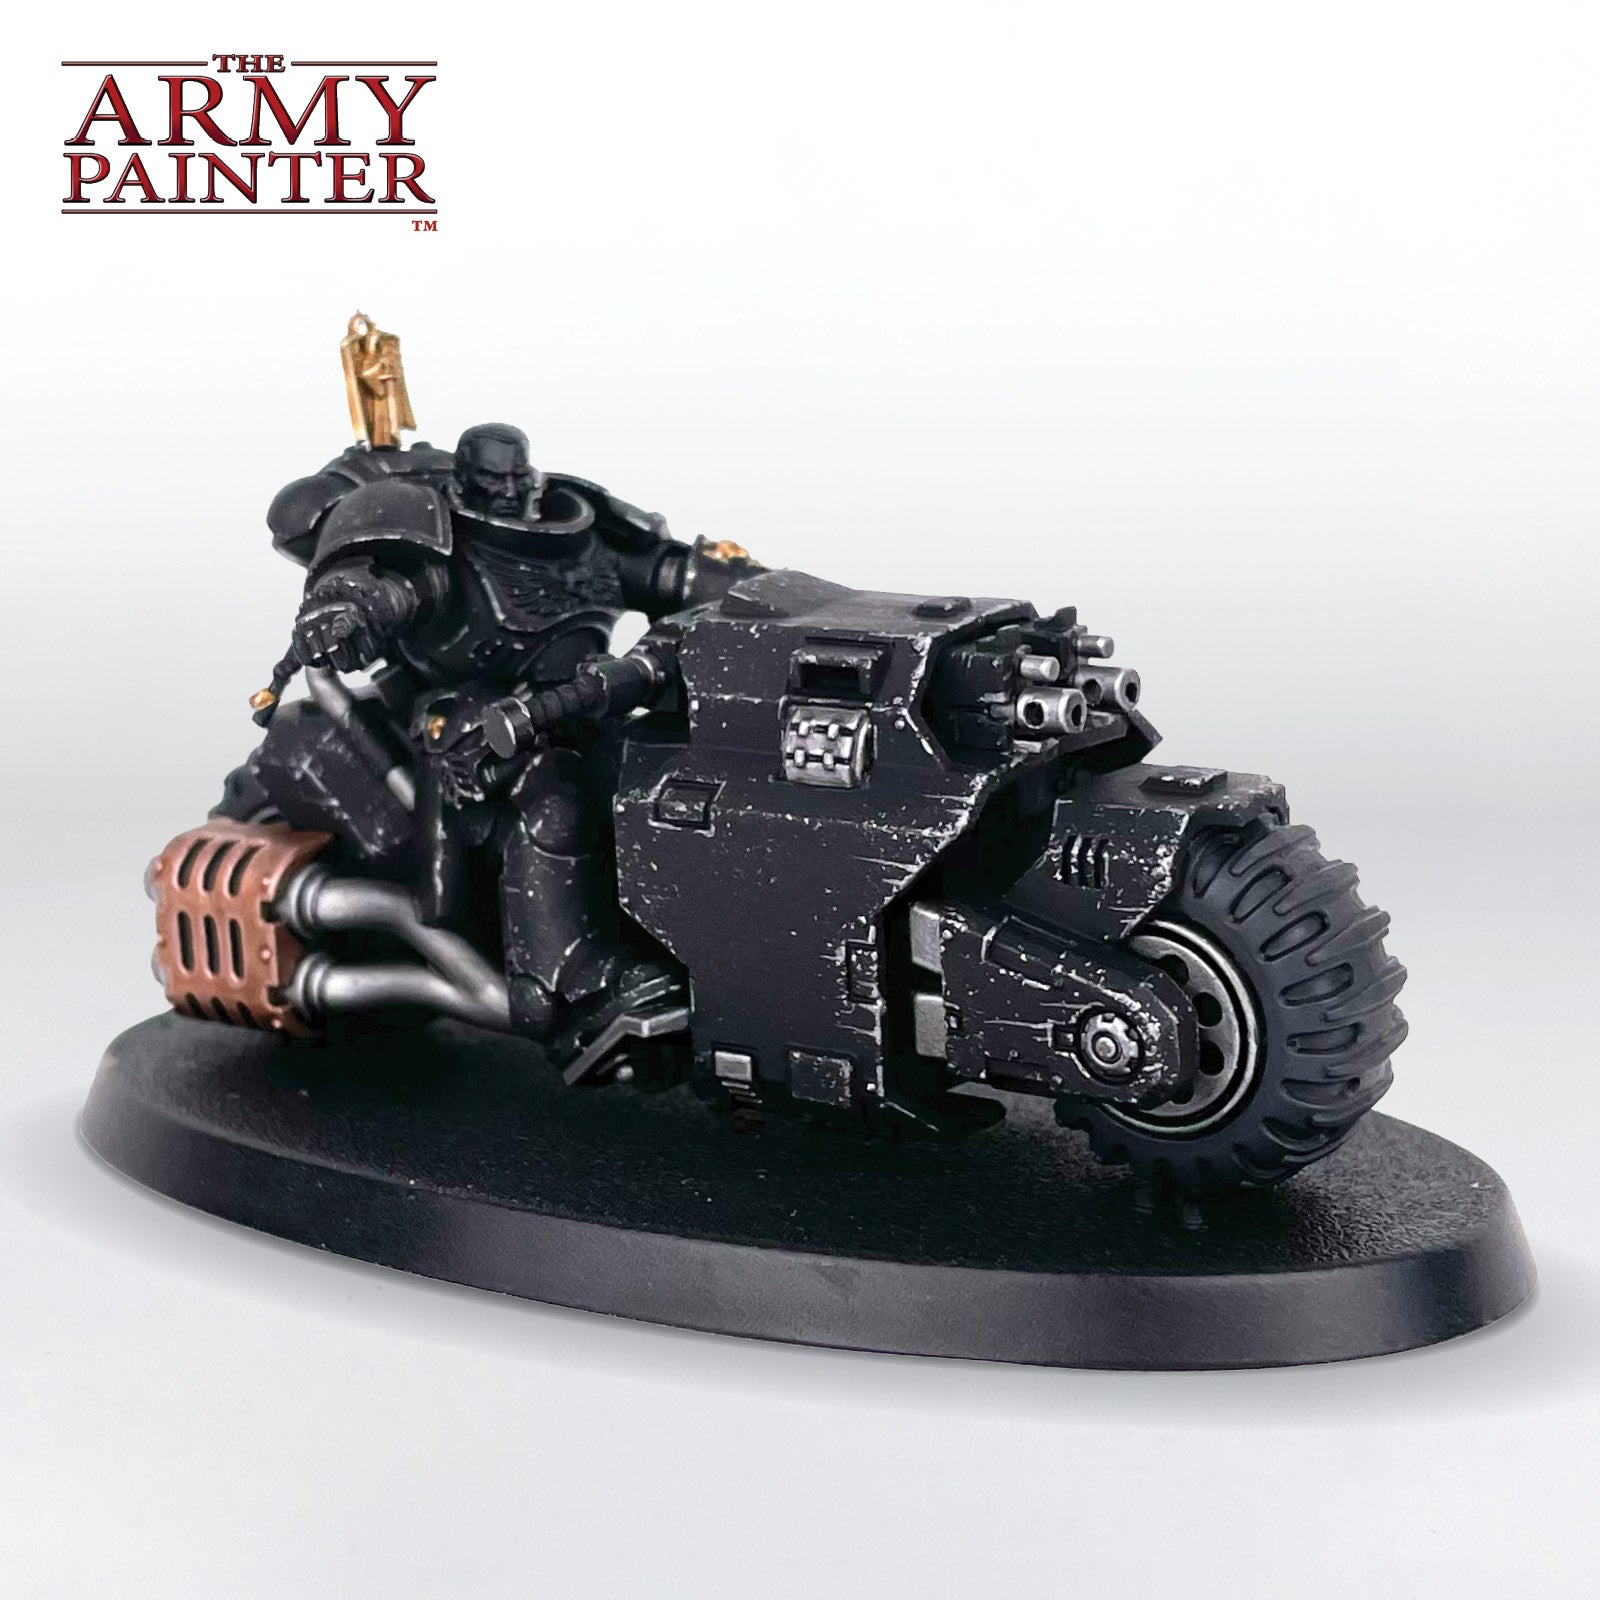
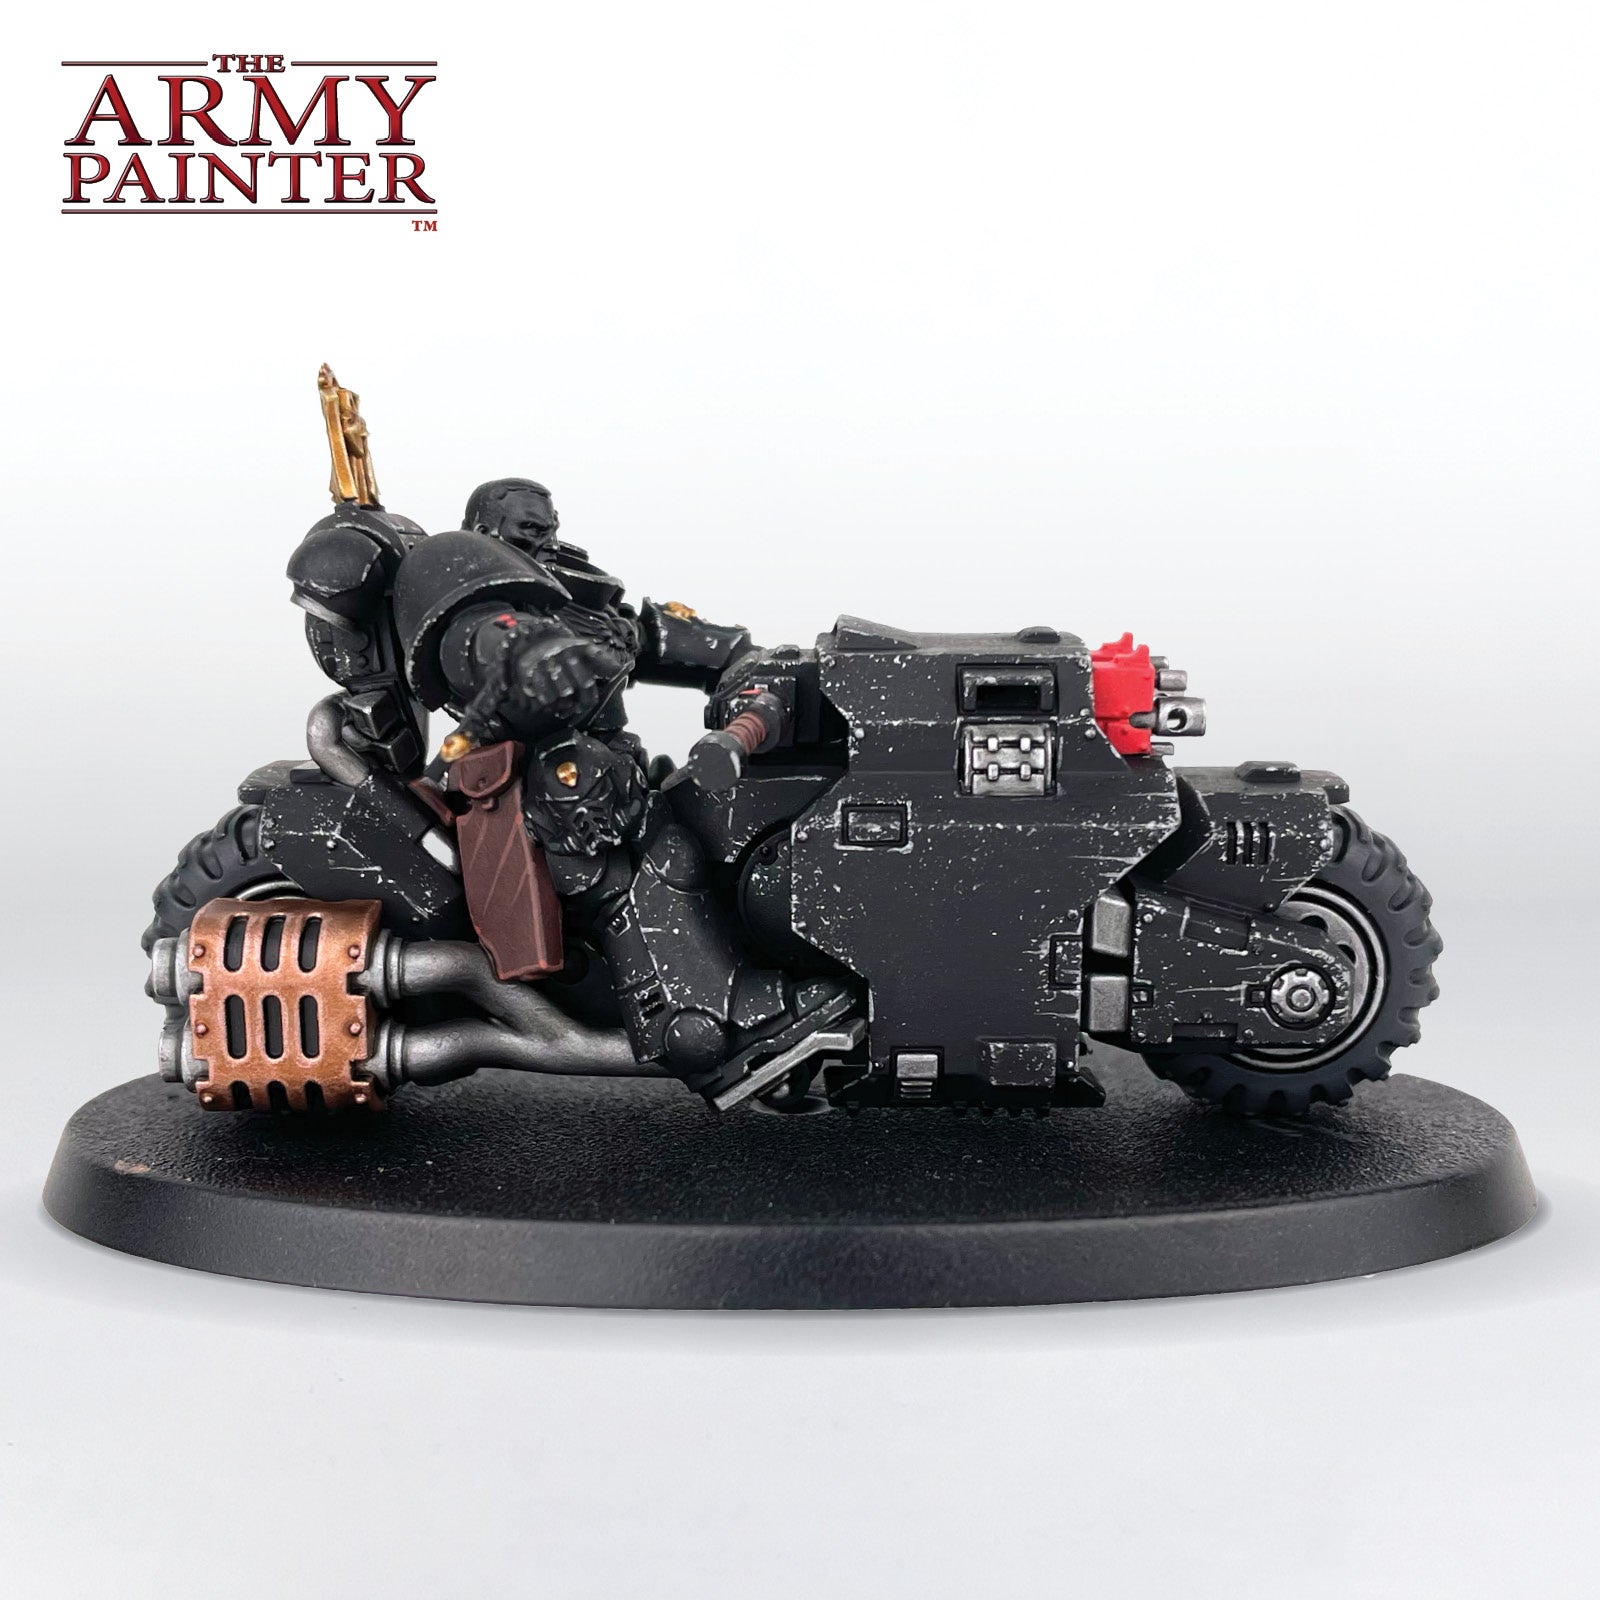
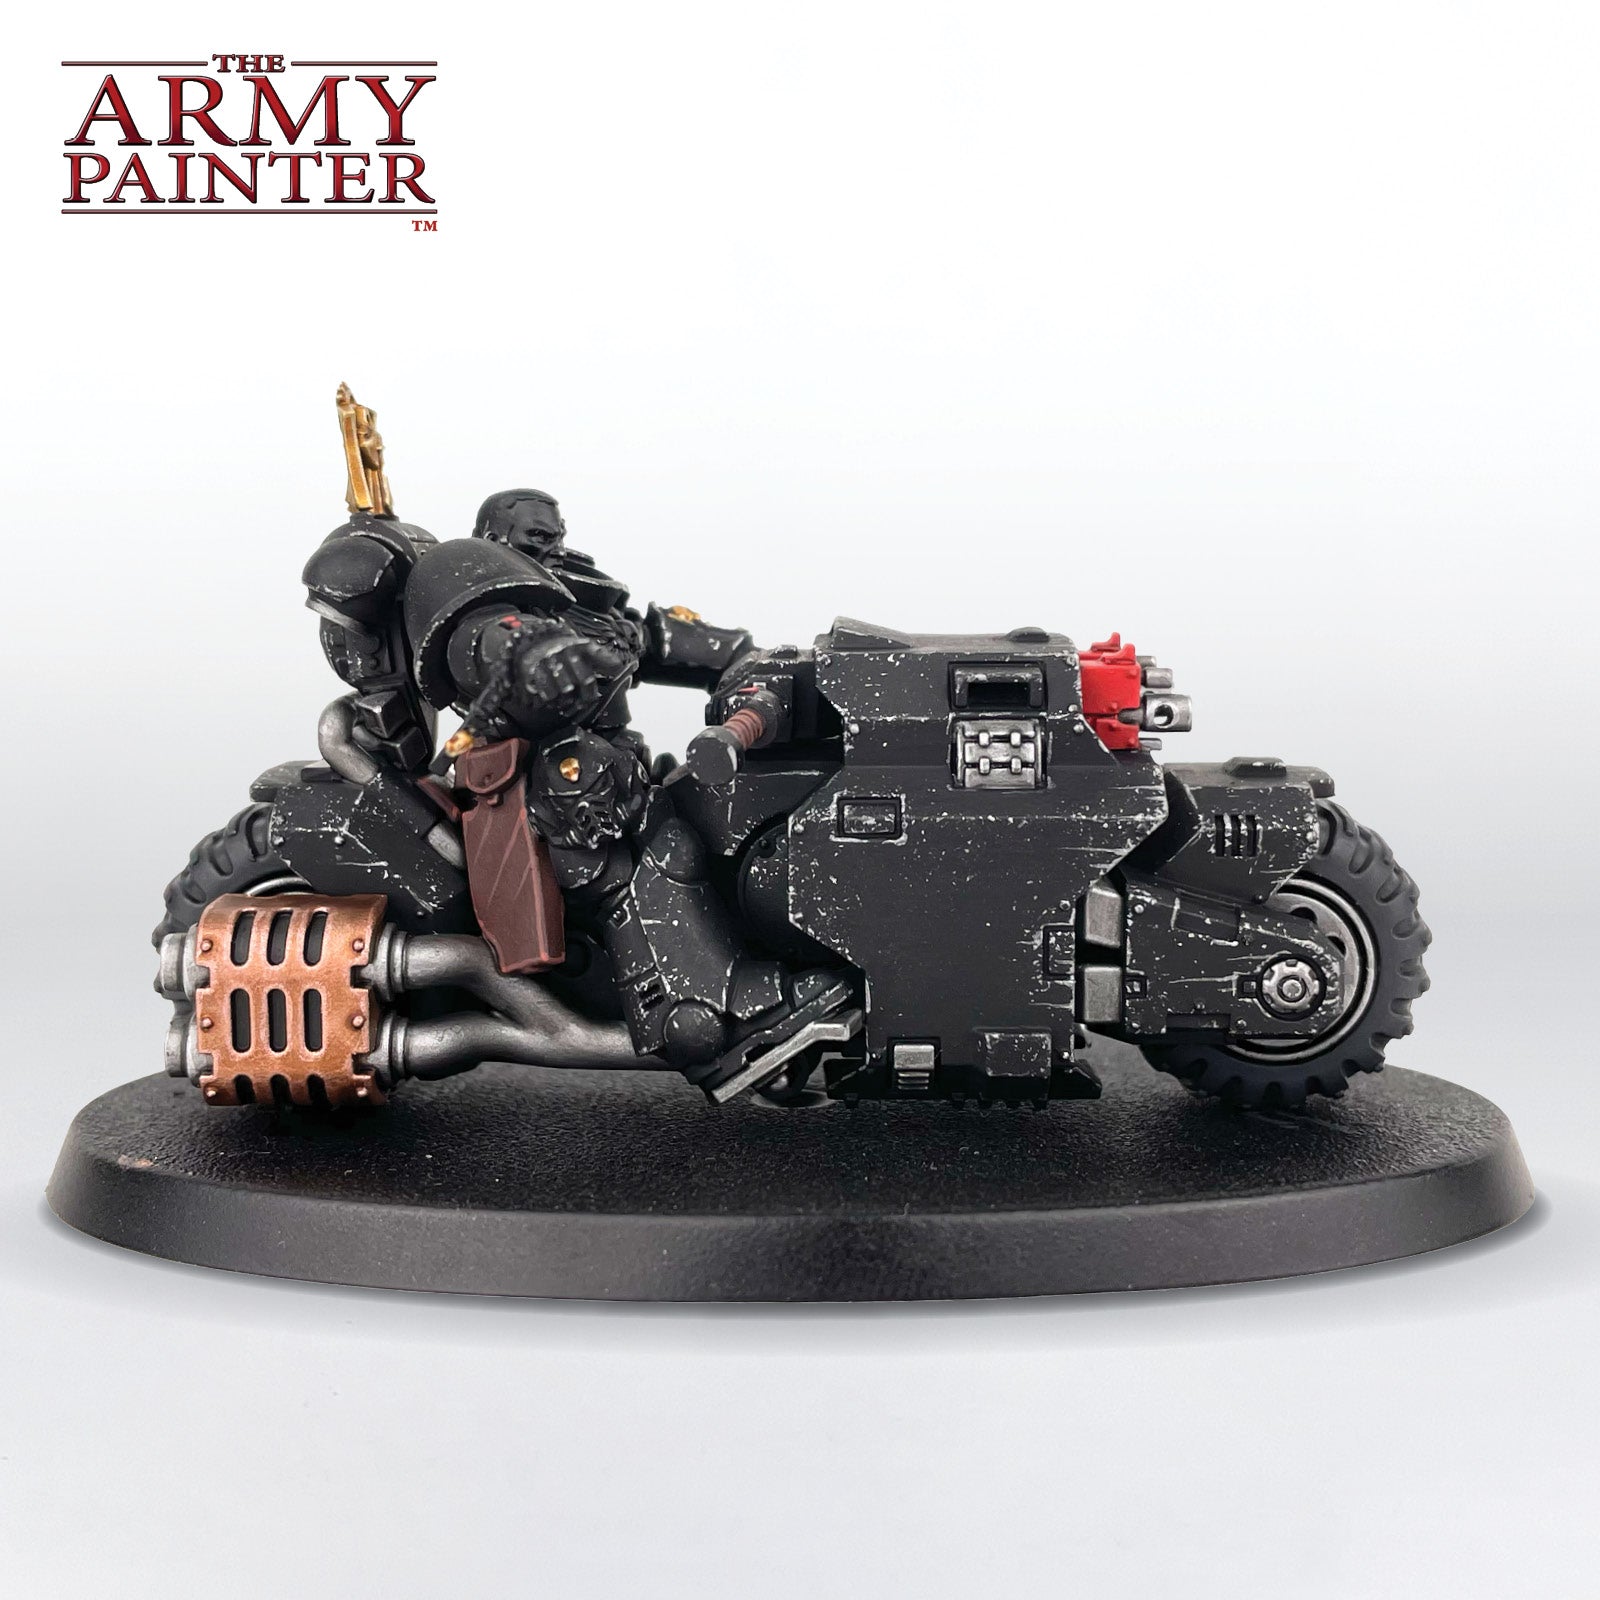
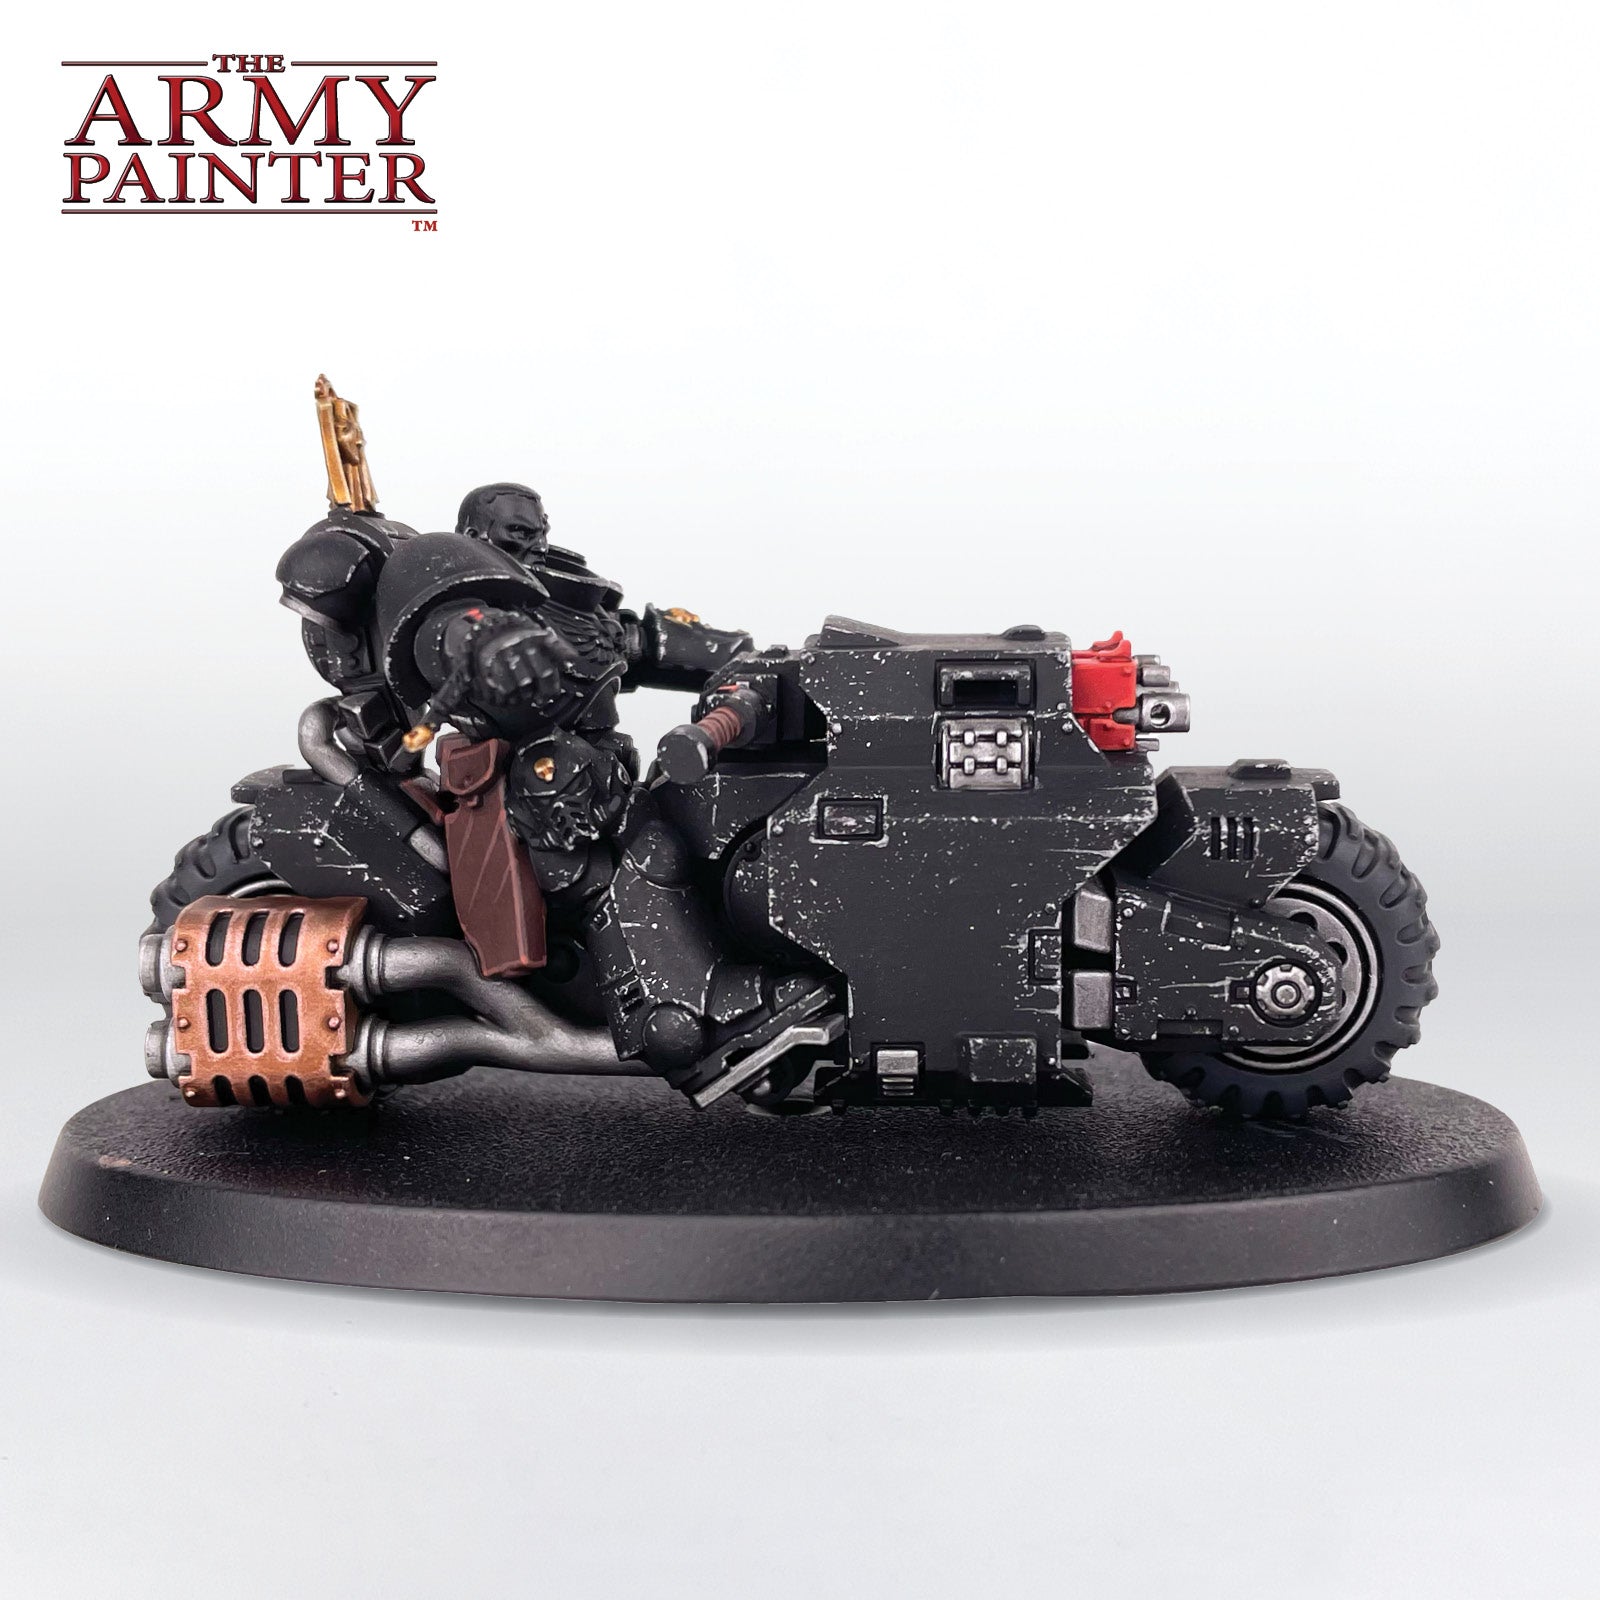
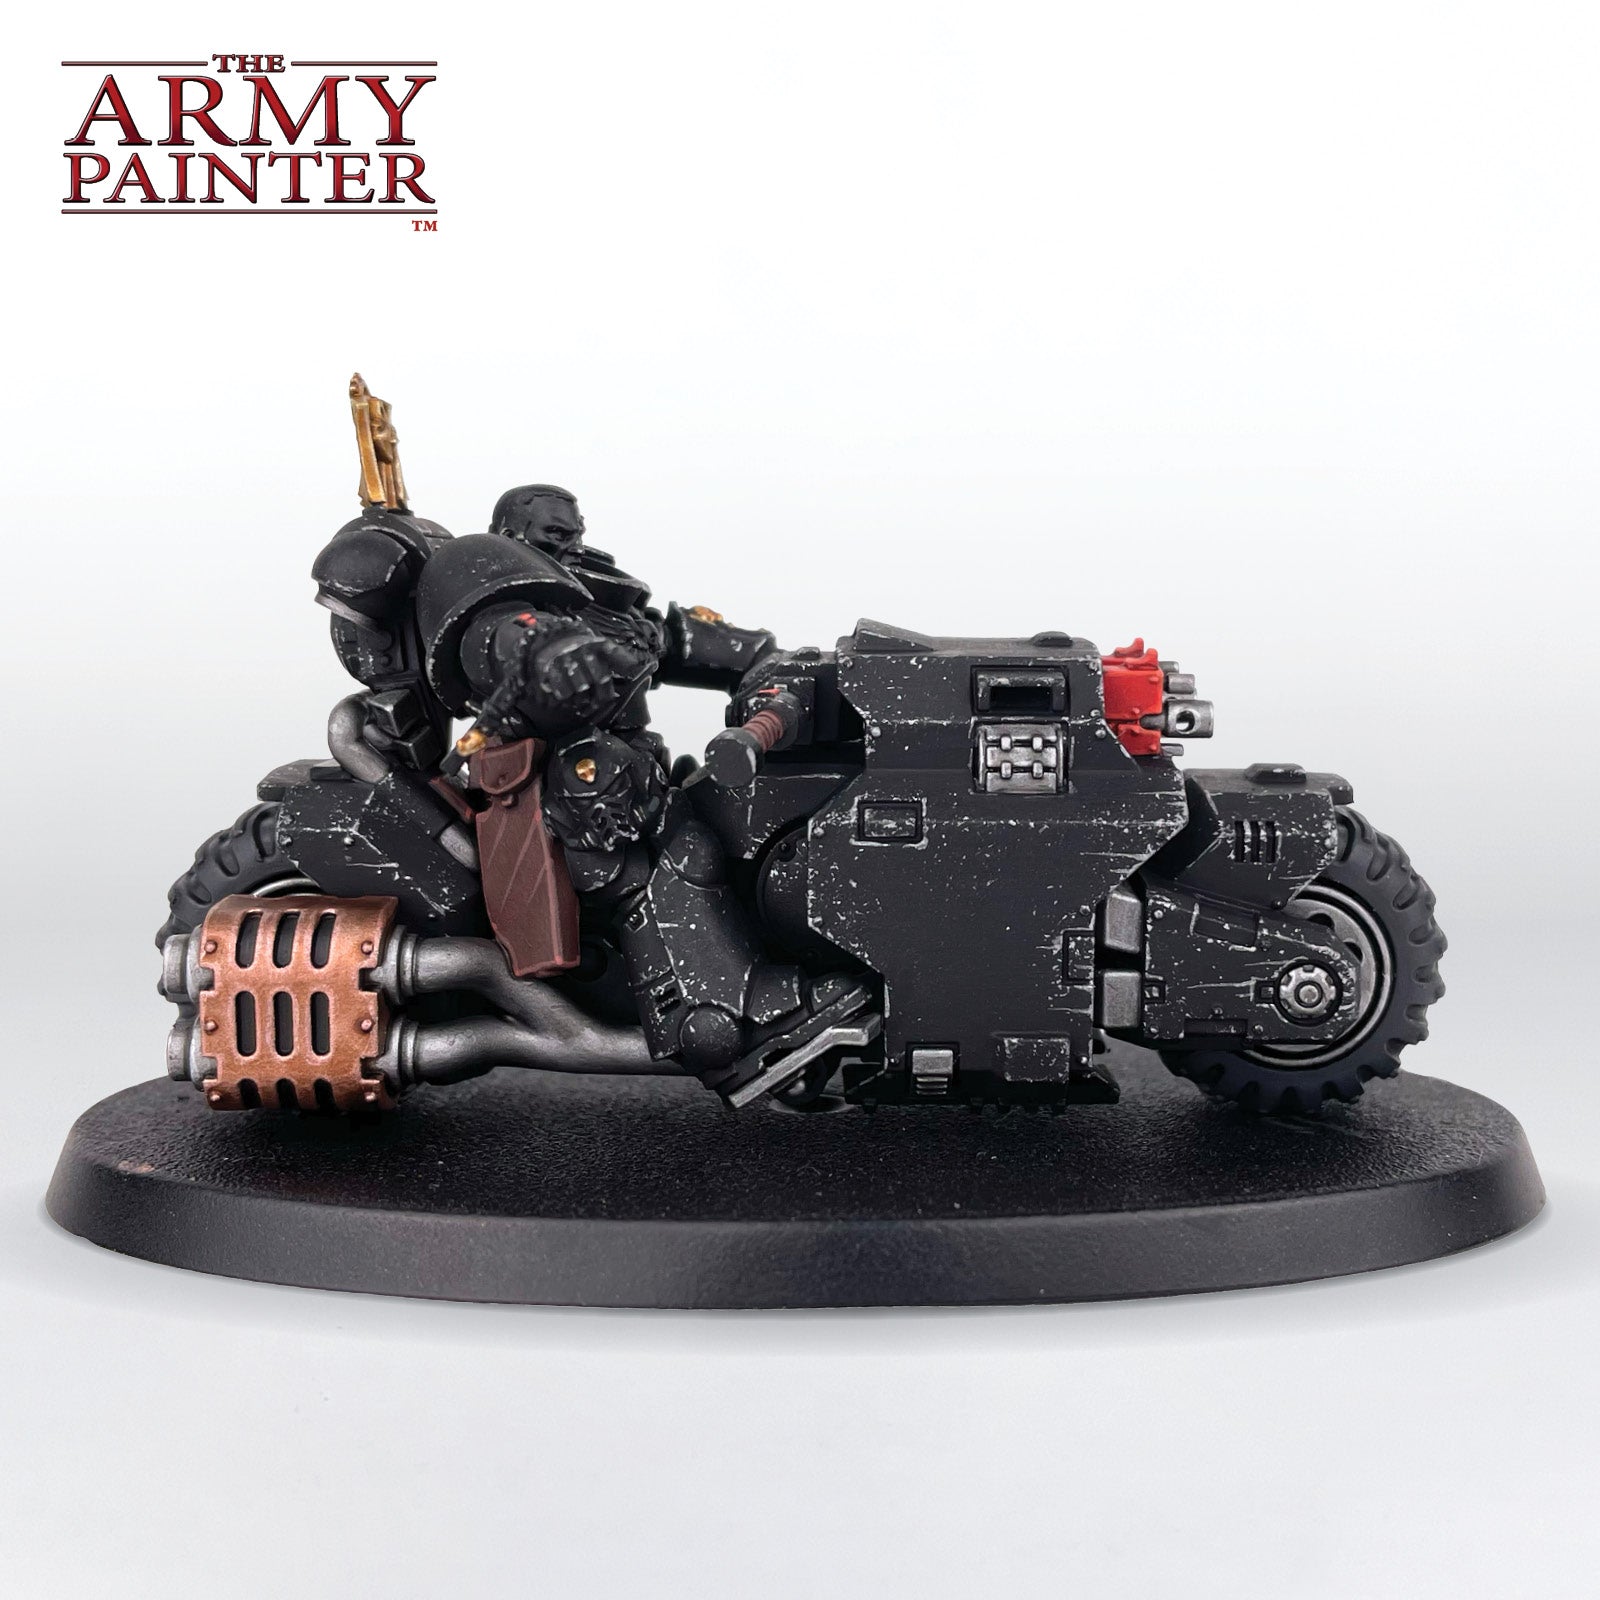
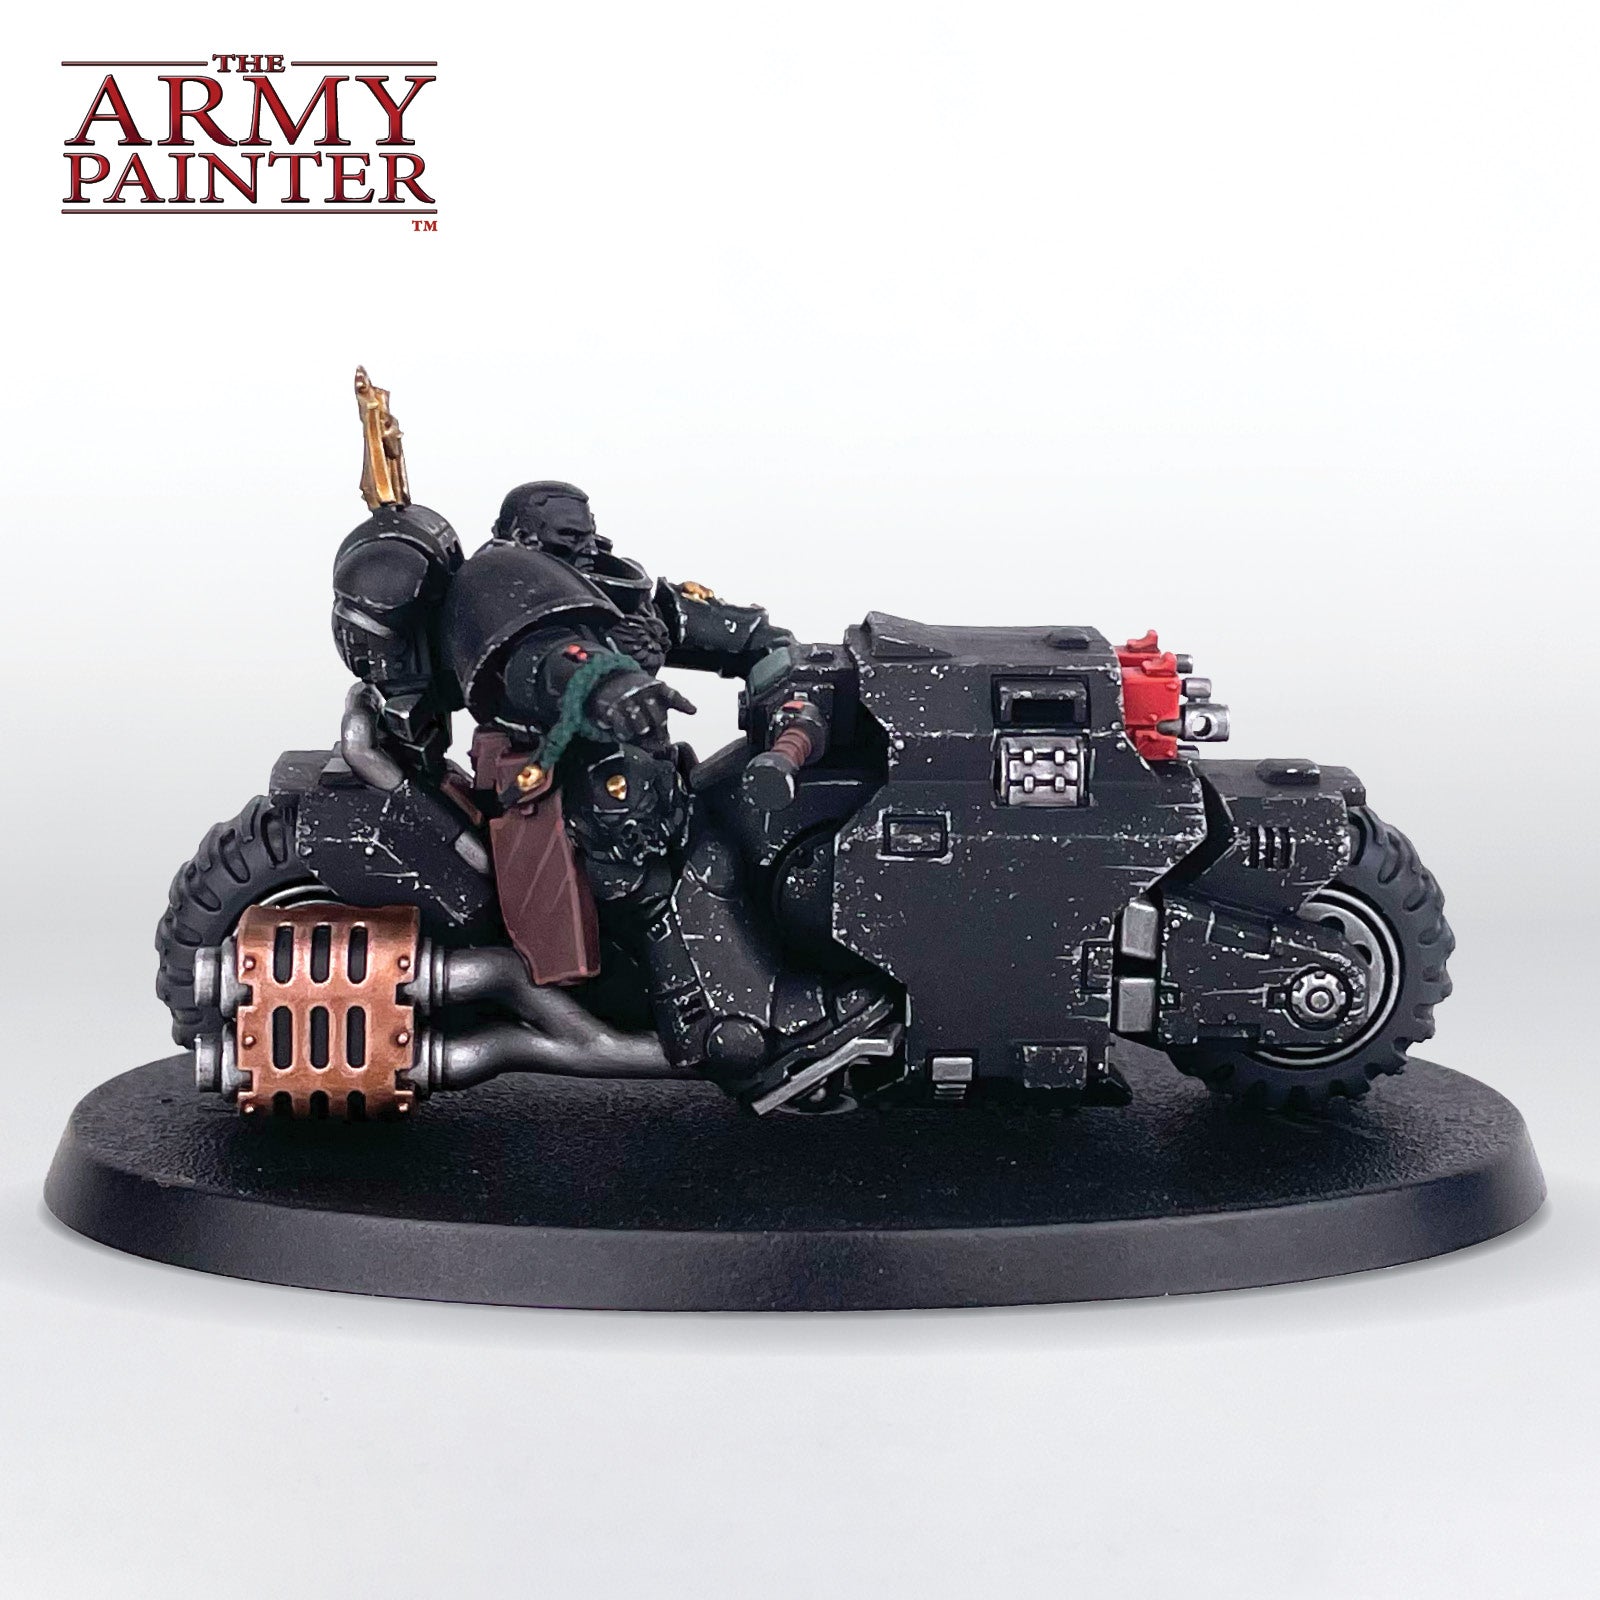
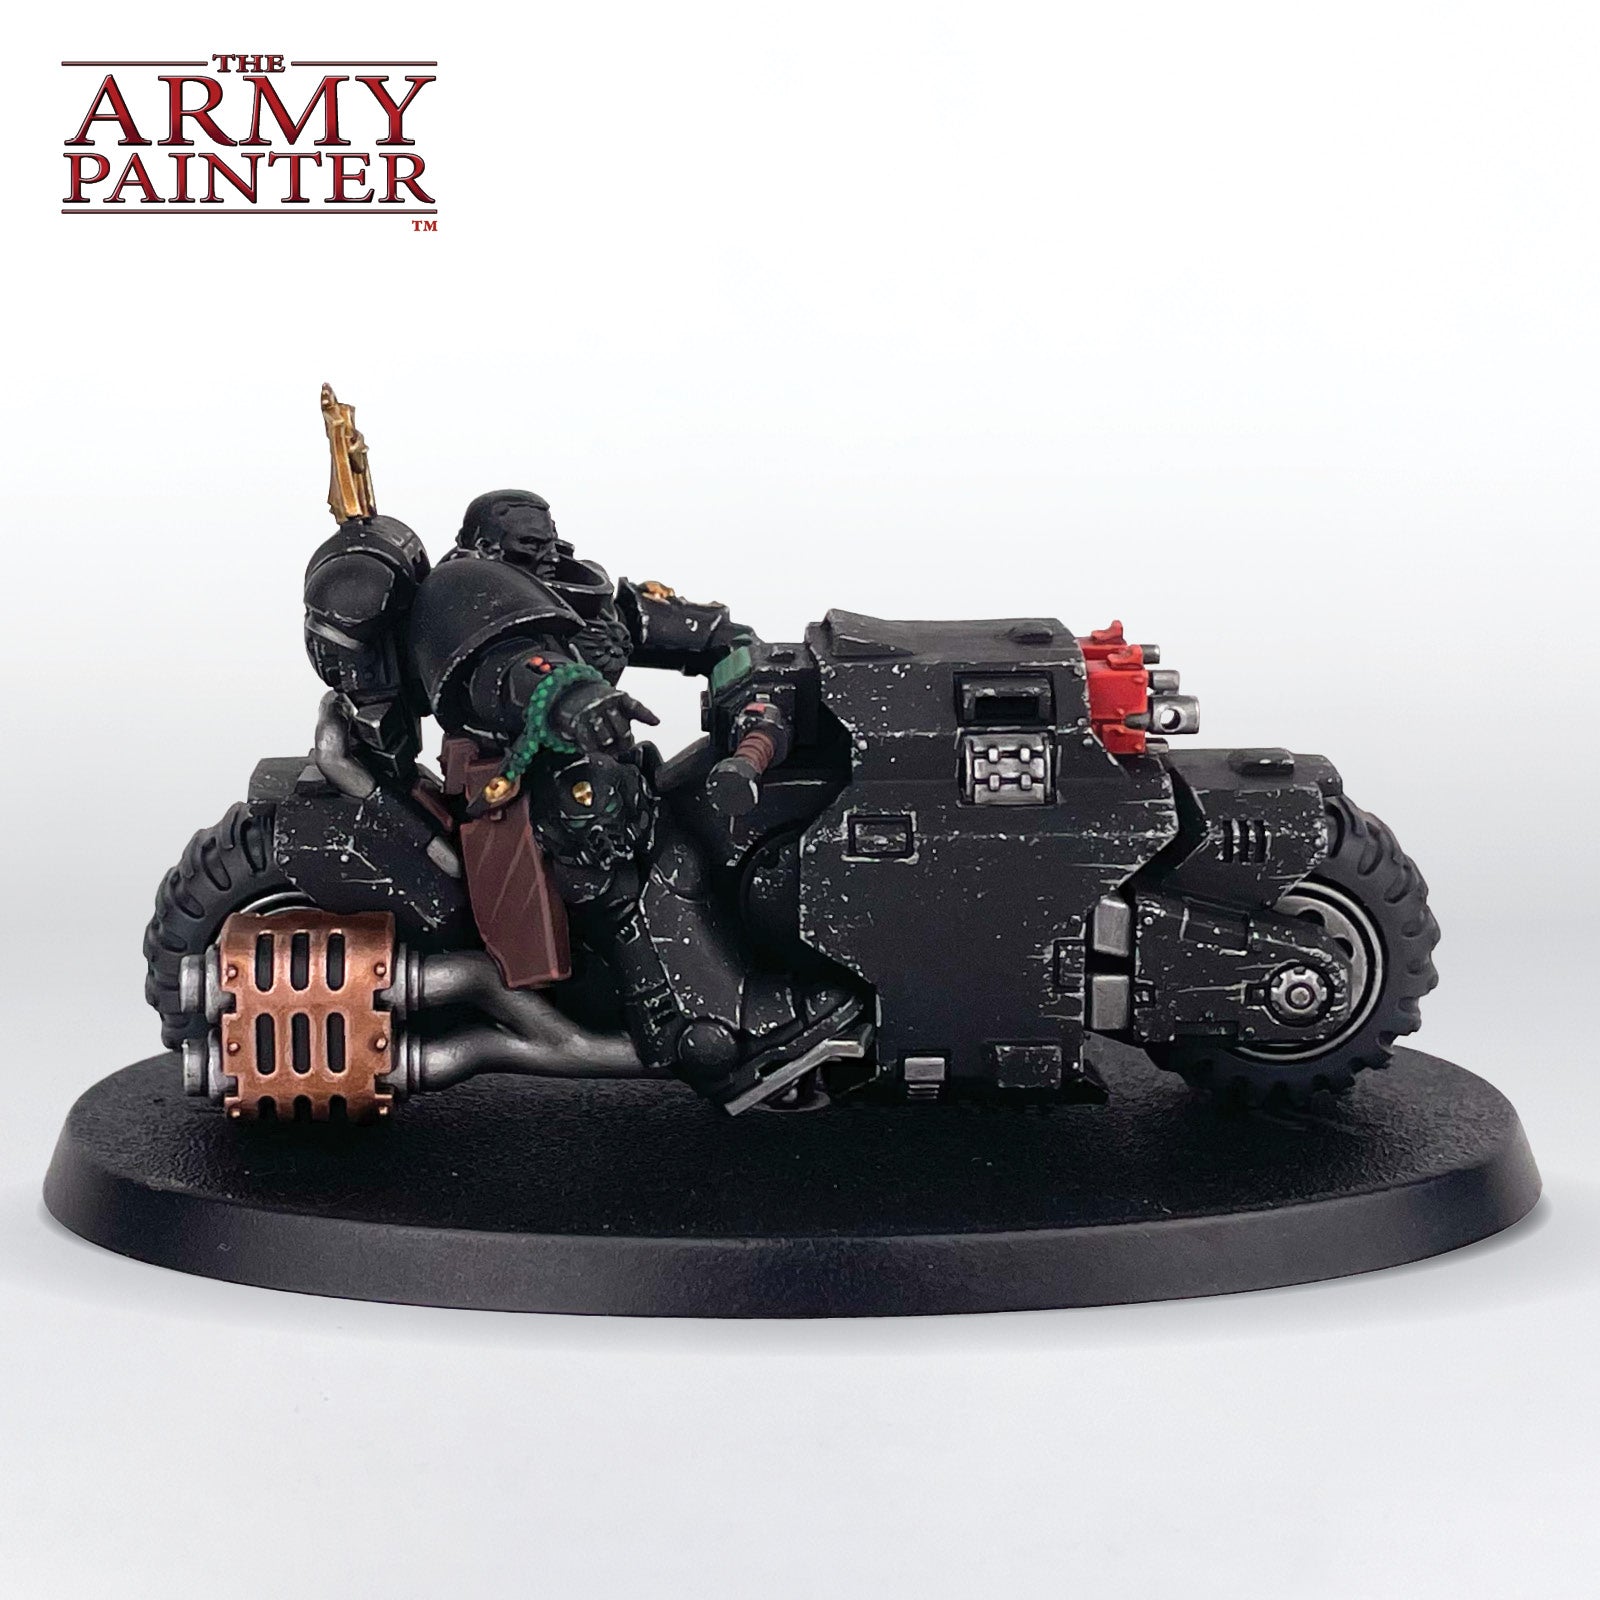
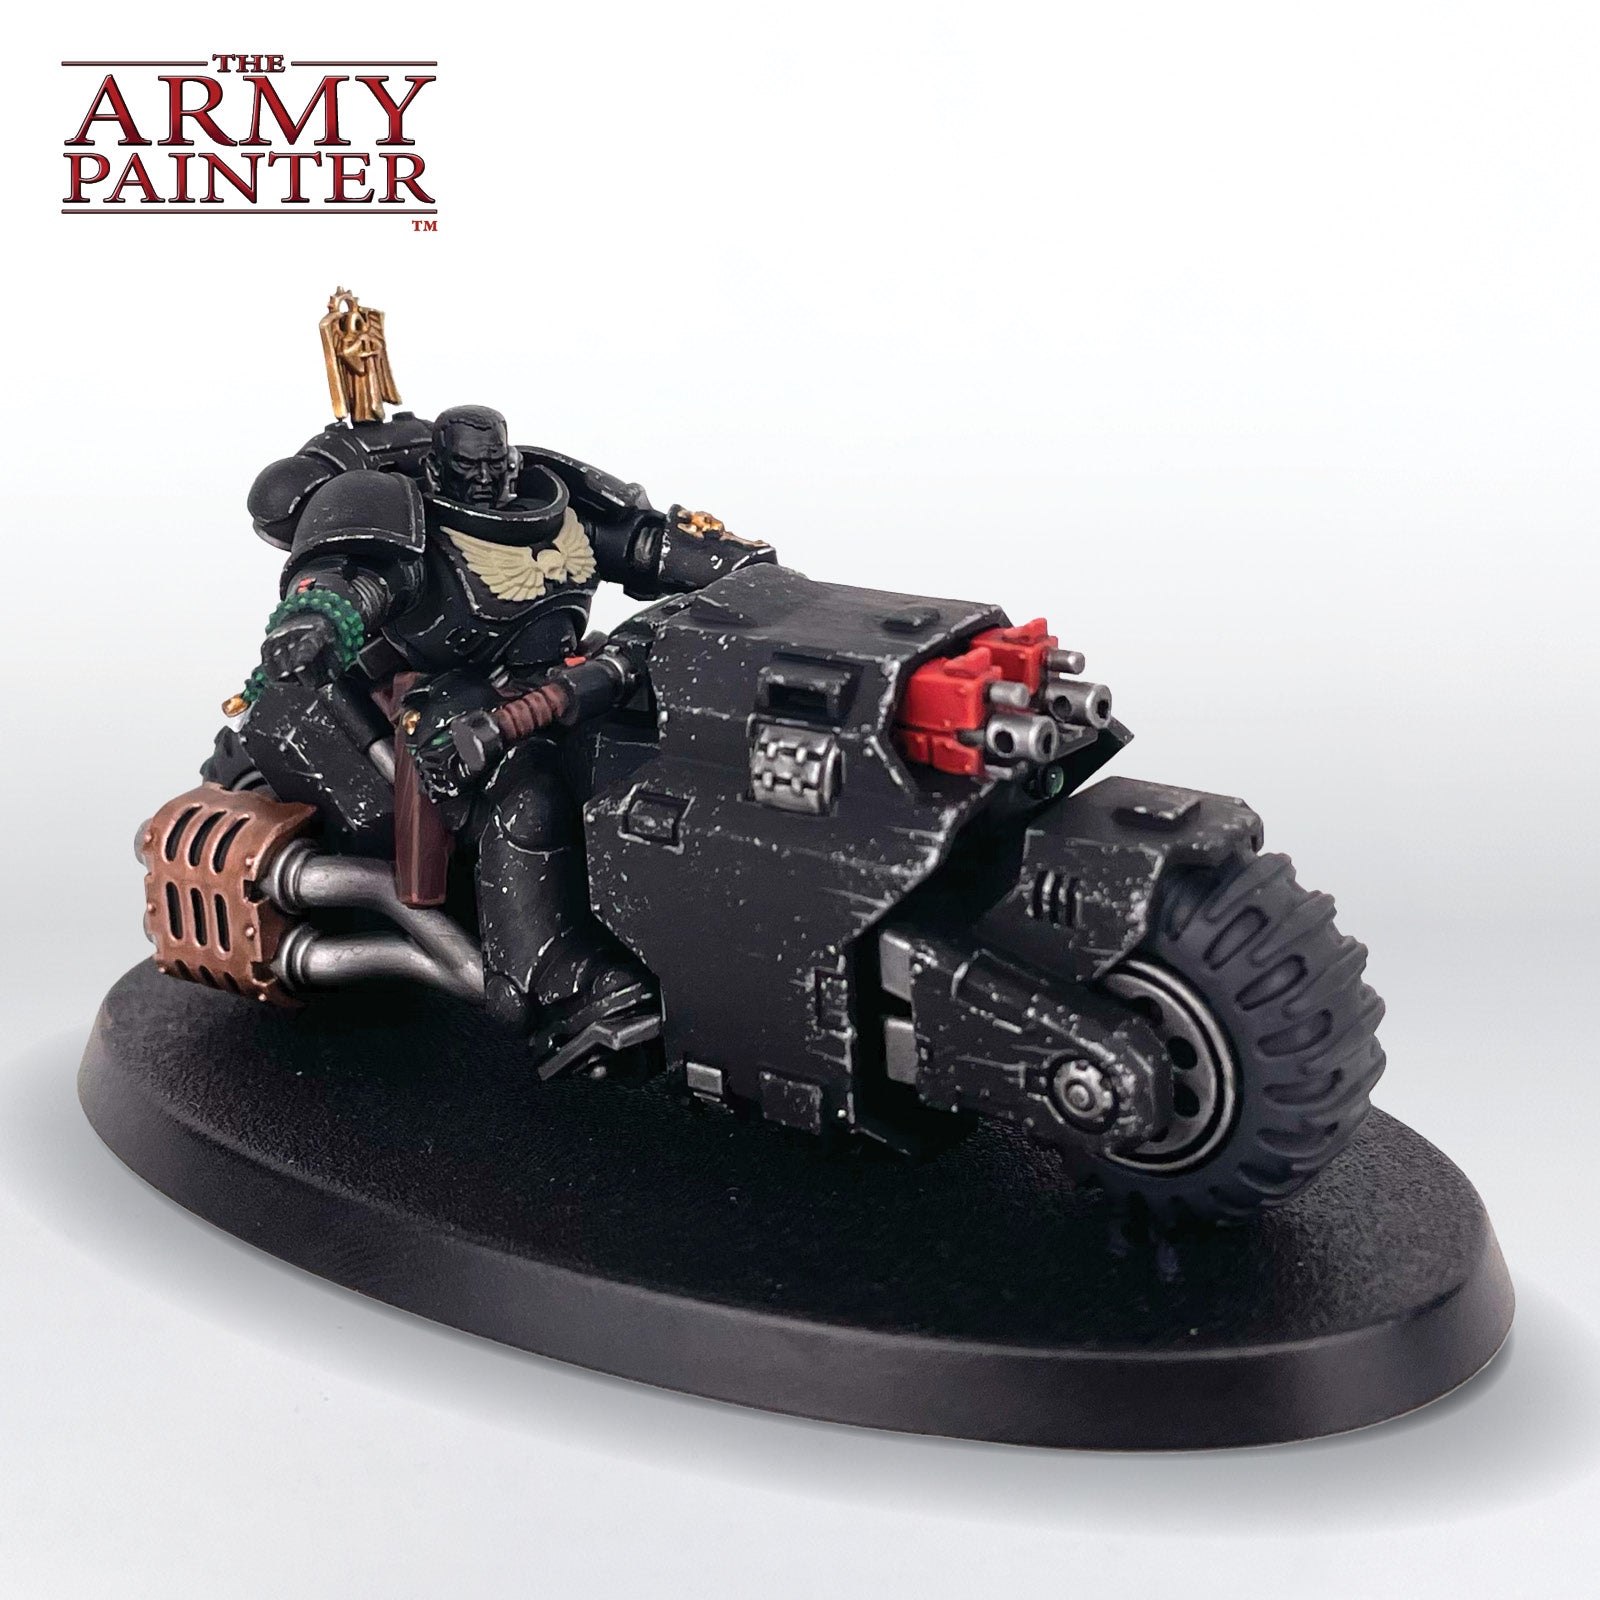
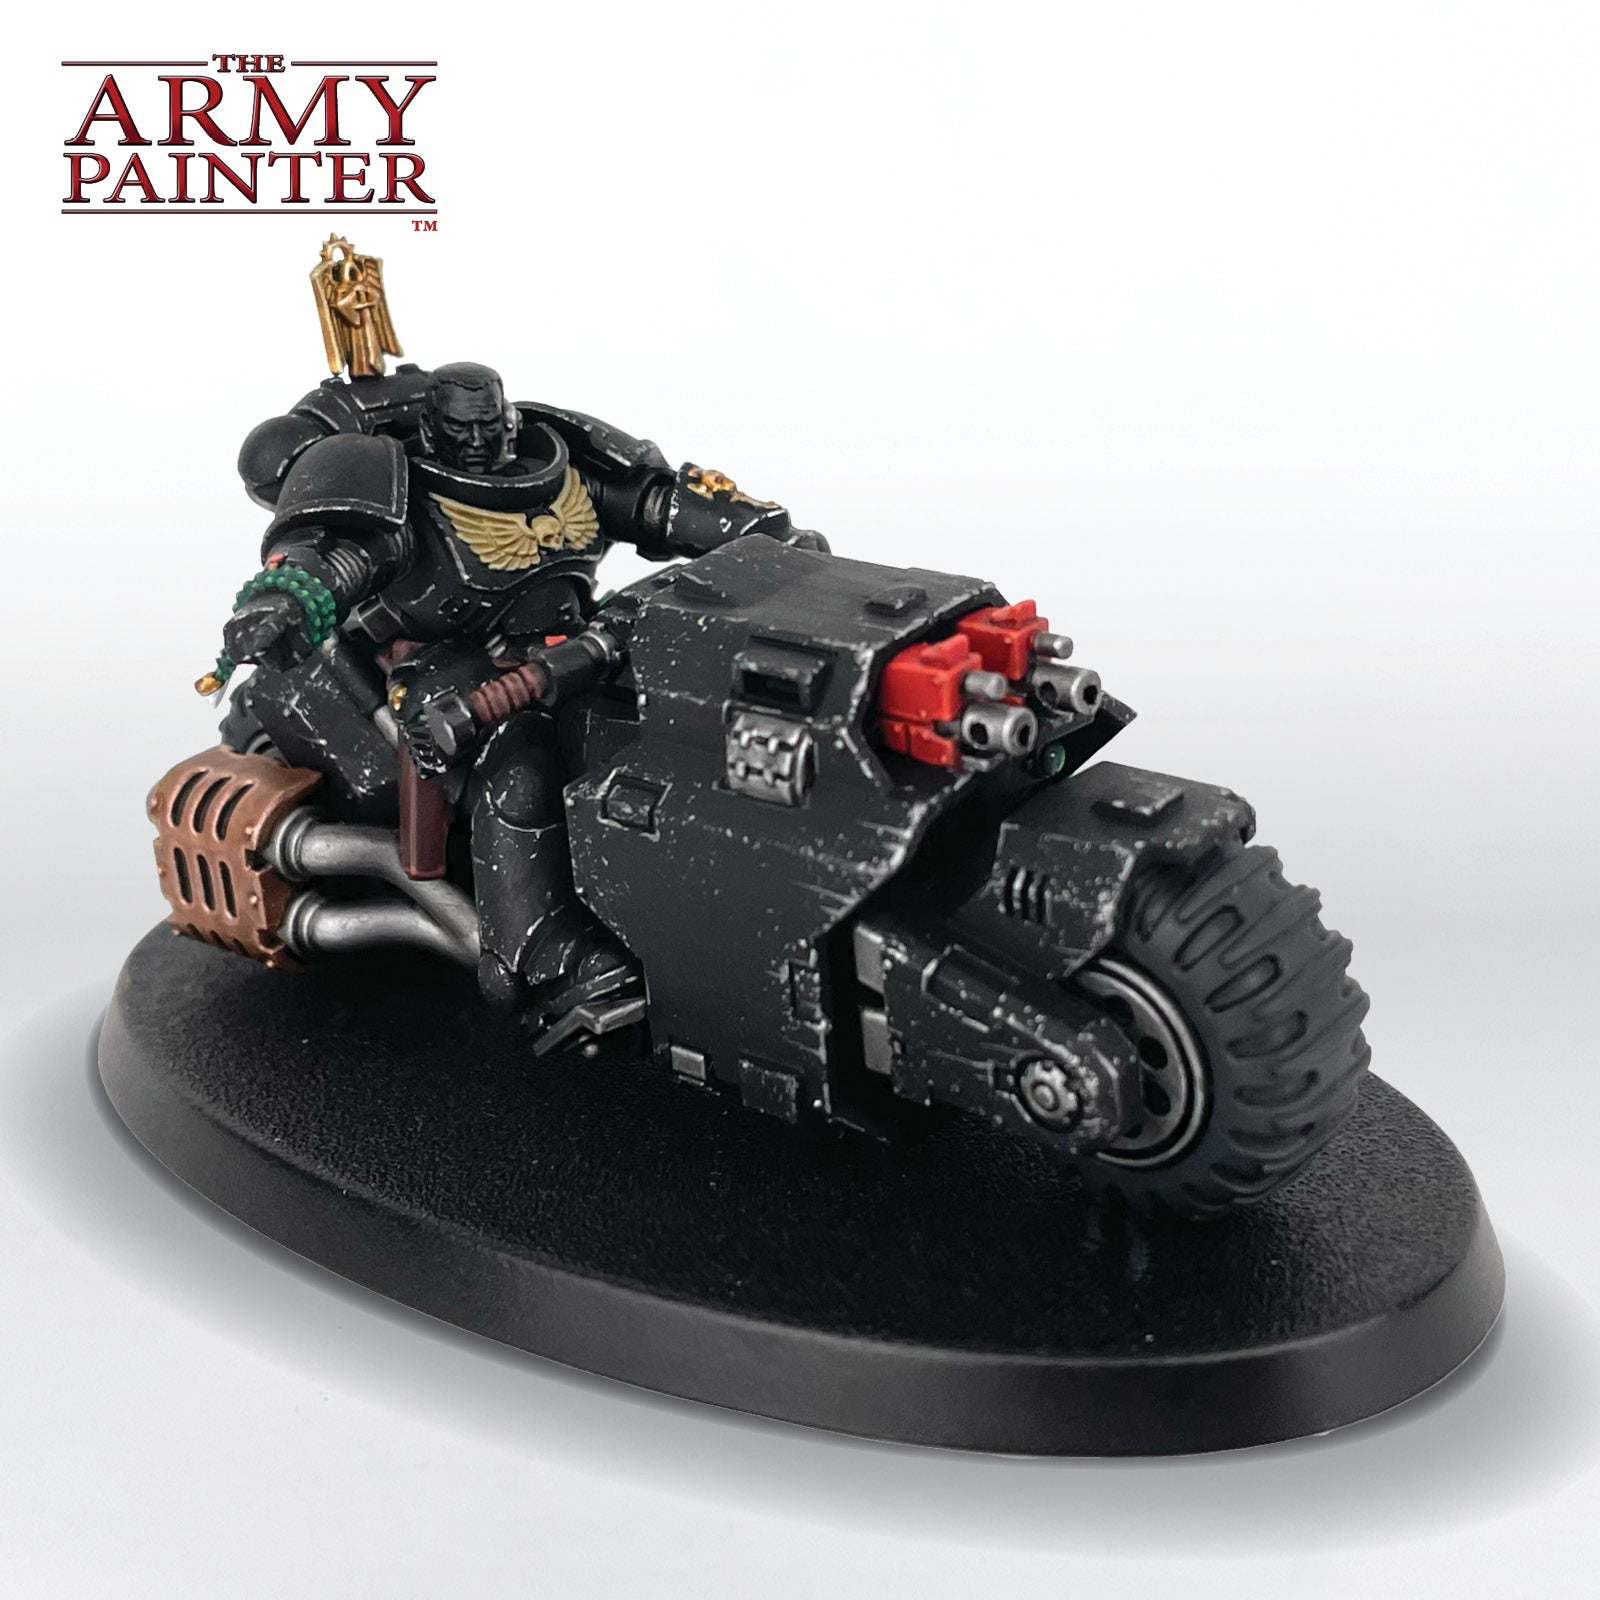
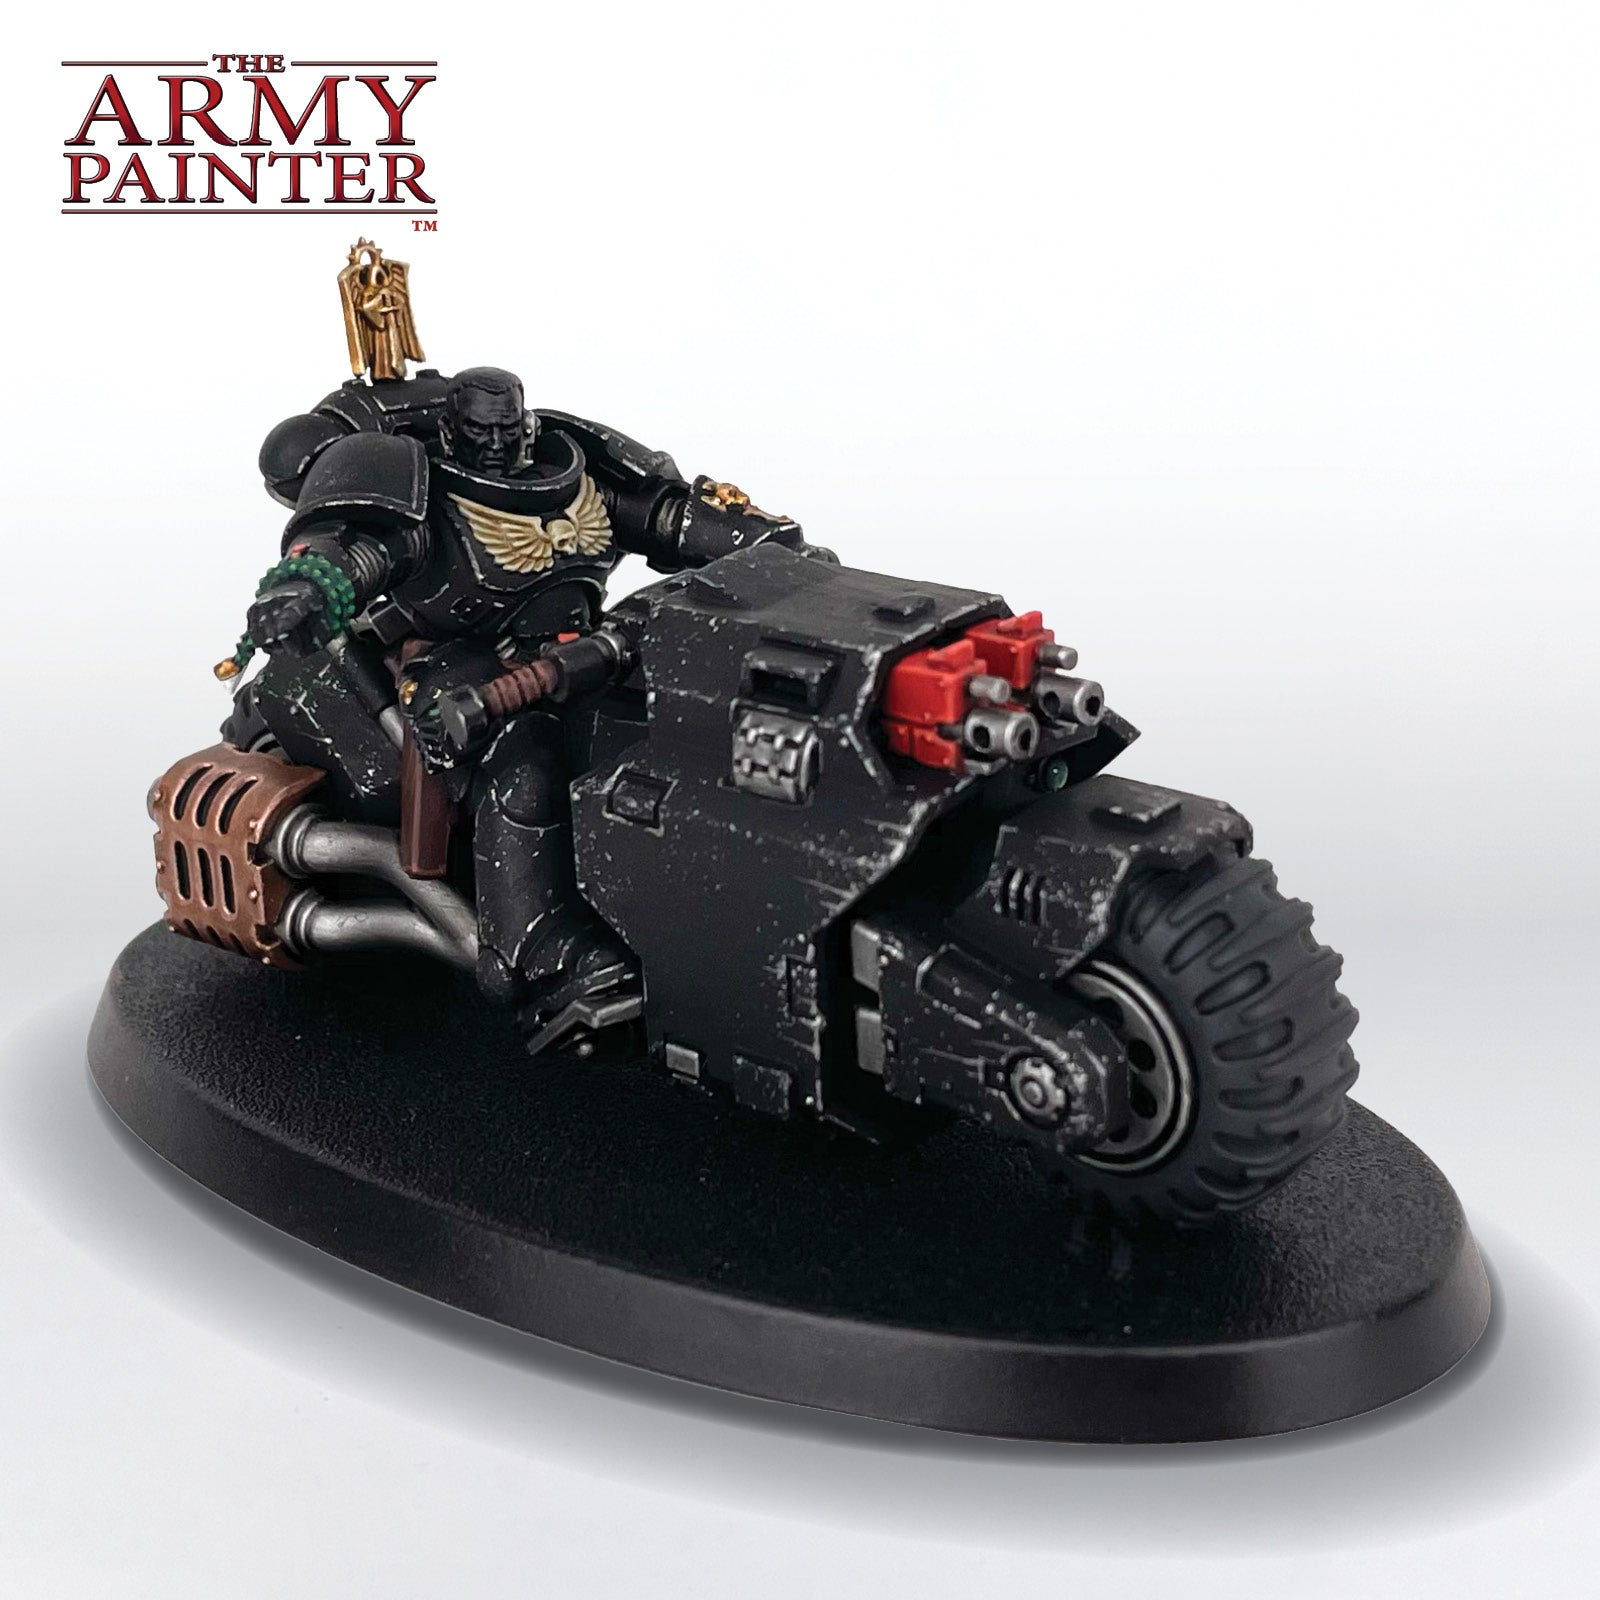
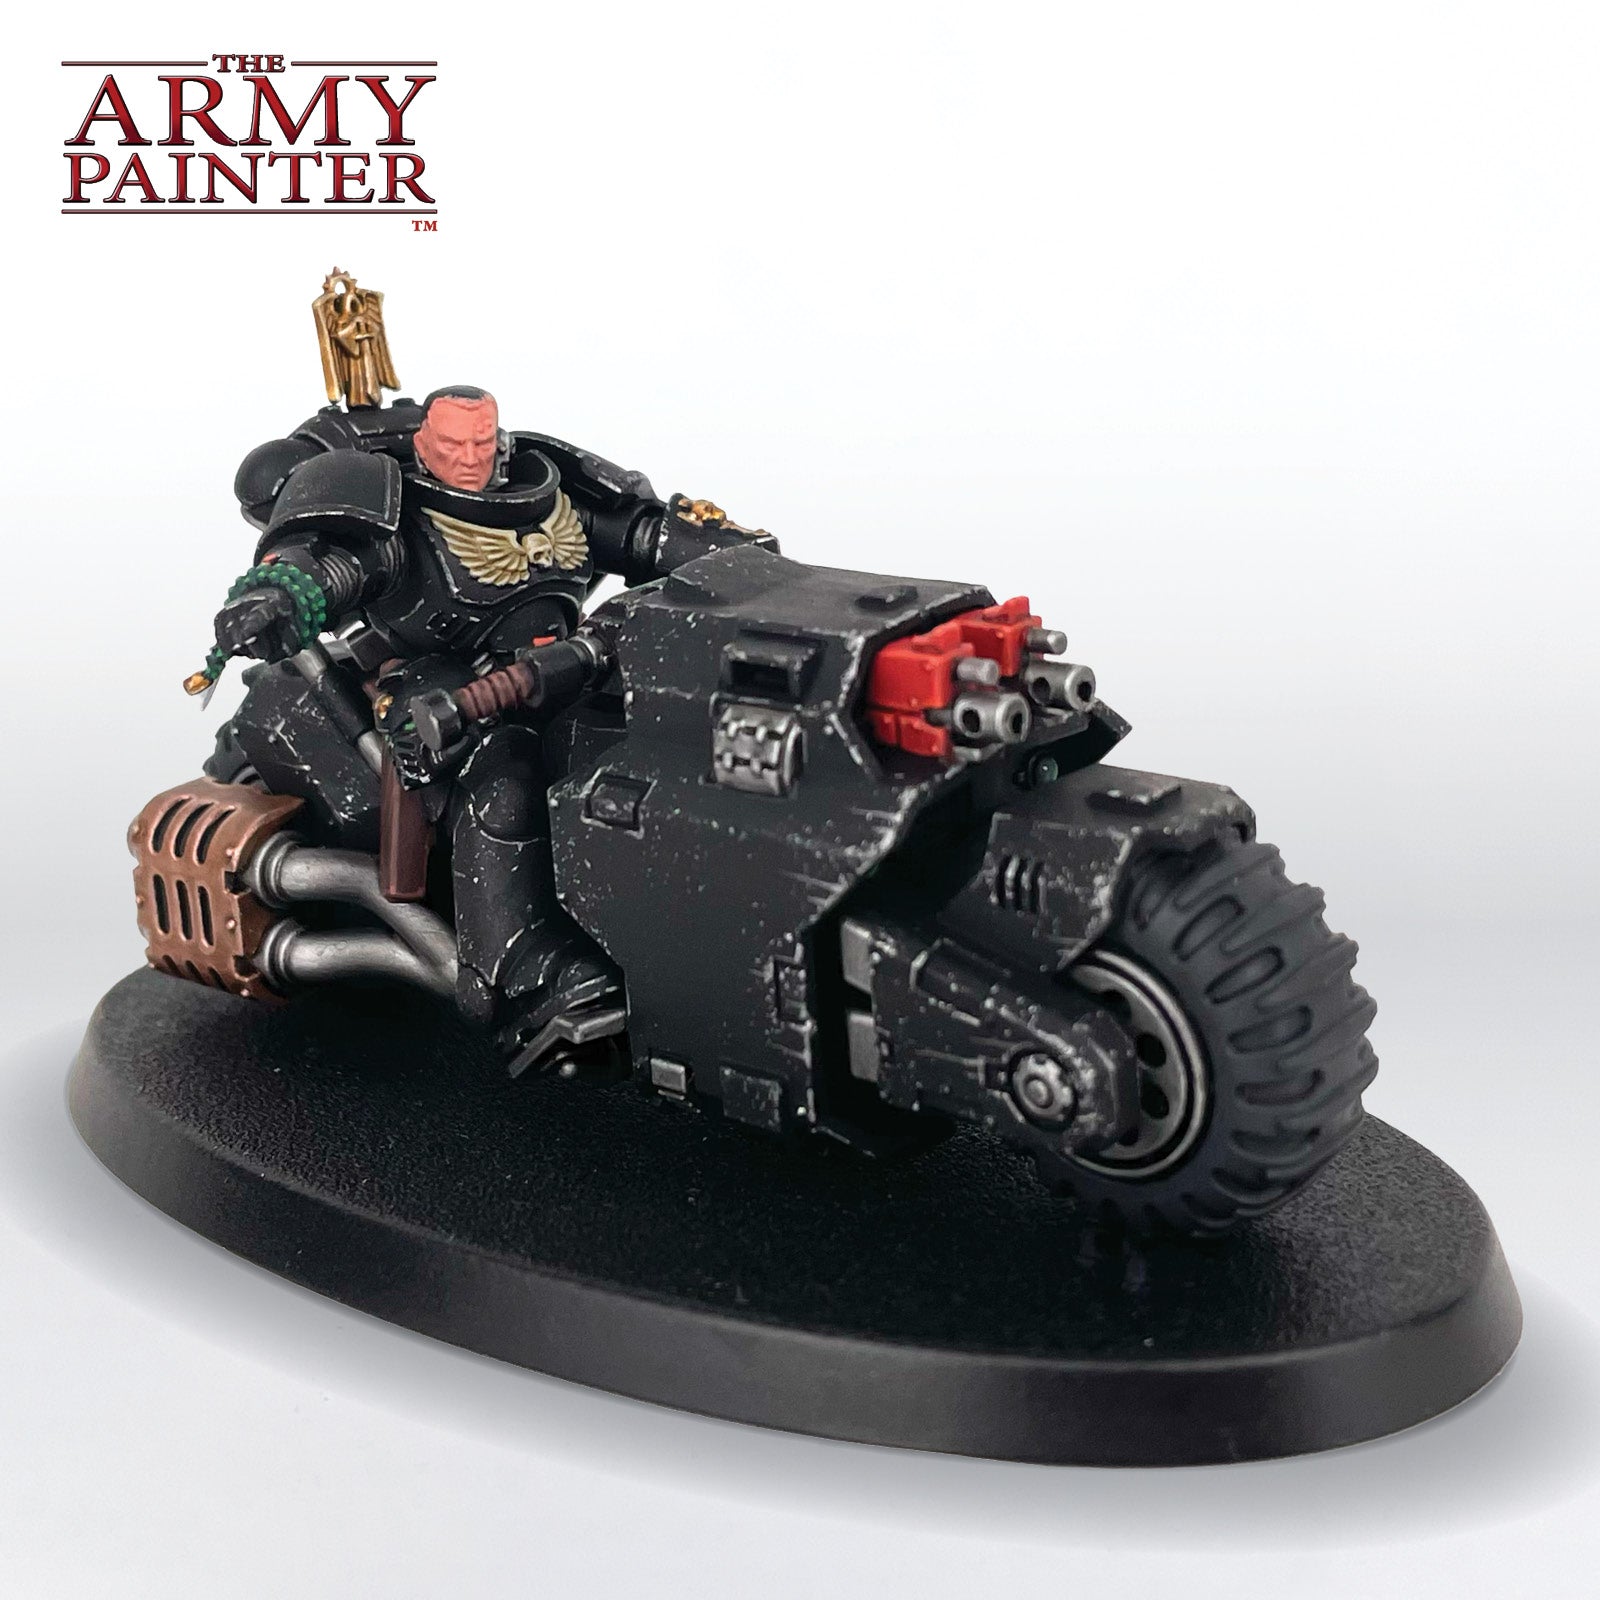
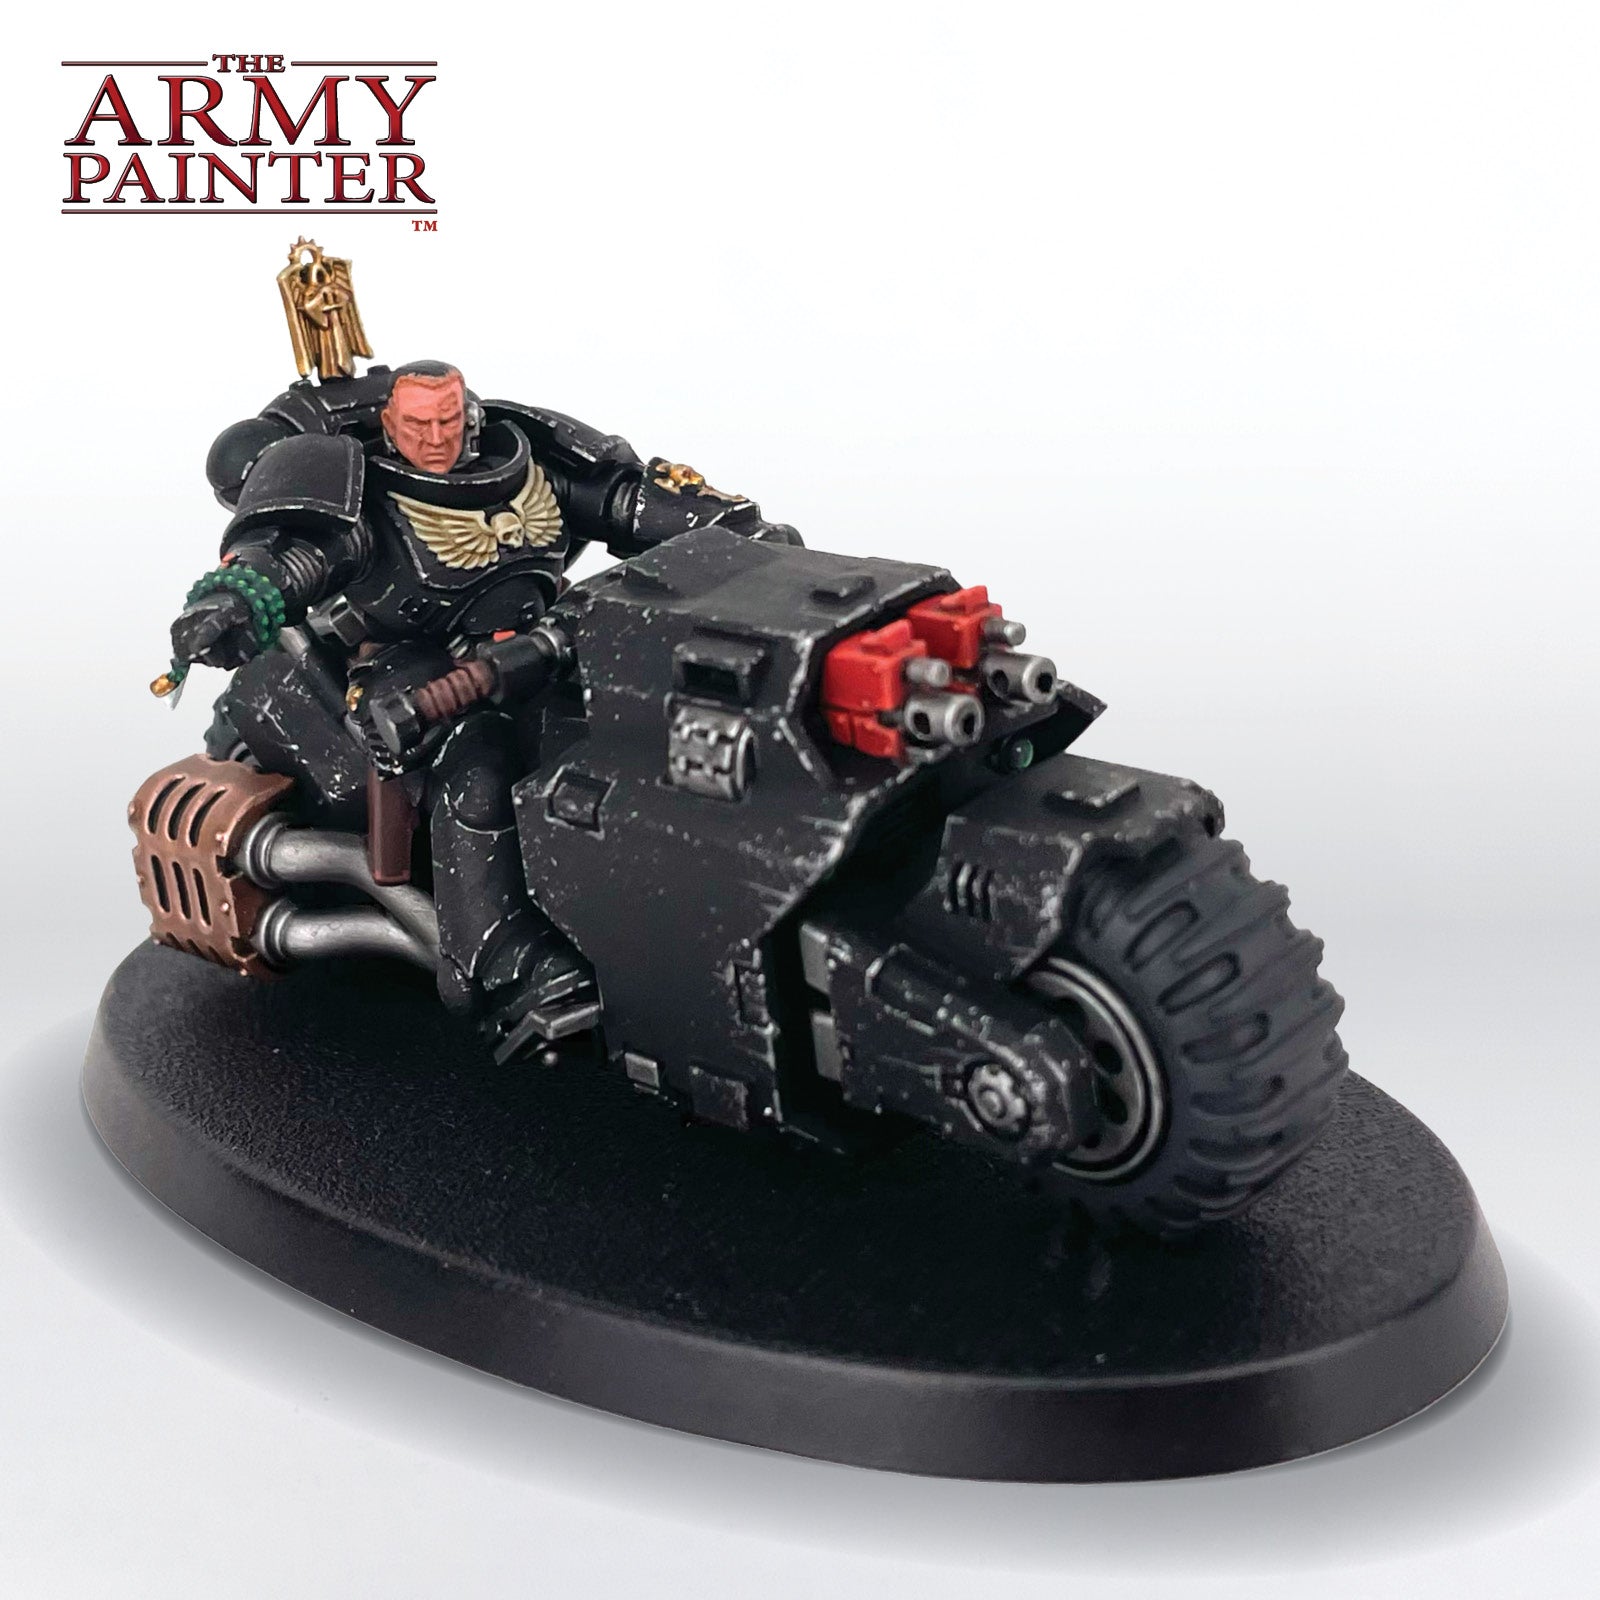
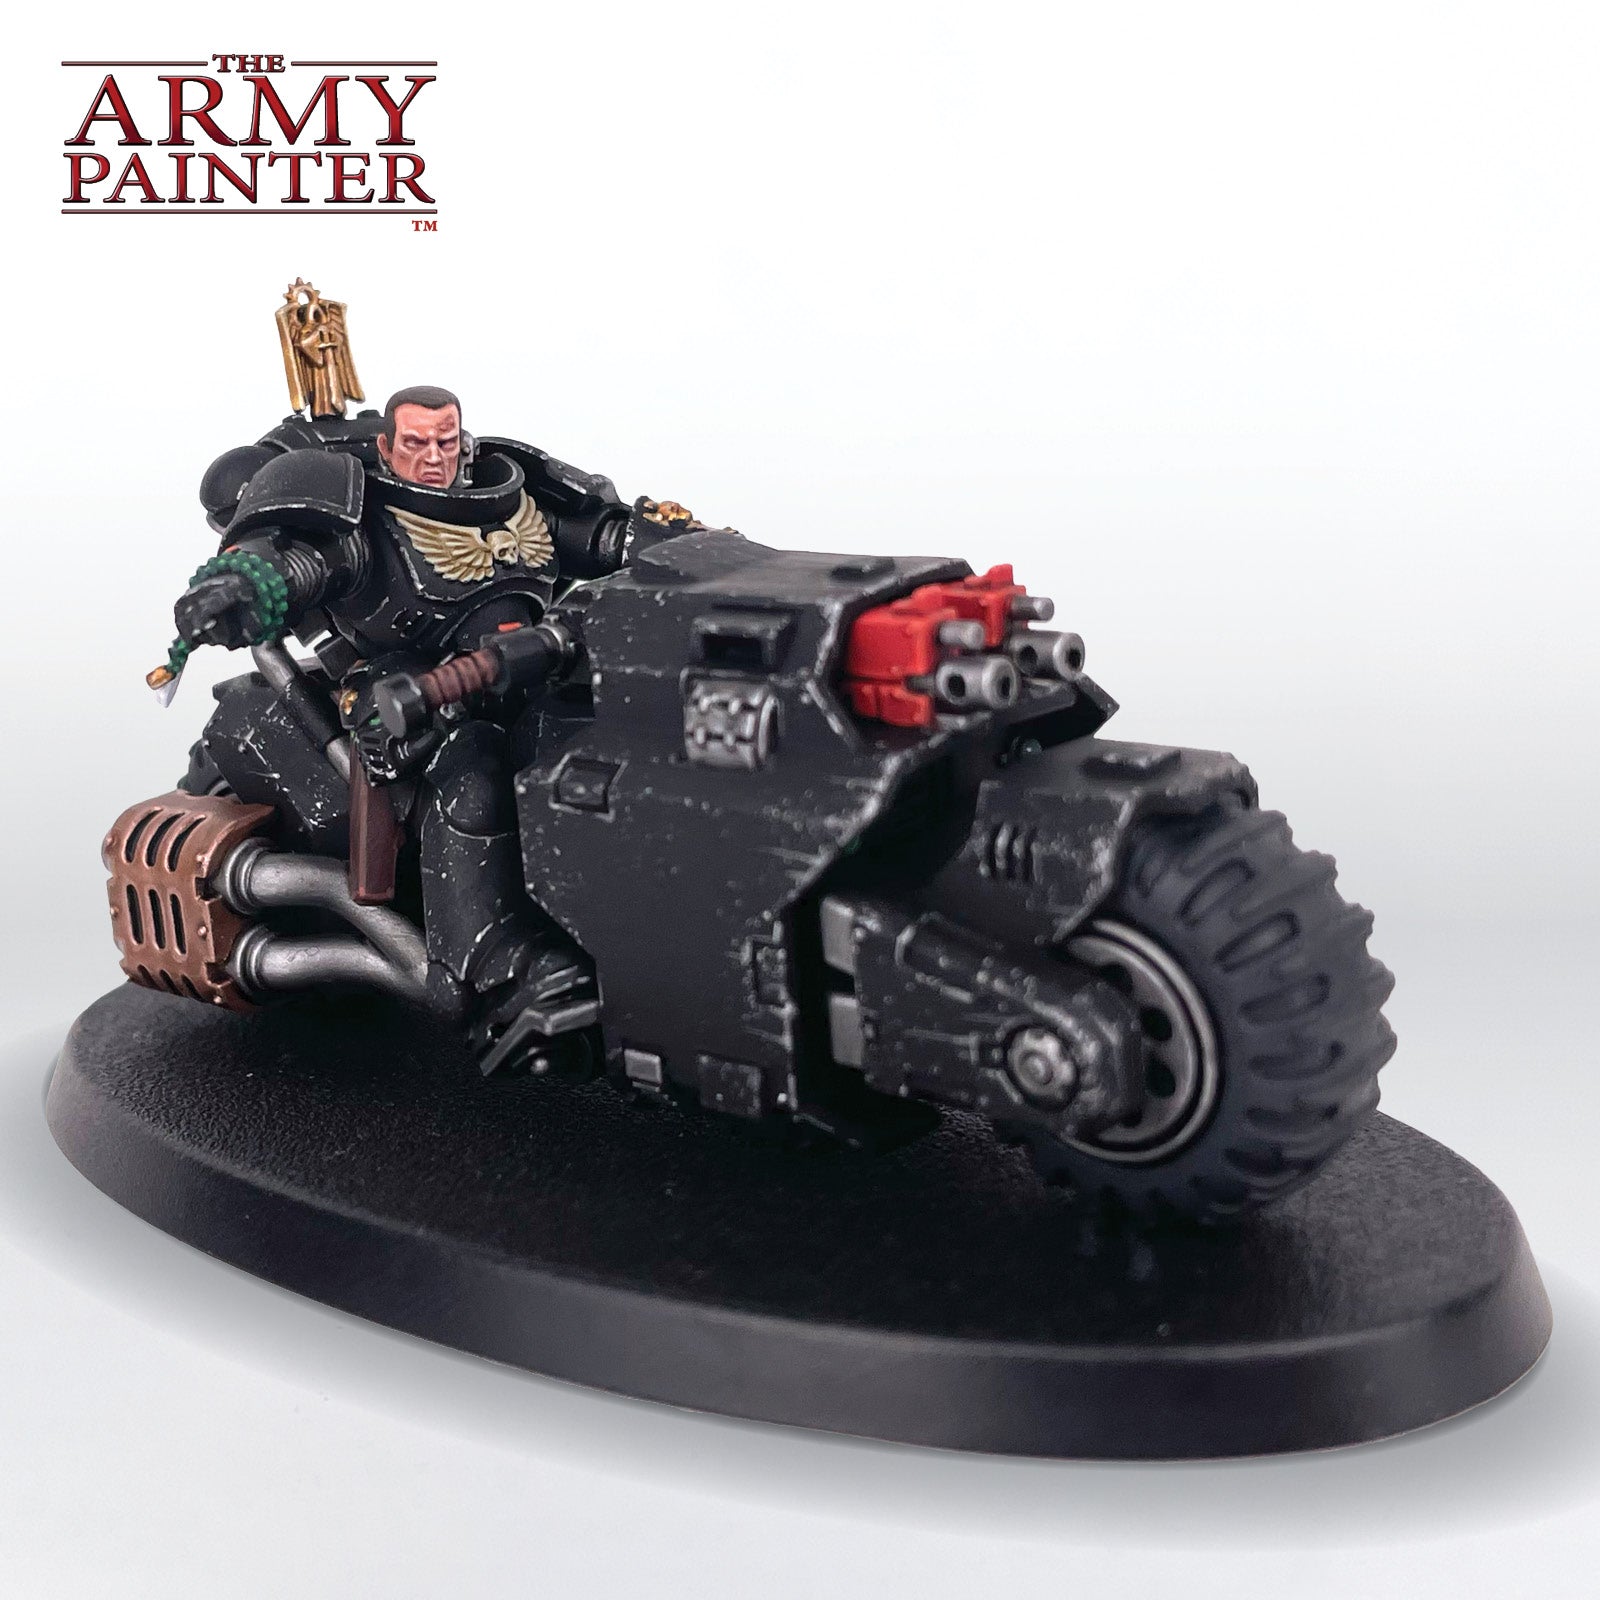
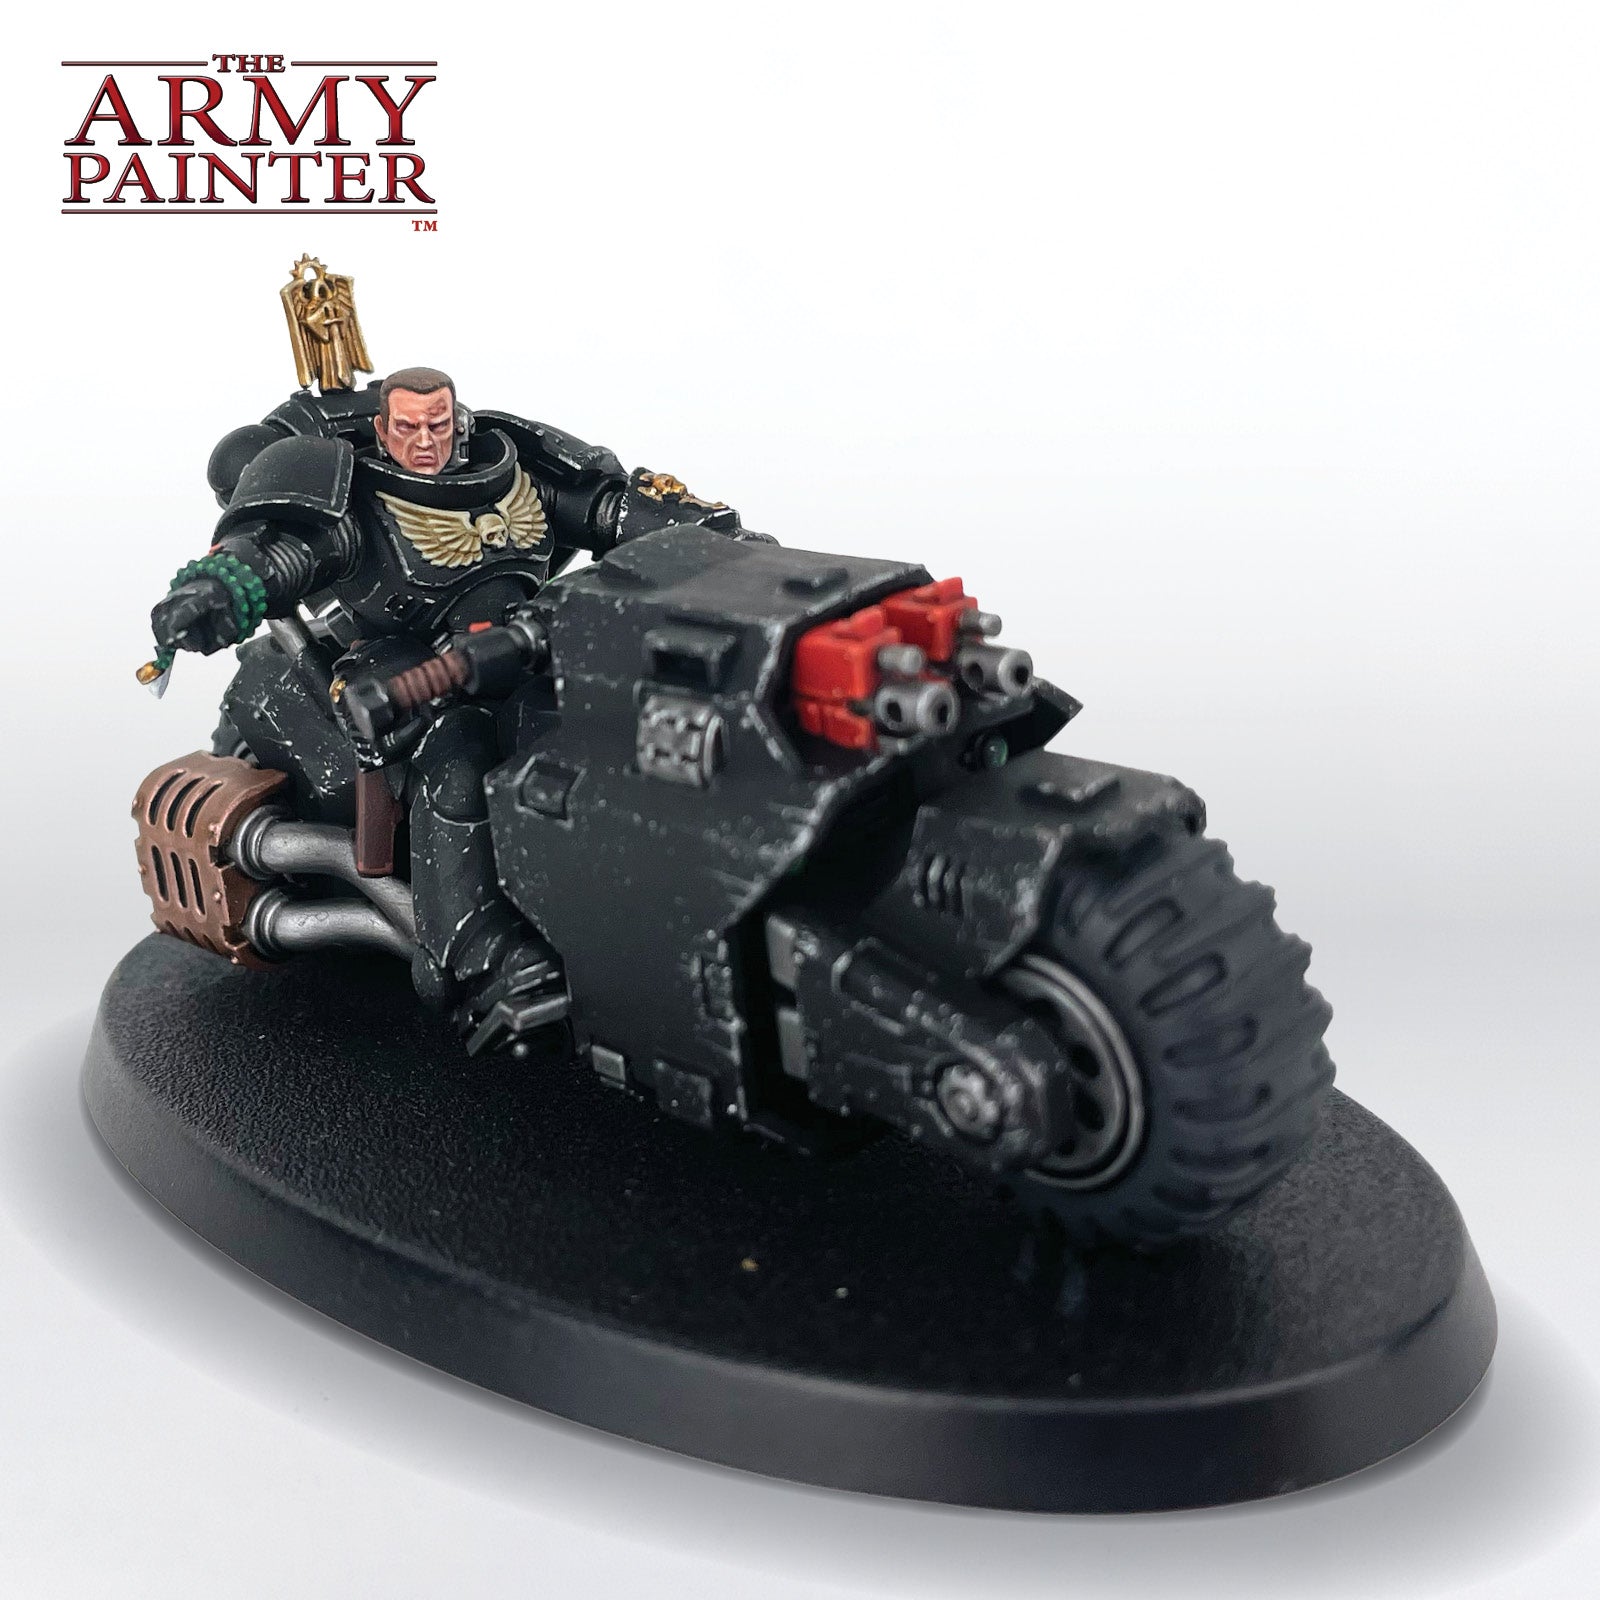
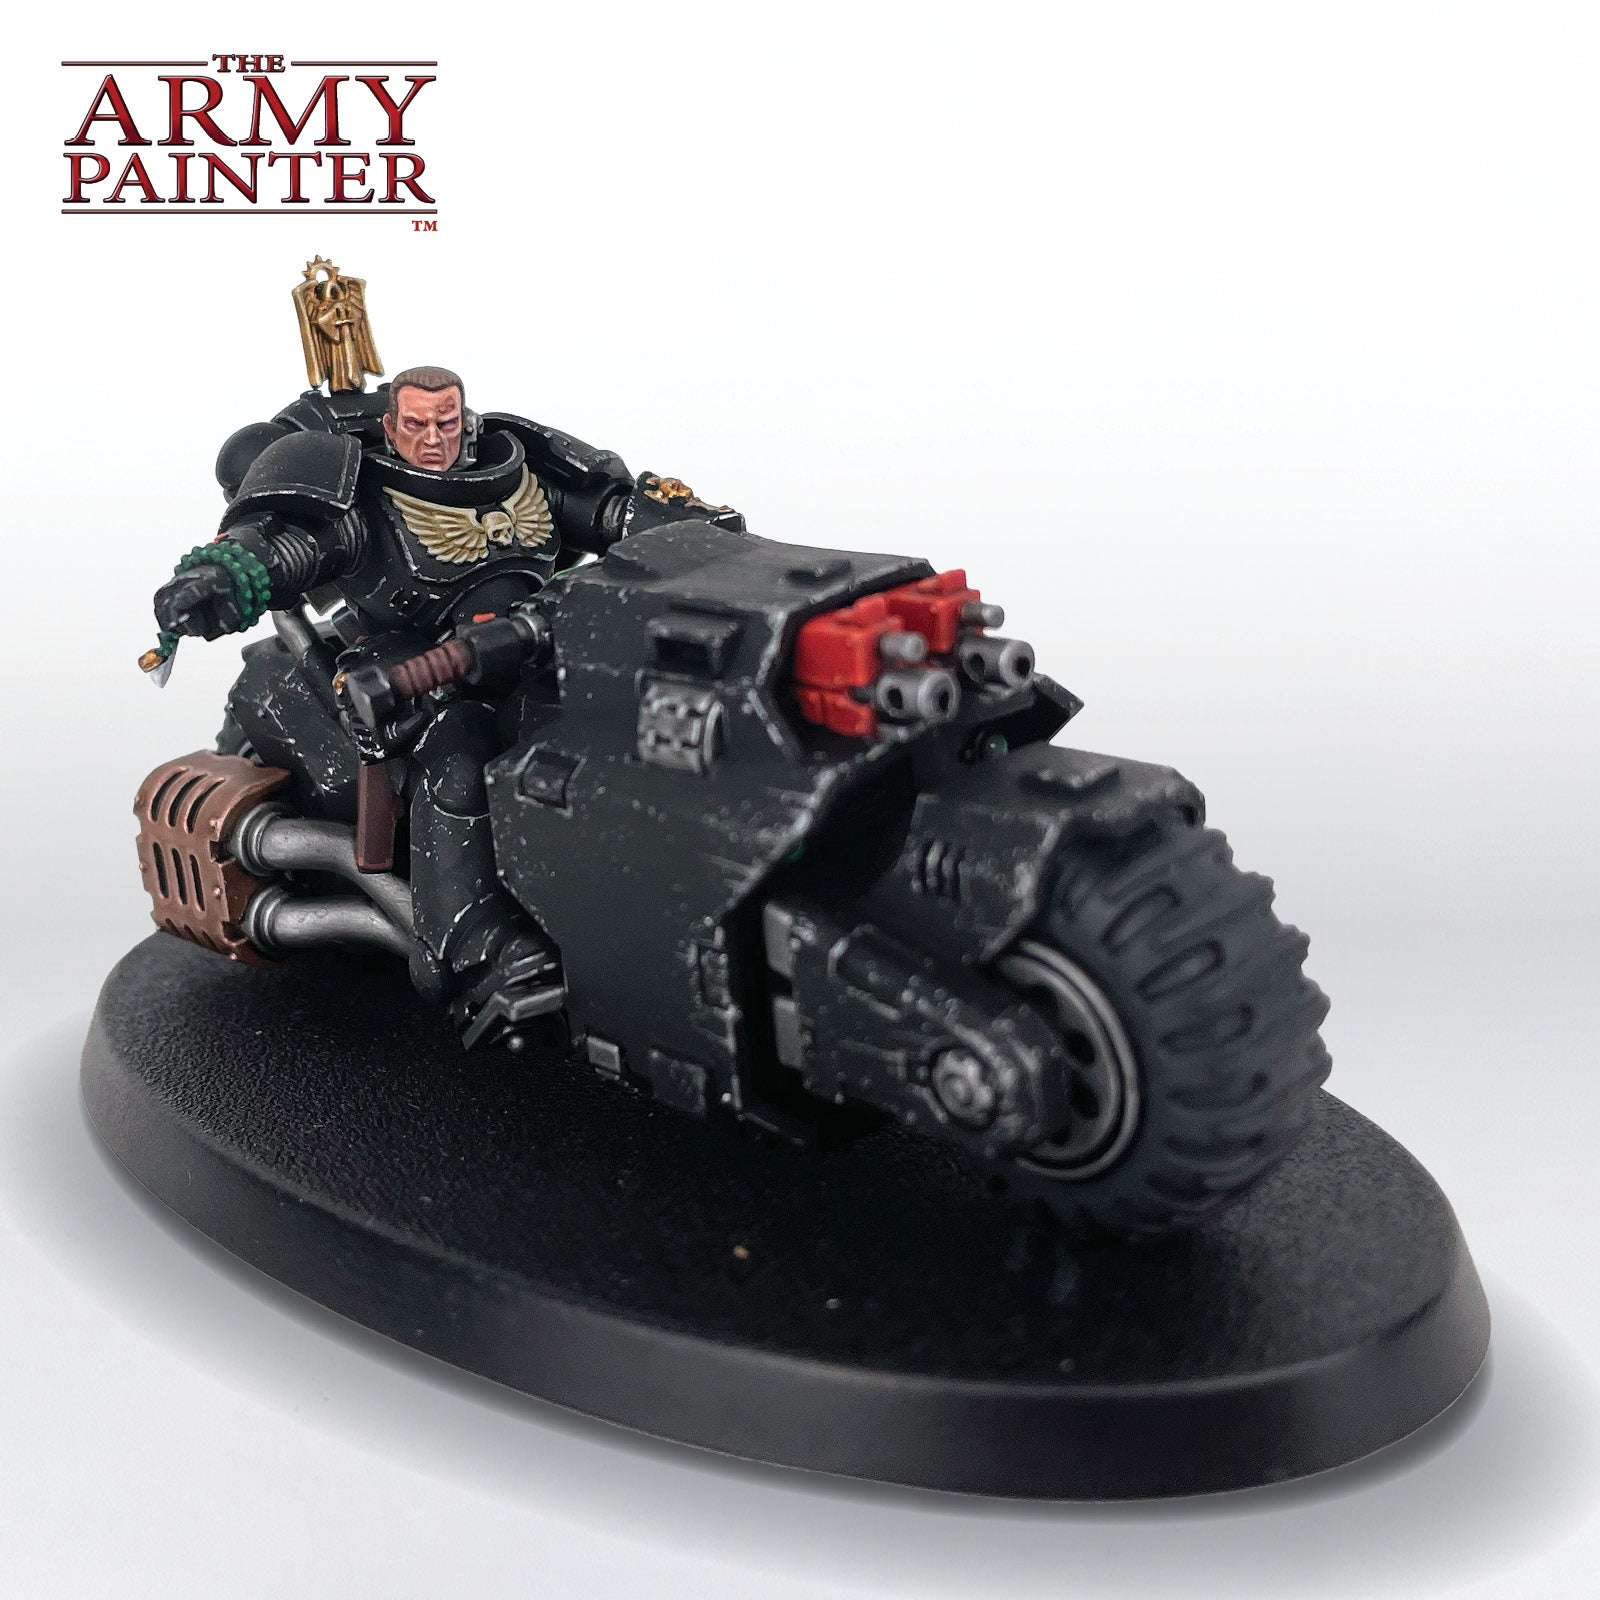
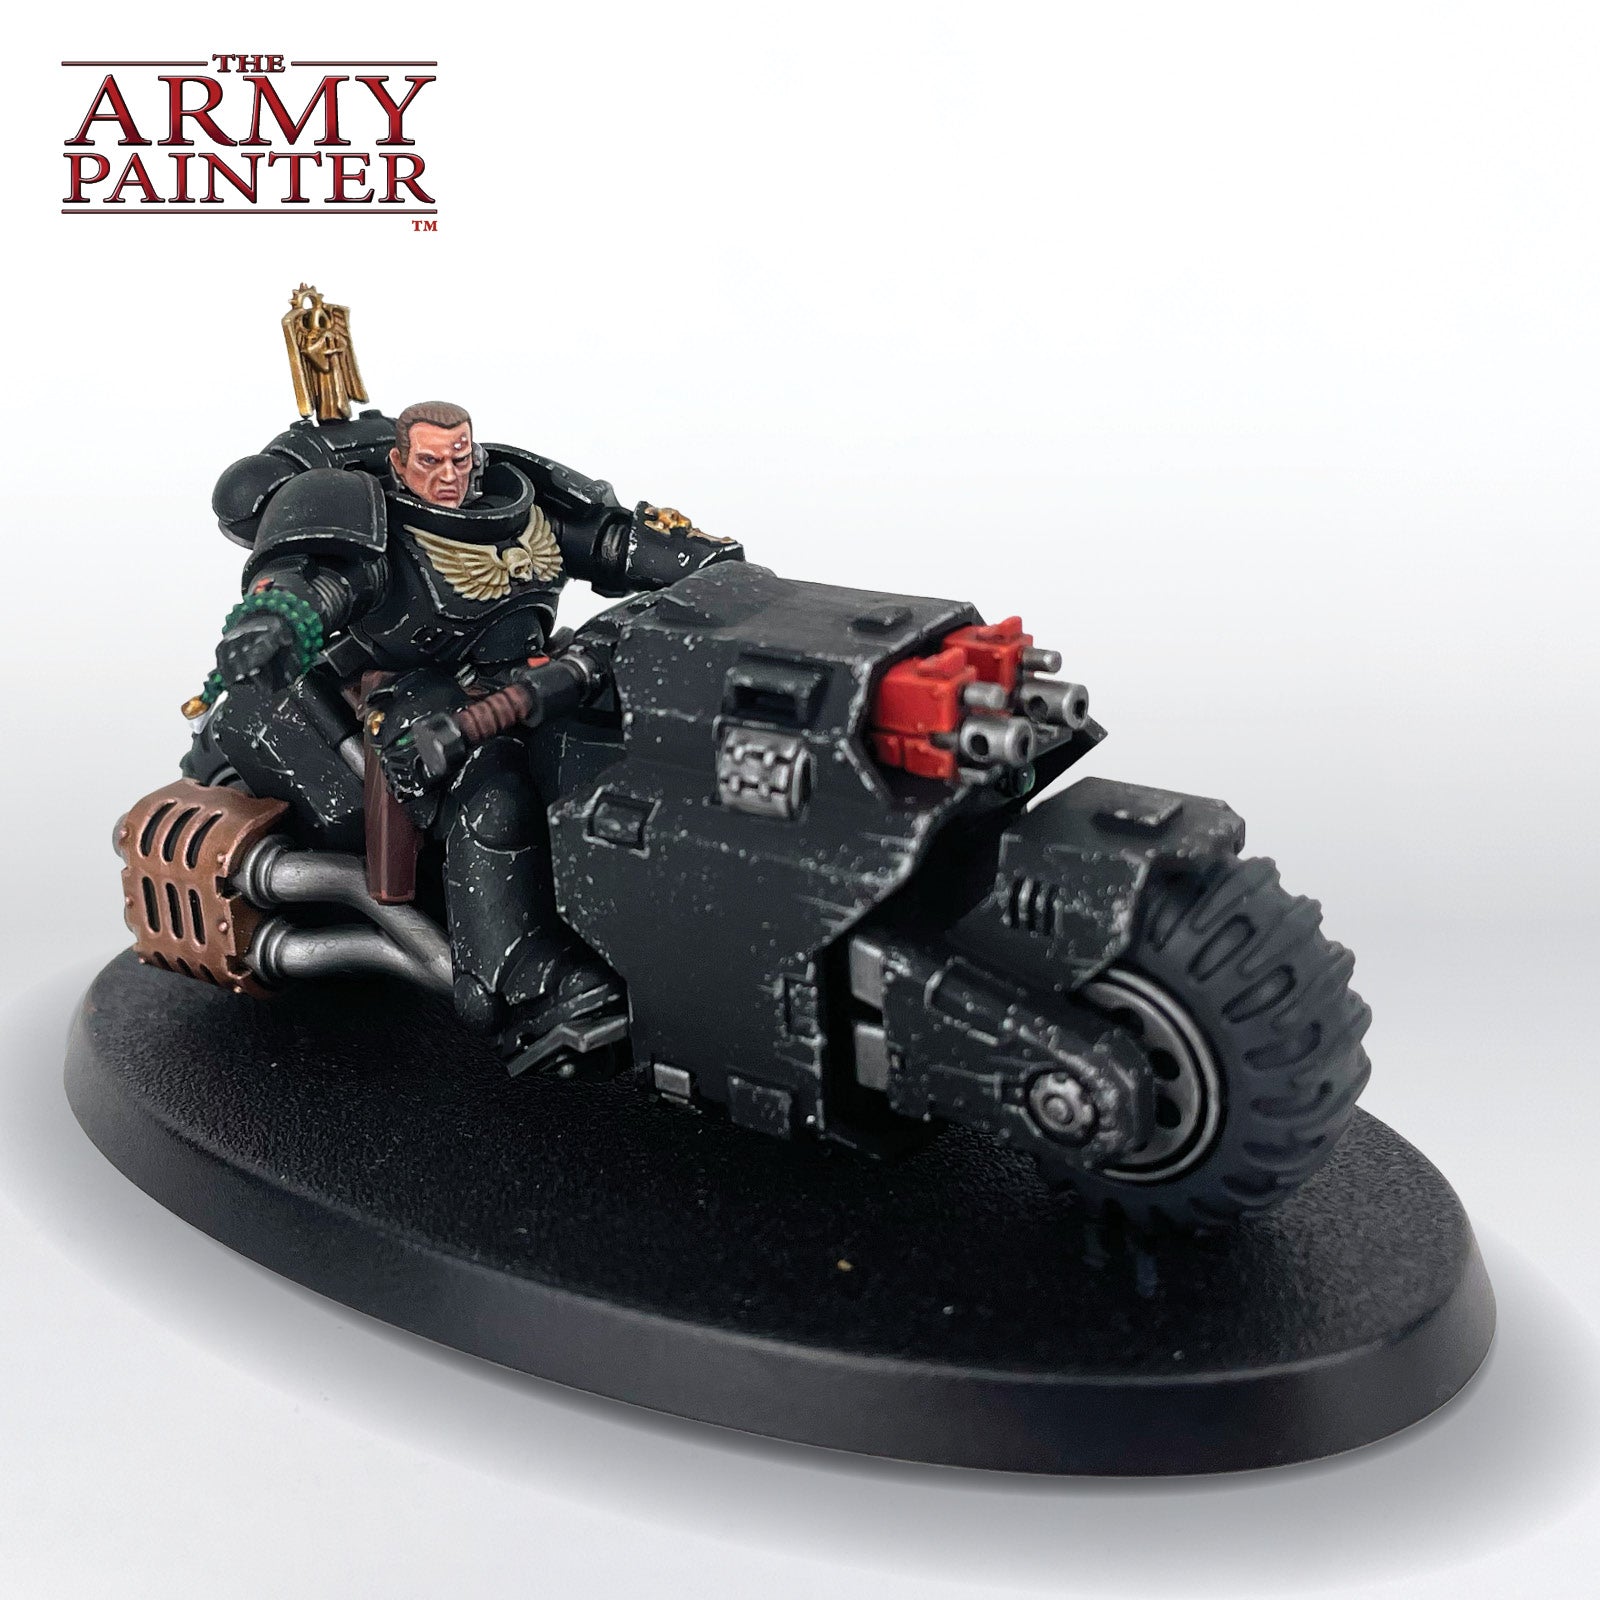
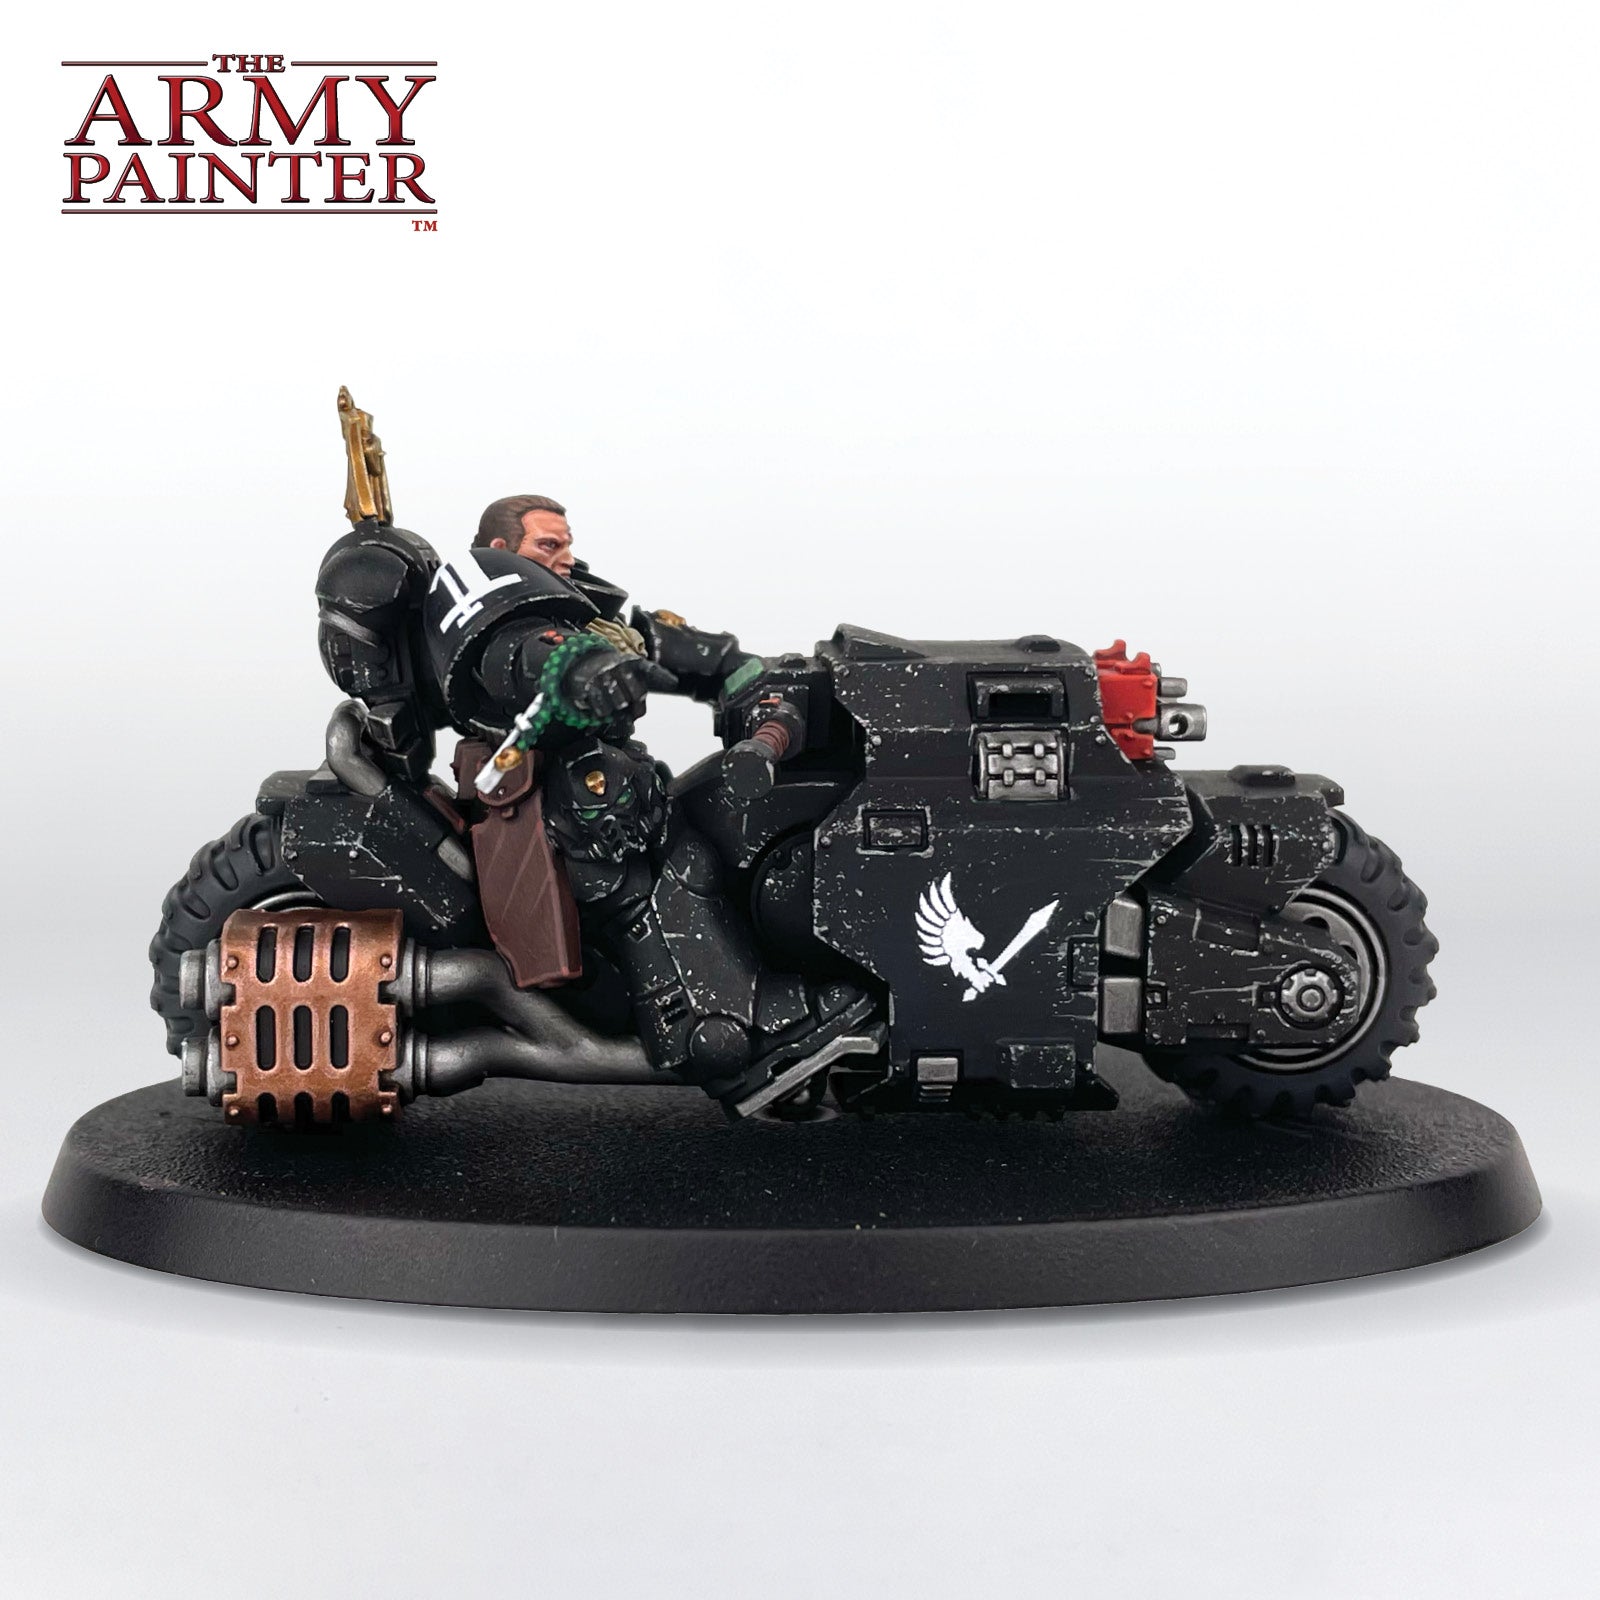
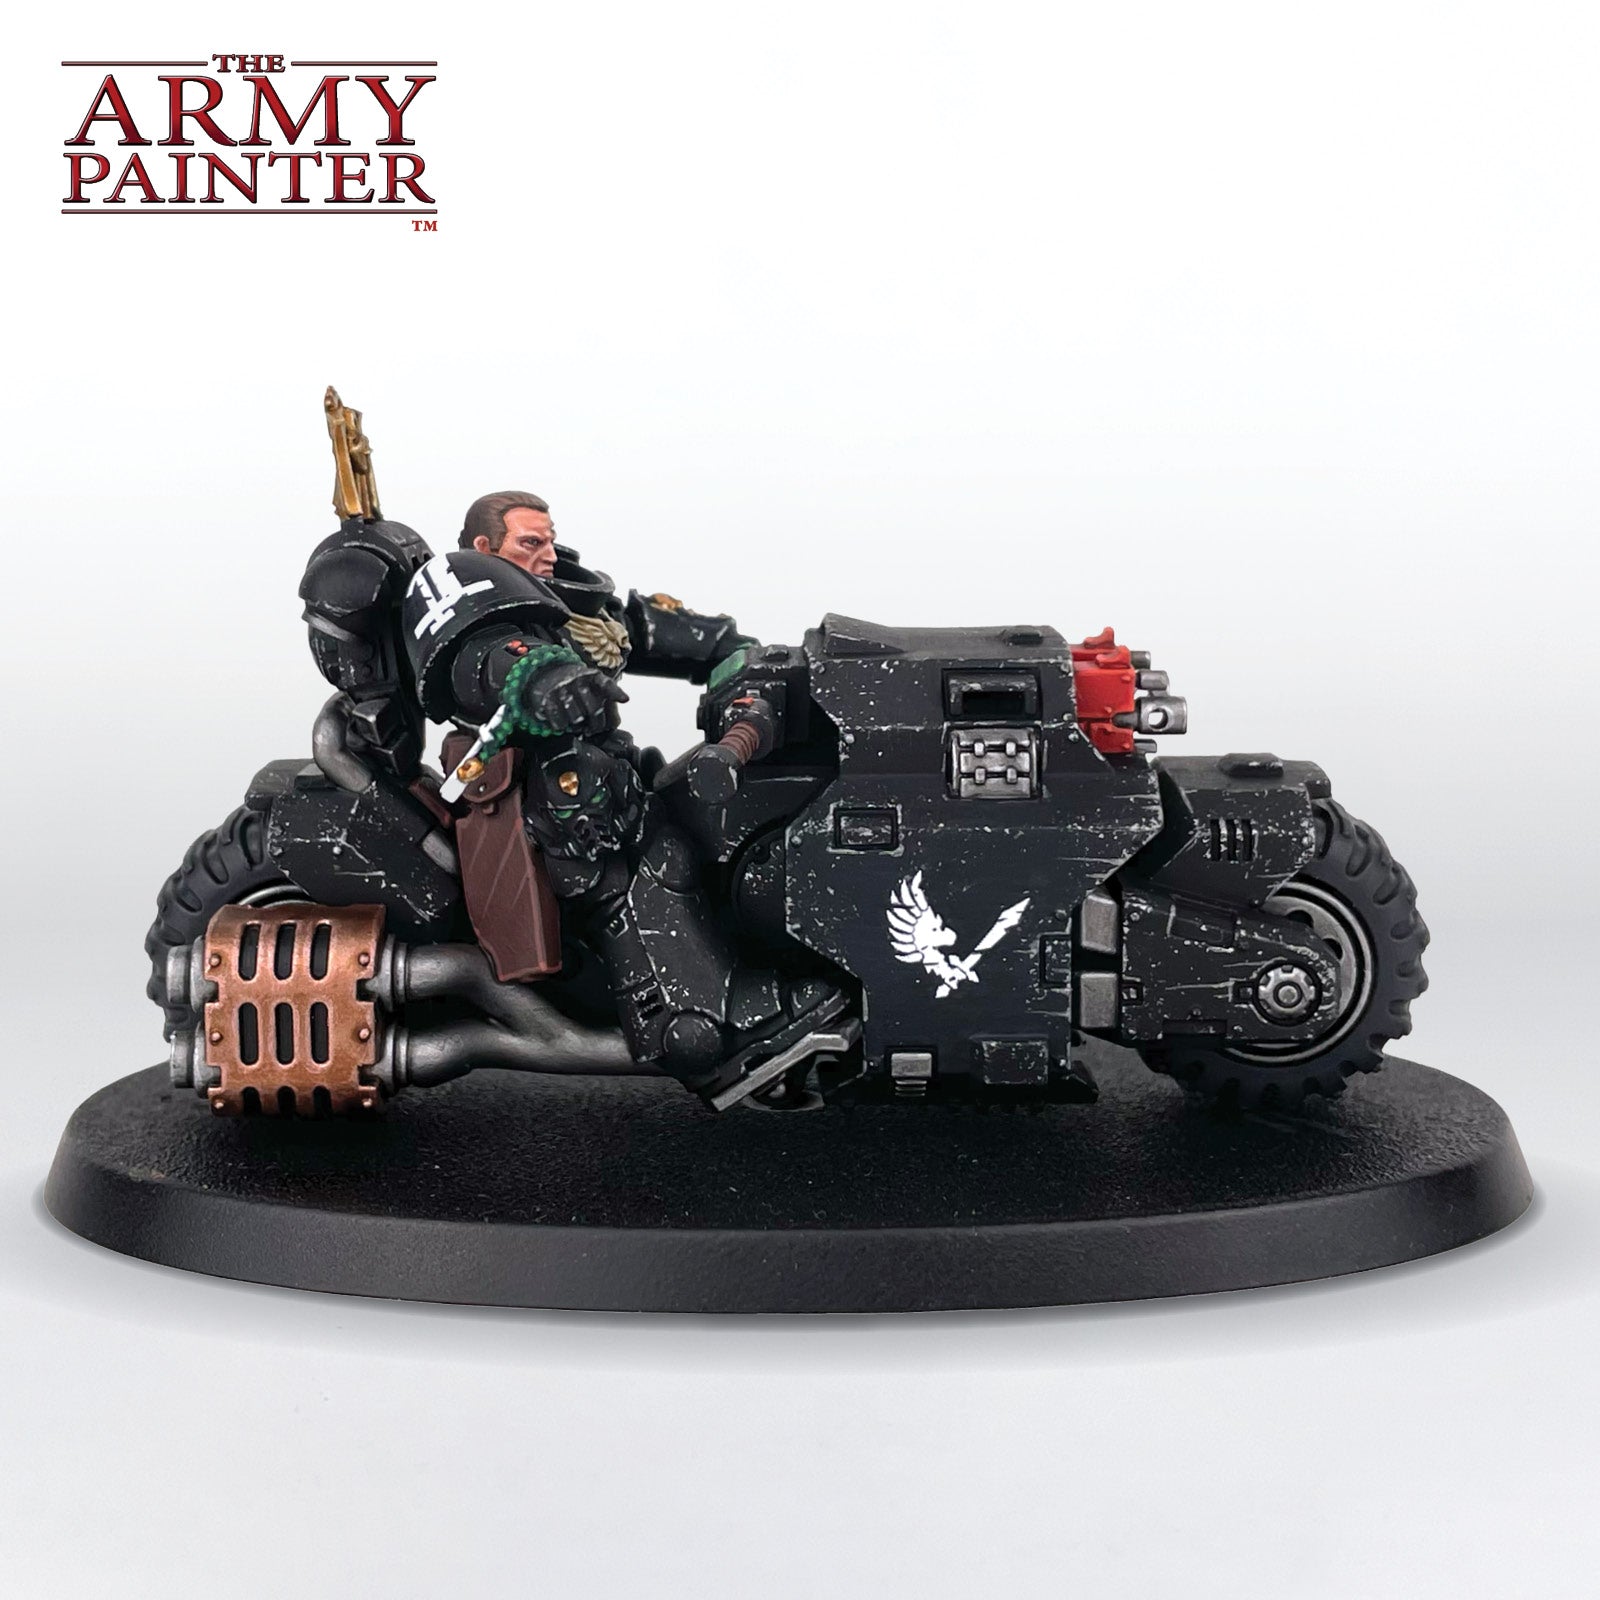
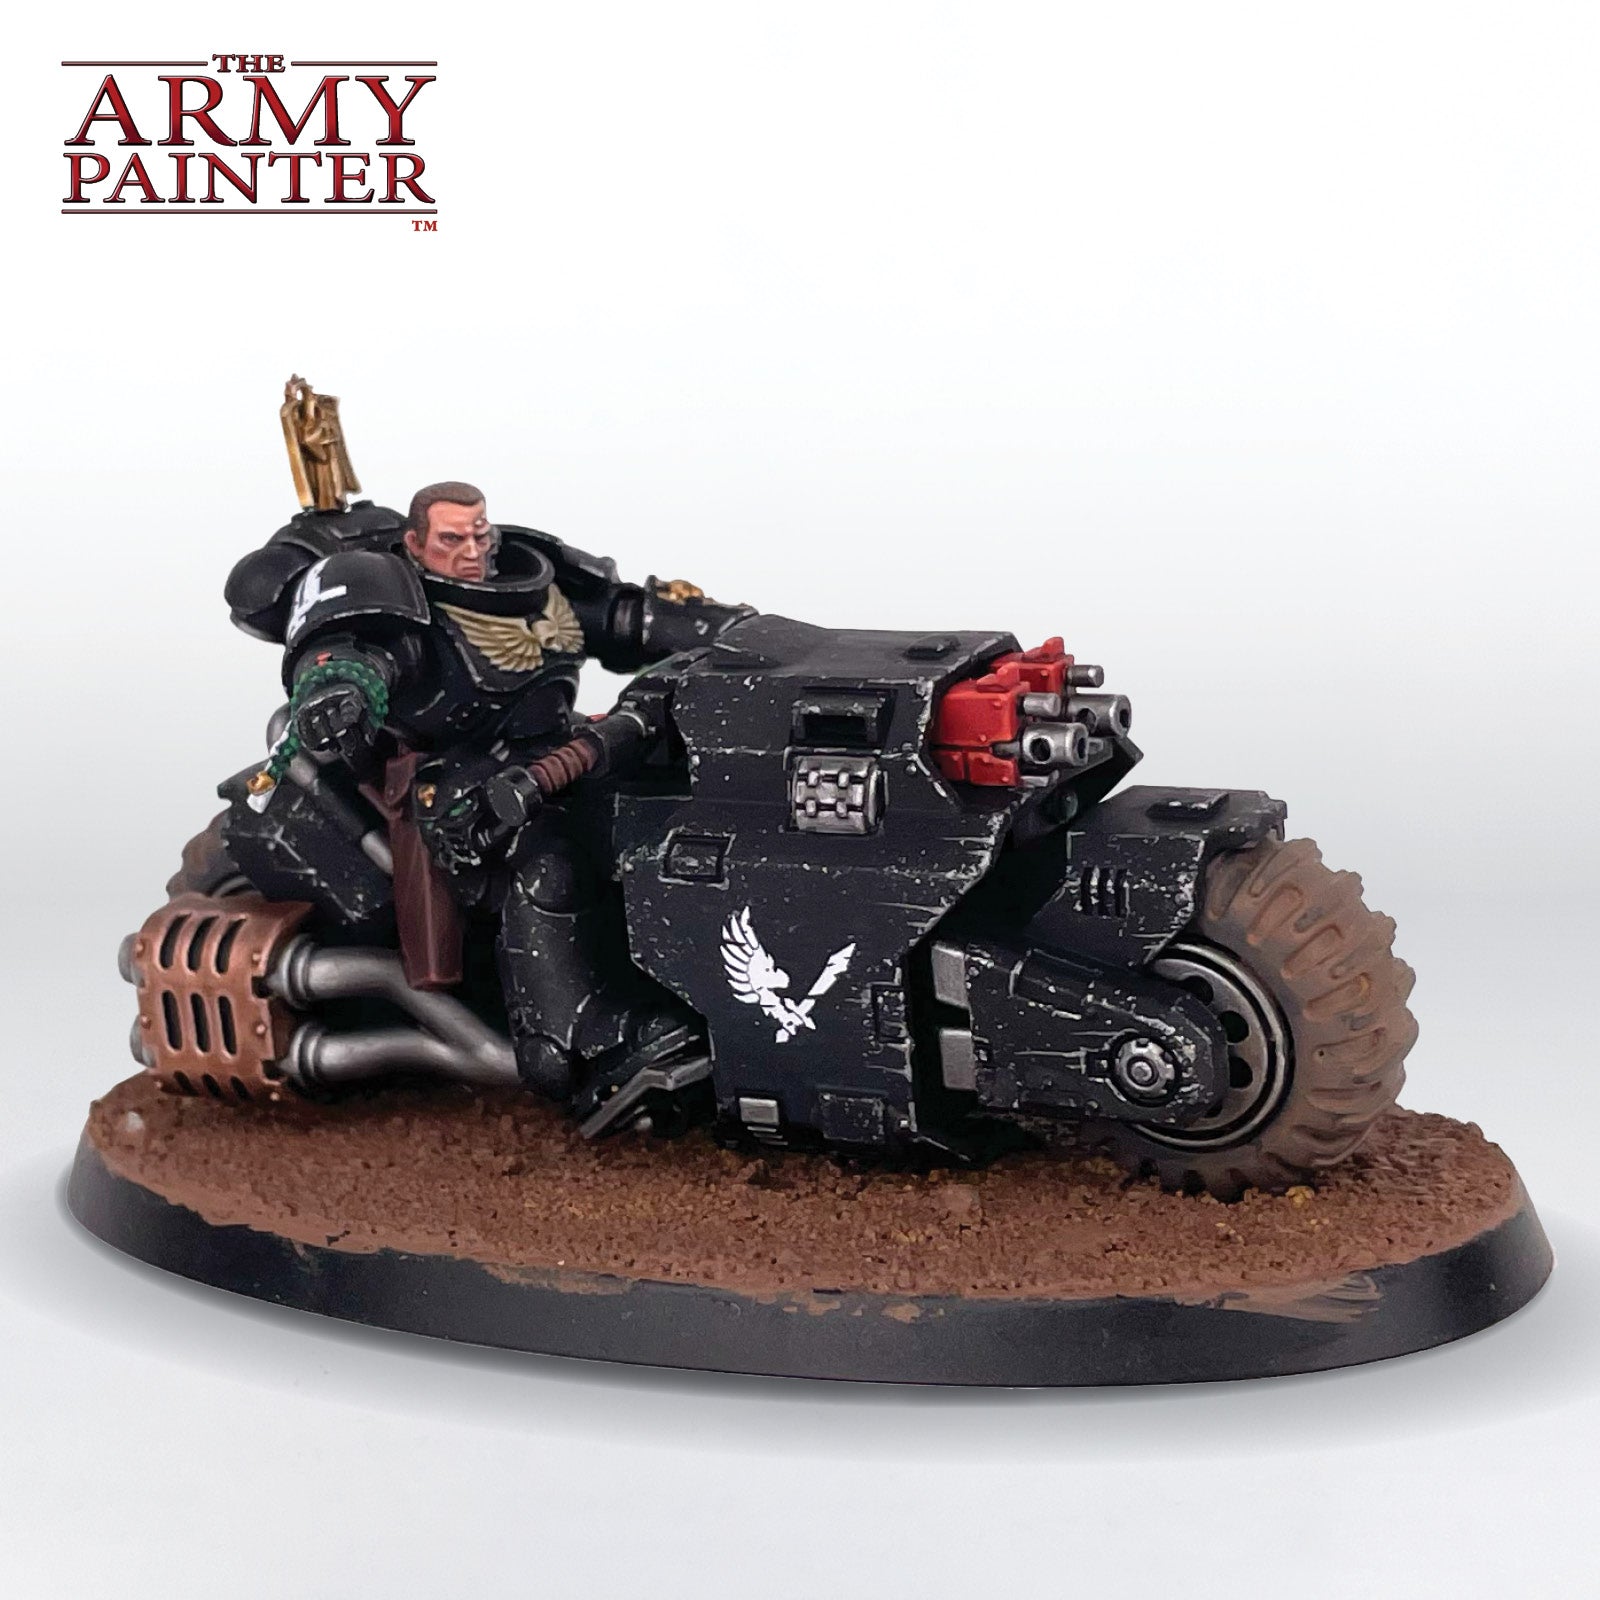
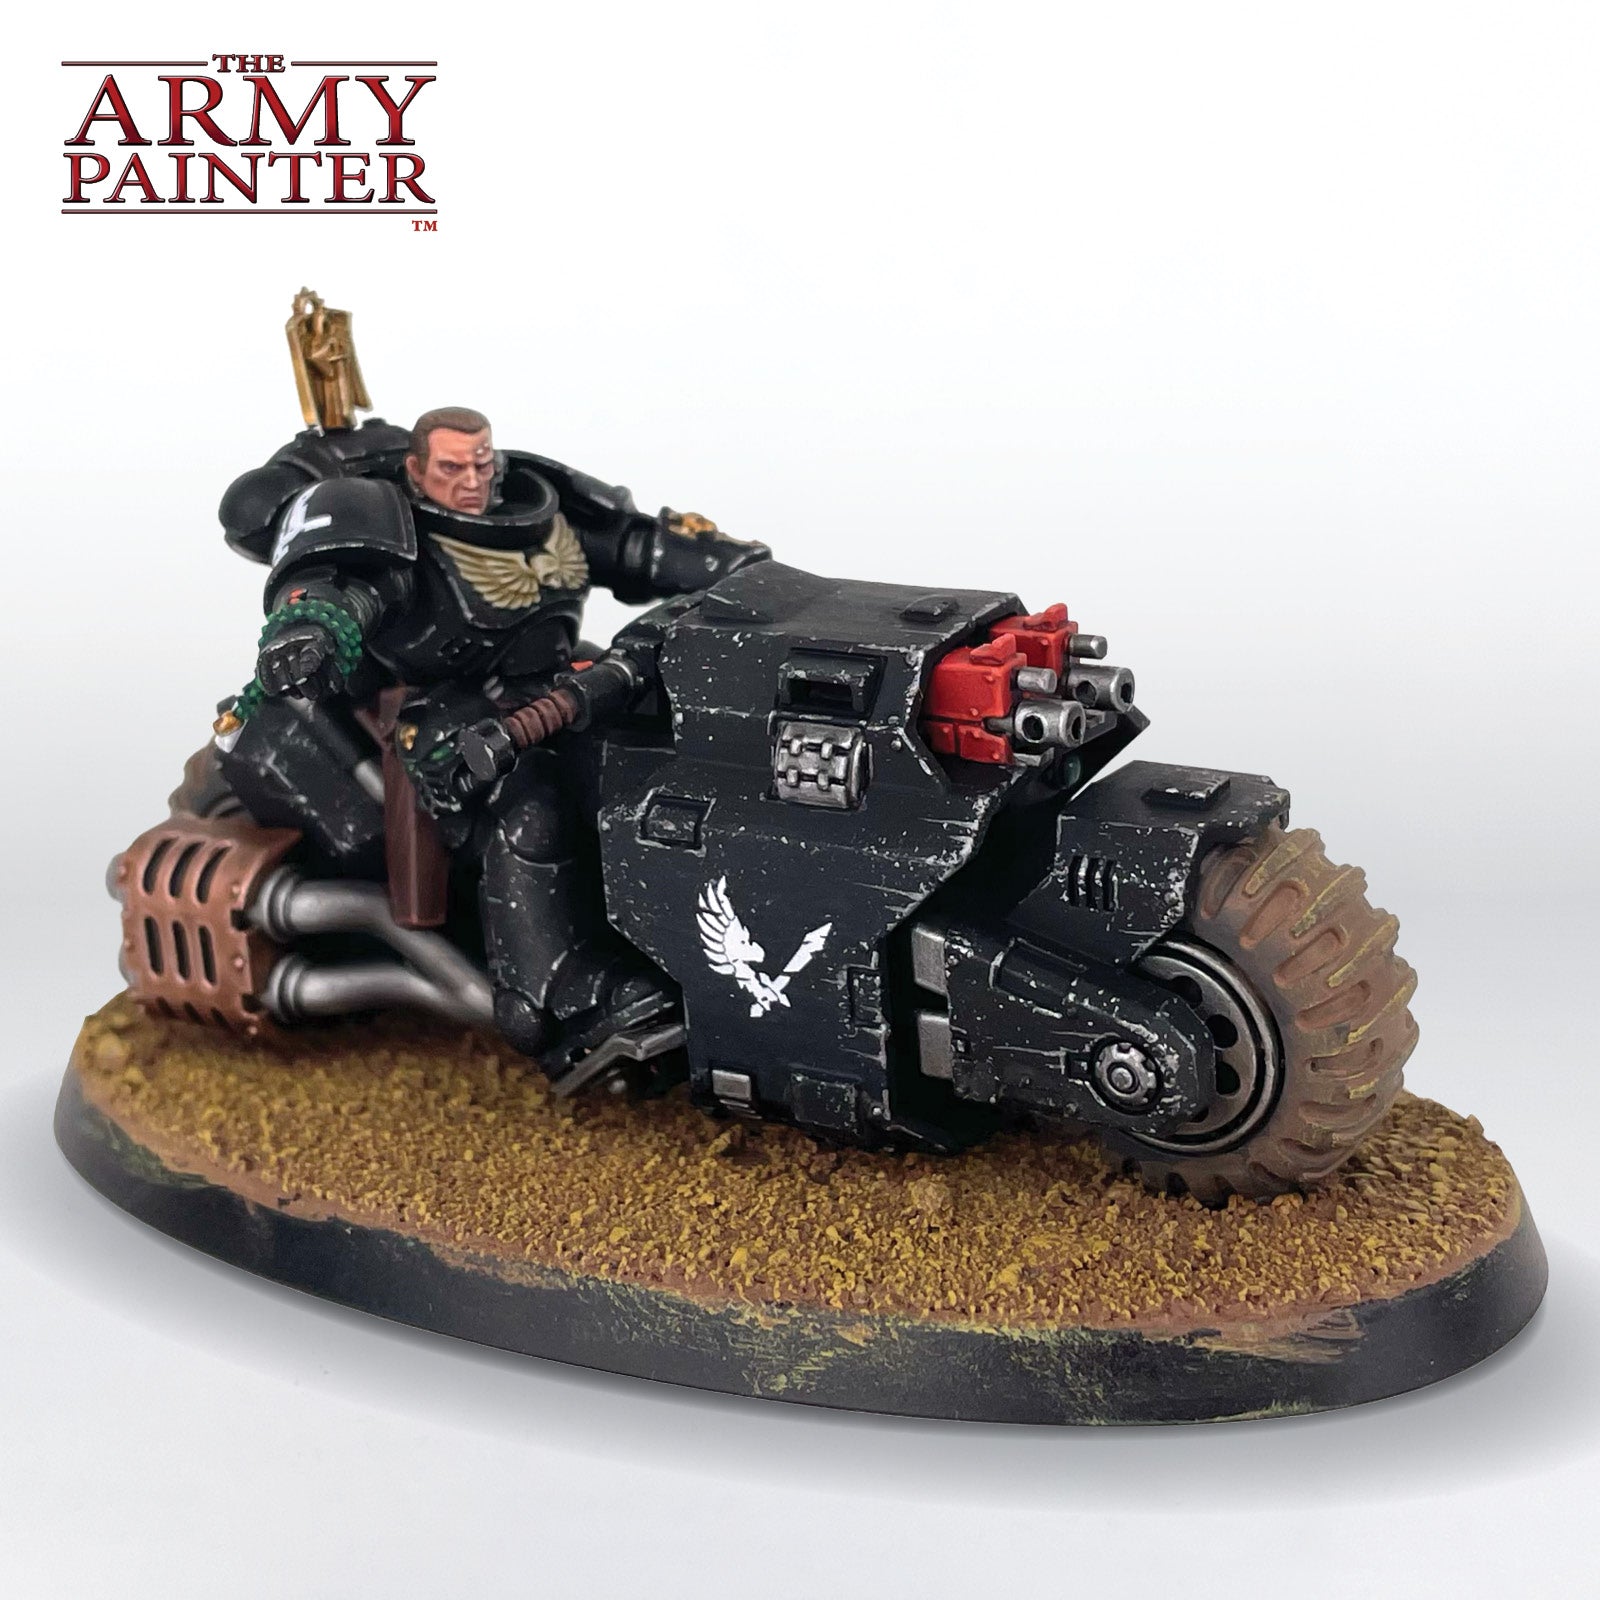
How to Paint a
Ravenwing Outrider
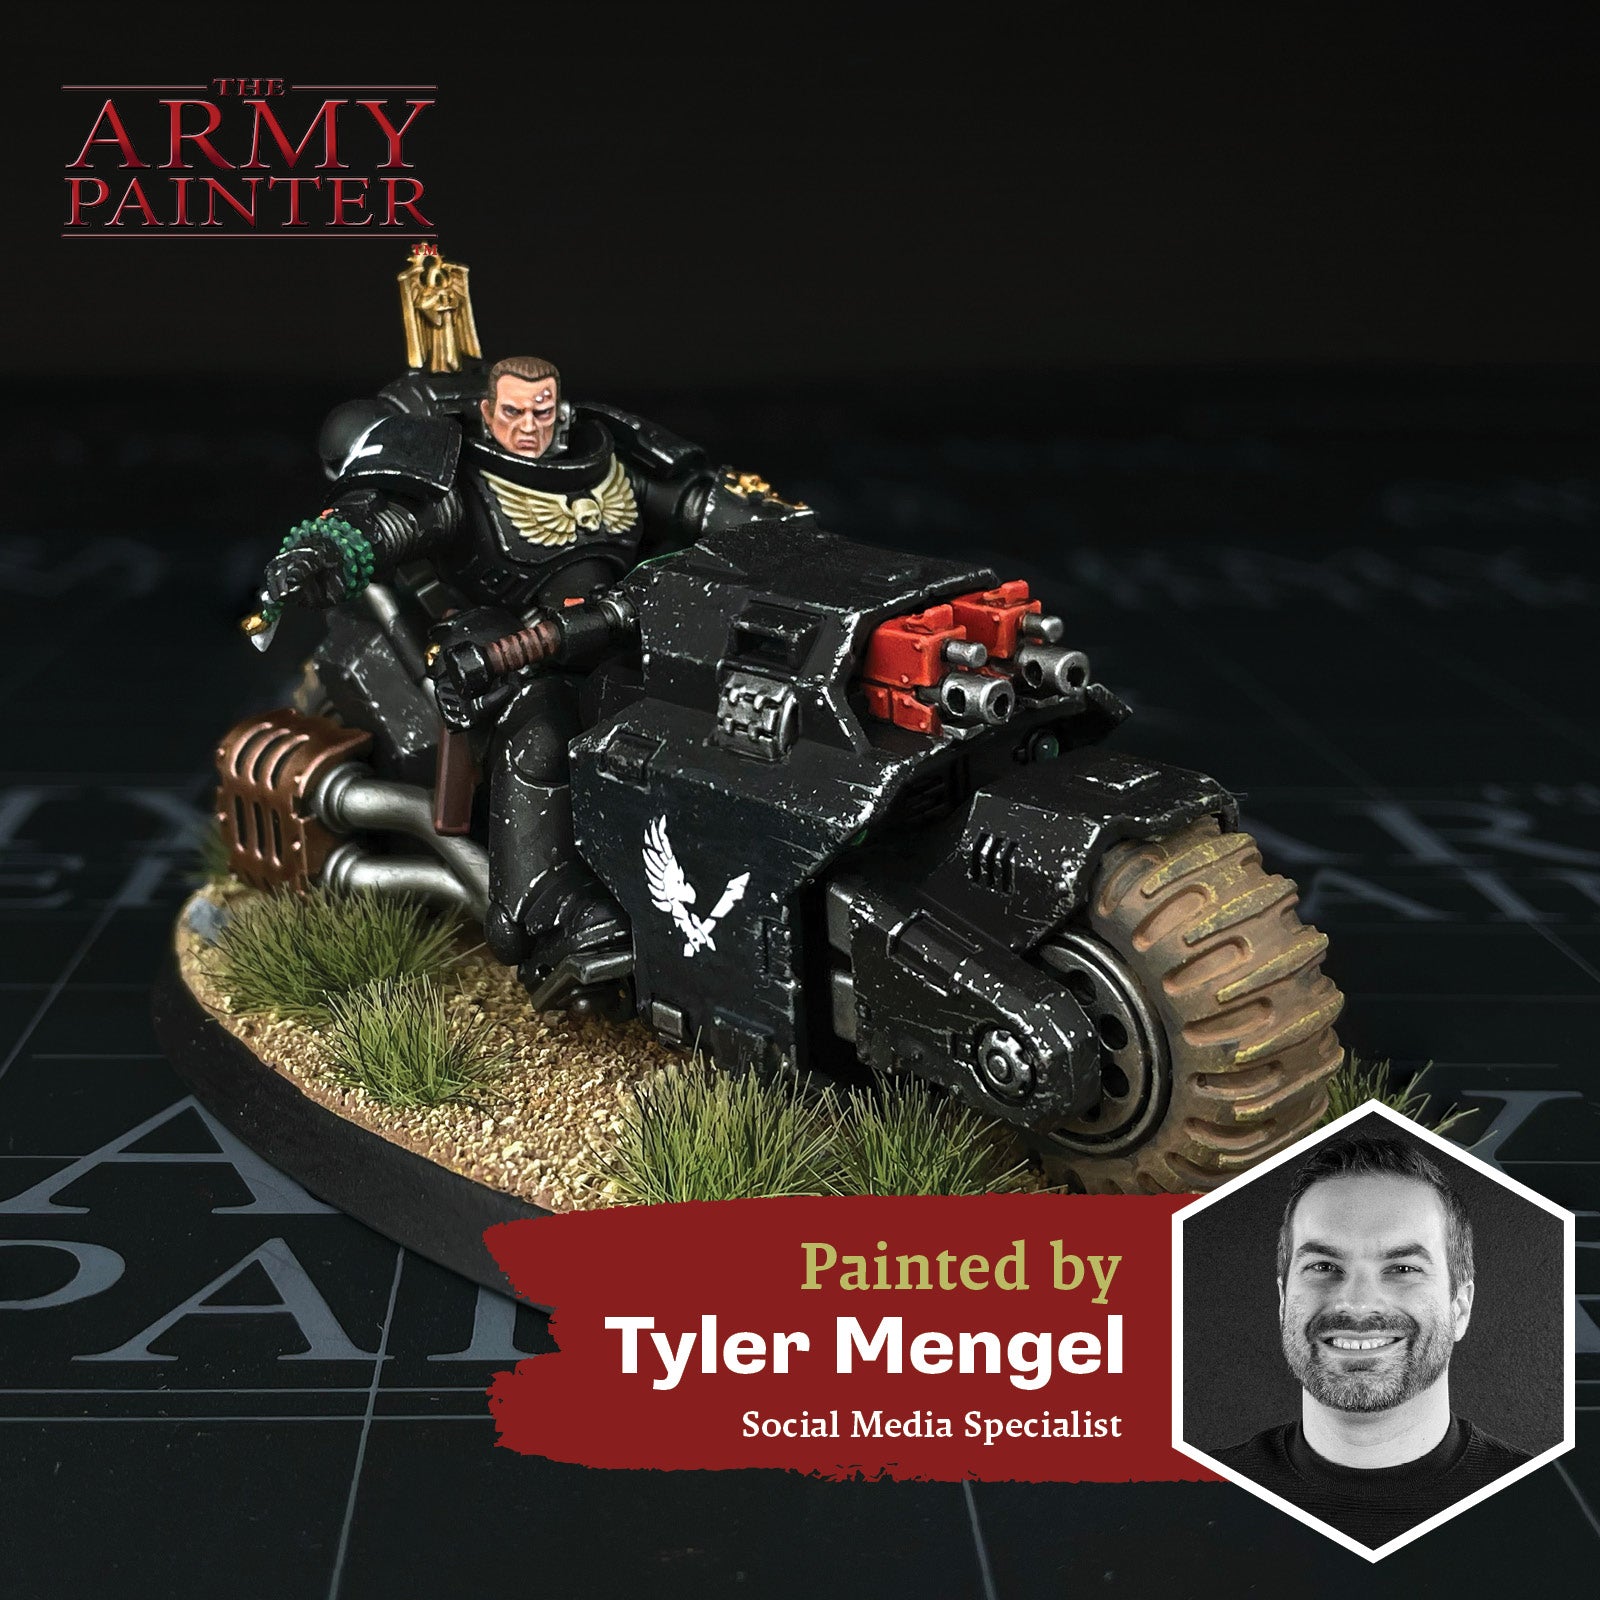
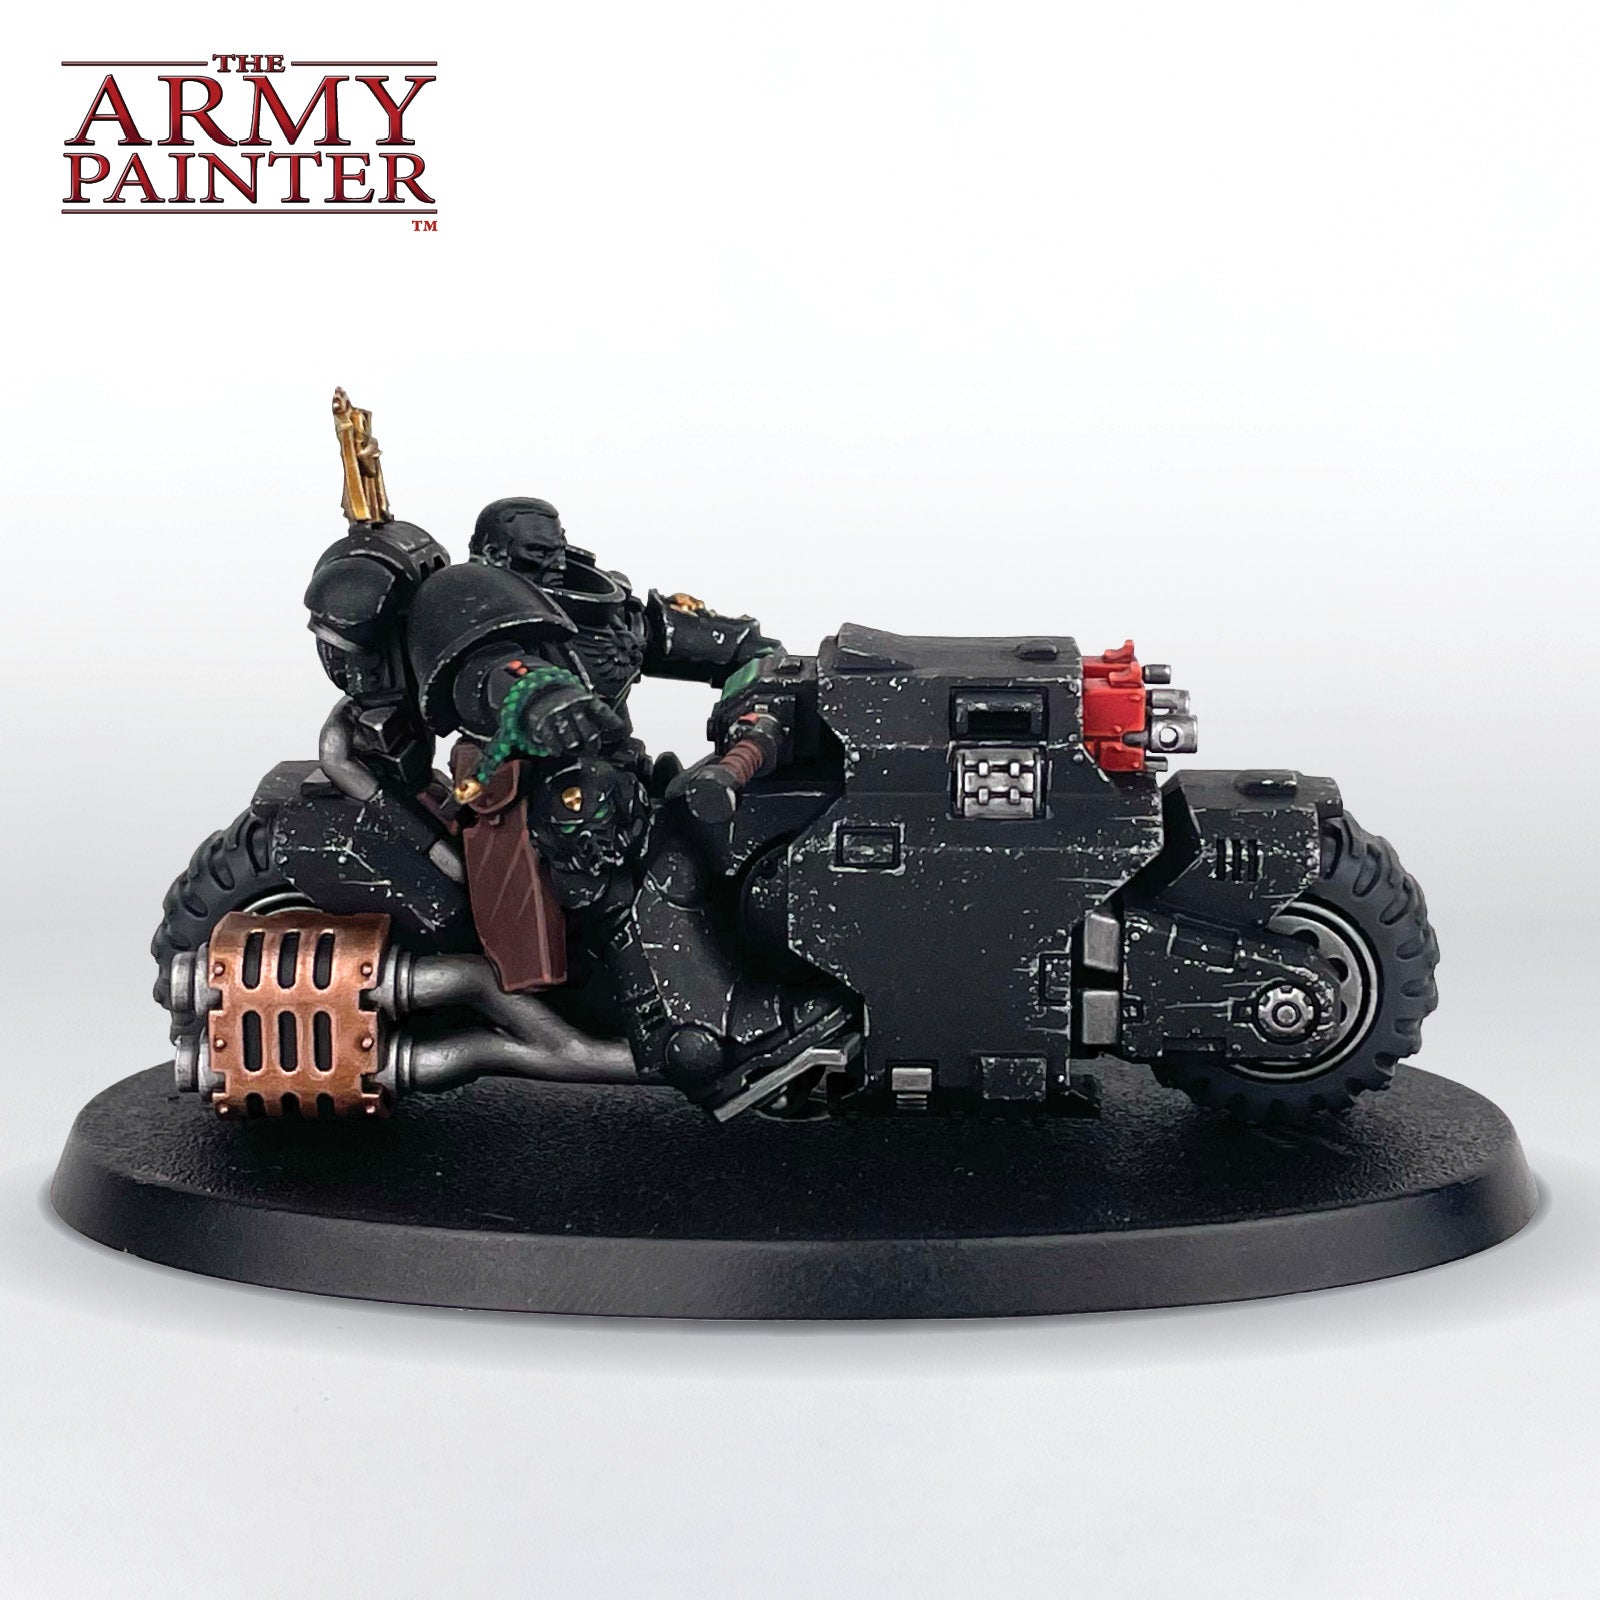
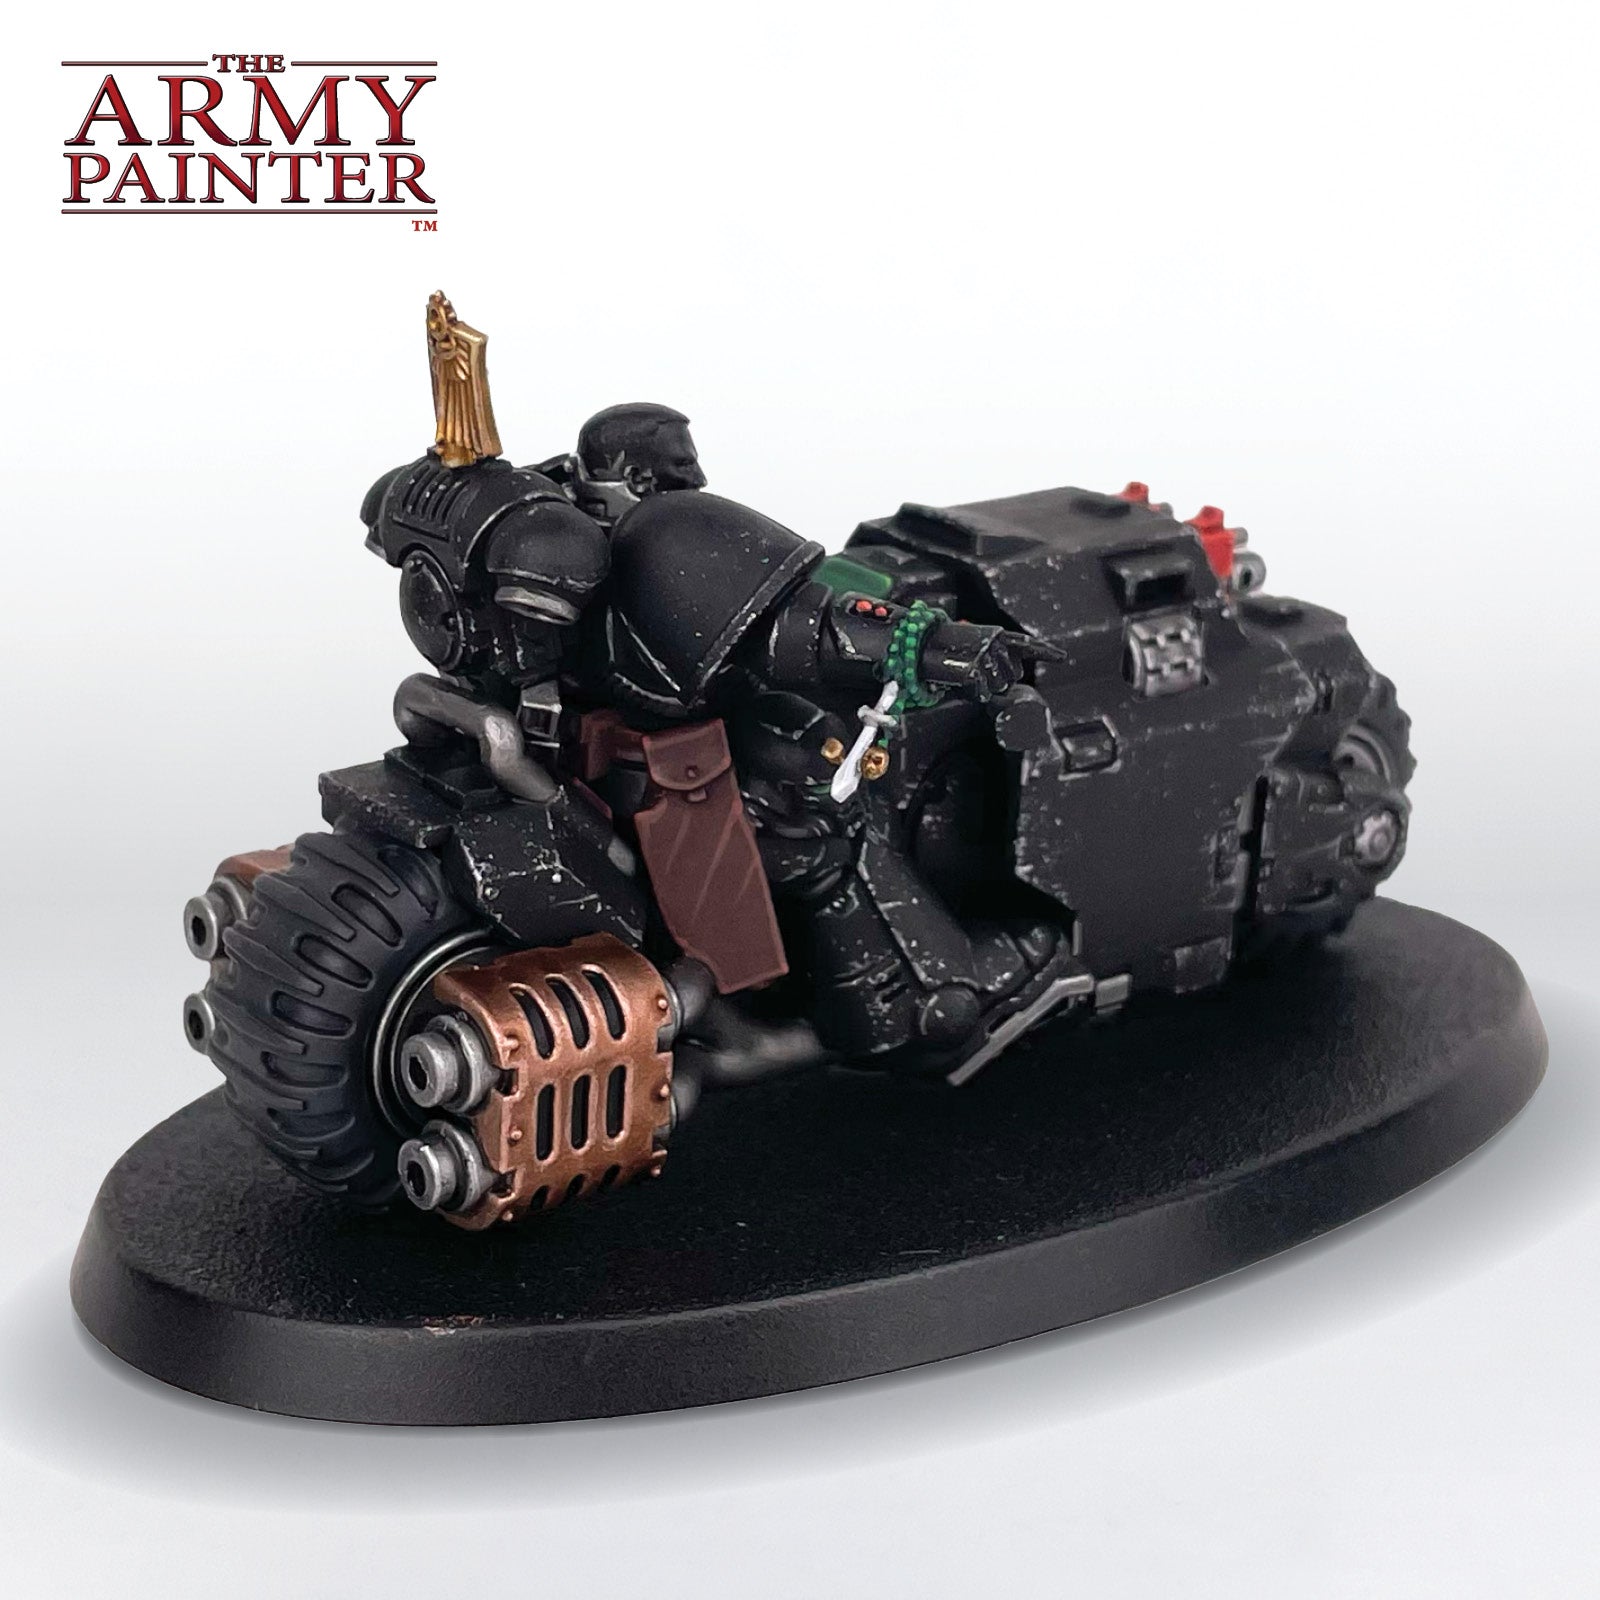
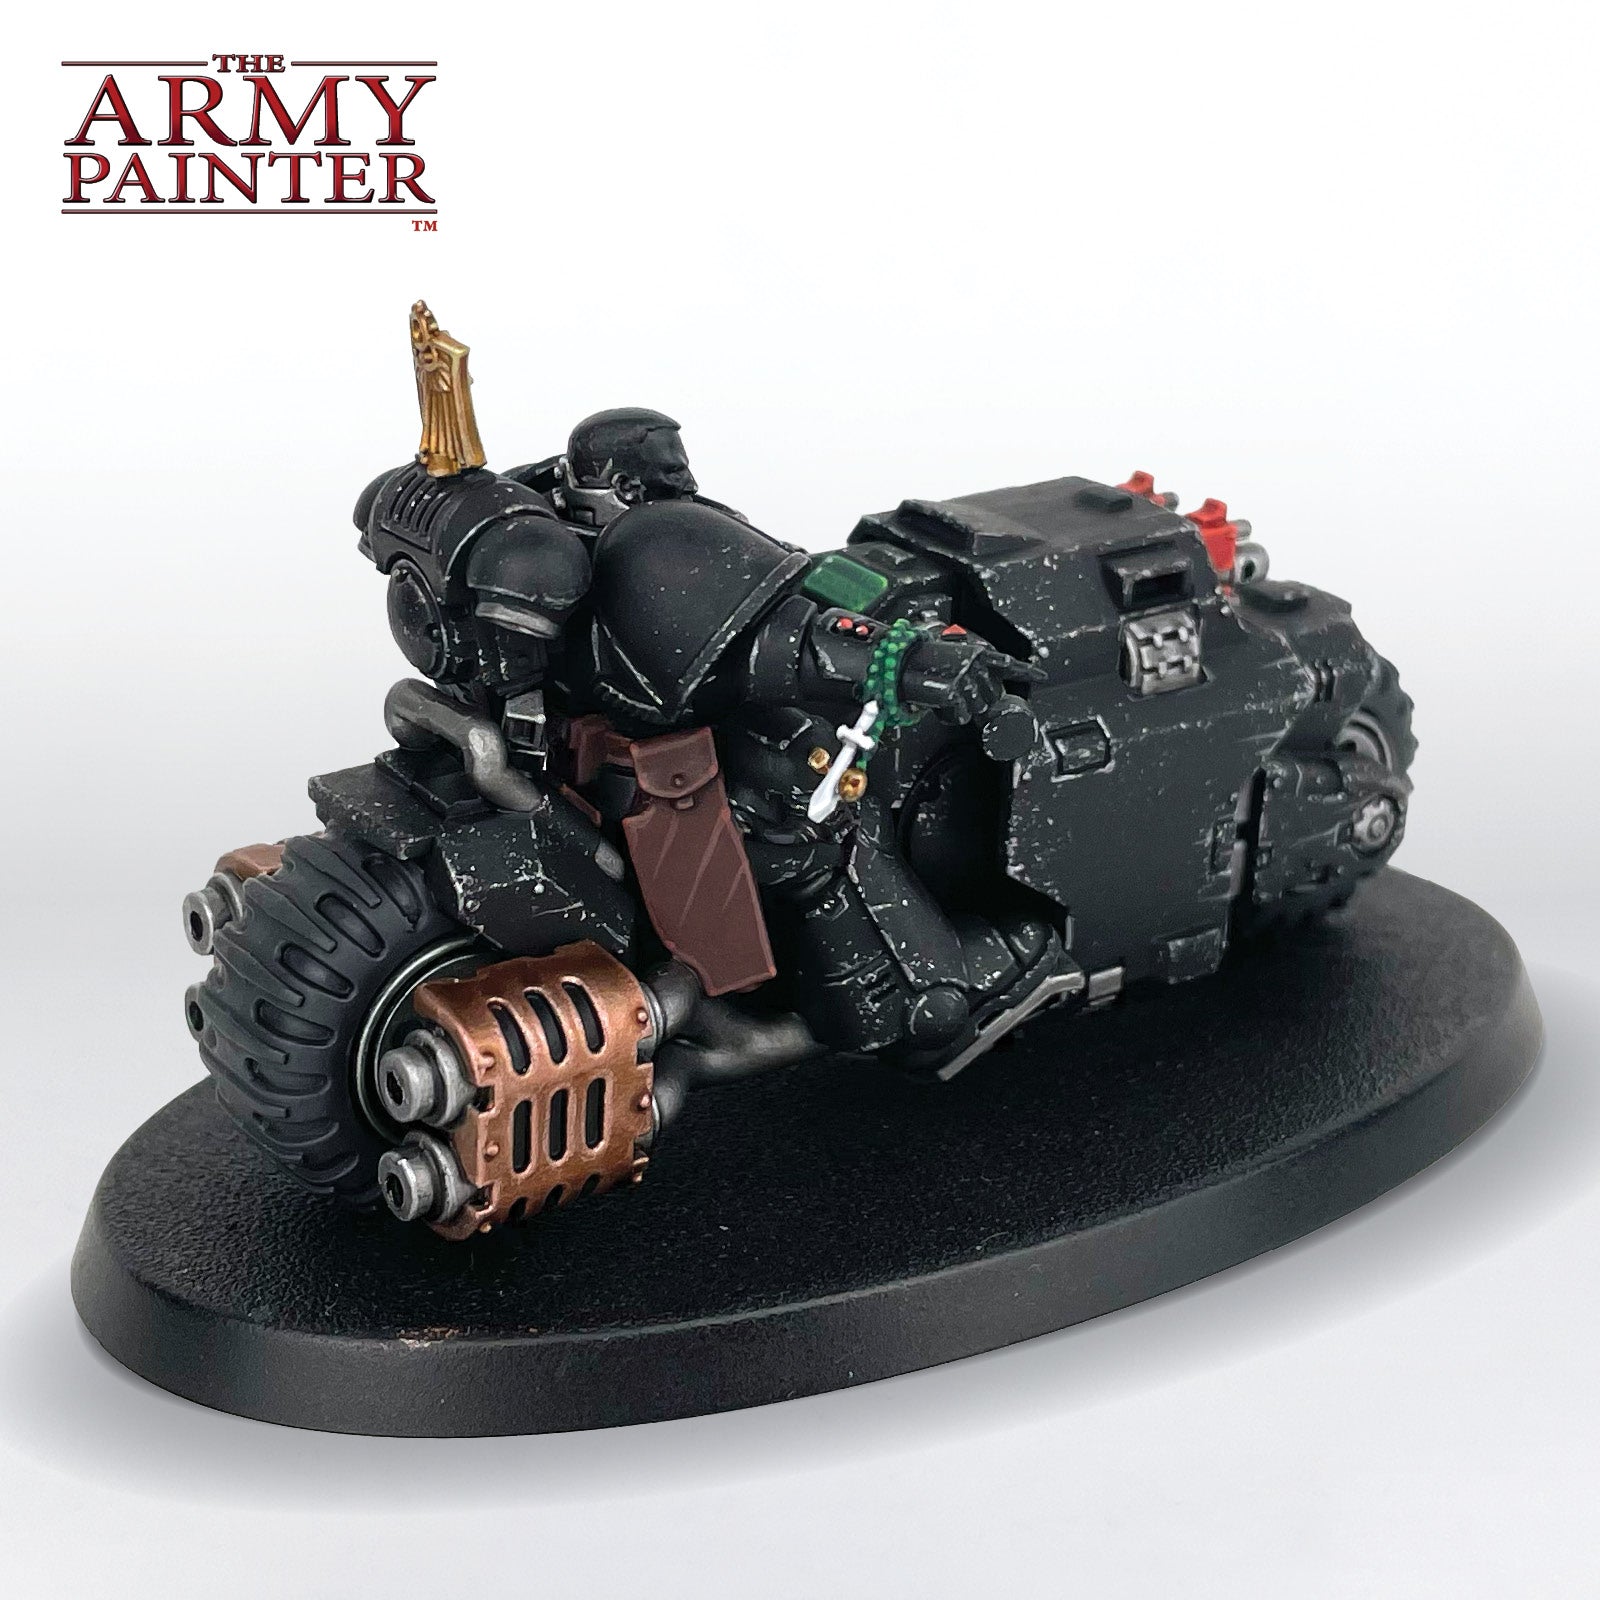
Welcome to the second installment of The Army Painter Academy, a series where we break down how we paint a miniature step-by-step, complete with pictures for every bit of paint applied along the way.
Our Social Media Specialist, Tyler, is back with another son of The Lion, this time of the zoomy variety. The enigmatic Ravenwing take to the field of battle atop their mighty steeds, or motorcycles as some people call them, as is the case with this Primaris Outrider from Games Workshop. Clad in black armour, they make a striking addition to any Dark Angel army, giving you some variety in your colour of power armour. Not only will we be looking at a new selection of Warpaints Fanatic colours, but we'll also be painting this bike in a faster and looser style, relying on weathering to define edges and break up the large areas of black.
This tutorial has been broken down by colour segments, starting with the black armour, and moving onto the leather, the metallics, and so on. Each section is further broken down into manageable steps by applying one colour at a time. Simply click the arrows at the bottom of each section to scroll through the steps if you're on a desktop, or scroll to the side on your mobile phone.
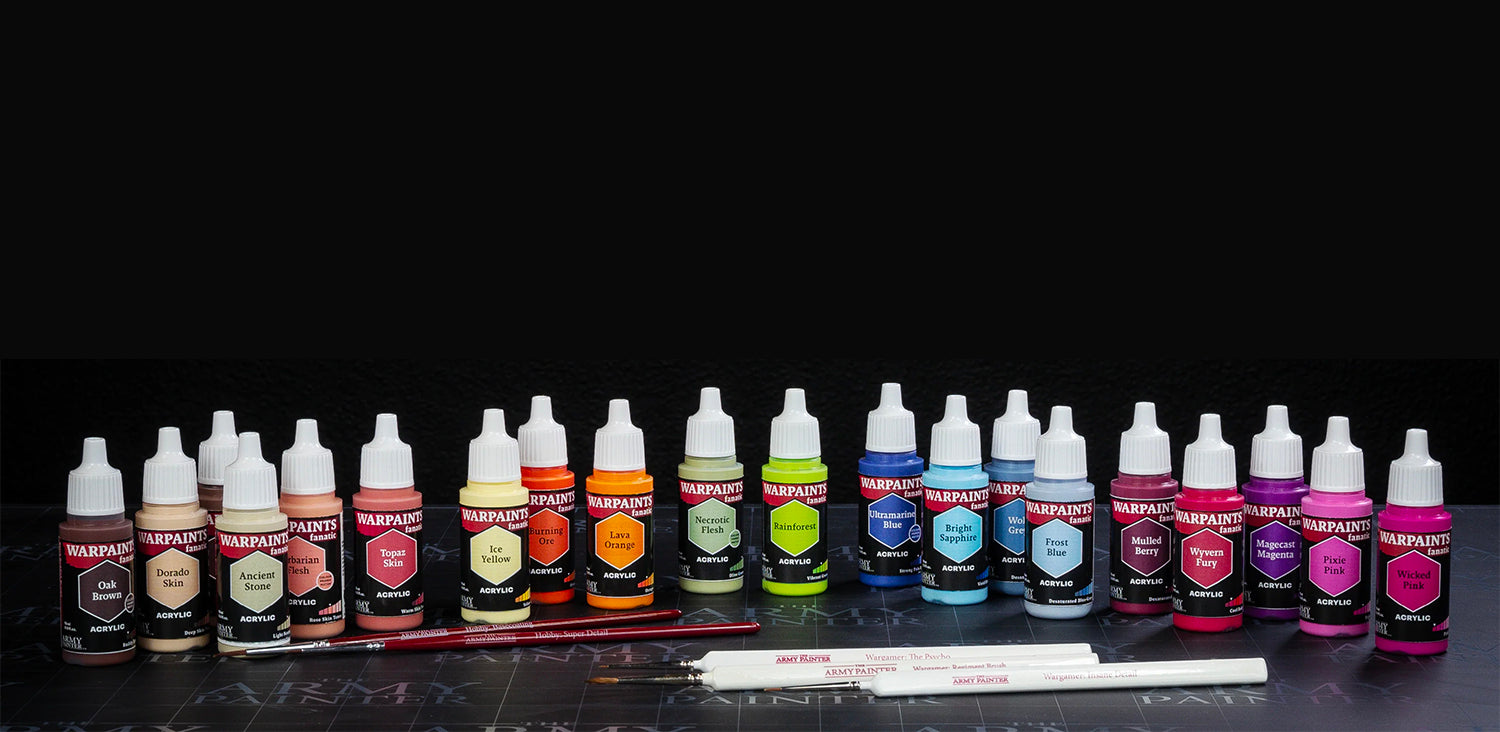
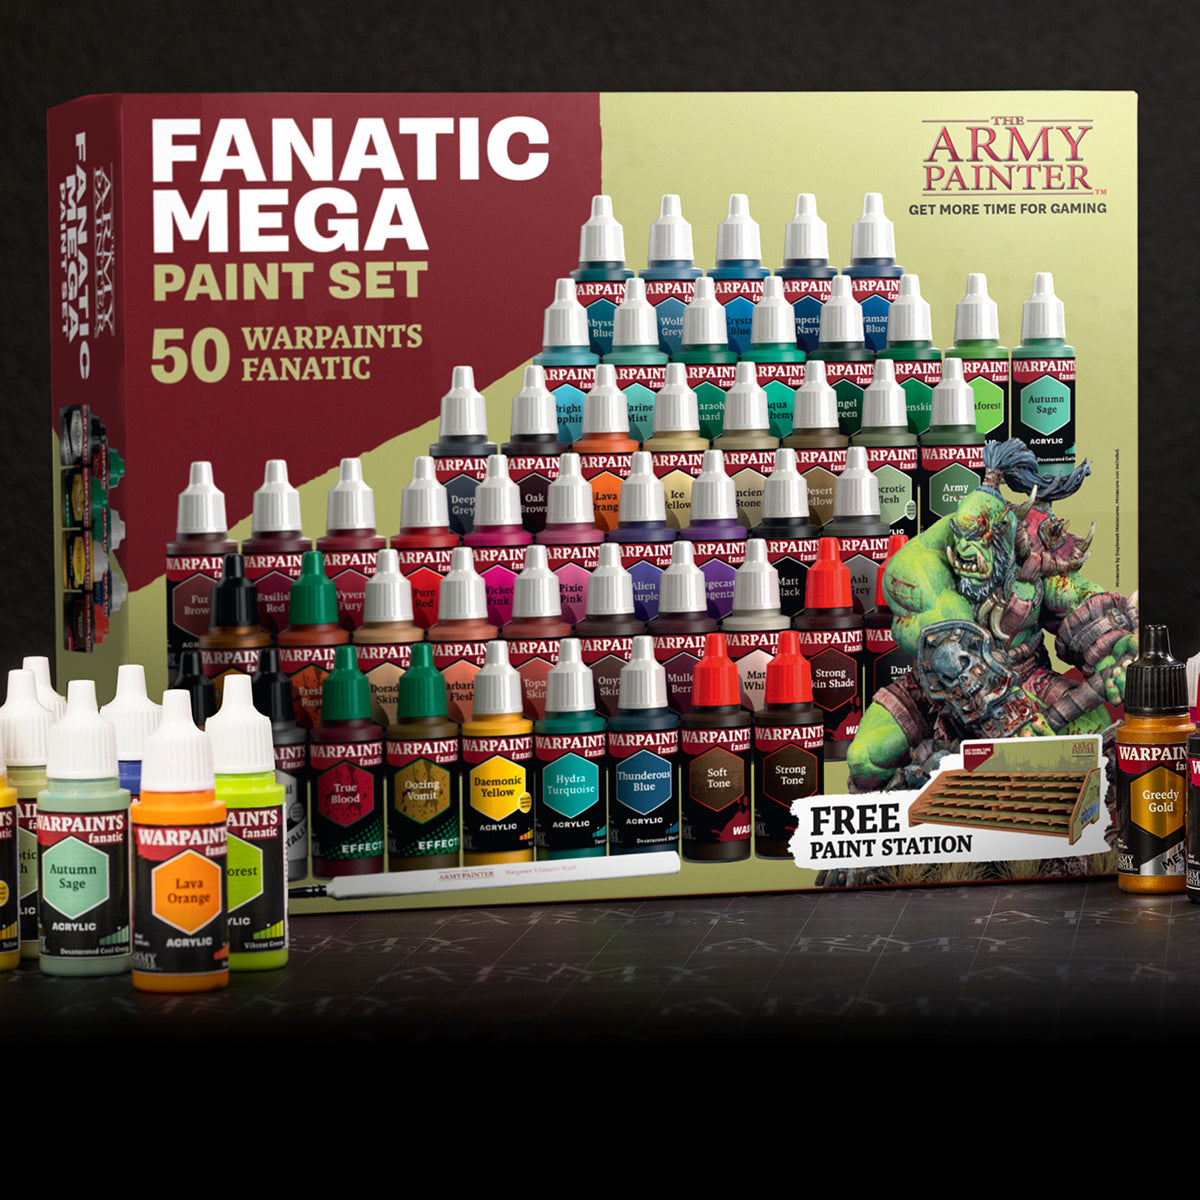
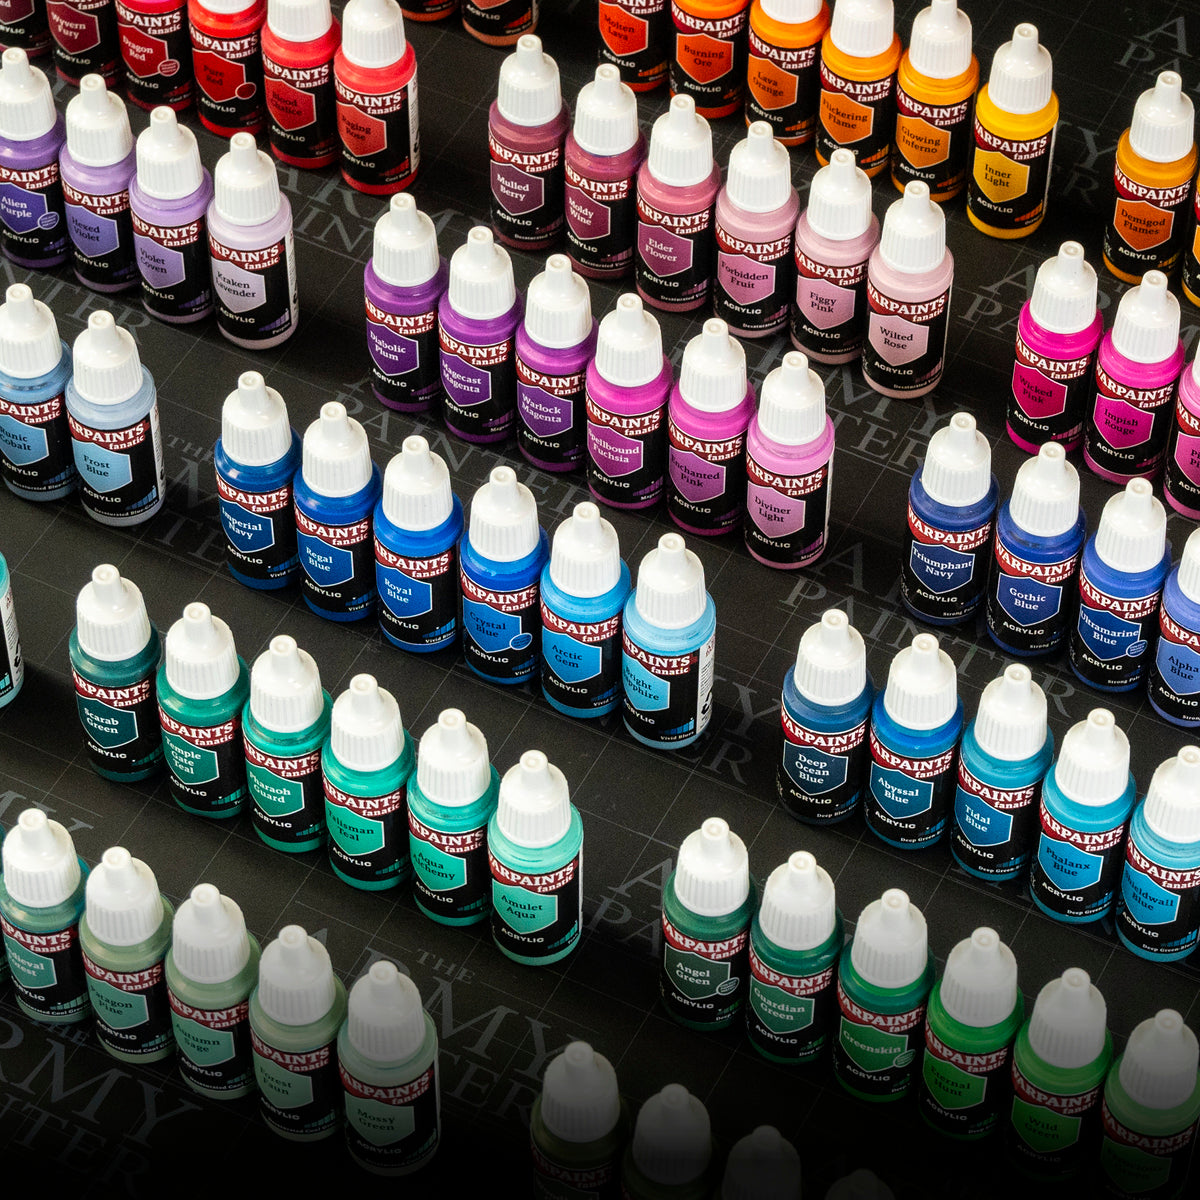
Every colour on this miniature, outside of the primer, comes from our new Warpaints Fanatic range, and uses the Flexible Triad System as much as possible.
Let's get painting!

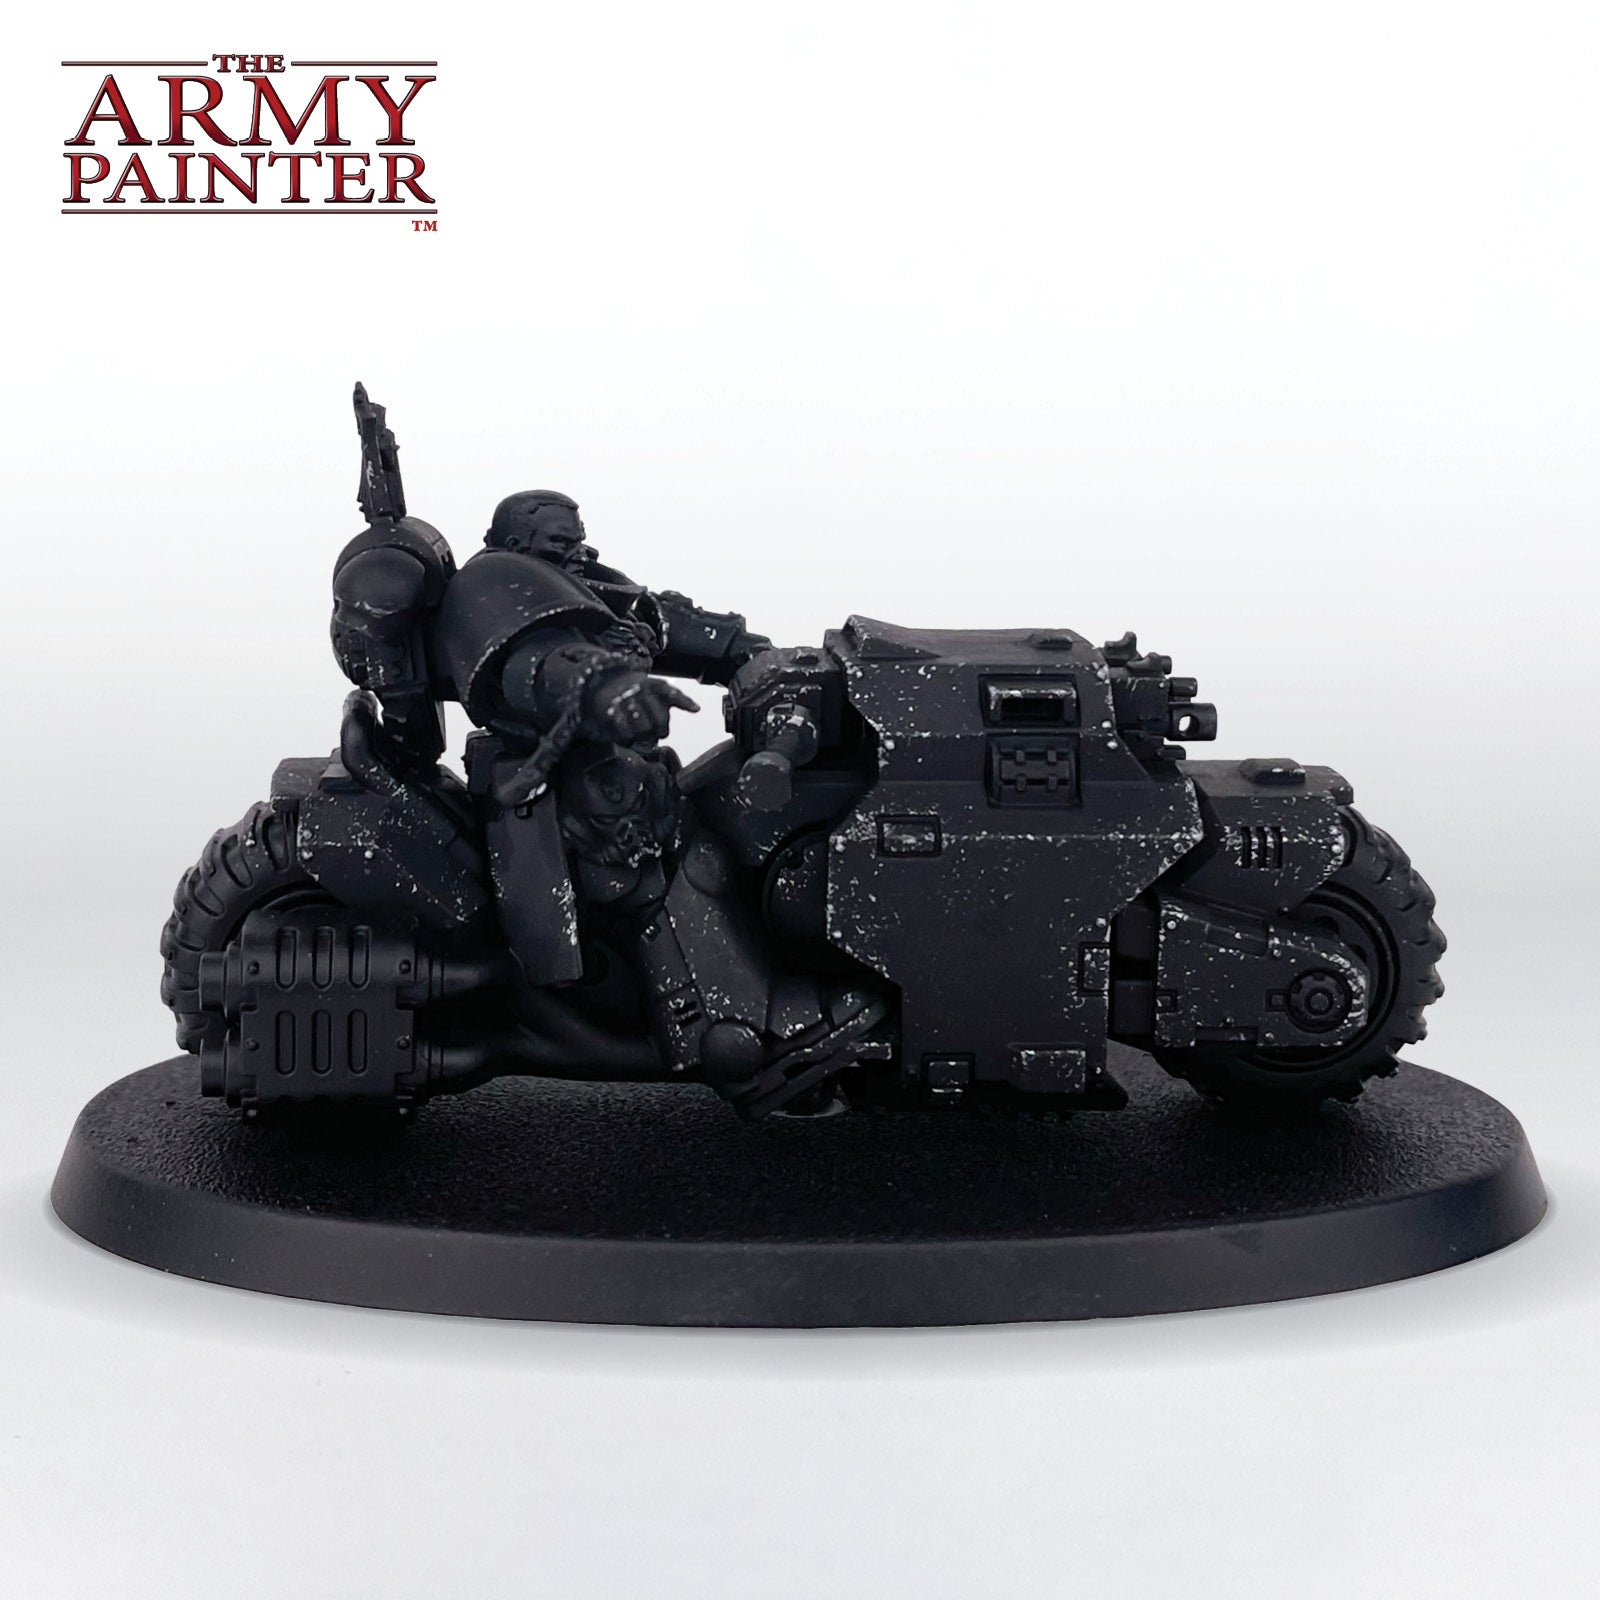
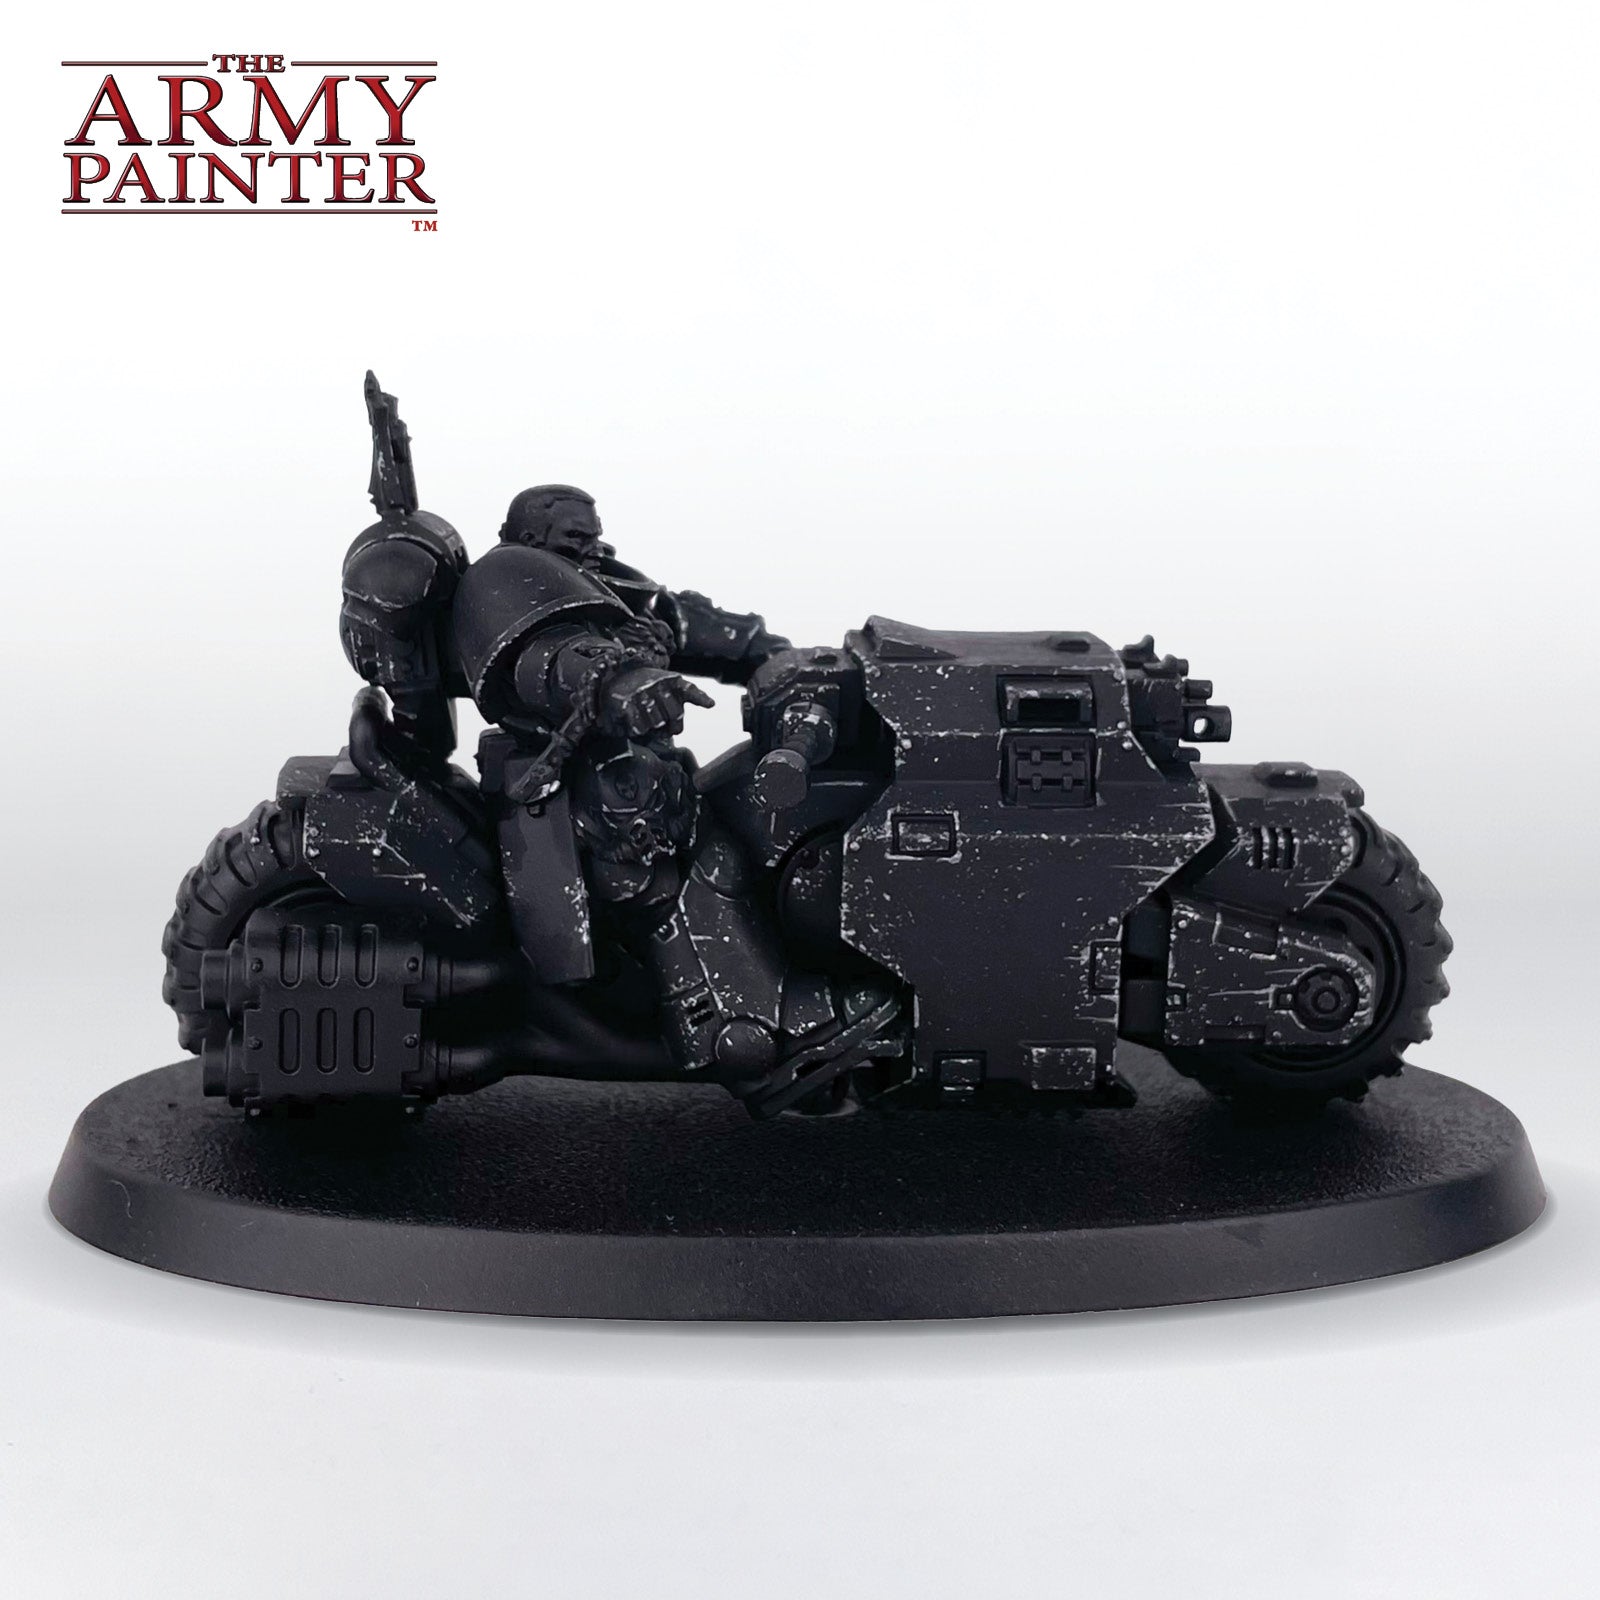
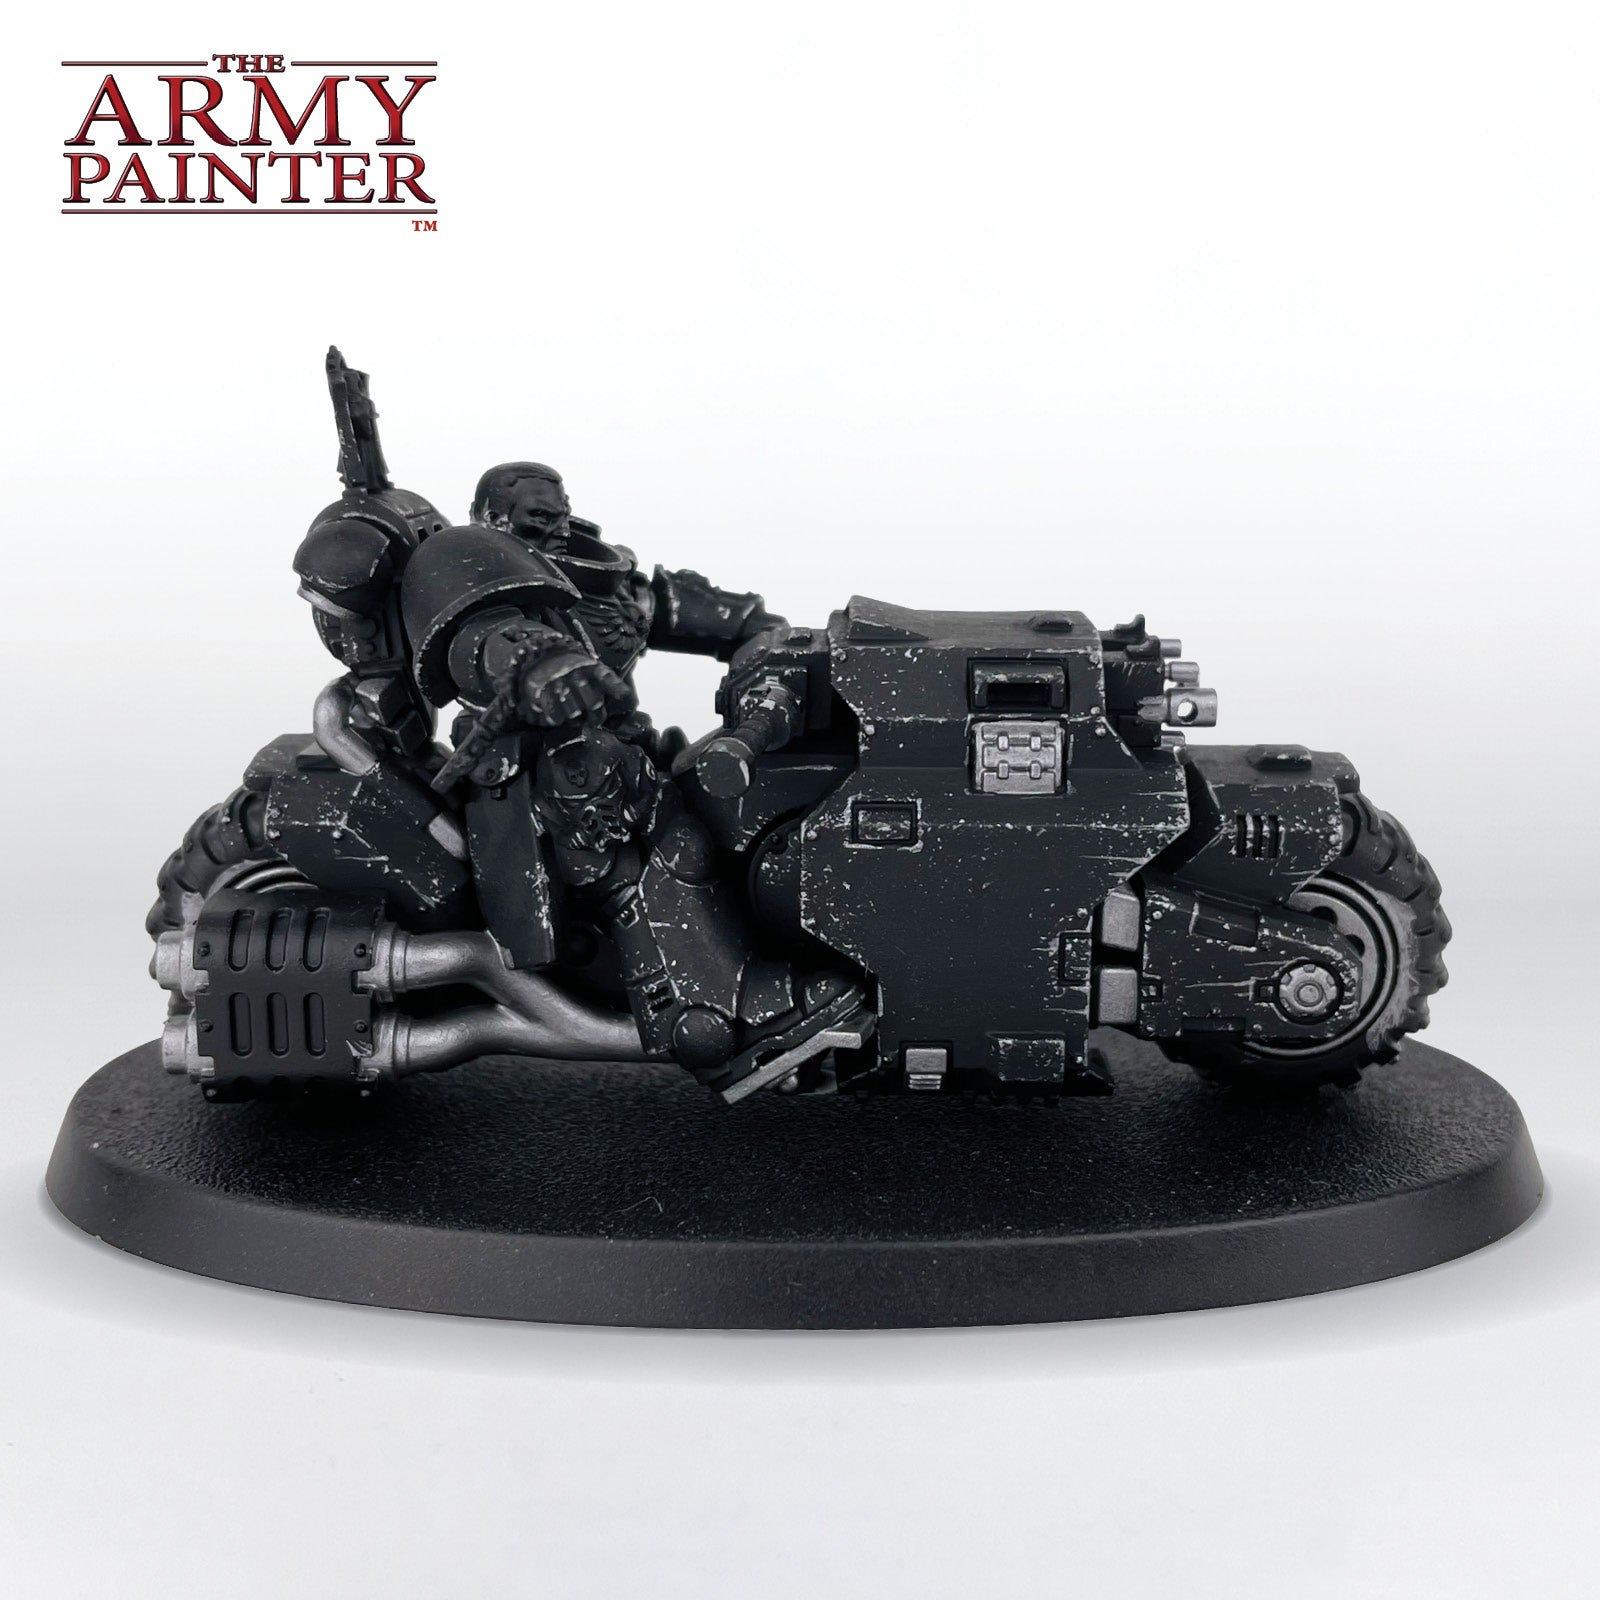
The Black Armour
Step 1
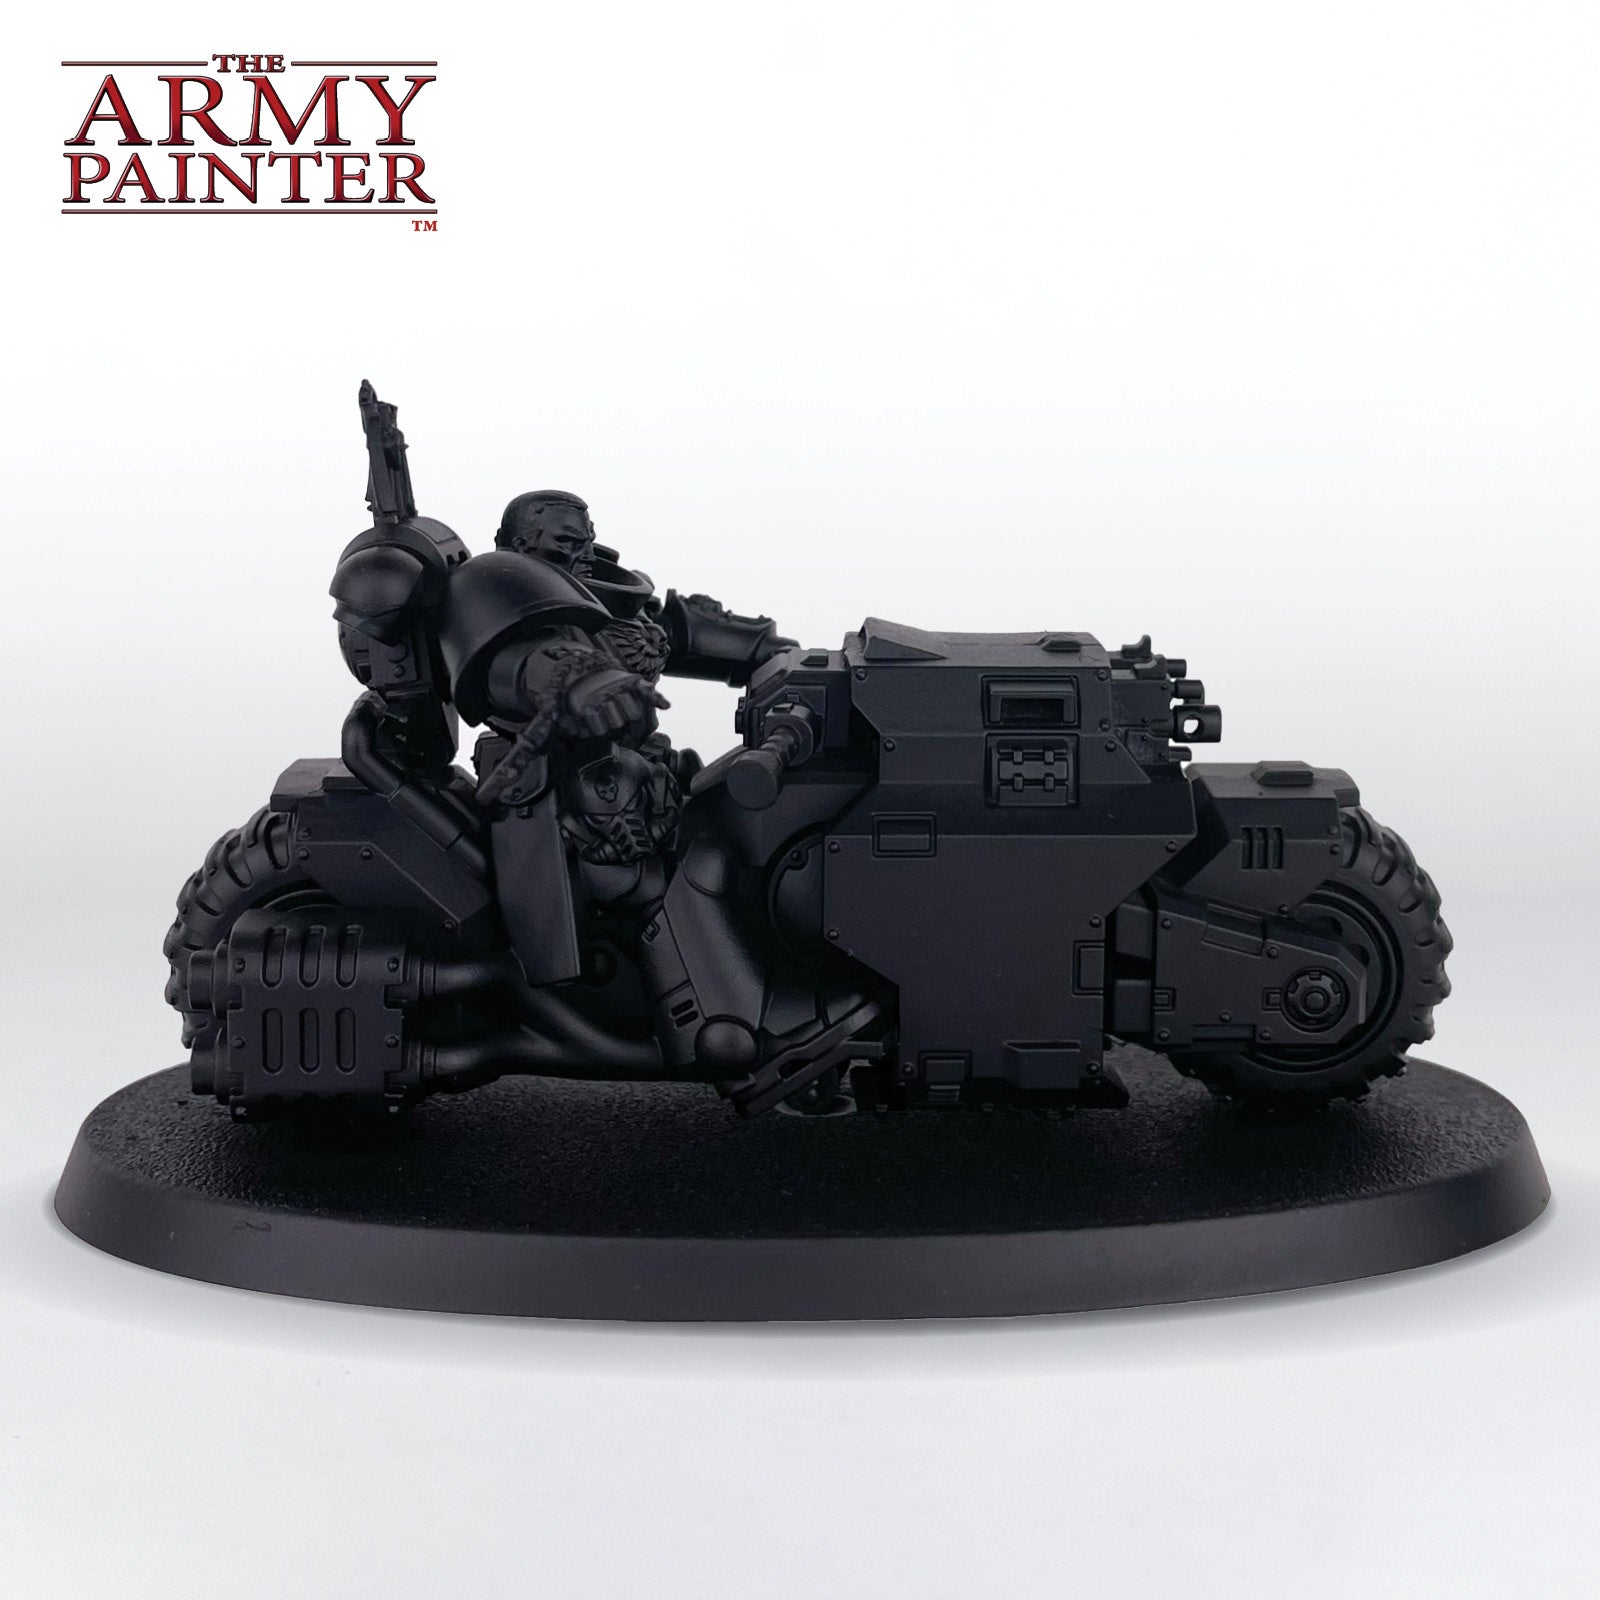
I started off by priming the model with Matt Black Colour Primer. To give it an even finish and cover up any missed areas I also did a quick coat of Warpaints Fanatic Matt Black over all the black areas,
Step 2
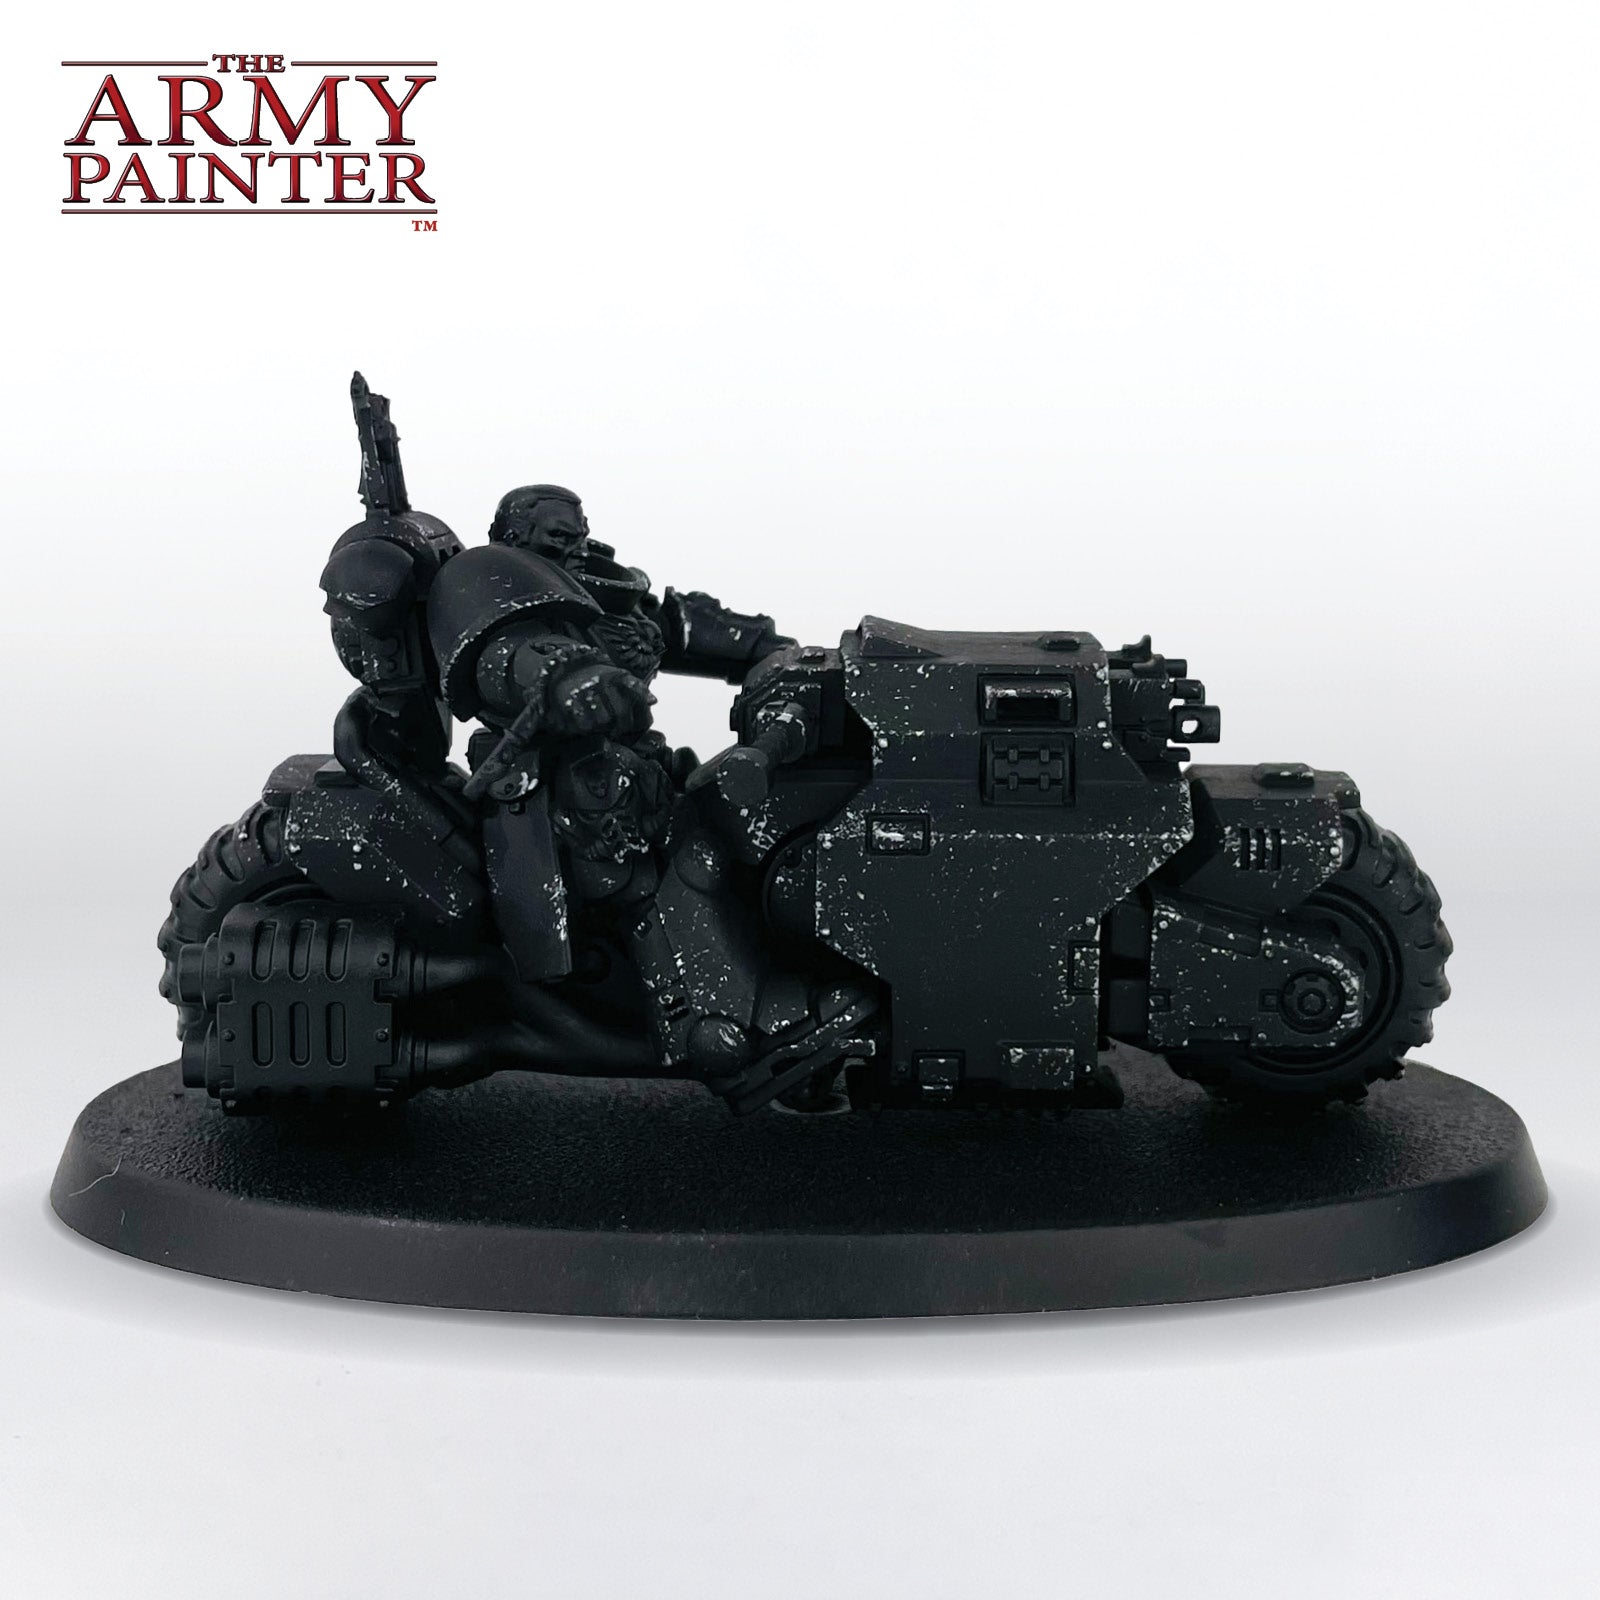
I then used a bit of torn off foam (you can also use sponge) to add a chipping effect to the black armour using Warpaints Fanatic Plate Mail Metal. Focus this on edges and areas that would recieve wear and tear.
Step 3
This was then cleaned up with some Warpaints Fanatic Matt Black where needed. Using foam for a chipping look is quick and easy, but can be hard to be precise with. If you do too much just clean it up with the base colour.
Step 4
I then finished off the armour with some more Warpaints Fanatic Plate Mail Metal, but this time using a brush. I picked out some more edges and added streaks to show the damage taken while driving the bike.

The Metallics
Silver
Step 1
All of the silver metallics were basecoated with Warpaints Fanatic Gun Metal. This also includes the soft armour in his joints, since I wanted some contrast with the black armour.
Silver
Step 3
Finally, an edge highlight of Warpaints Fanatic Plate Mail Metal was applied. I kept the metal areas cleaner than the armor to give a bit of contrast. The soft armour was not highlighted to help it feel different from the rest of the metallics.
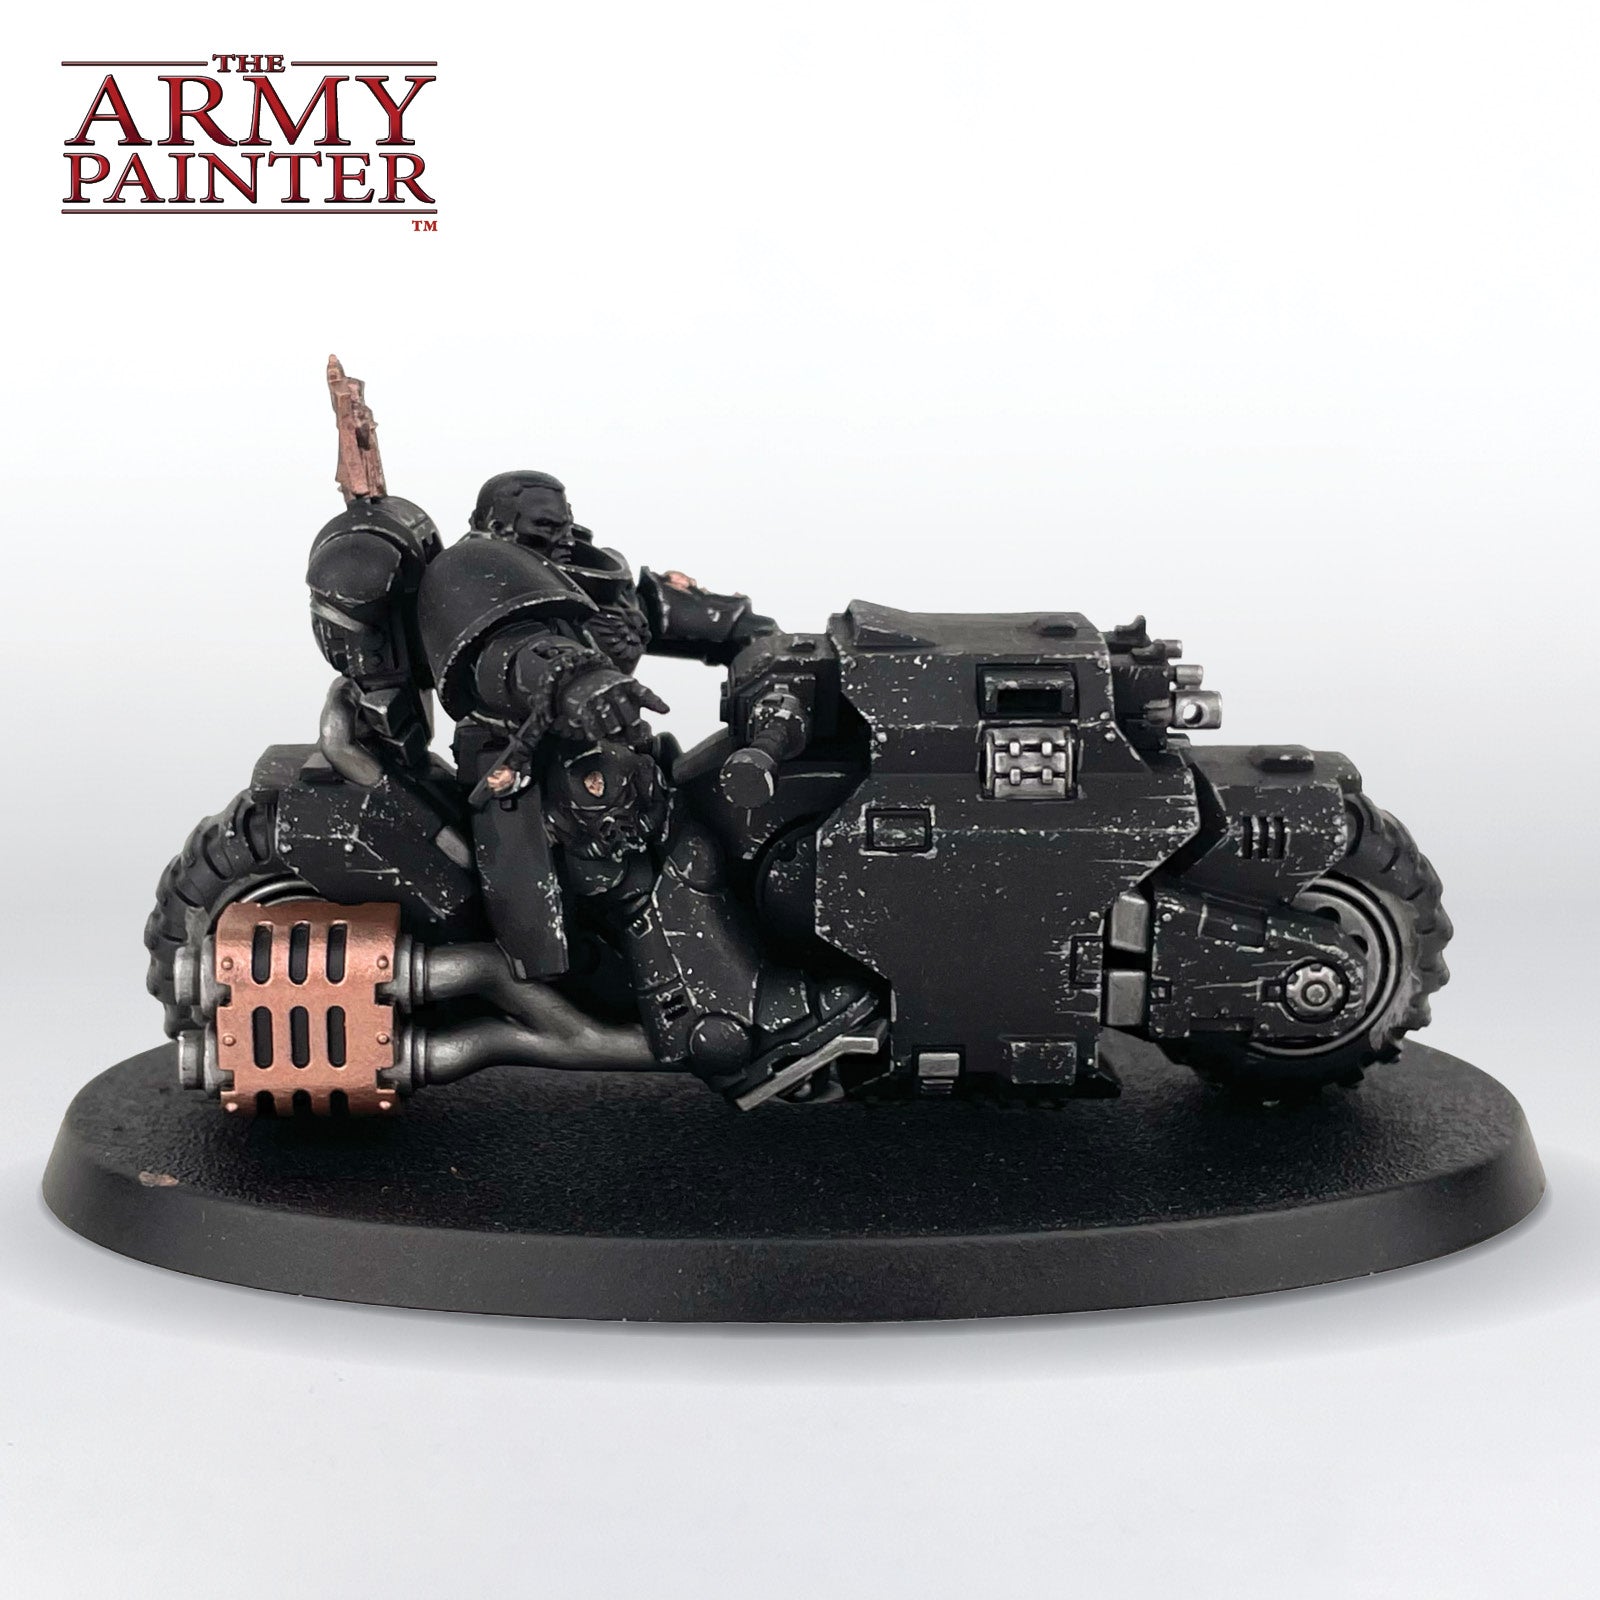
Brass & Gold
Step 1
The casing on the exhaust pipes, and any areas that will be gold were basecoated with Warpaints Fanatic Evil Chrome.
Brass & Gold
Step 3
Both of these areas were then shaded with Warpaints Fanatic Strong Skin Shade Wash.
Brass & Gold
Step 5
Finally, the gold was highlighted with a mix of Warpaints Fanatic Greedy Gold and Mithril.
The Rubber Tires
Step 1
The tires on the bike were basecoated with a mix of Warpaints Fanatic Deep Grey and Matt Black. This way it is a slightly different shade of black from the armour.
Step 2
These were then shaded with Warpaints Fanatic Dark Tone. Don't worry about the tires looking a little less finished than other areas, we'll be coming back to them at a later stage.

The Brown Leather
Step 1
All of the leather areas were basecoated with Warpaints Fanatic Oak Brown. On this Outrider that included the belt and pouches on the Marine, the seat of the bike, and the handles on the chainsword and the bike itself.
Step 2
These were then shaded with Warpaints Fanatic Dark Skin Shade Wash.
Step 3
Next, the leather was highlighted with Warpaints Fanatic Dryad Brown.

Step 4
Lastly, a final highlight of Warpaints Fanatic Fur Brown was applied on the corners.
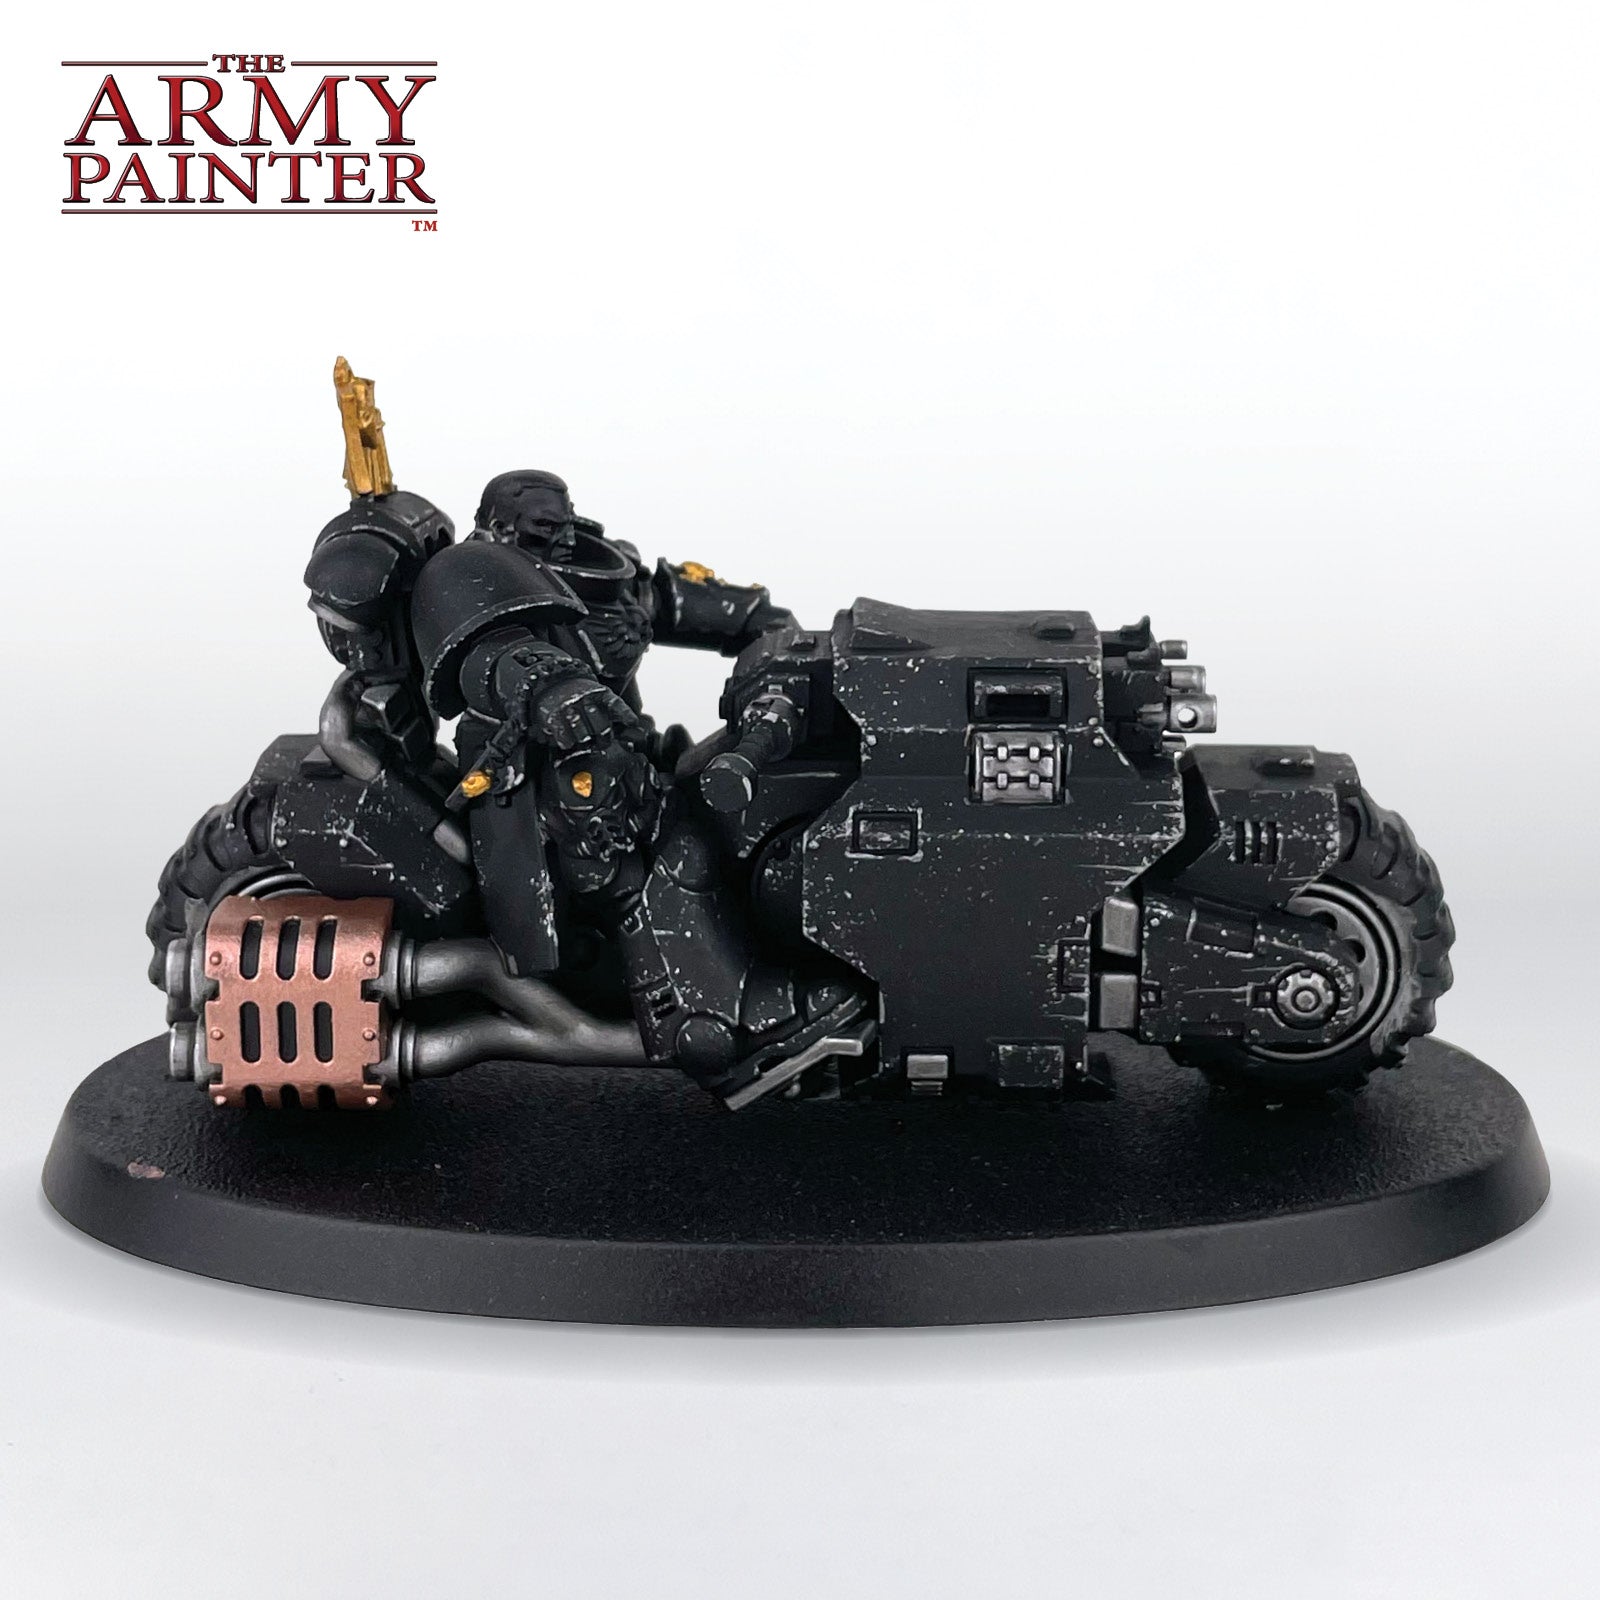
The Red Weapons
Step 1
The red weapon casings were basecoated with Warpaints Fanatic Pure Red. Don't forget to paint his holstered chainsword as well. I also painted some of the buttons and lights on his armour in this colour.
Step 2
These were then shaded with Warpaints Fanatic Strong Skin Shade Wash.
Step 3
Next, I highlighted all of the red with Warpaints Fanatic Angelic Red.
Step 4
The red was finished with a dot highlight of Warpaints Fanatic Legendary Red on all of the corners.
The Green & White
The Green
Step 1
All of green areas were basecoated with Warpaints Fanatic Angels Green. On this model that includes the prayer beads, lenses, and several buttons and screens. On the eye lenses I left the back third Matt Black.
The Green
Step 2
These were then all highlighted with Warpaints Fanatic Greenskin. On the lenses this was the front third of the lens.
The Green
Step 3
Next, a highlight of Warpaints Fanatic Emerald Forest was applied. This was just done on some of the top prayer beads, corners, and a little sliver of the front of the lenses.
The White
Step 1
The only white area on this model is the little sword hanging from his wrist. This was basecoated with Warpaints Fanatic Brigade Grey and given a quick hit of Dark Tone Wash near the hilt.
The White
Step 2
This was then given a quick highlight of Warpaints Fanatic Matt White. I also dotted all of the lenses and screens at this stage with a little reflection point.
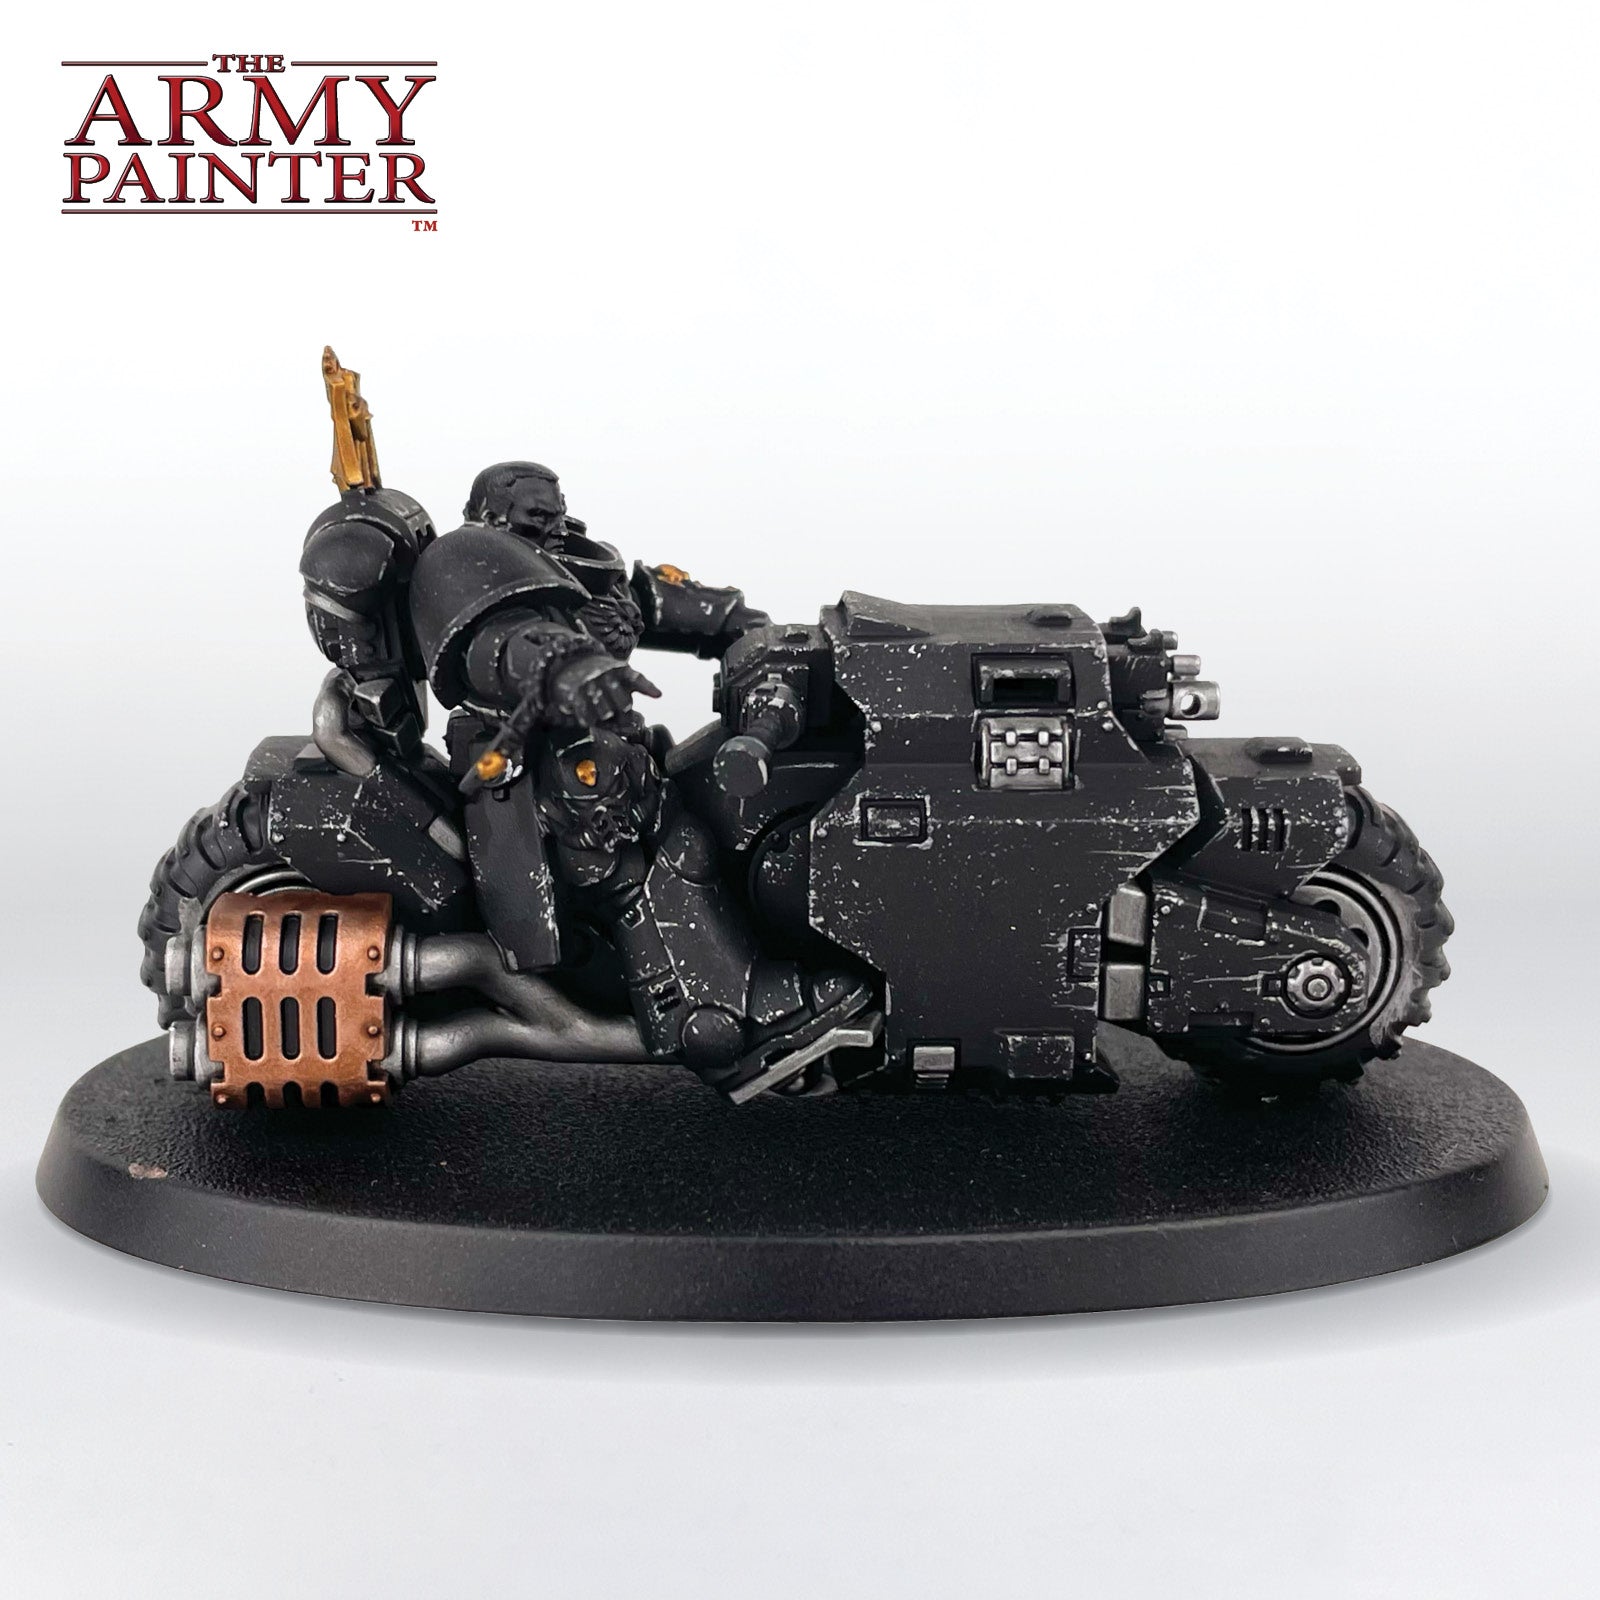
The Bone Colour
Step 1
The only bone area on this model is the Imperialis on the chest. This was basecoated with Warpaints Fanatic Dusty Skull.
Step 2
This was then shaded with Warpaints Fanatic Soft Tone Wash.
Step 3
The Imperialis was then highlighted with Warpaints Fanatic Skeleton Bone.

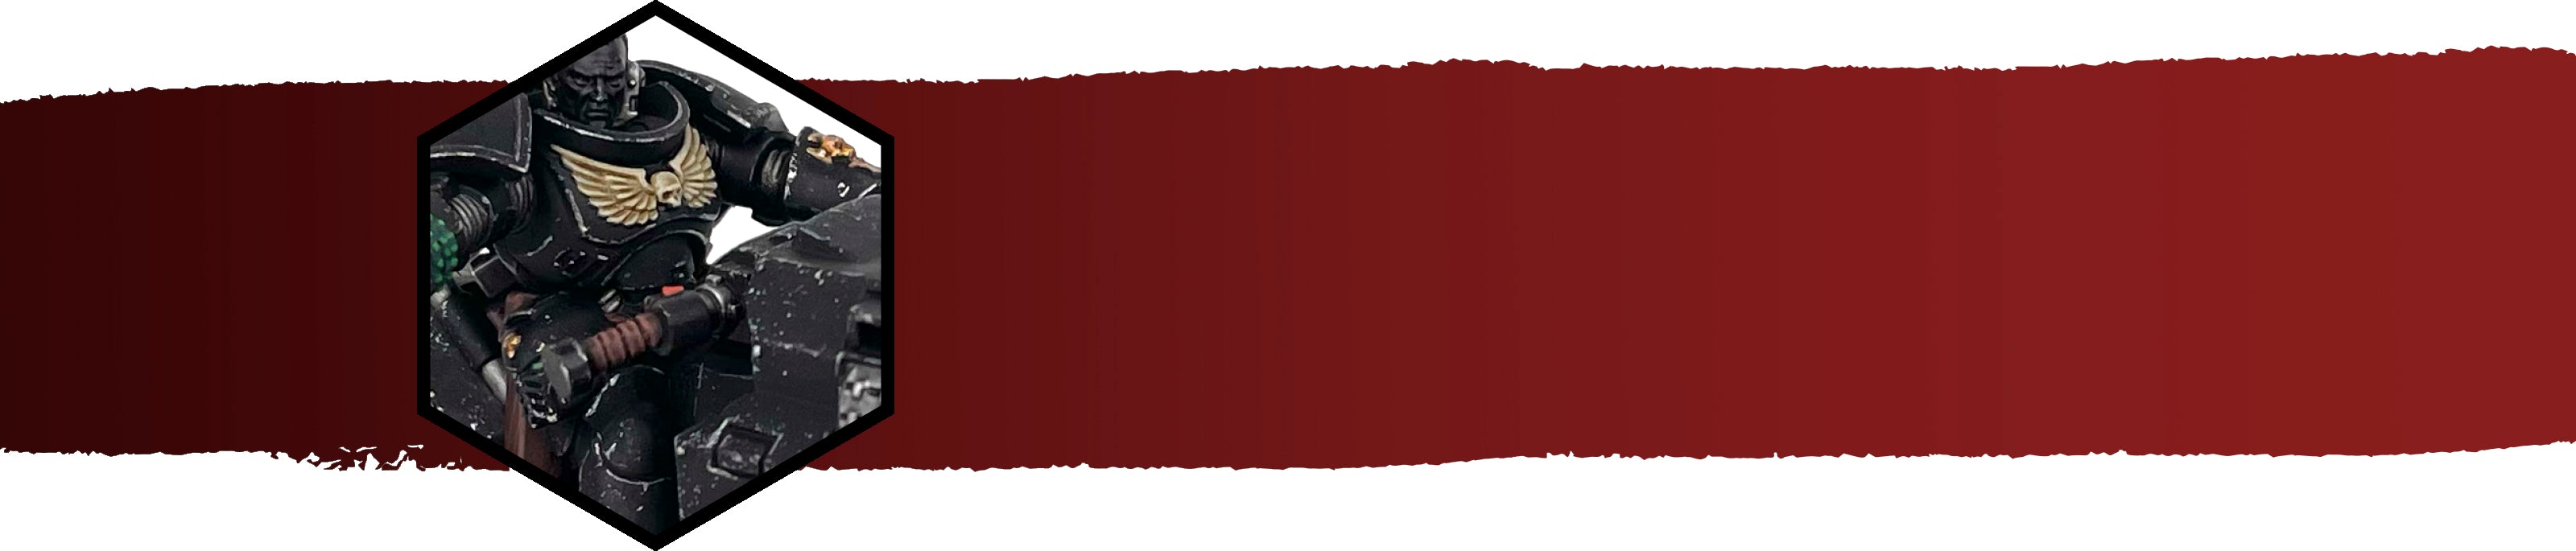
The Face & Hair
The Face
Step 1
The face is the focal point of the model, so it's okay to spend a bit more time on it. I started by basecoating it with Warpaints Fanatic Moonstone Skin.
The Face
Step 2
I added a bit of shading using Warpaints Fanatic Strong Skin Shade Wash thinned with a bit of water. Instead of covering the entire face with it, I only painted it around the eyes, nose, mouth, and hairline.
The Face
Step 3
Next, I layered the face with Warpaints Fanatic Barbarian Flesh, leaving the previous step and shade showing in the recesses.
The Face
Step 4
To add a bit of warmth and variation into the face, the eyes were painted with Warpaints Fanatic Purple Tone Wash and the bottom lip with Magenta Tone Wash.
The Face
Step 5
The final highlight on the skin was done with Warpaints Fanatic Ruby Skin. This was applied to prominent areas like the eyebrows, nose, chin, and cheekbones.
The Hair
Step 1
To paint the hair brown, but make sure it reads differently than the leather, it was basecoated with Warpaints Fanatic Brigadine Brown.
The Hair
Step 2
This was then highlighted with Warpaints Fanatic Bootstrap Brown. I focused this on the top of his head and tried to follow the pattern of the sculpted hair.
The Hair
Step 3
A final highlight of Warpaints Fanatic Leather Brown was applied to the edges of his hairline in a striated pattern.
The Final Touches
Step 1
Lastly, I painted his service studs as well as the buttons on his pouches with Warpaints Fanatic Plate Mail Metal. I also decided to paint his eyes with Warpaints Fanatic Matt White and dotted with Matt Black, but you can choose to skip this step and it will still look great since we shaded them with purple earlier.
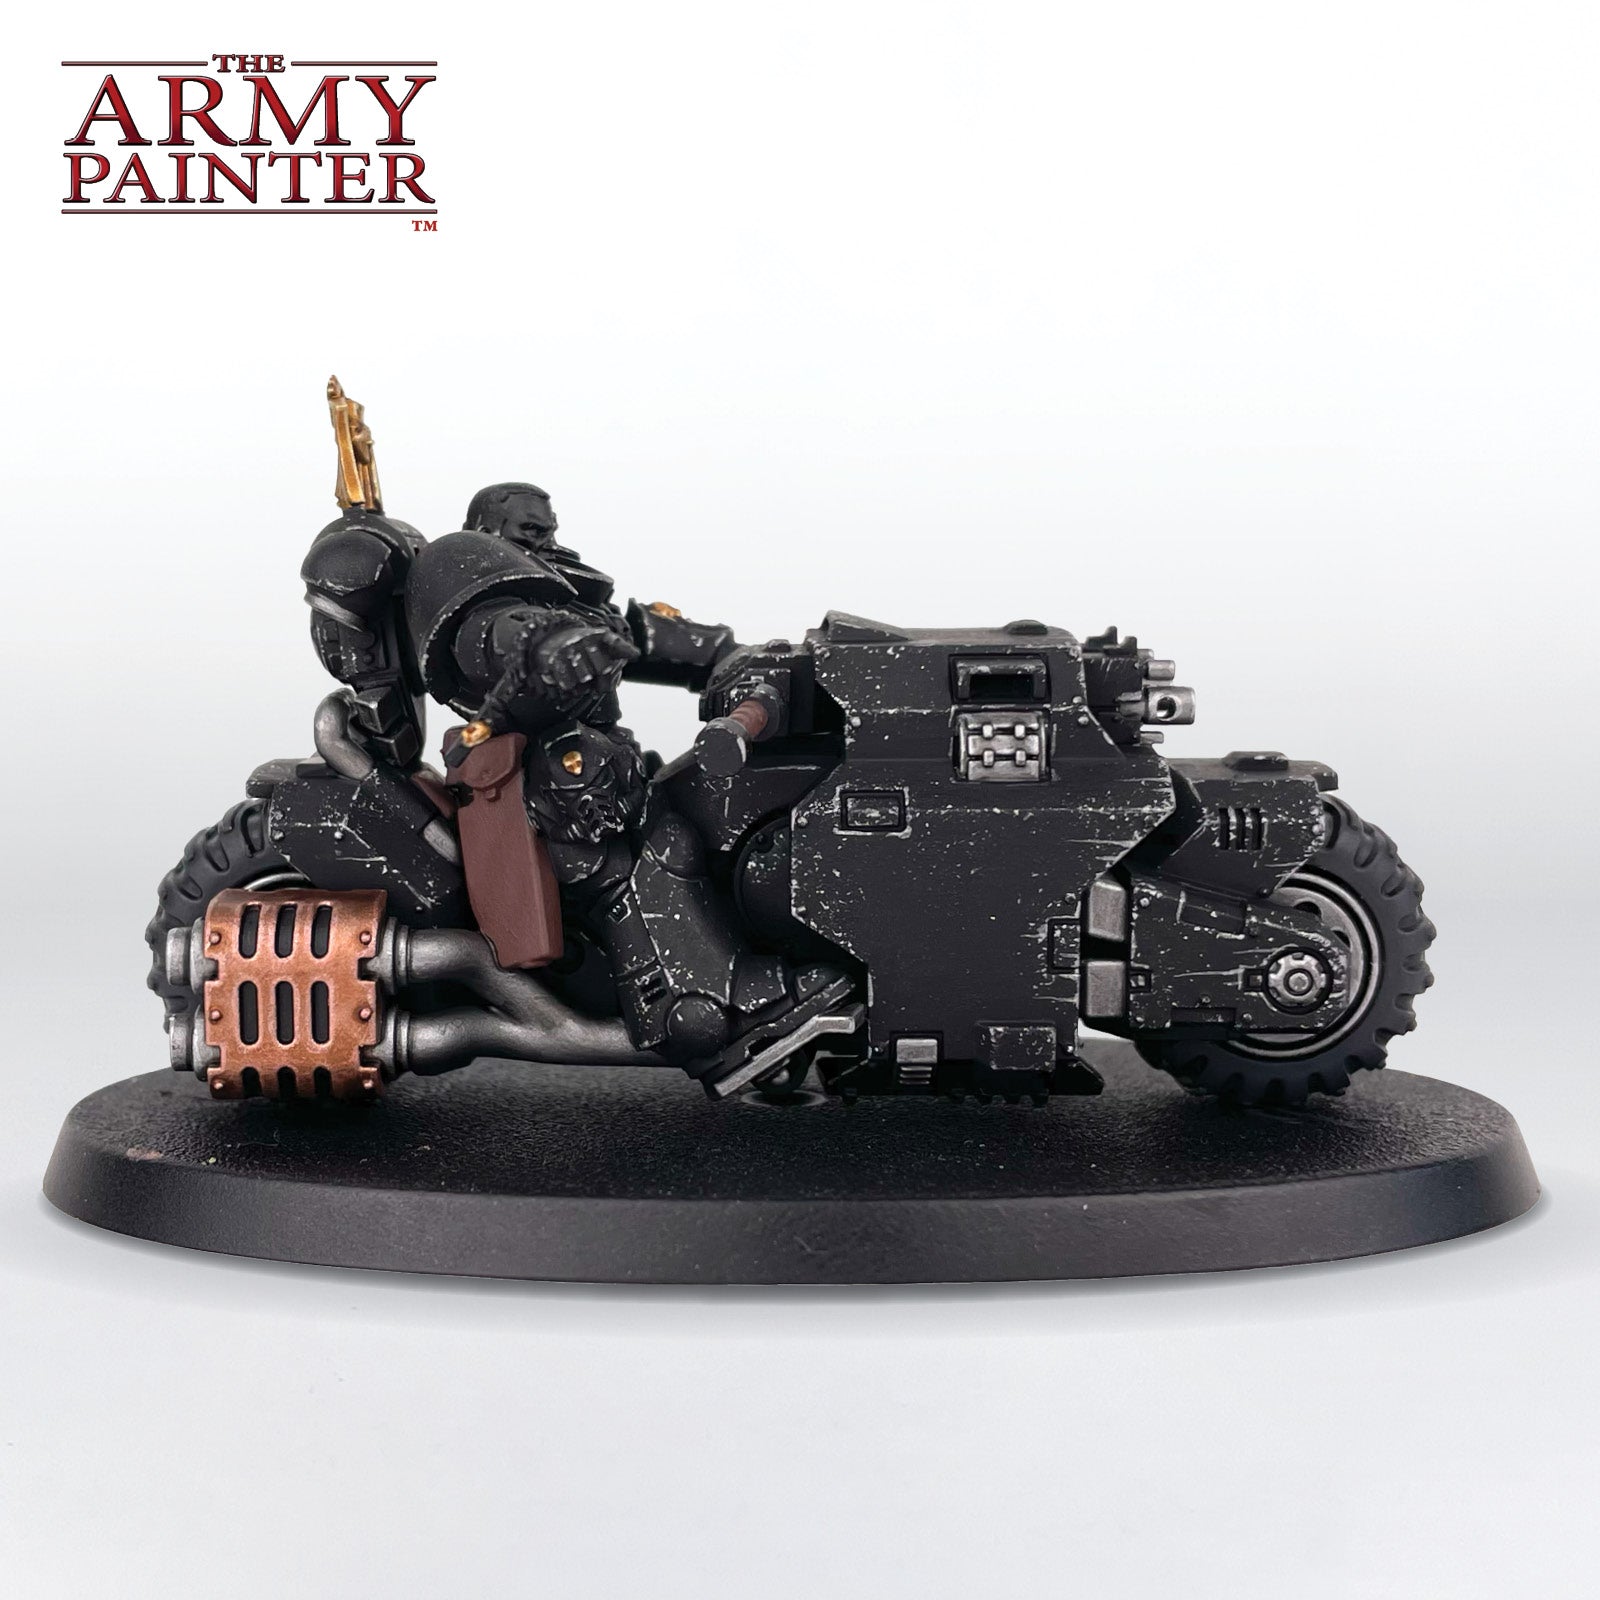
The Weathering
Step 1
Before I started the weathering I applied all of the decals to the model and gave them a coat of Warpaints Fanatic Matt Varnish to protect them.
Step 2
These were then chipped by painting scratches into them with Warpaints Fanatic Matt Black. Remember, less is more. You can always go back and add more if you feel like it's not enough.
Step 3
For the dust on the wheels you'll want to match the colours of your basing. For mine, the main colour of the base is Warpaints Fanatic Leather Brown. After painting the base, I watered down the paint significantly and slathered it over the wheels, concentrating it towards the middle. I built this up over two coats.
Step 4
The next colour on the base was a drybrush of Warpaints Fanatic Wasteland Clay, so I also gave the tires a light drybrush at the same time. The base got one more drybrush after this of Warpaints Fanatic Ancient Stone, but I opted not to use this on the tires at all because I wanted them to read as more brown.
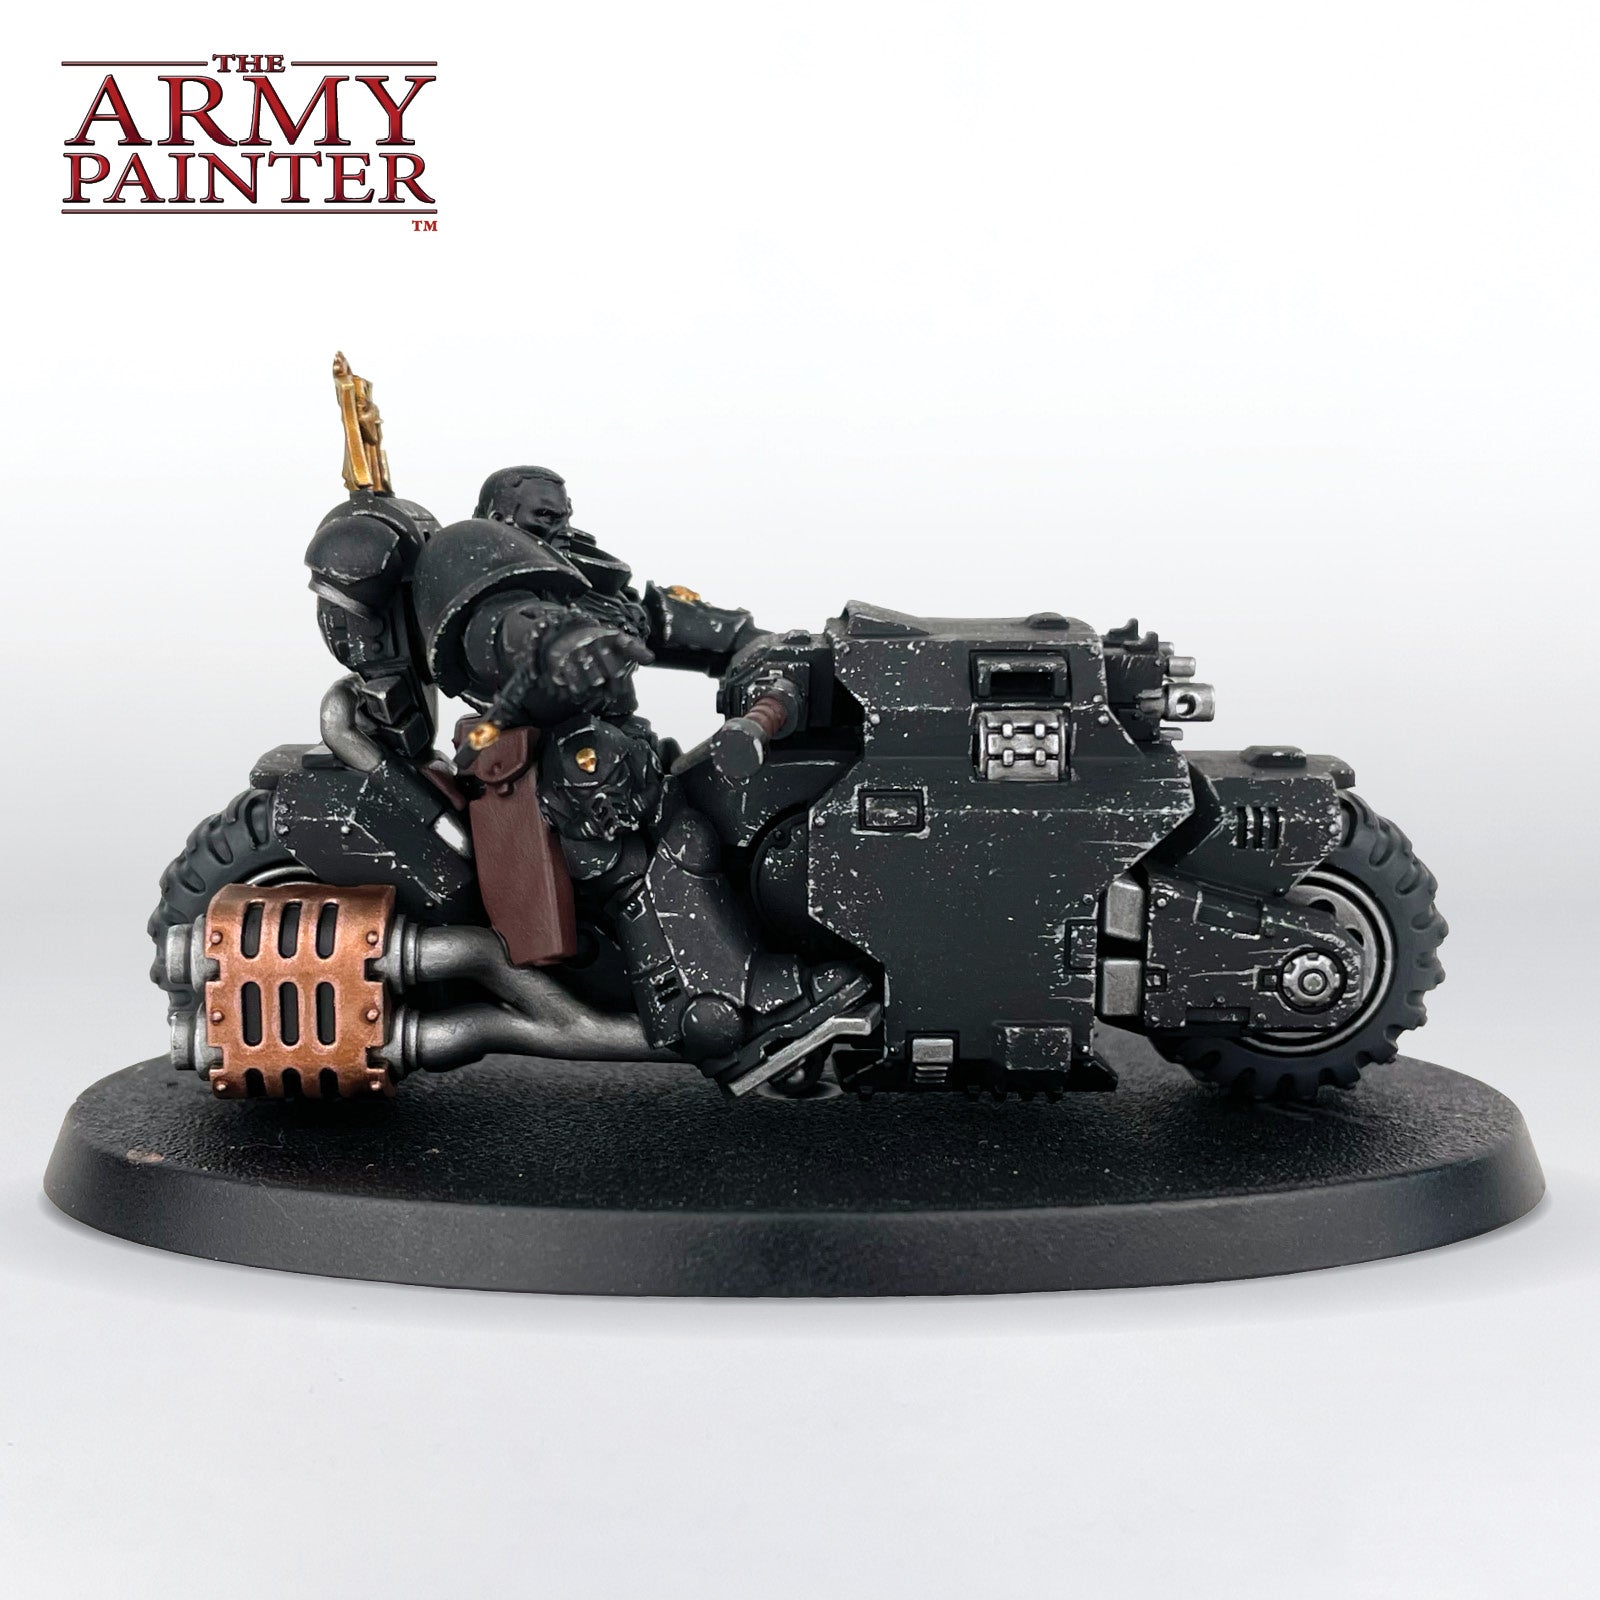
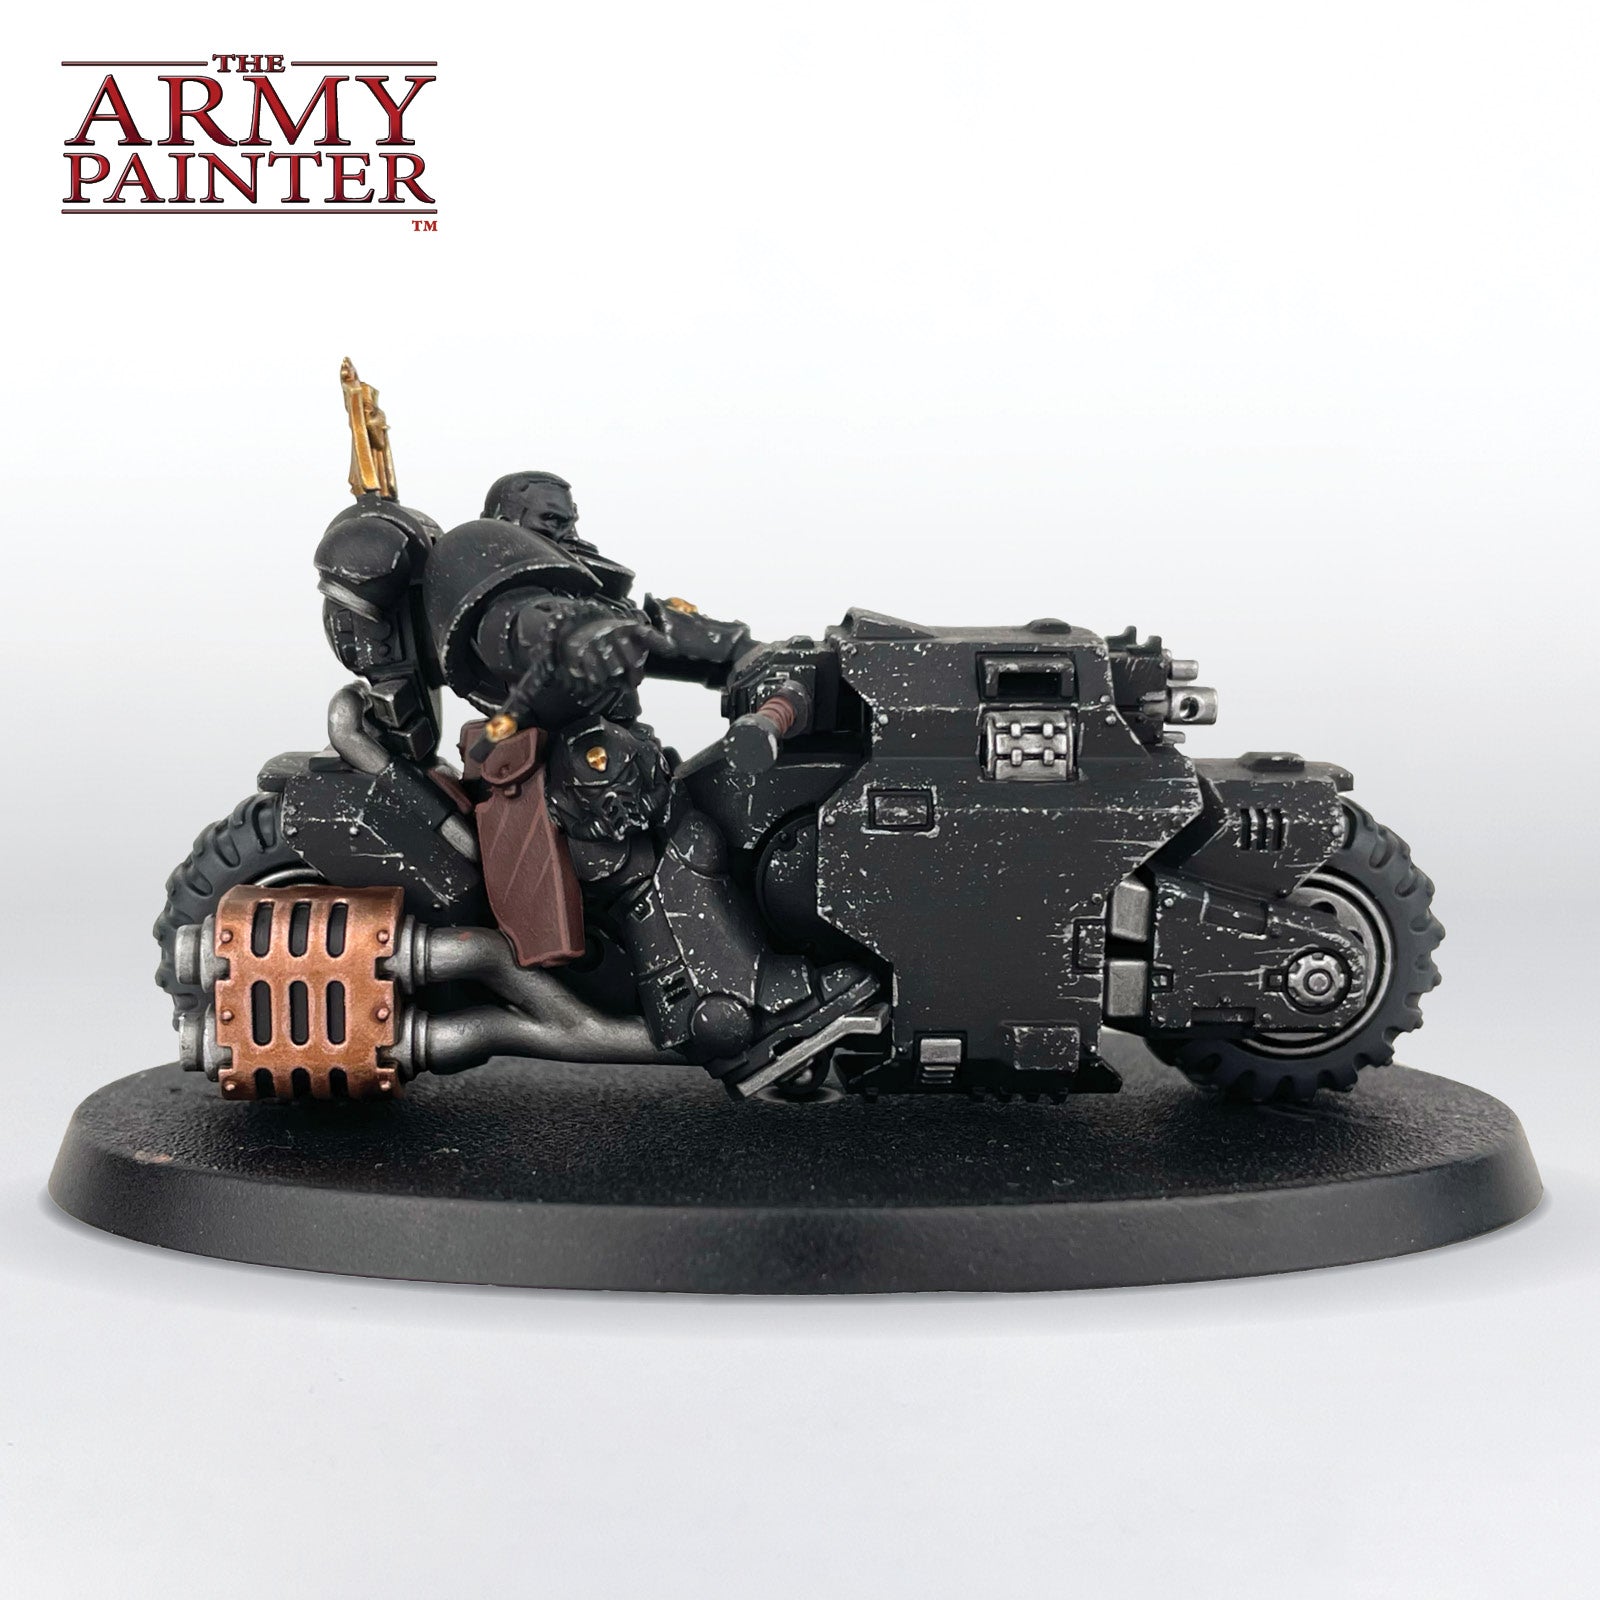
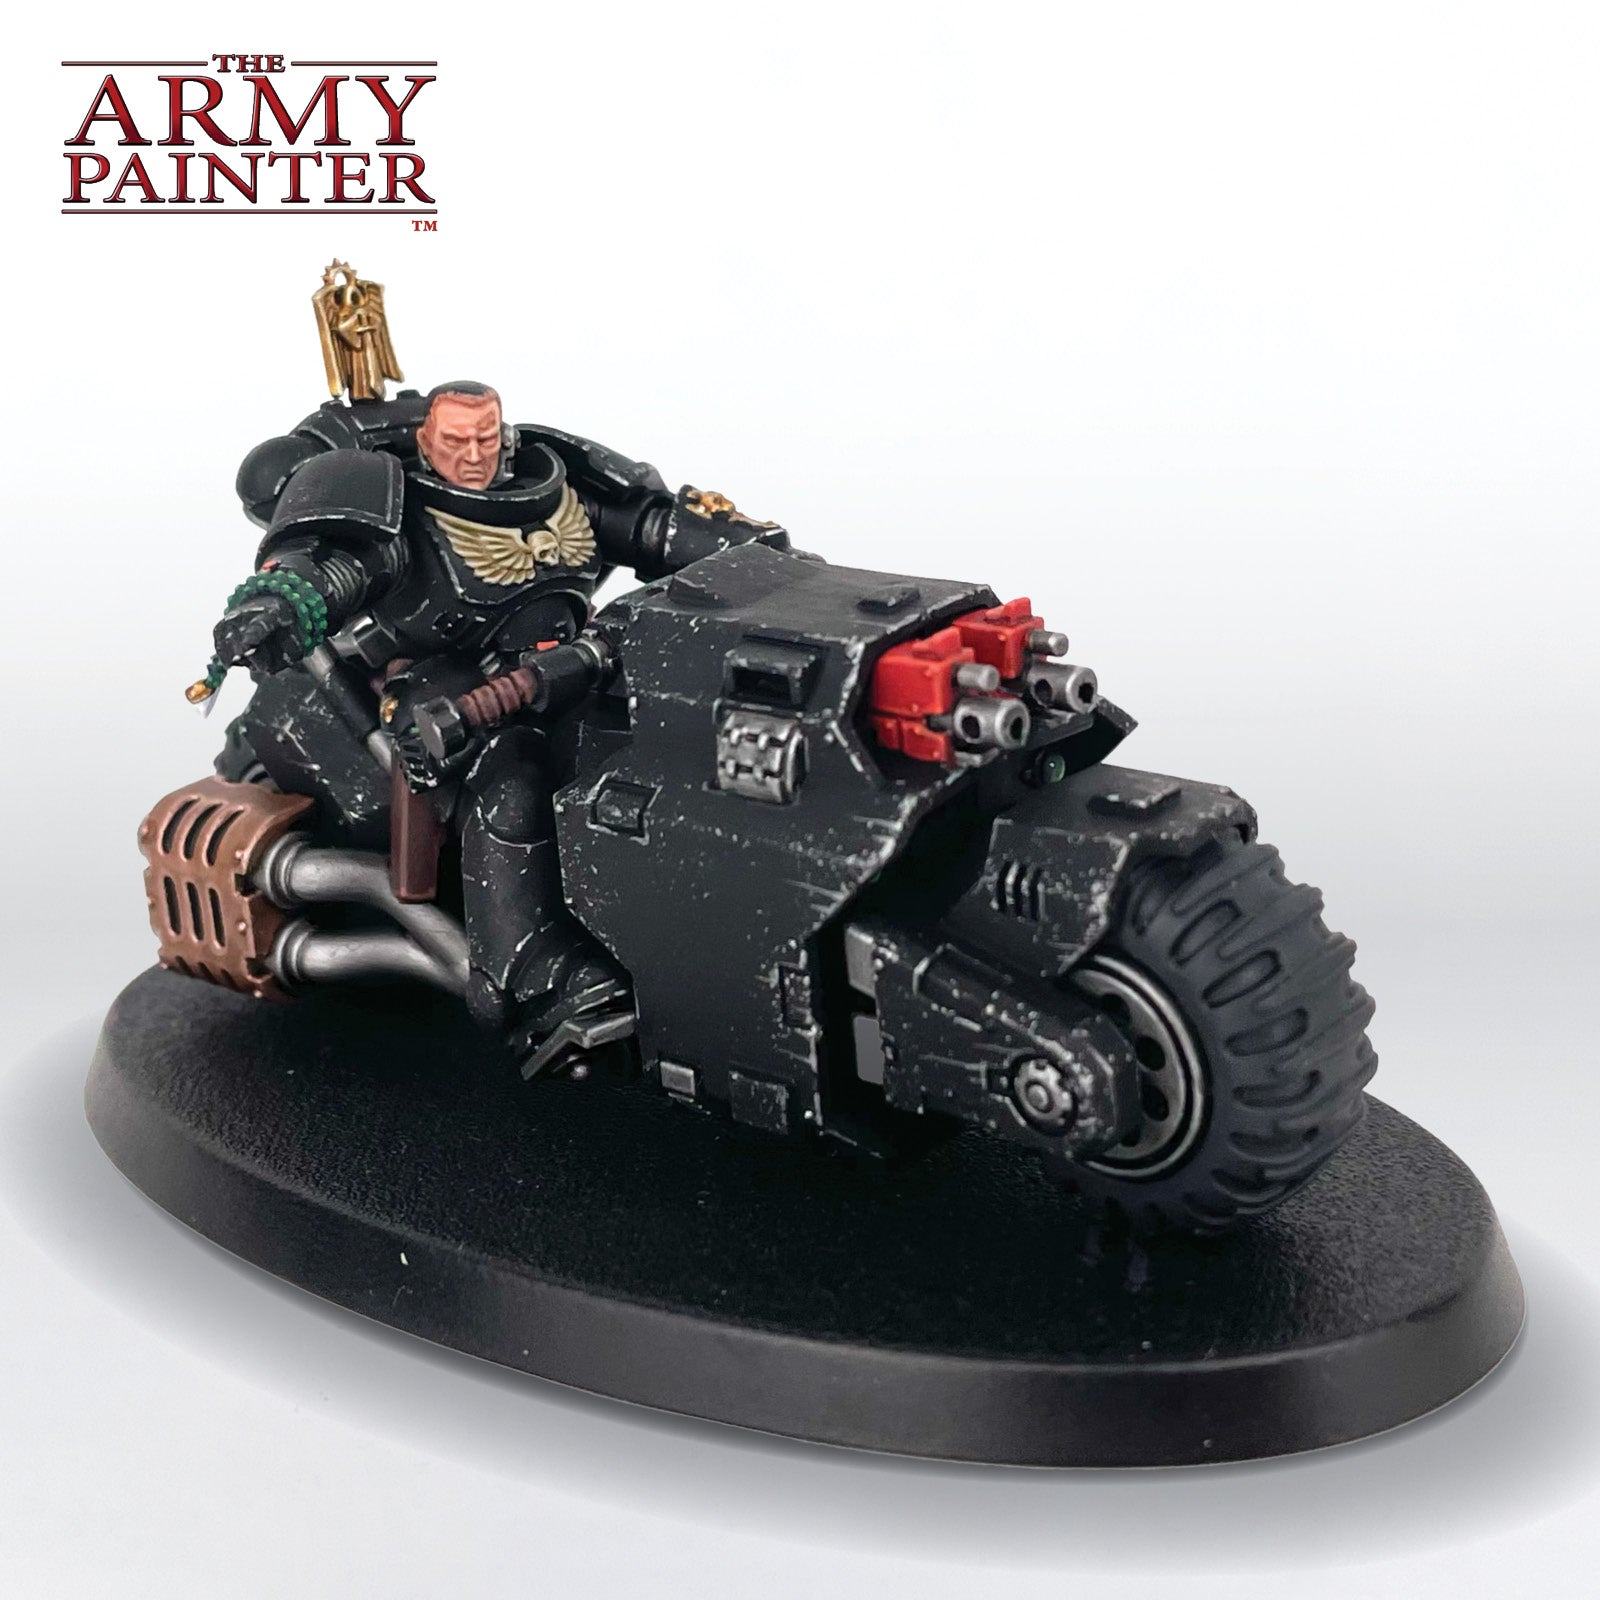
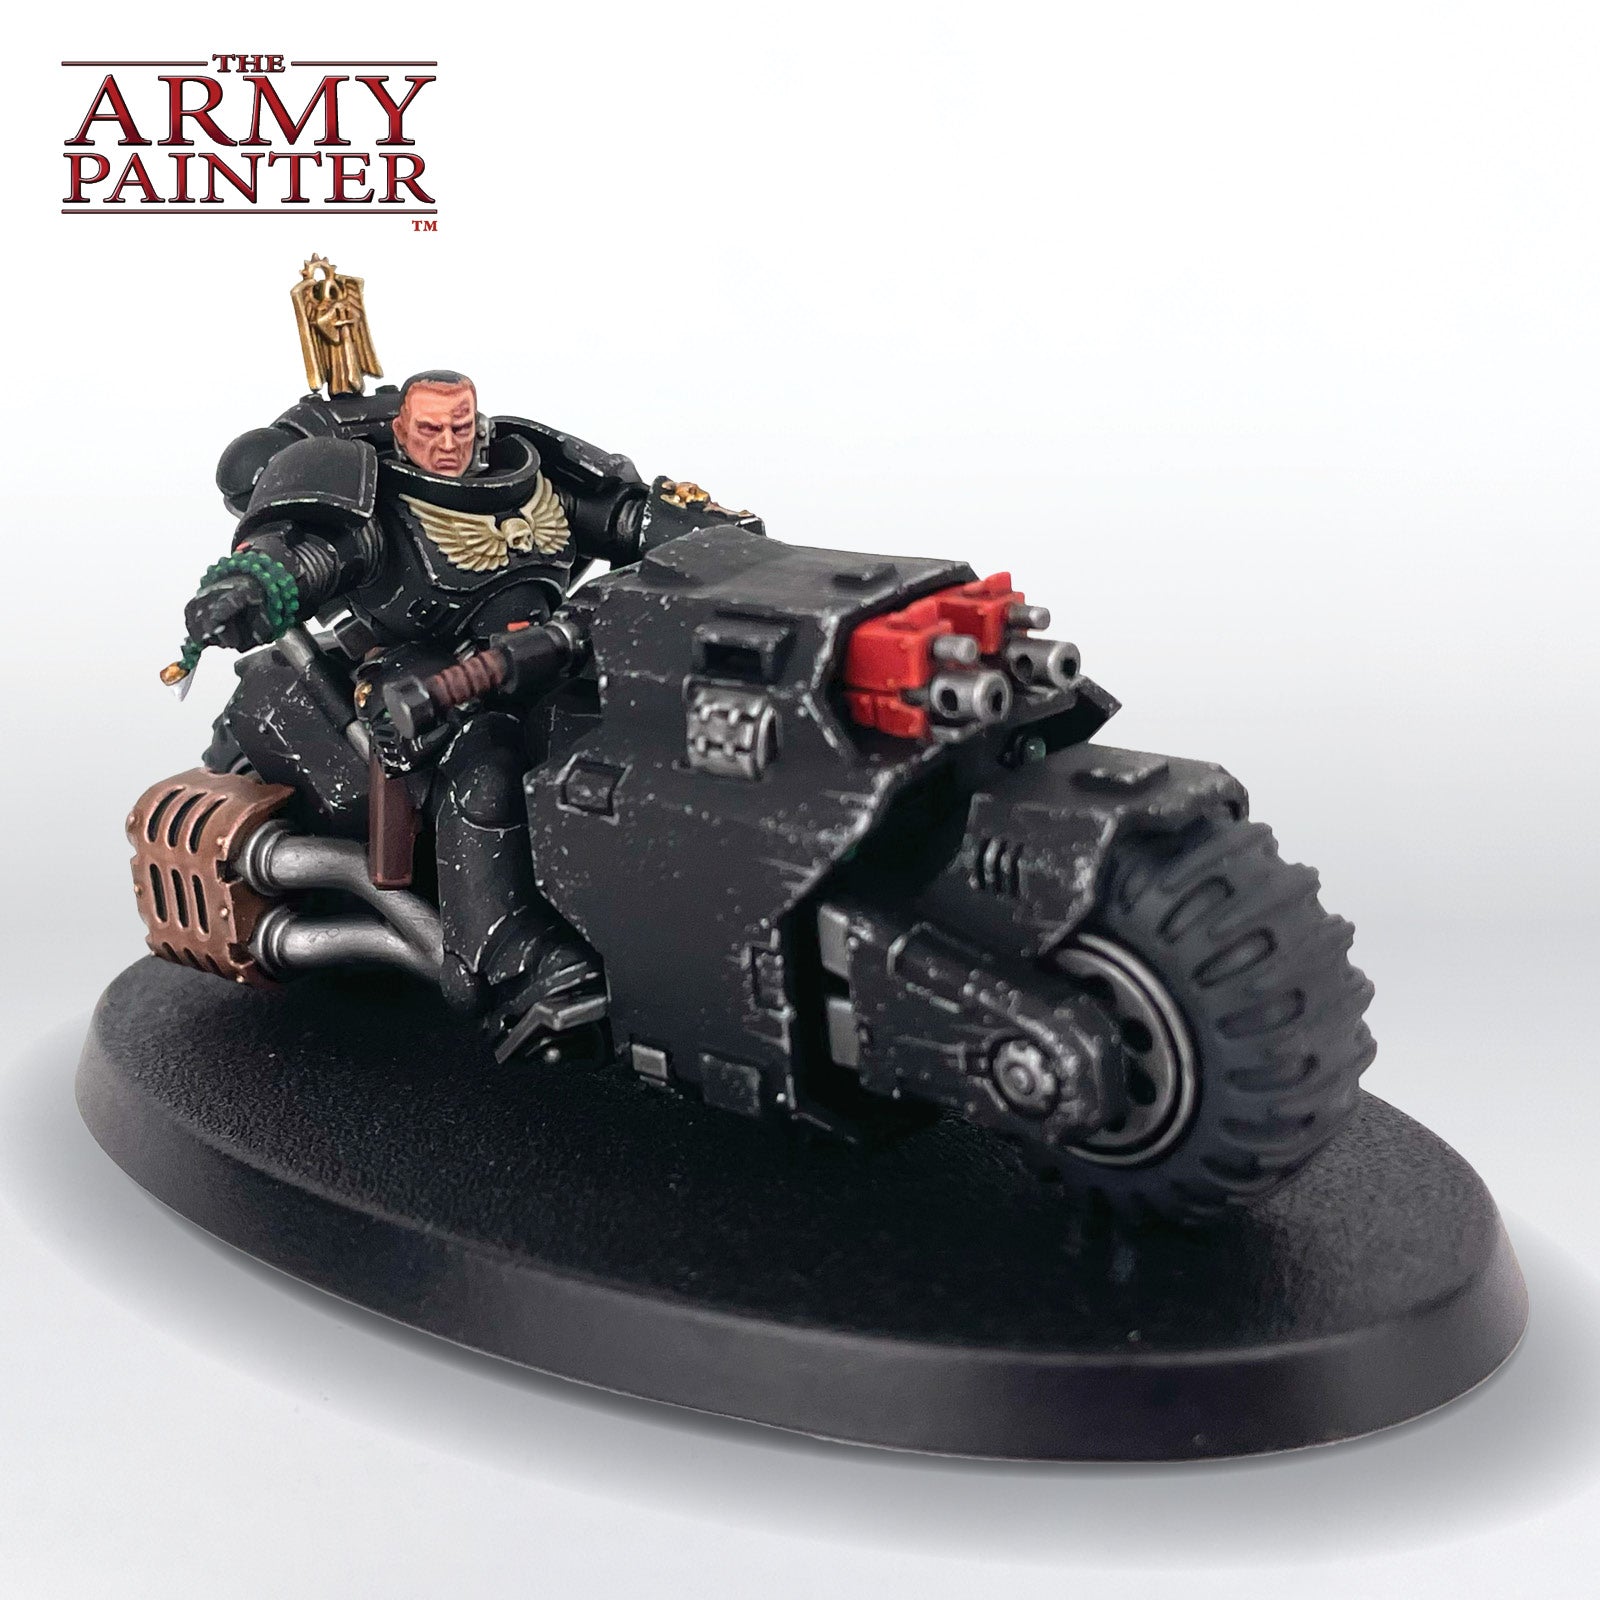
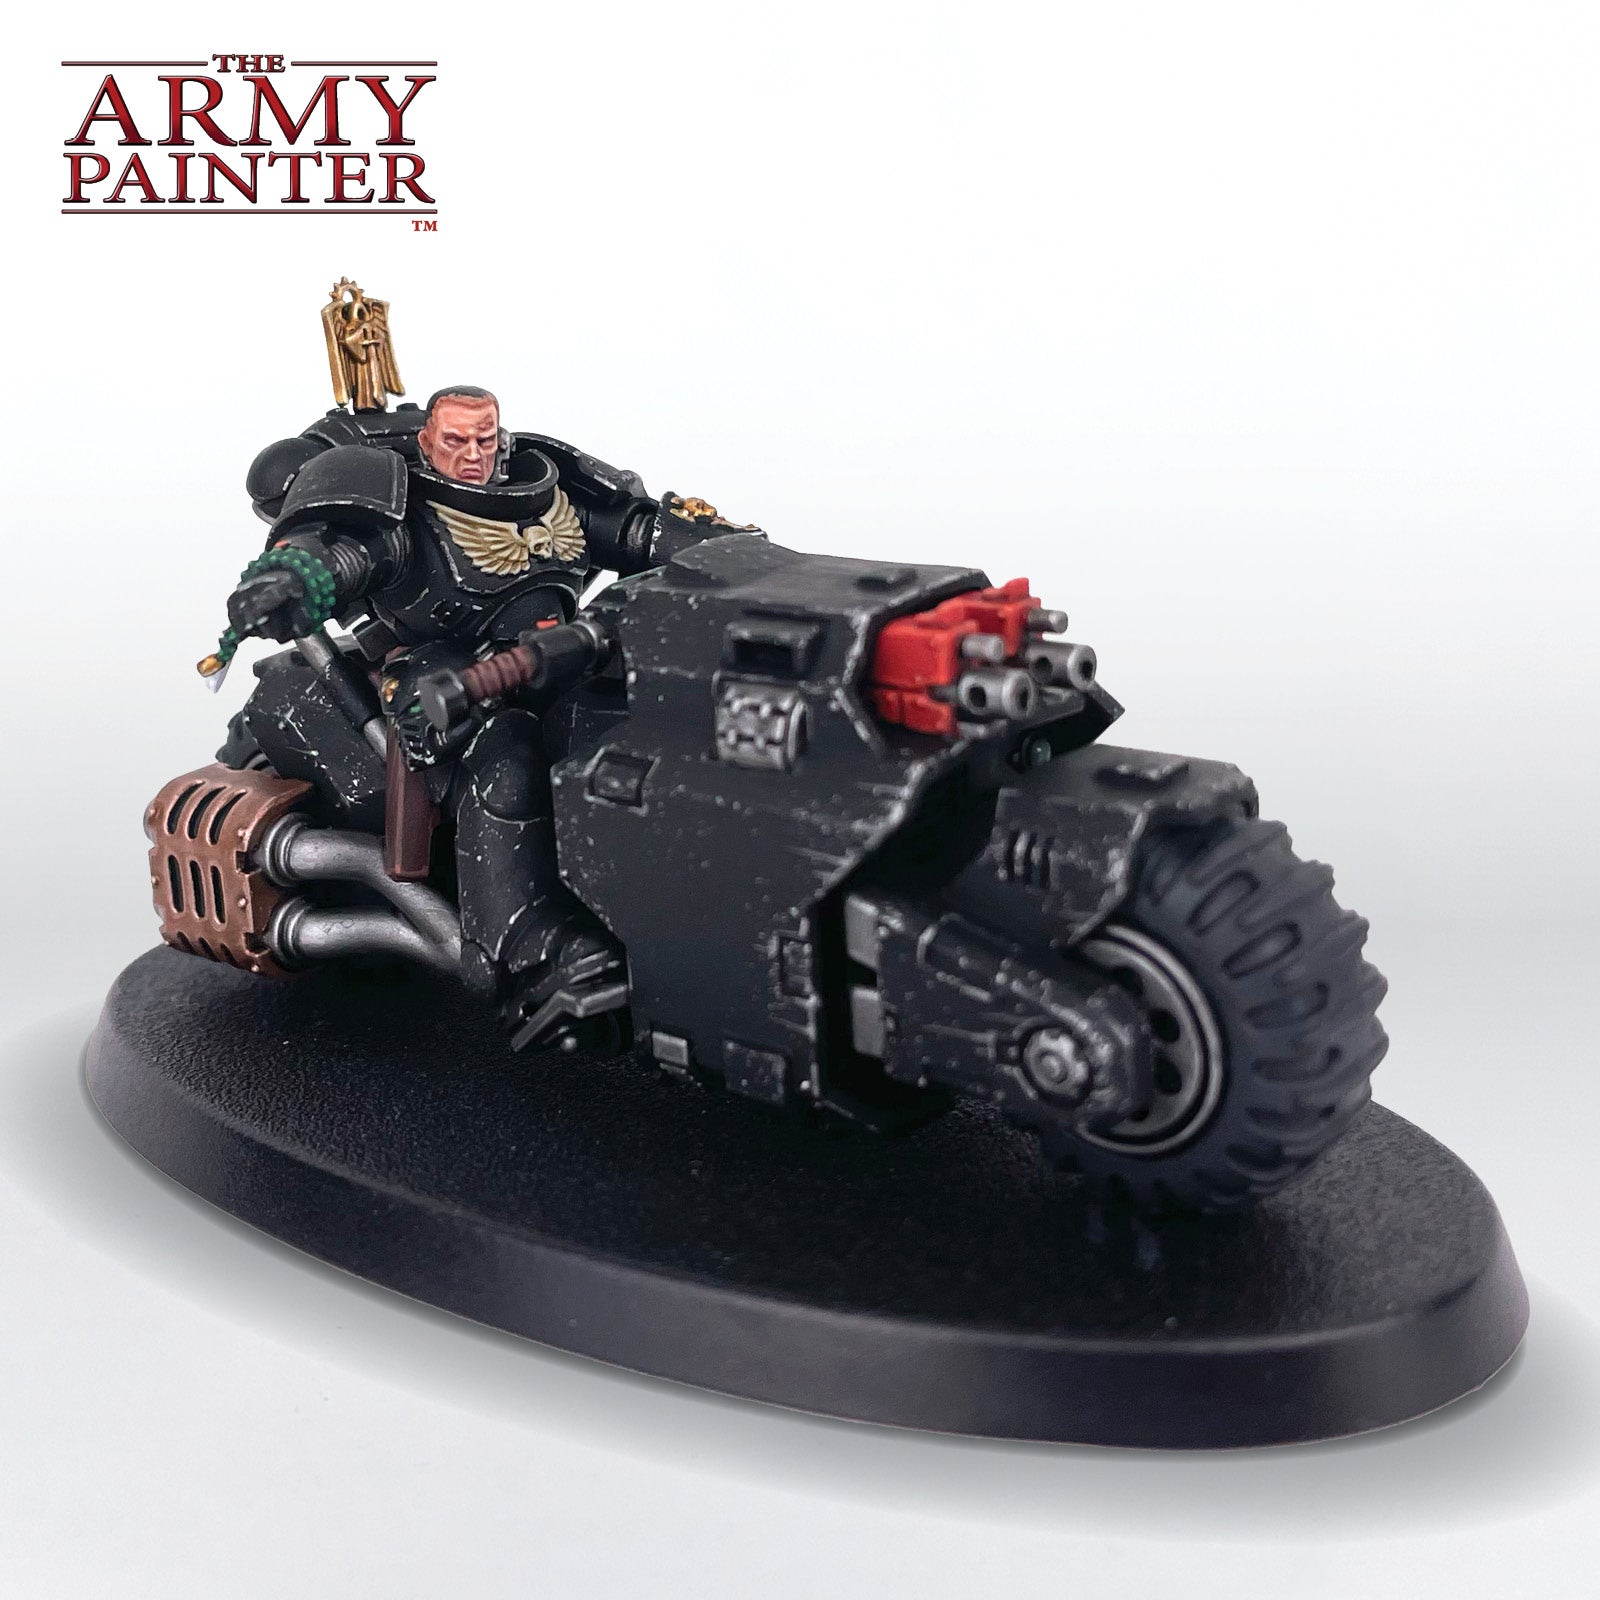
With that, your model is done!
If you plan on using your model for gaming we highly recommend varnishing it with either our Spray, Warpaints Air, or upcoming Warpaints Fanatic varnishes.
With regular Dark Angels and the Ravenwing done, that leaves only one variety of the Unforgiven left to cover, so keep an eye out for the bone white armour of the Deathwing in the future. There may even be something roaring its way onto our tutorials this very Friday...
If you paint your own model following one of these guides tag us with #thearmypainteracademy to share your work!