


Does Basing Matter?
The devil is in the details, and that goes for miniatures and their bases as well.
Completing the base not only provides context and a story for the miniature but can also enhance the overall aesthetic and make it stand out on the gaming table.
Basing can be as simple or as detailed as you like. A simple approach can help keep the focus on the mini, while a detailed base can tell a story and add depth to your model.
This is where materials like our Tufts come into play.
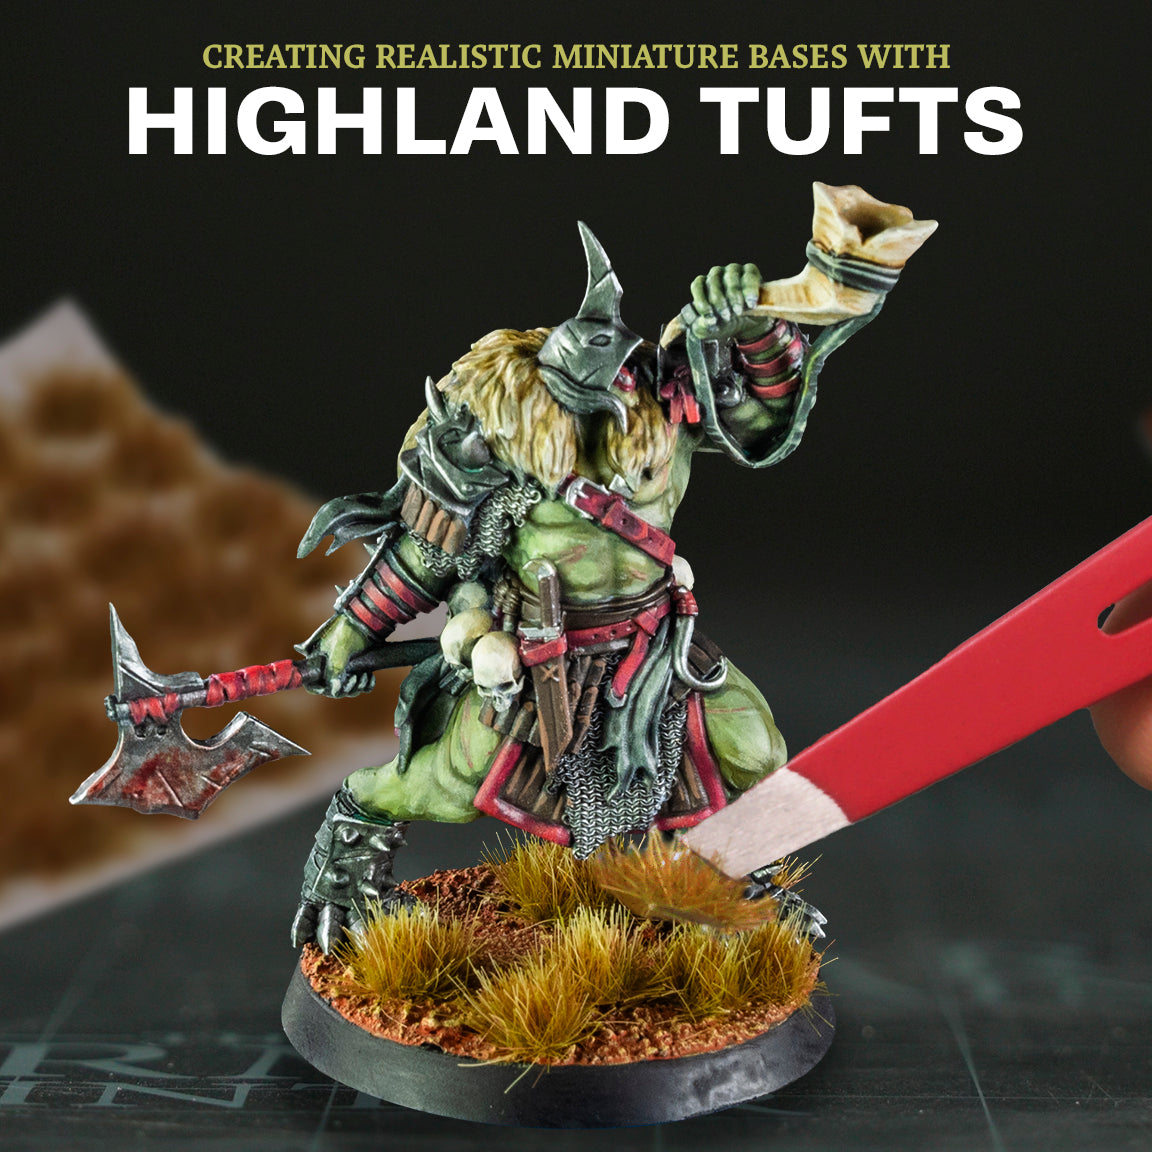
In the fifth part of our 12-month series, we’ll feature the same Goblin Warchief from the Fanatic Most Wanted Set as last time, but now in a rugged and sparse highland field.
Adding Life to Your Miniature Base with Highland Tufts
What are Highland Tufts?
The Highland Tufts are pre-made clusters of synthetic grass with an arid brown green look that's perfect for a variety of bases. They come in three different sizes (12 large, 35 medium, and 30 small), making them versatile for different scales and settings.
As with all Tufts from The Army Painter, the Highland Tufts can be used on many different miniatures and settings. They are great for arid fields or even just a bit of variation amongst your other tufts.

How to Work with Basing and Tufts
Before you begin working on your base, make sure you have the following tools: Battlefield Basing: Glue, tweezer, and basing/tufts materials.
Thin the Battlefield Basing: Glue with a bit of water and spread it onto the base with an old brush. This way, you won’t mess up your newer or more expensive brushes.

Dip the base into your chosen basing material, ensuring it’s fully covered. Tap off any excess material and clean up any misplaced bits.

For added depth and contrast, consider giving the now textured base a basecoat with Warpaints Fanatic and drybrush with a lighter colour on top.

Add tufts that match your thematic story to enhance the look and add a touch of realism. Glue them on with Battlefield Basing: Glue (or Super Glue if you want a stronger hold).

And that’s it! By following these simple steps, your miniature is now set in the environment you want and is ready to join the rest of the army on the tabletop.
For a more in-depth guide, check out our blog post, Finishing the Miniature’s Base, or YouTube video How To Use: Battlefields Basing Materials.
How To Create a Highland Base

- First, we add some ground textures to make the base even more visually appealing and engaging. The texture is a mix of Battlefield Basing: Snow and Battlefield Basing: Brown Battleground, glued onto the base with Battlefield Basing: Glue.
- After the texture dried and any excess basing materials were removed, the base was primed with our Matt Black Colour Primer.
- Next, apply a coat of Warpaints Fanatic Fresh Rust.
- This was followed by a drybrush with Warpaints Fanatic Burnt Turf.
- Next, the rim of the base was painted with Warpaints Fanatic Matt Black, before applying the Highland Tufts with Battlefield Basing: Glue.

Your Goblin Warchief is now ready to lead his horde across the highlands of your fantasy setting.
Easily Take Your Base from Simple to Advanced

As you can see, there are many ways to finish your miniature’s base. Some may be simple, others more advanced. Whether you choose a basic or more elaborate approach depends on the effect and story you wish to convey with your miniature and overall army. Whichever road you decide to follow, you will find basing materials in The Army Painter’s catalogue that fit your needs.
Some bases come with pre-designed elements, while others require you to create the setting and thematic narrative yourself. The image below illustrates how the base can transform a miniature and how, with a few materials, you can upgrade from a simple base to a more detailed and intricate one.

