


How to Paint
White Scars
Welcome to the next instalment of The Army Painter Academy: a series where we break down how we paint a miniature step-by-step, complete with pictures for every bit of paint applied along the way.
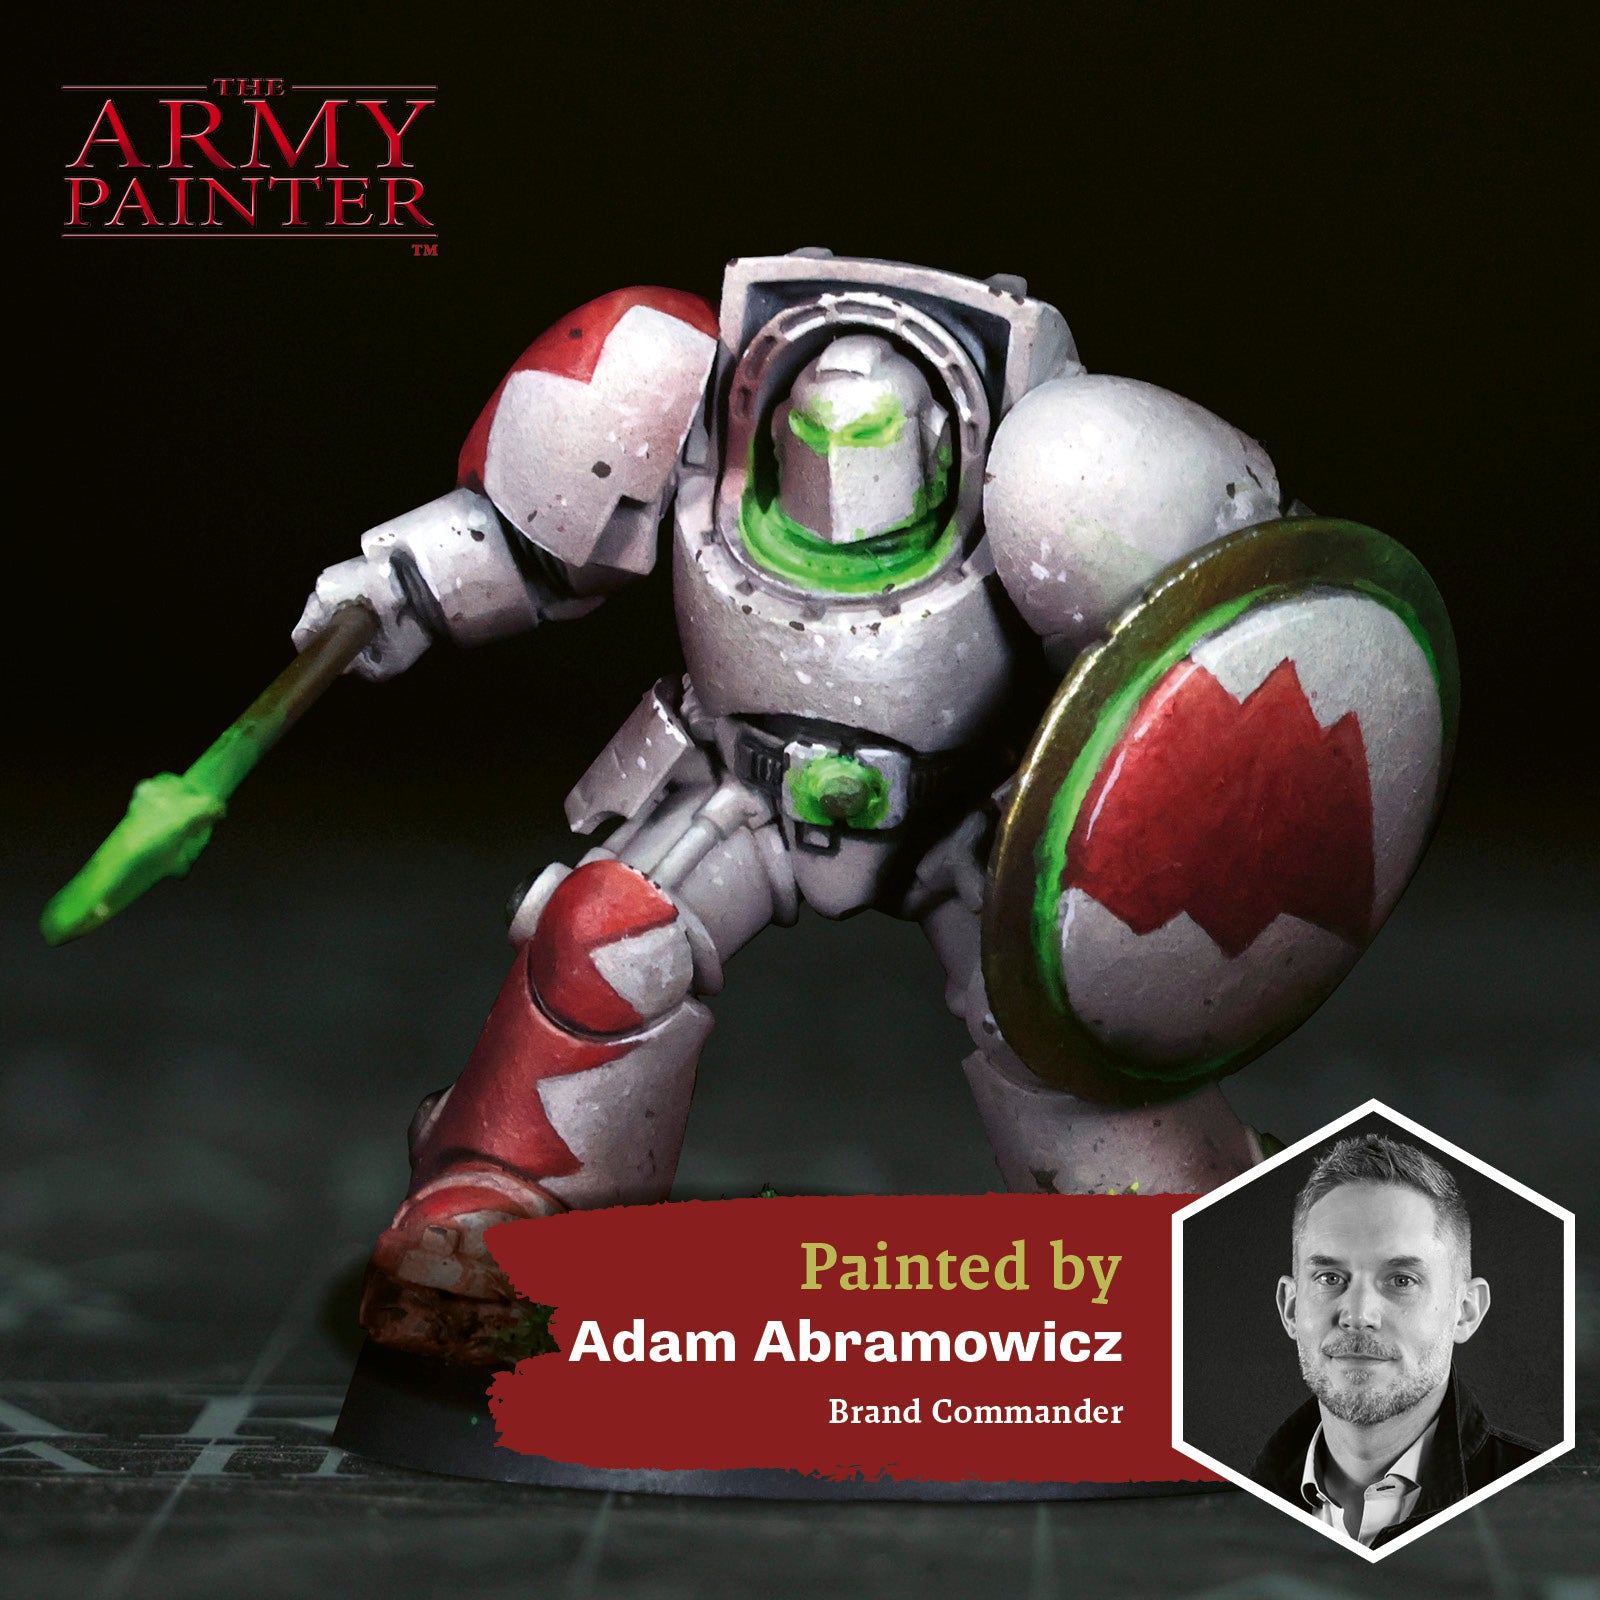
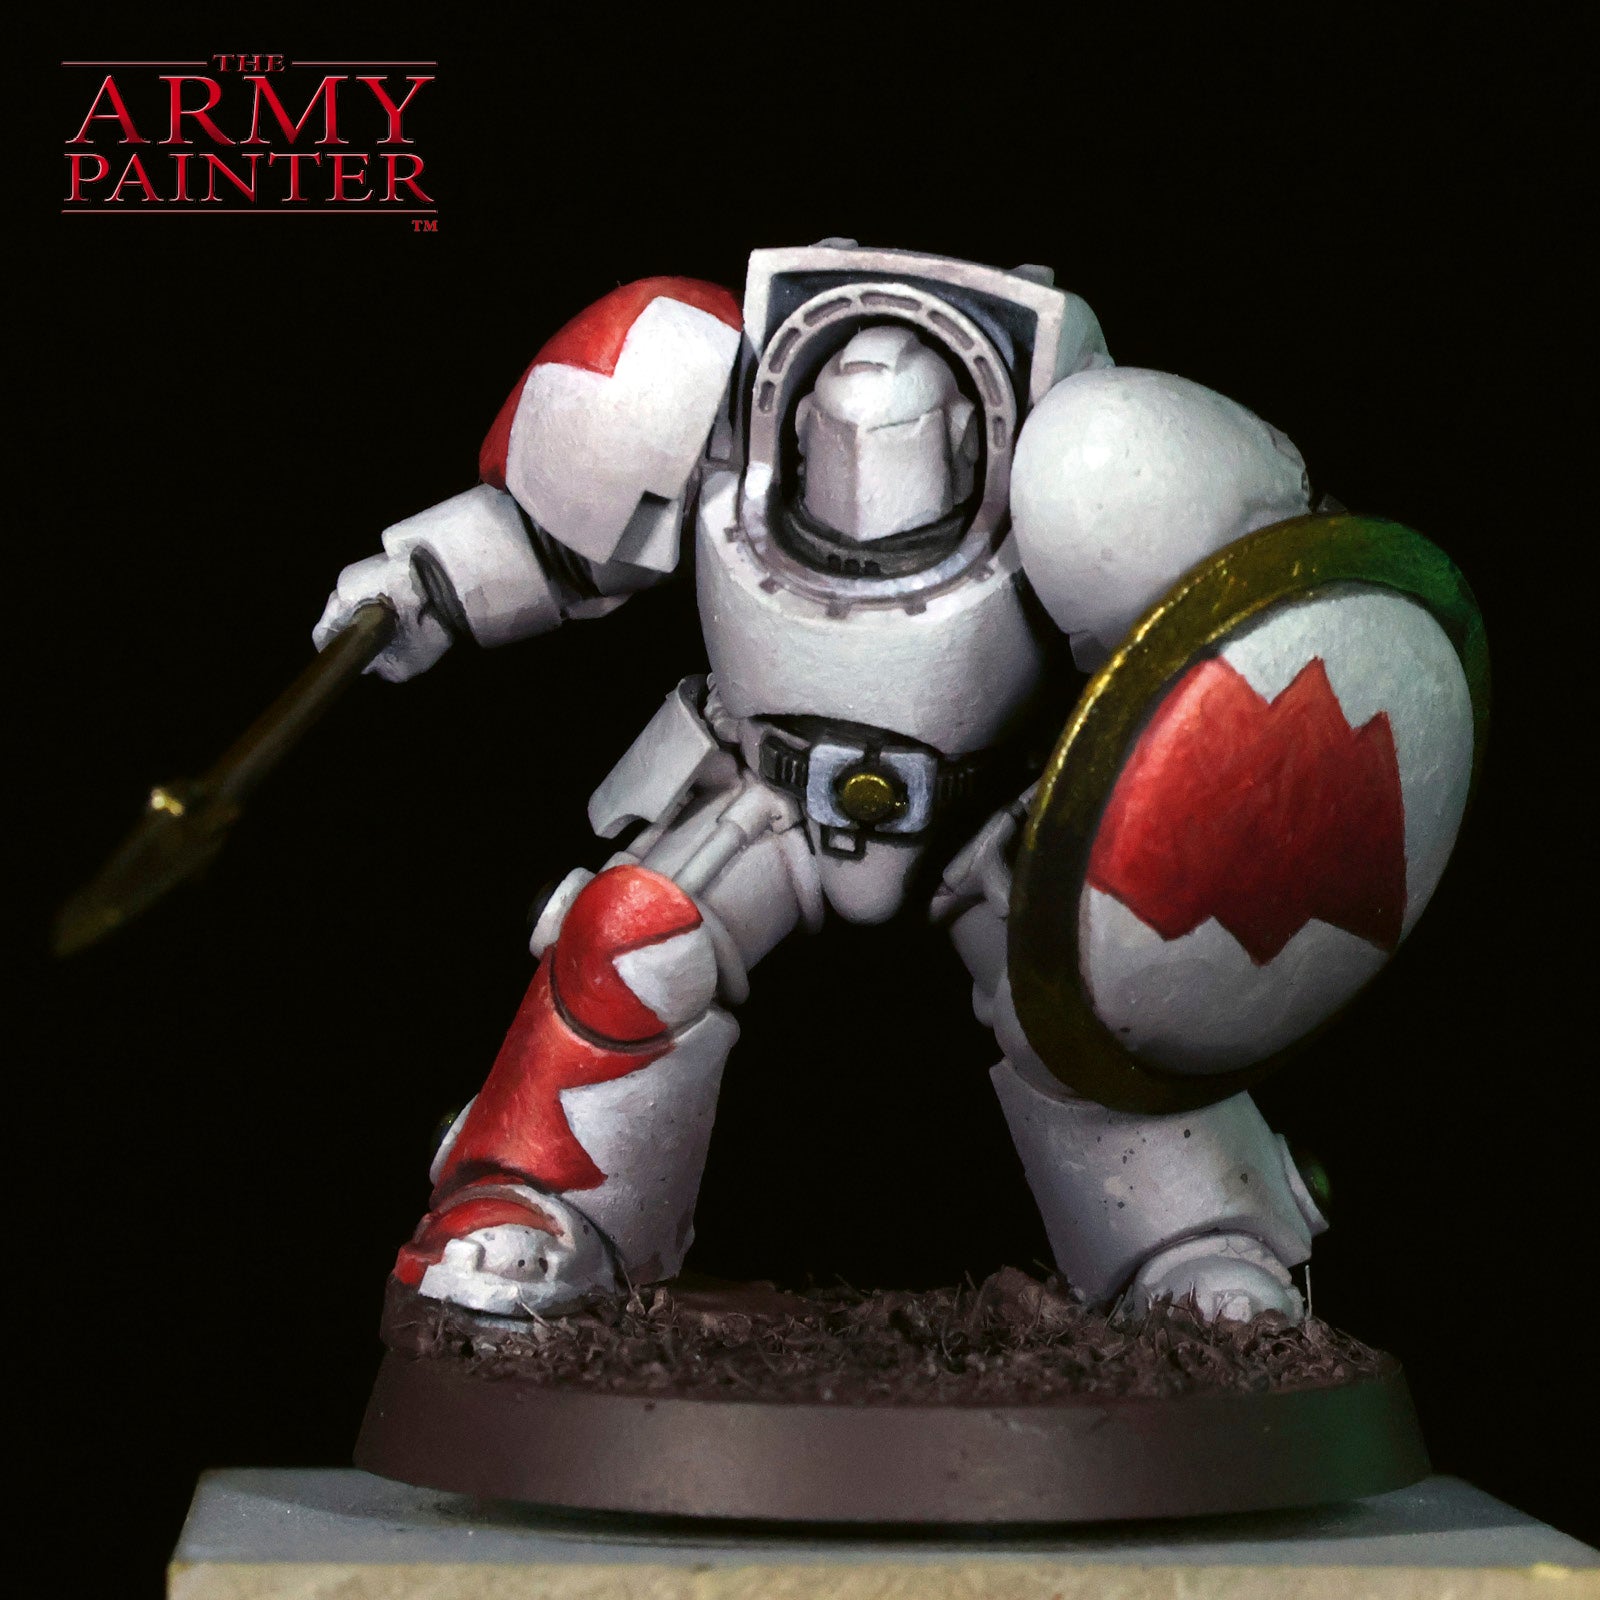
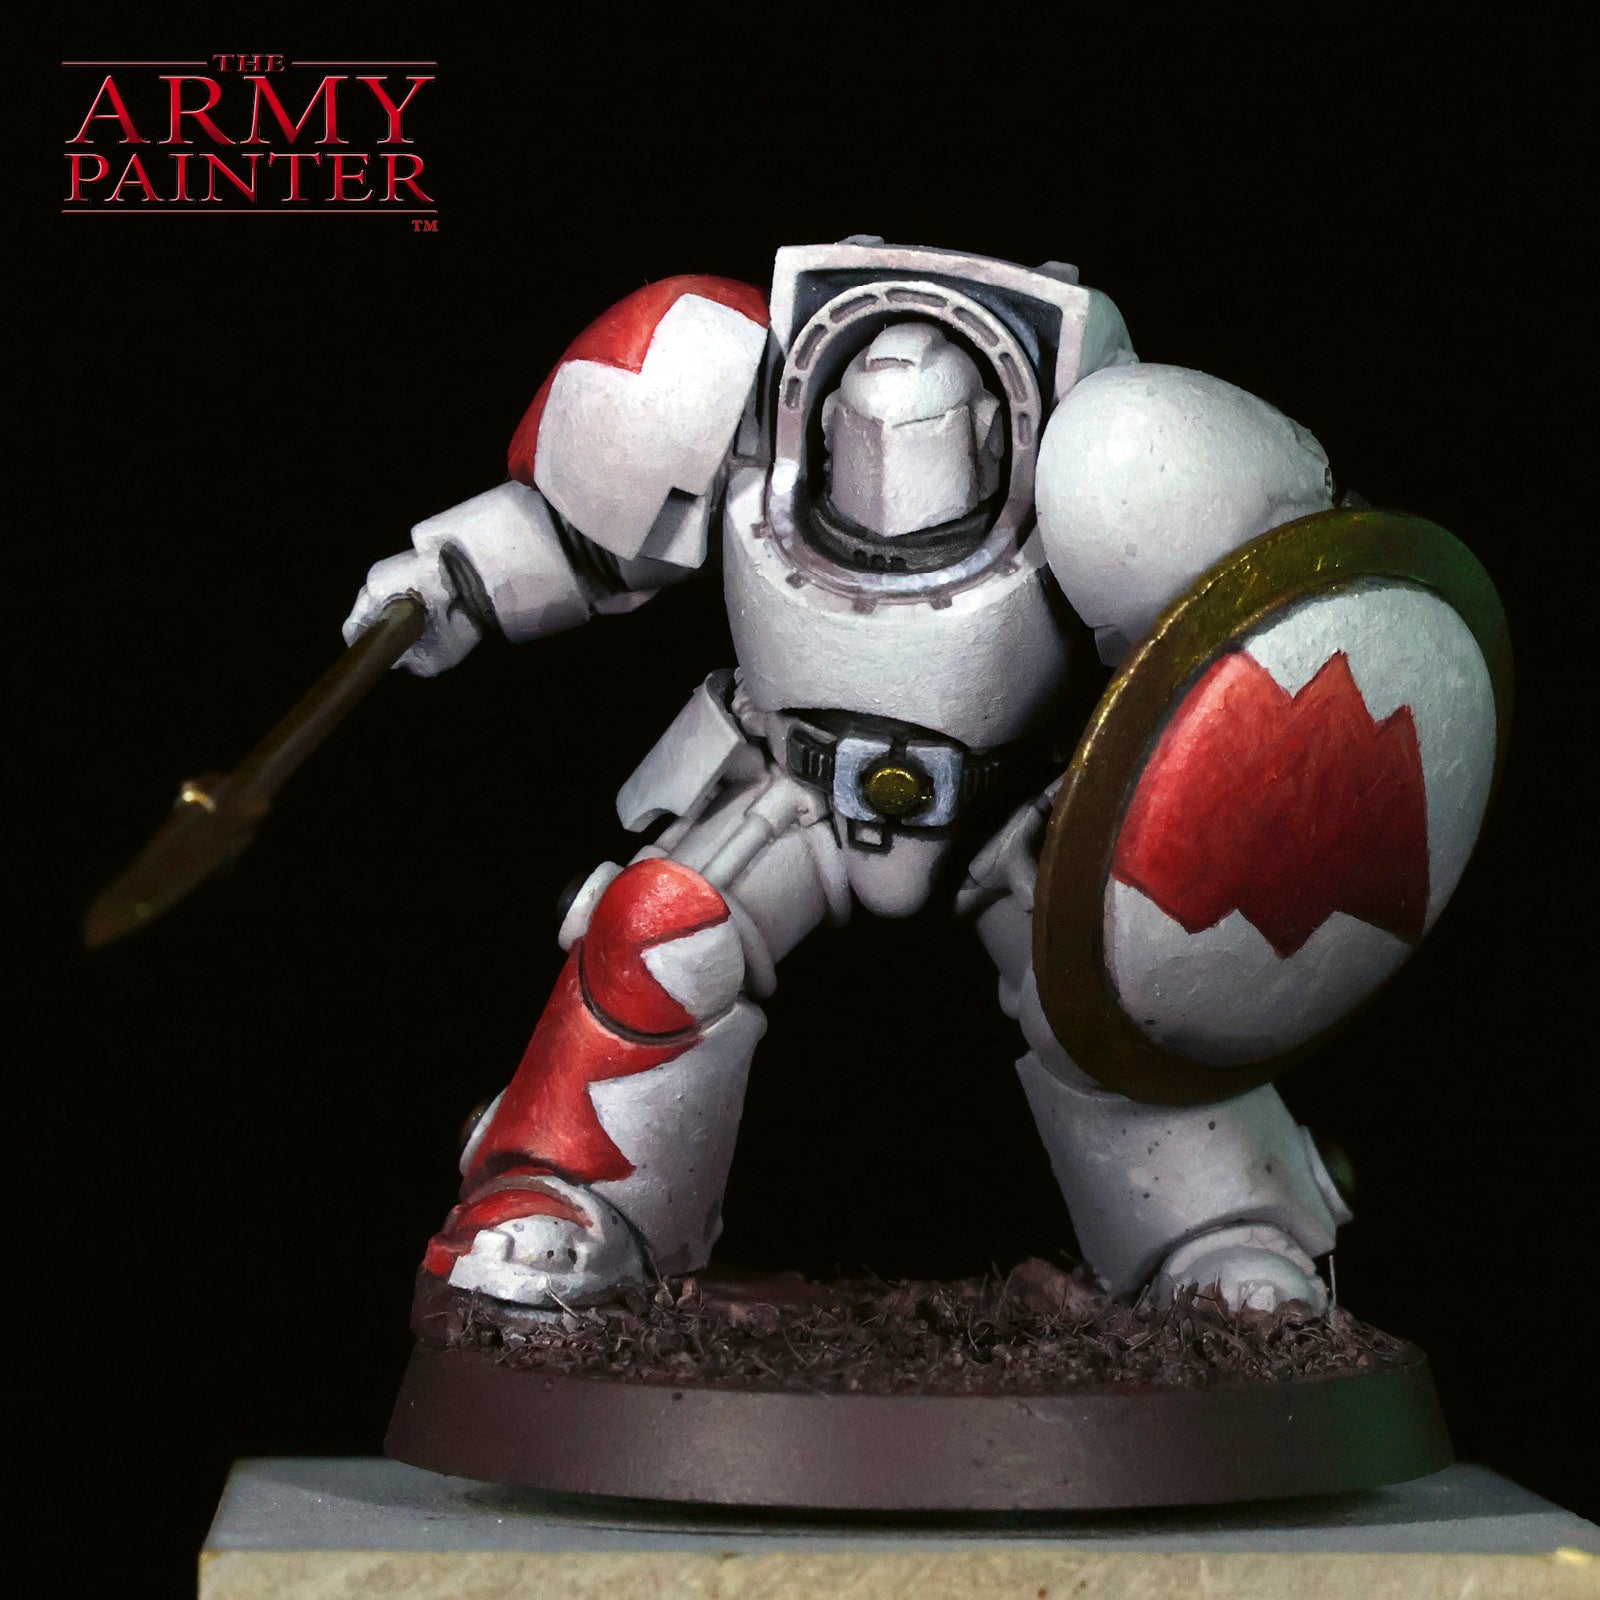
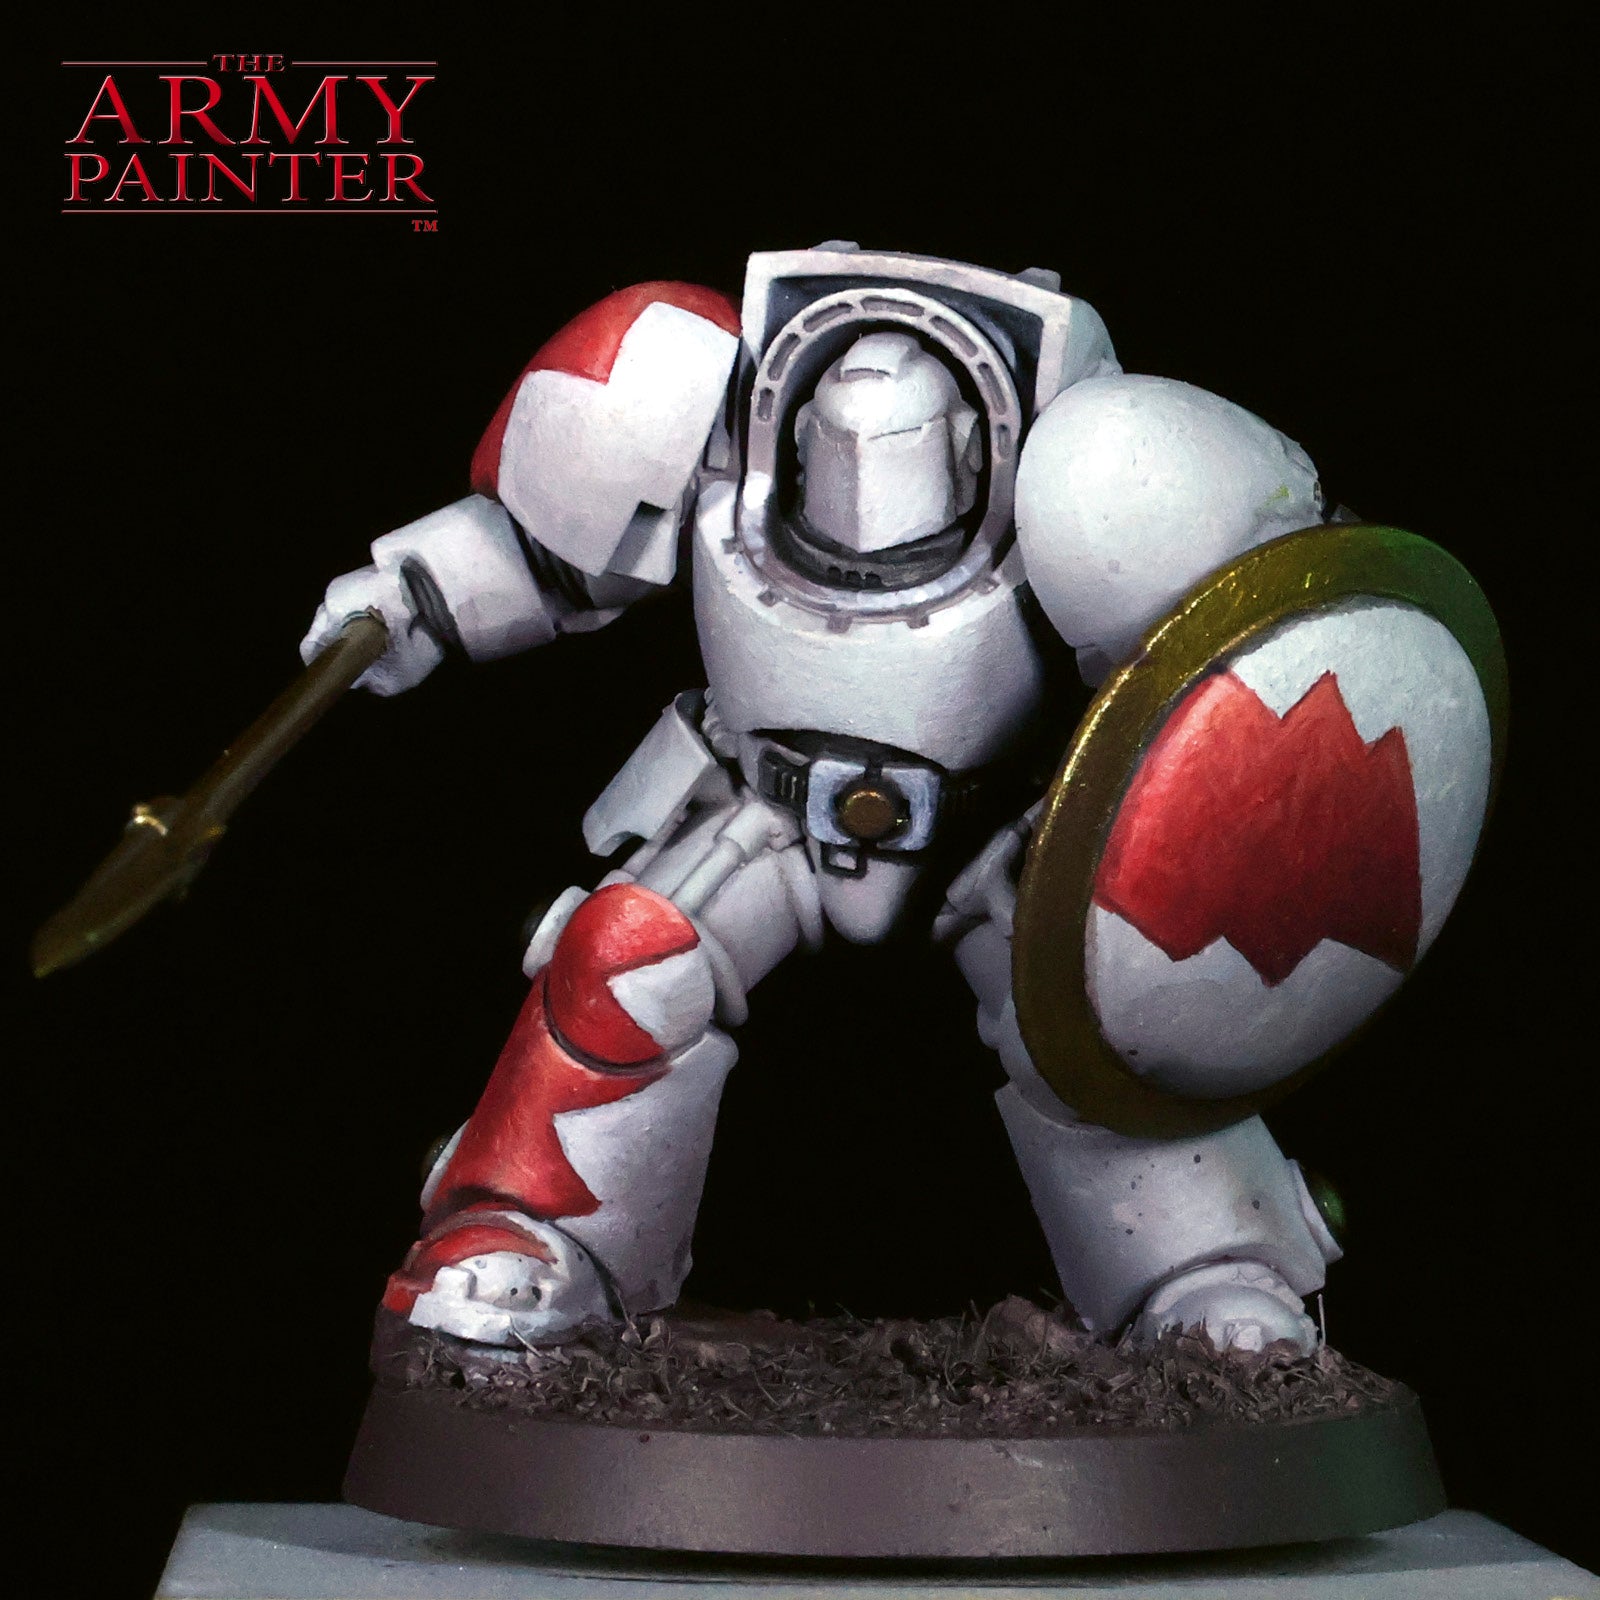
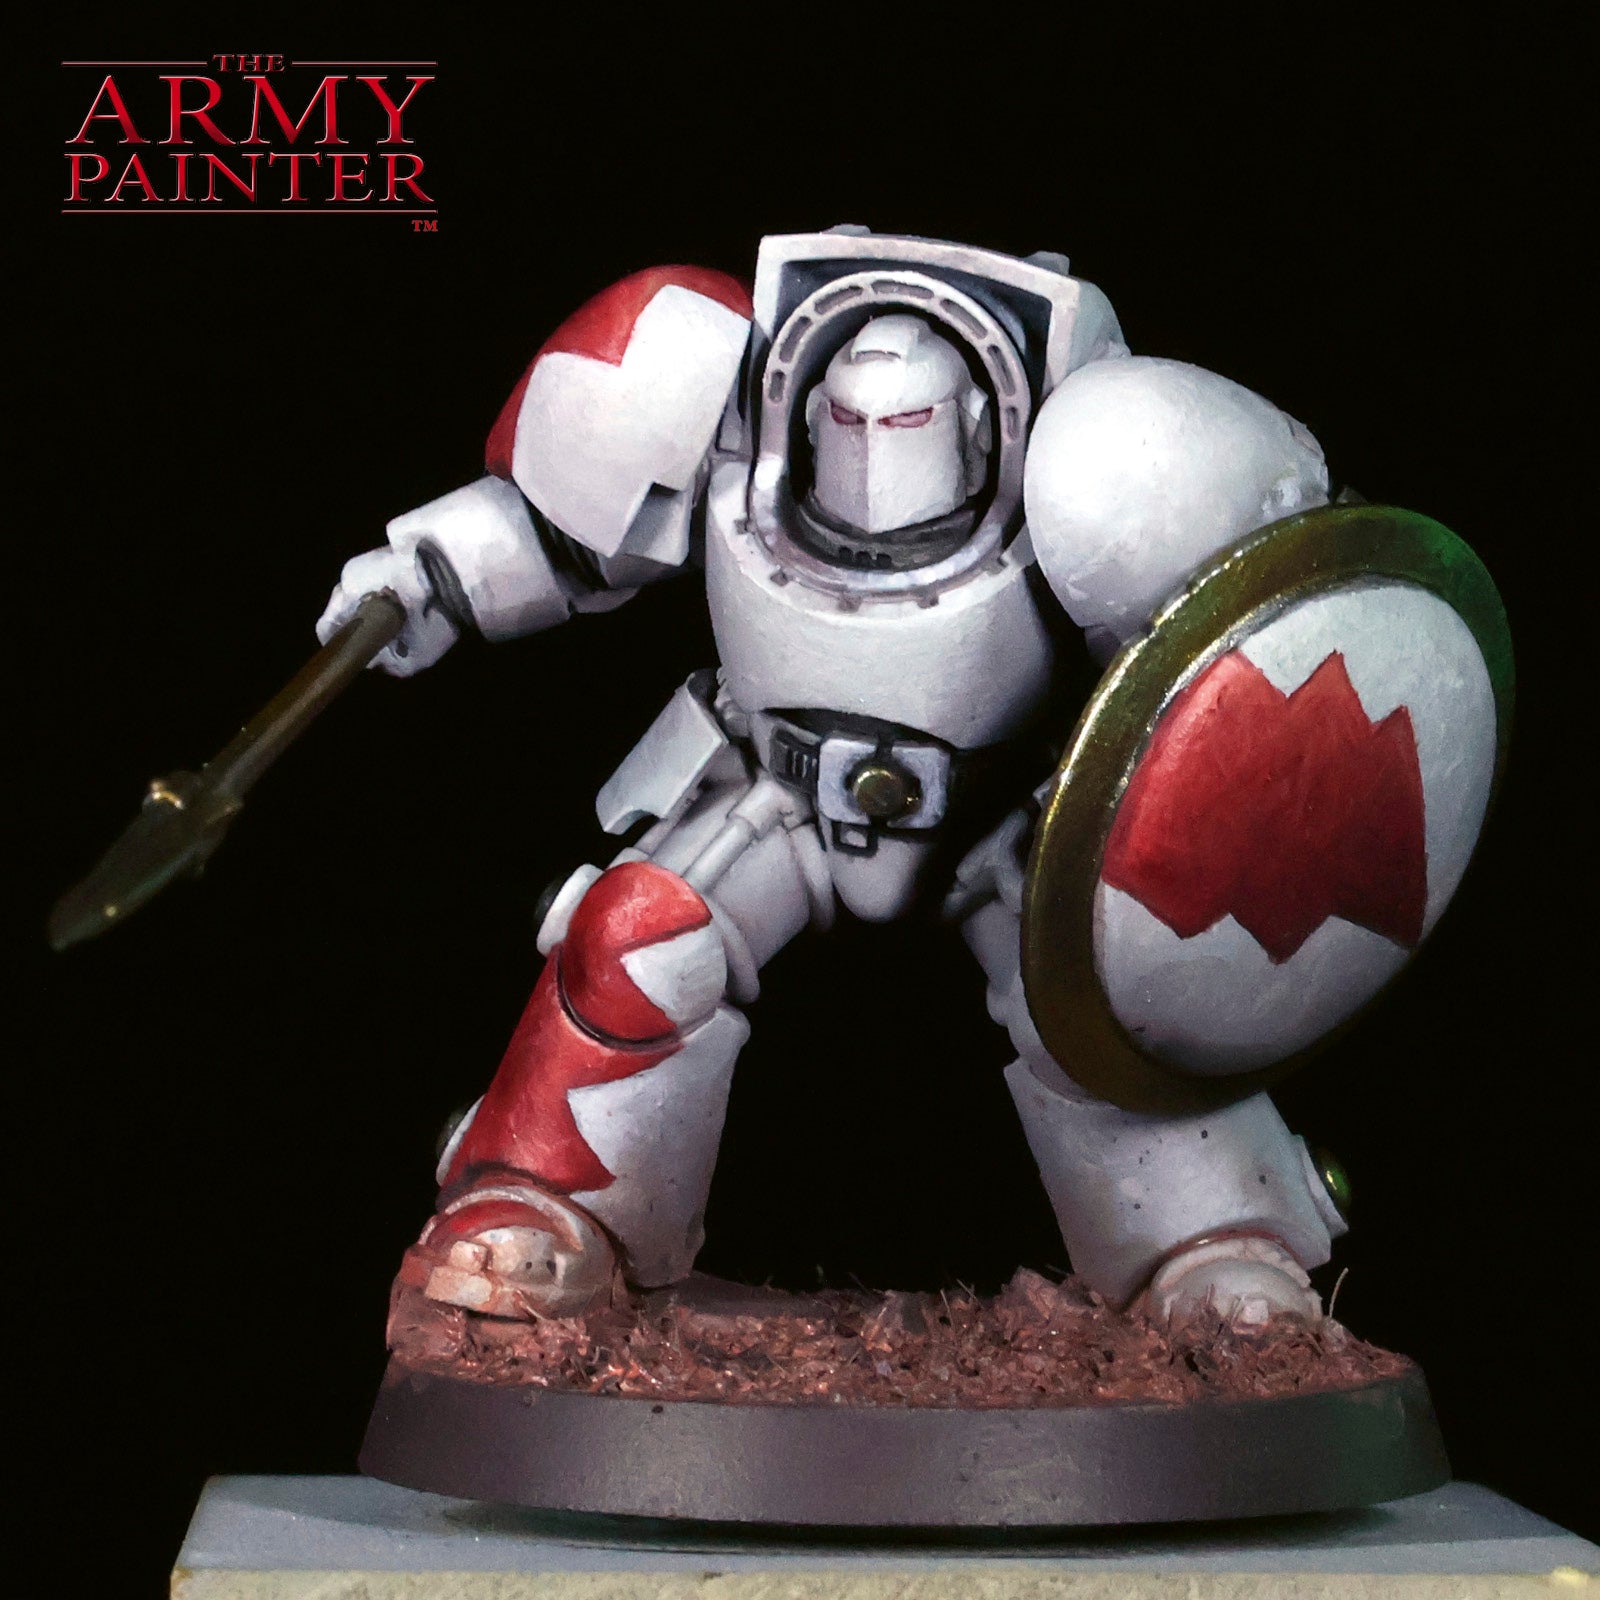
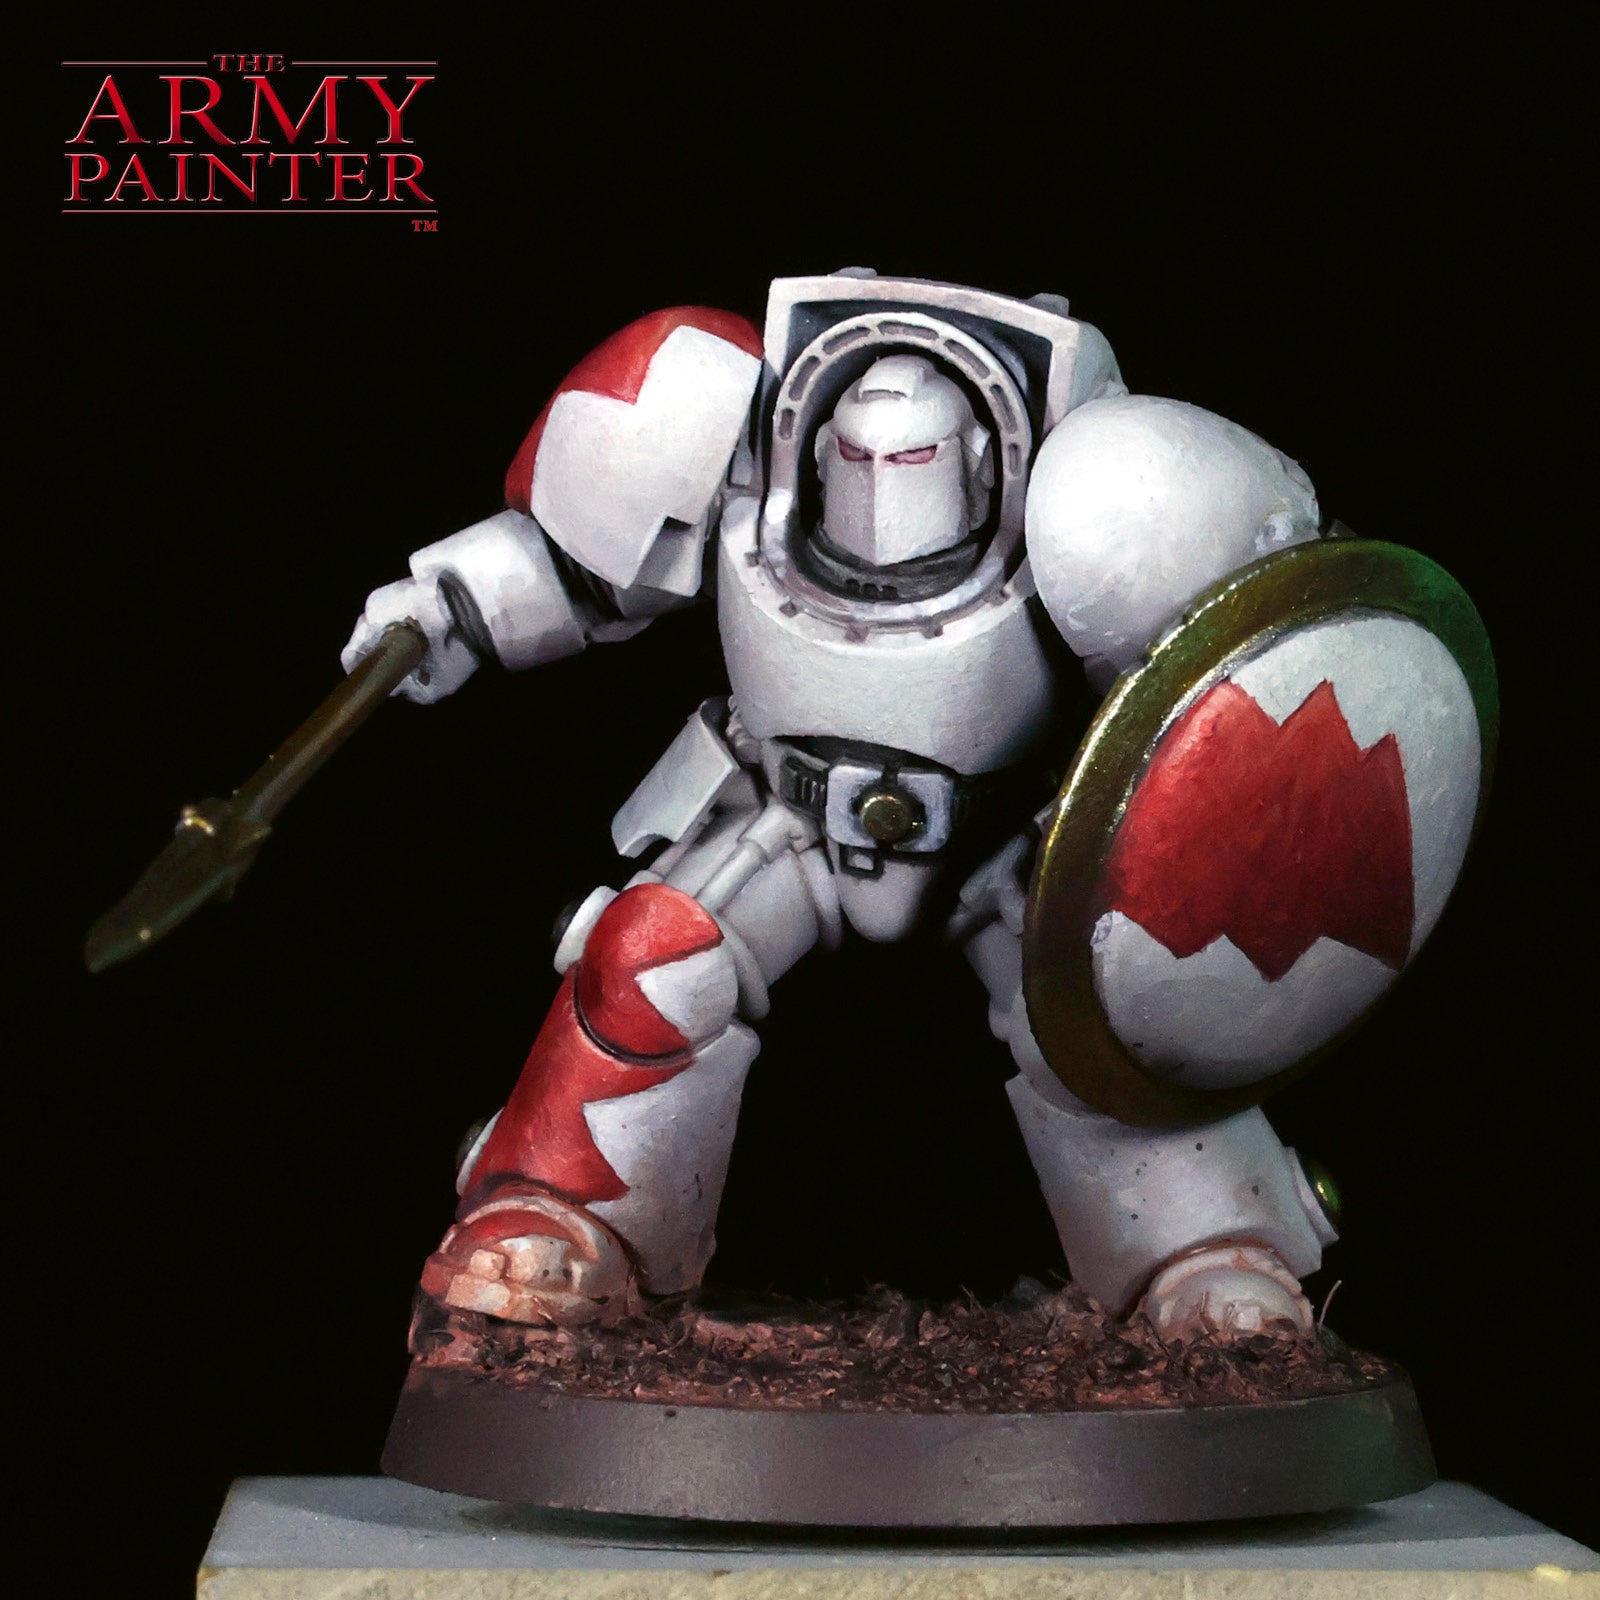
Striking fast and true, the White Scars are racing onto the scene of this edition of the Academy. As the greatest connoisseurs of everything fast in Games Workshop’s Warhammer 40,000 setting, they’ve discovered what the Orks already knew:the red ones go fastest. They just approach it a little more tastefully, with some stylish lightning bolts and jags displayed on their otherwise stark white armour. This distinctive colour scheme is instantly recognisable amongst the warriors of the Adeptus Astartes, but can prove a little intimidating to paint, especially for newer hobbyists.
Enter Adam “The Tactical Painter” Abramowicz, armed with the latest creation from our painting dungeons (otherwise known as product development)—the White Scars Paint Bundle!
These eight carefully chosen paints were selected to represent the most common and important colours within the heraldry of the sons of the Khan. But where is the white, you may be asking? With these paint bundles, we assume you likely already have some of the more basic paint colours used across most colour schemes, such as Matt White, Matt Black, and Gun Metal (or the silver metallic of your choice). By excluding those likely repeating colours, we’ve ensured you get the most bang for your buck, especially when purchasing several of our various paint bundles.
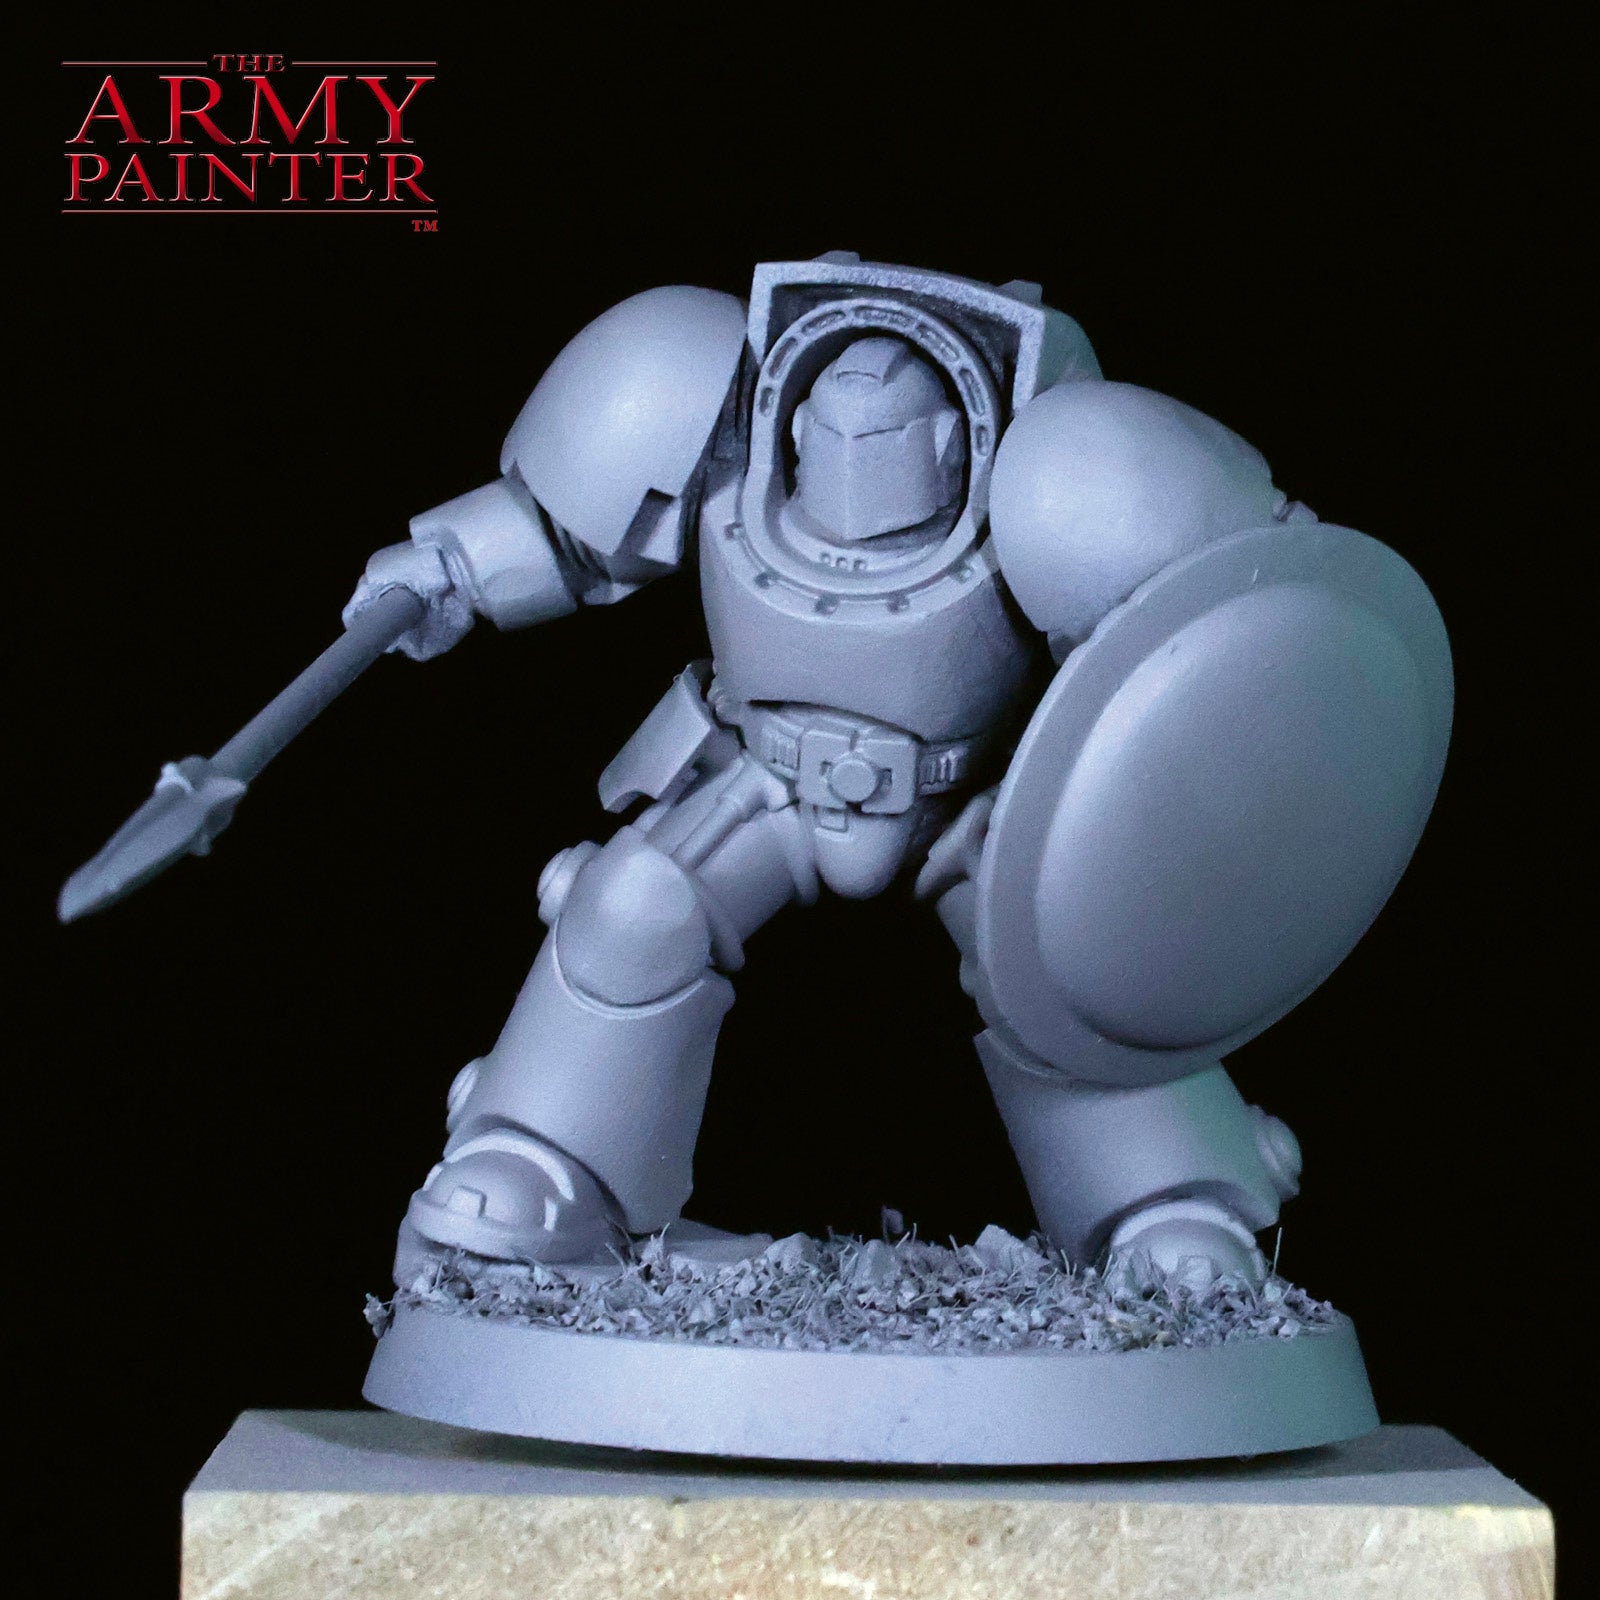
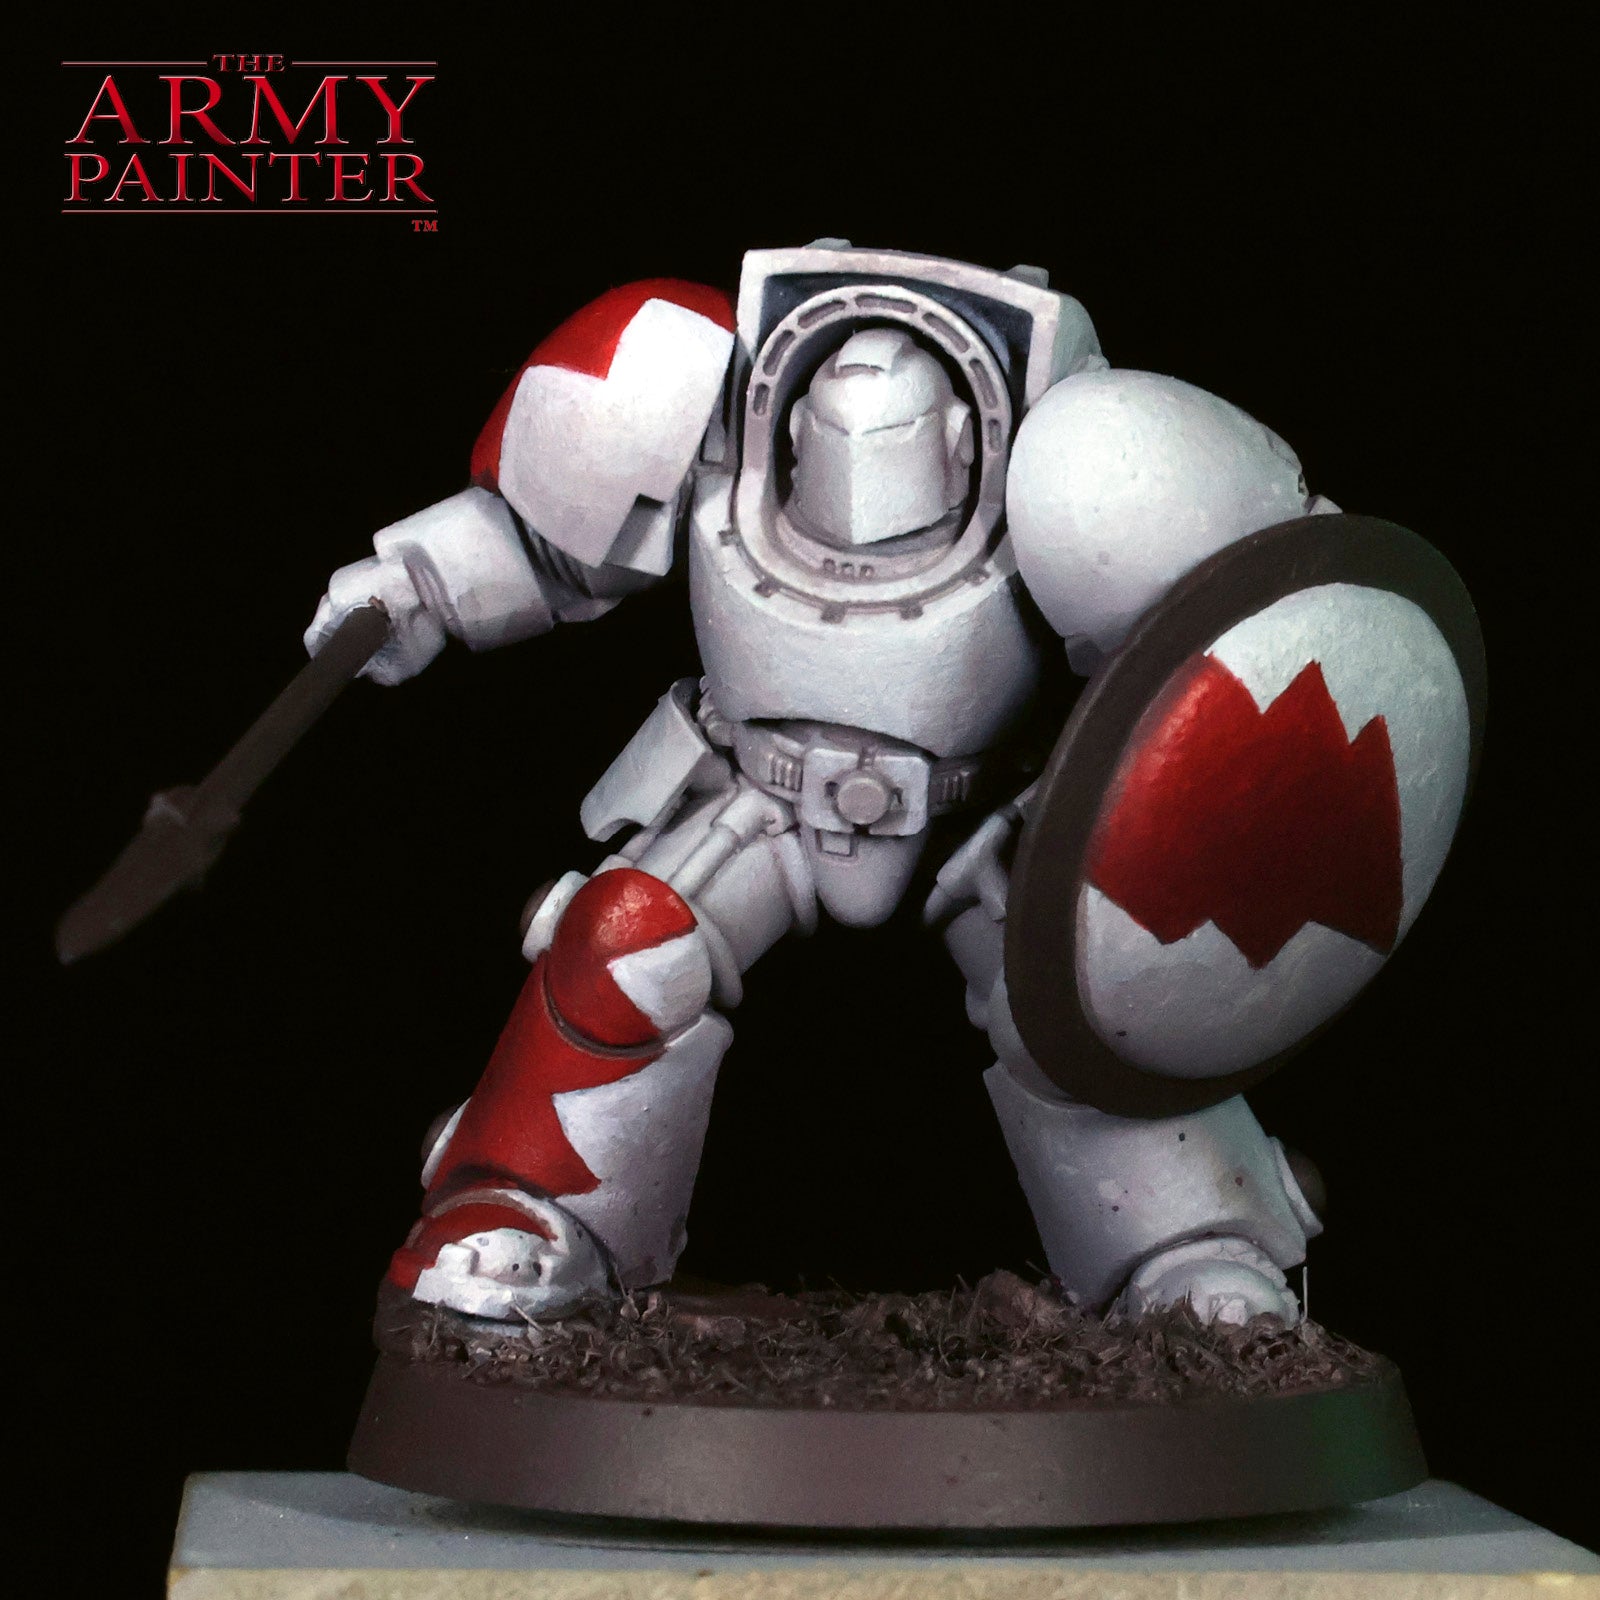
Adam has taken this bundle, along with a few extra colours, and brought this mighty Terminator of the 1st Company to life, documenting the process each step of the way.
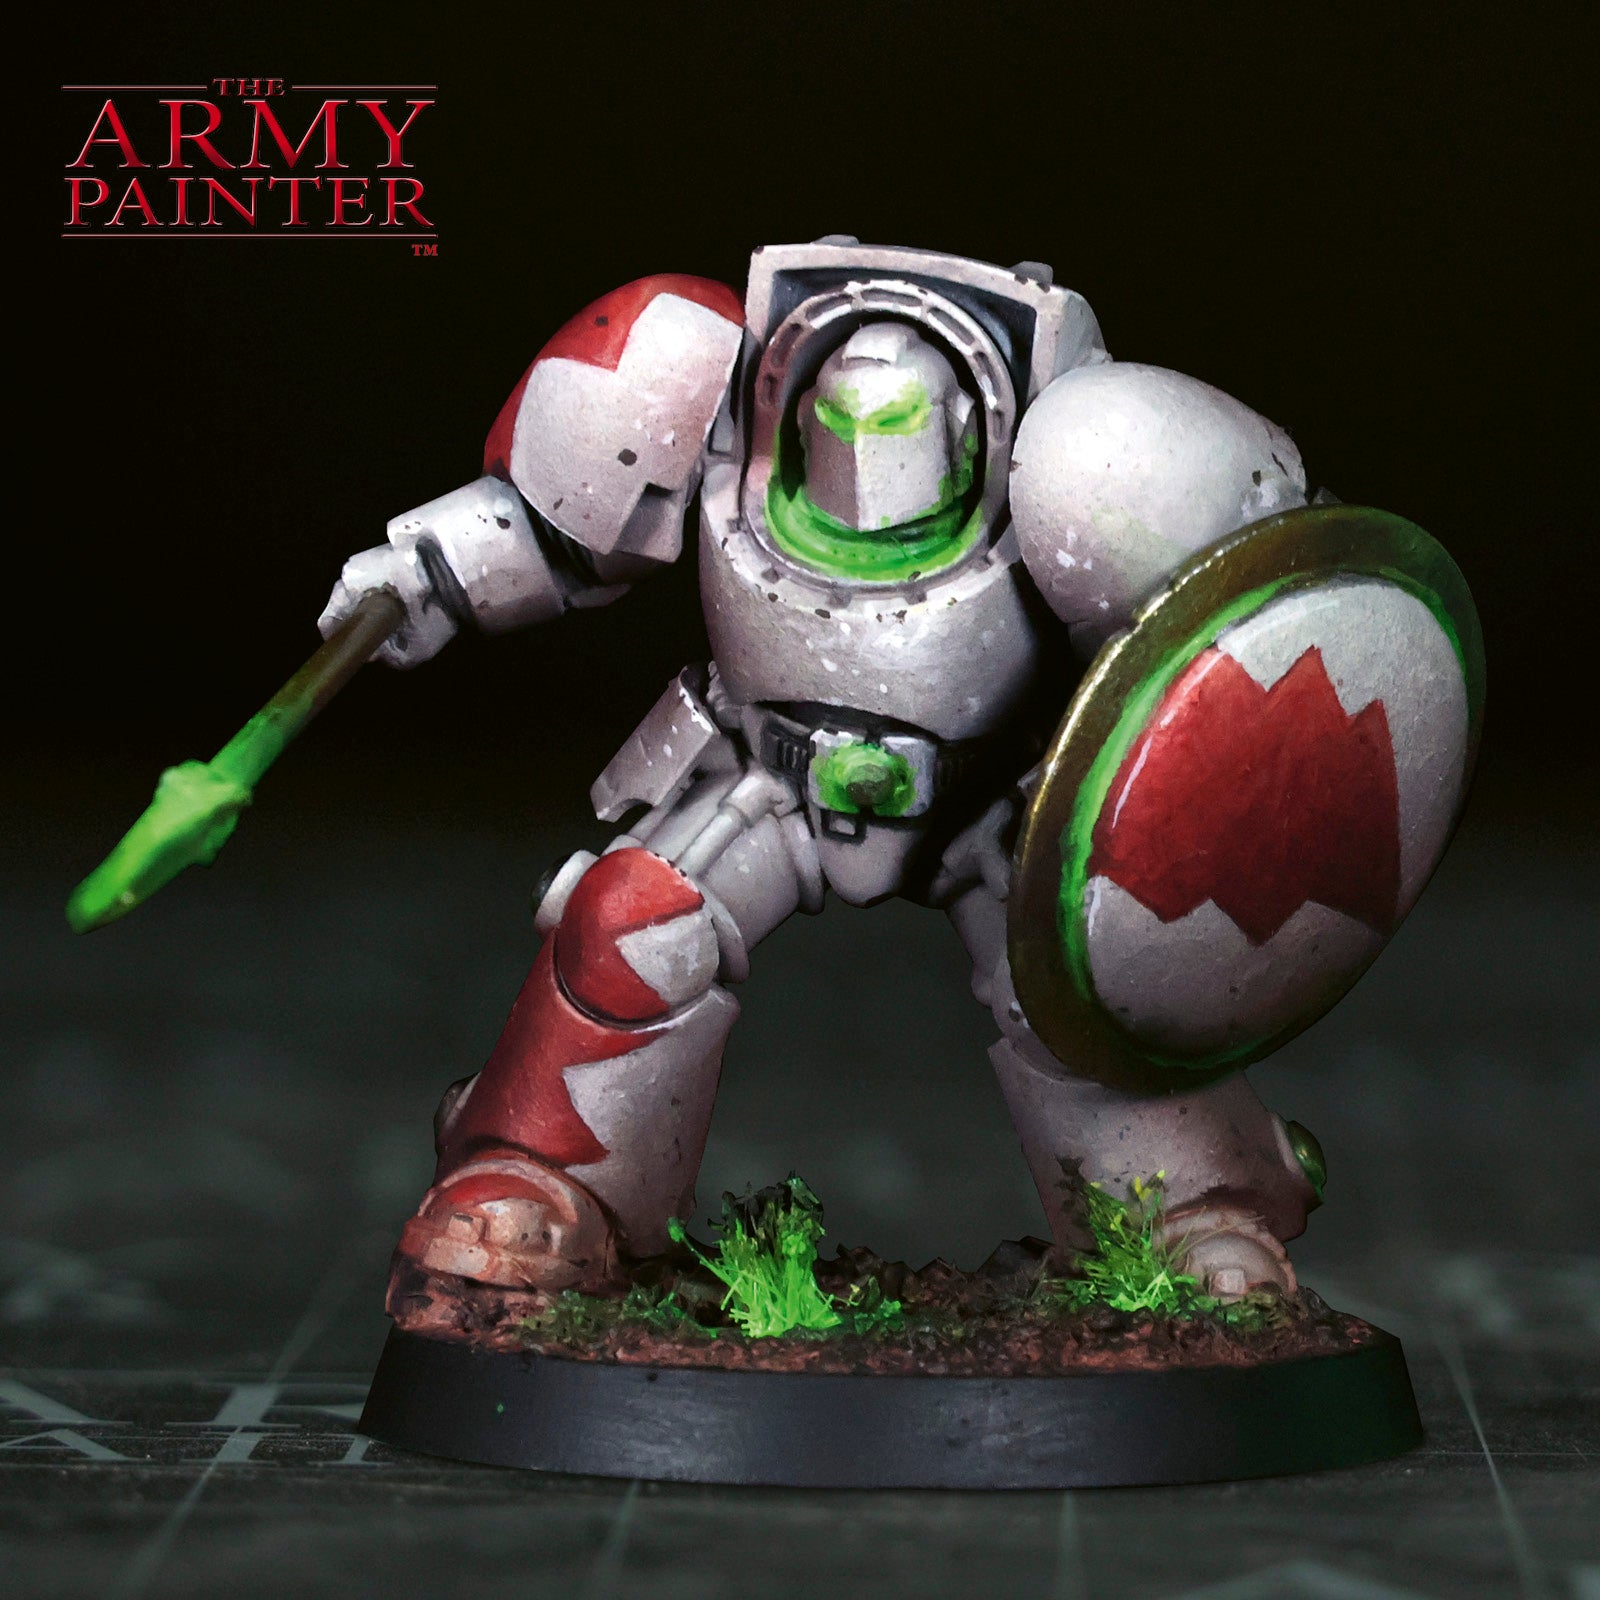
Adam: I’ve been playing Warhammer—across its systems, editions, and evolutions—for most of my life, and I’ve painted more armies than I can reasonably count. Honestly? Probably more than anyone I know. So, what are the odds that I’d never actually painted a Terminator for myself? Pretty wild. I painted some Deathwing Knights years ago for a friend, but this is my first Terminator done purely for me—and my first proper dive into White Scars livery. They’ve always been my favourite faction: the lore, the speed, the playstyle. The new sculpts are gorgeous, though I couldn’t help myself—I added a custom spear and shield Alan printed for me, a 30k Blood Angels helmet, and leaned on some sculpting and filing lessons I picked up from Valbjorn. The goal here wasn’t perfection. It was restraint. I wanted a clean canvas to push freehand using a limited palette. When you own every color under the sun, choosing not to use them is a skill. These bundles force you to think first—and that’s where real growth happens. If you’re painting white or red armor, this one’s for you. And if you want those simple glow effects at the end, stay tuned!
Let's get painting!

The White Armour
Step 1
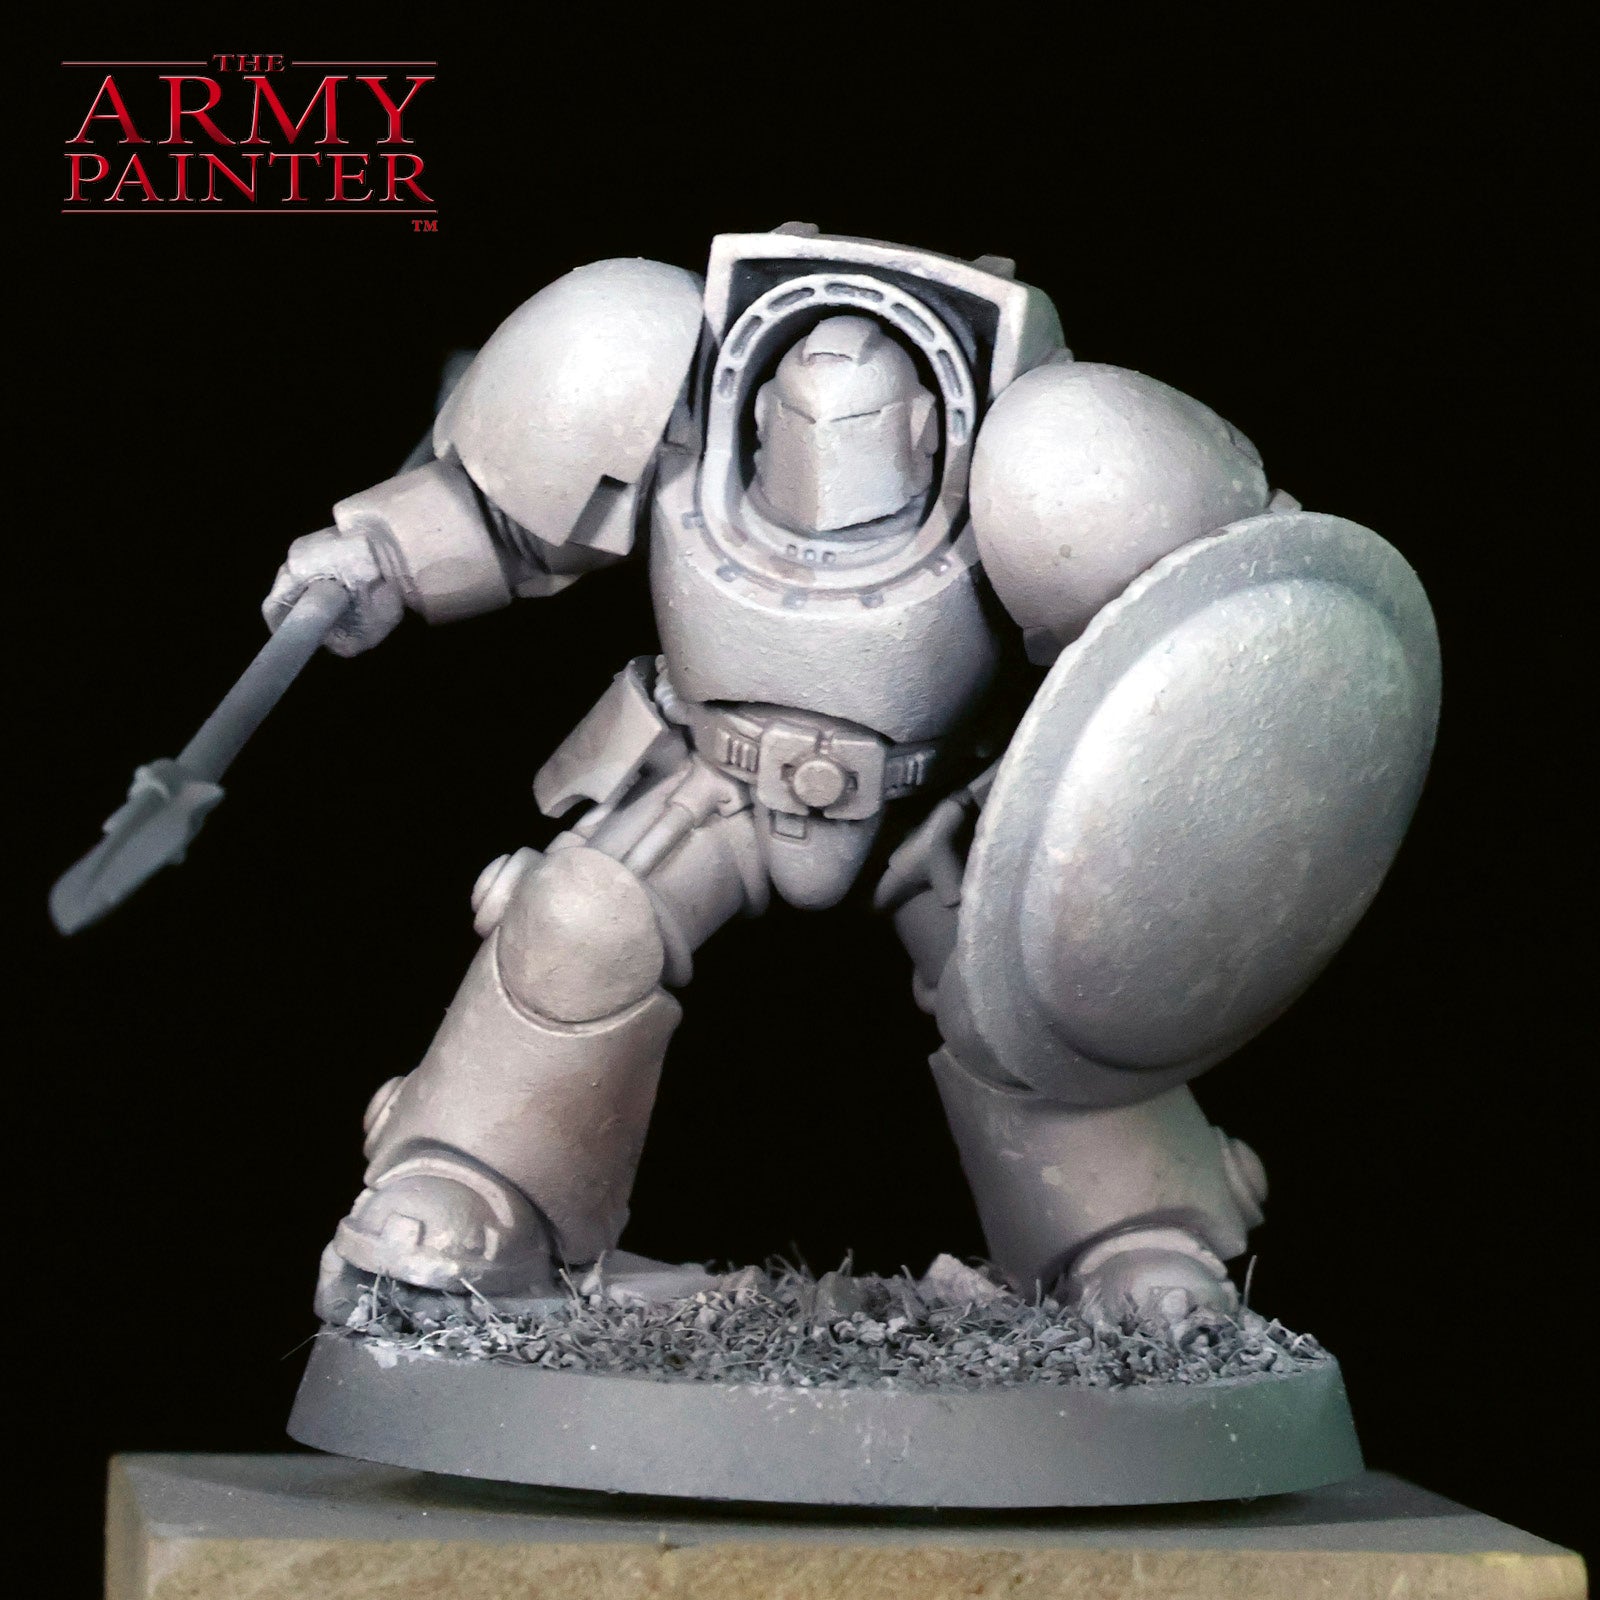
It was a bit humid, so I opted to prime indoors with my Iwata Revolution airbrush and my trusty Matt Grey Air Primer. Lately, I've been using grey as my primer colour as I'm playing with new techniques and tricks, but when in doubt, our Colour Primers are the fastest way to paint an army, such as our Uniform Grey Colour Primer.
Step 2
I love inventing words, especially for techniques! I used our new Precision Chipping brush to apply a stipple, or chipple, of Warpaints Fanatic Brigade Grey. Optional: I like to work with rough sketching, then smooth out any transitions with the airbrush. This is totally optional, but it's fast and easy.
Step 3
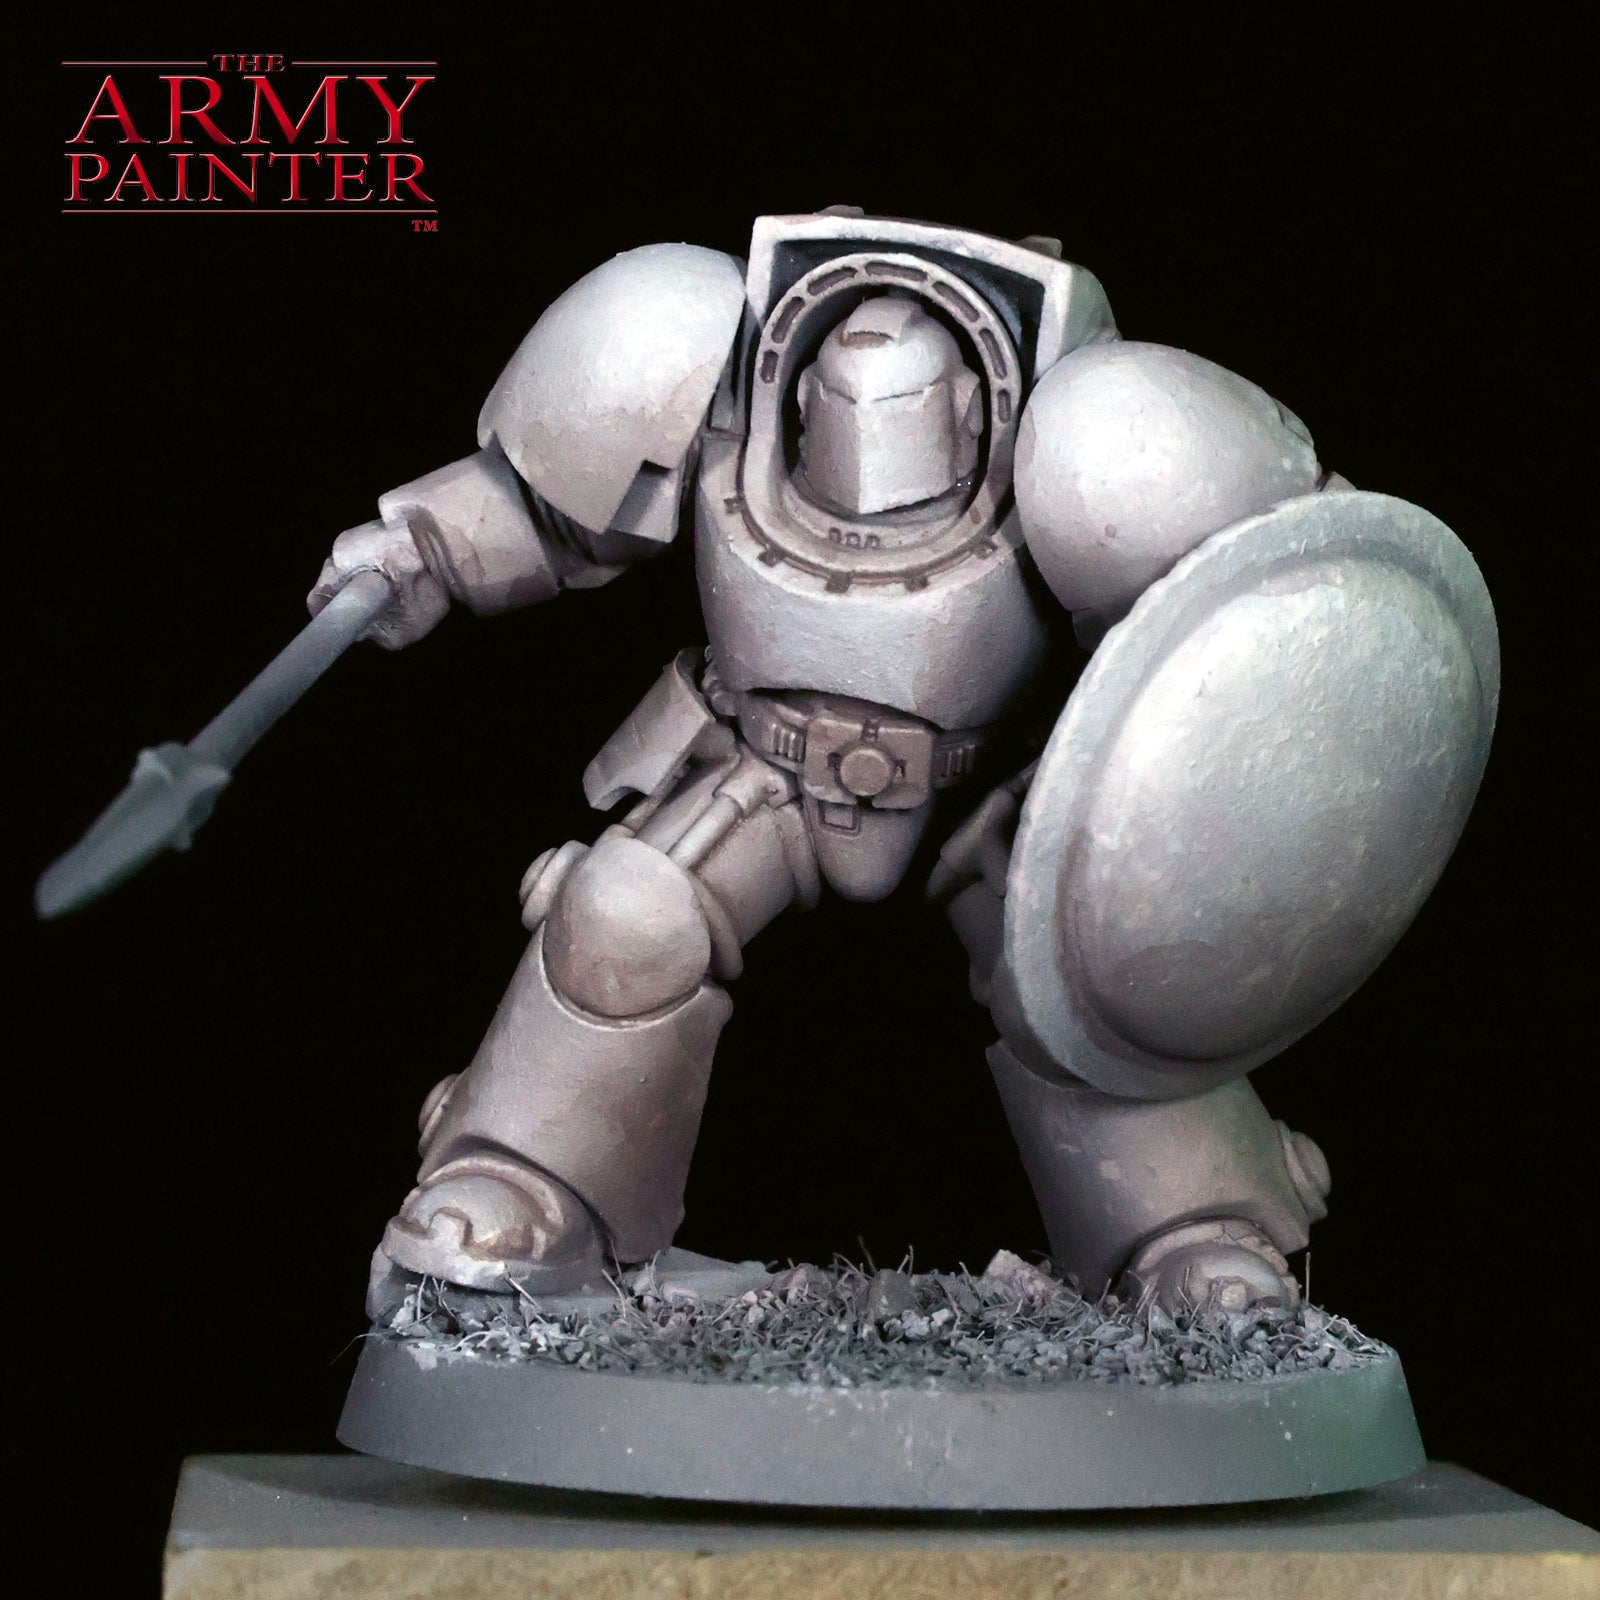
I refine the chipple effect, this time with Warpaints Fanatic Matt White. Optional: smooth the transition with an airbrush.
Step 4
Working with white and black is an exercise in mid-tones. I like to add some colour to my washes and glazing, and seeing how the bundle comes with Warpaints Fanatic Wash Dark Skin Shade, I found it perfect to blend with some of our base tone to glaze the shadows and apply a light wash to the mini.
Step 5
I intensify the shadows by adding some John Blanche Masterclass Banshee Brown to the previous mixture and focus this in the deepest shadow areas and recesses.
Step 6
Naturally, it's time to reestablish some of the volumes and details with Warpaints Fanatic Brigade Grey. You can refine this even further with Warpaints Fanatic Matt White if you'd like.
The Red Livery
Step 1
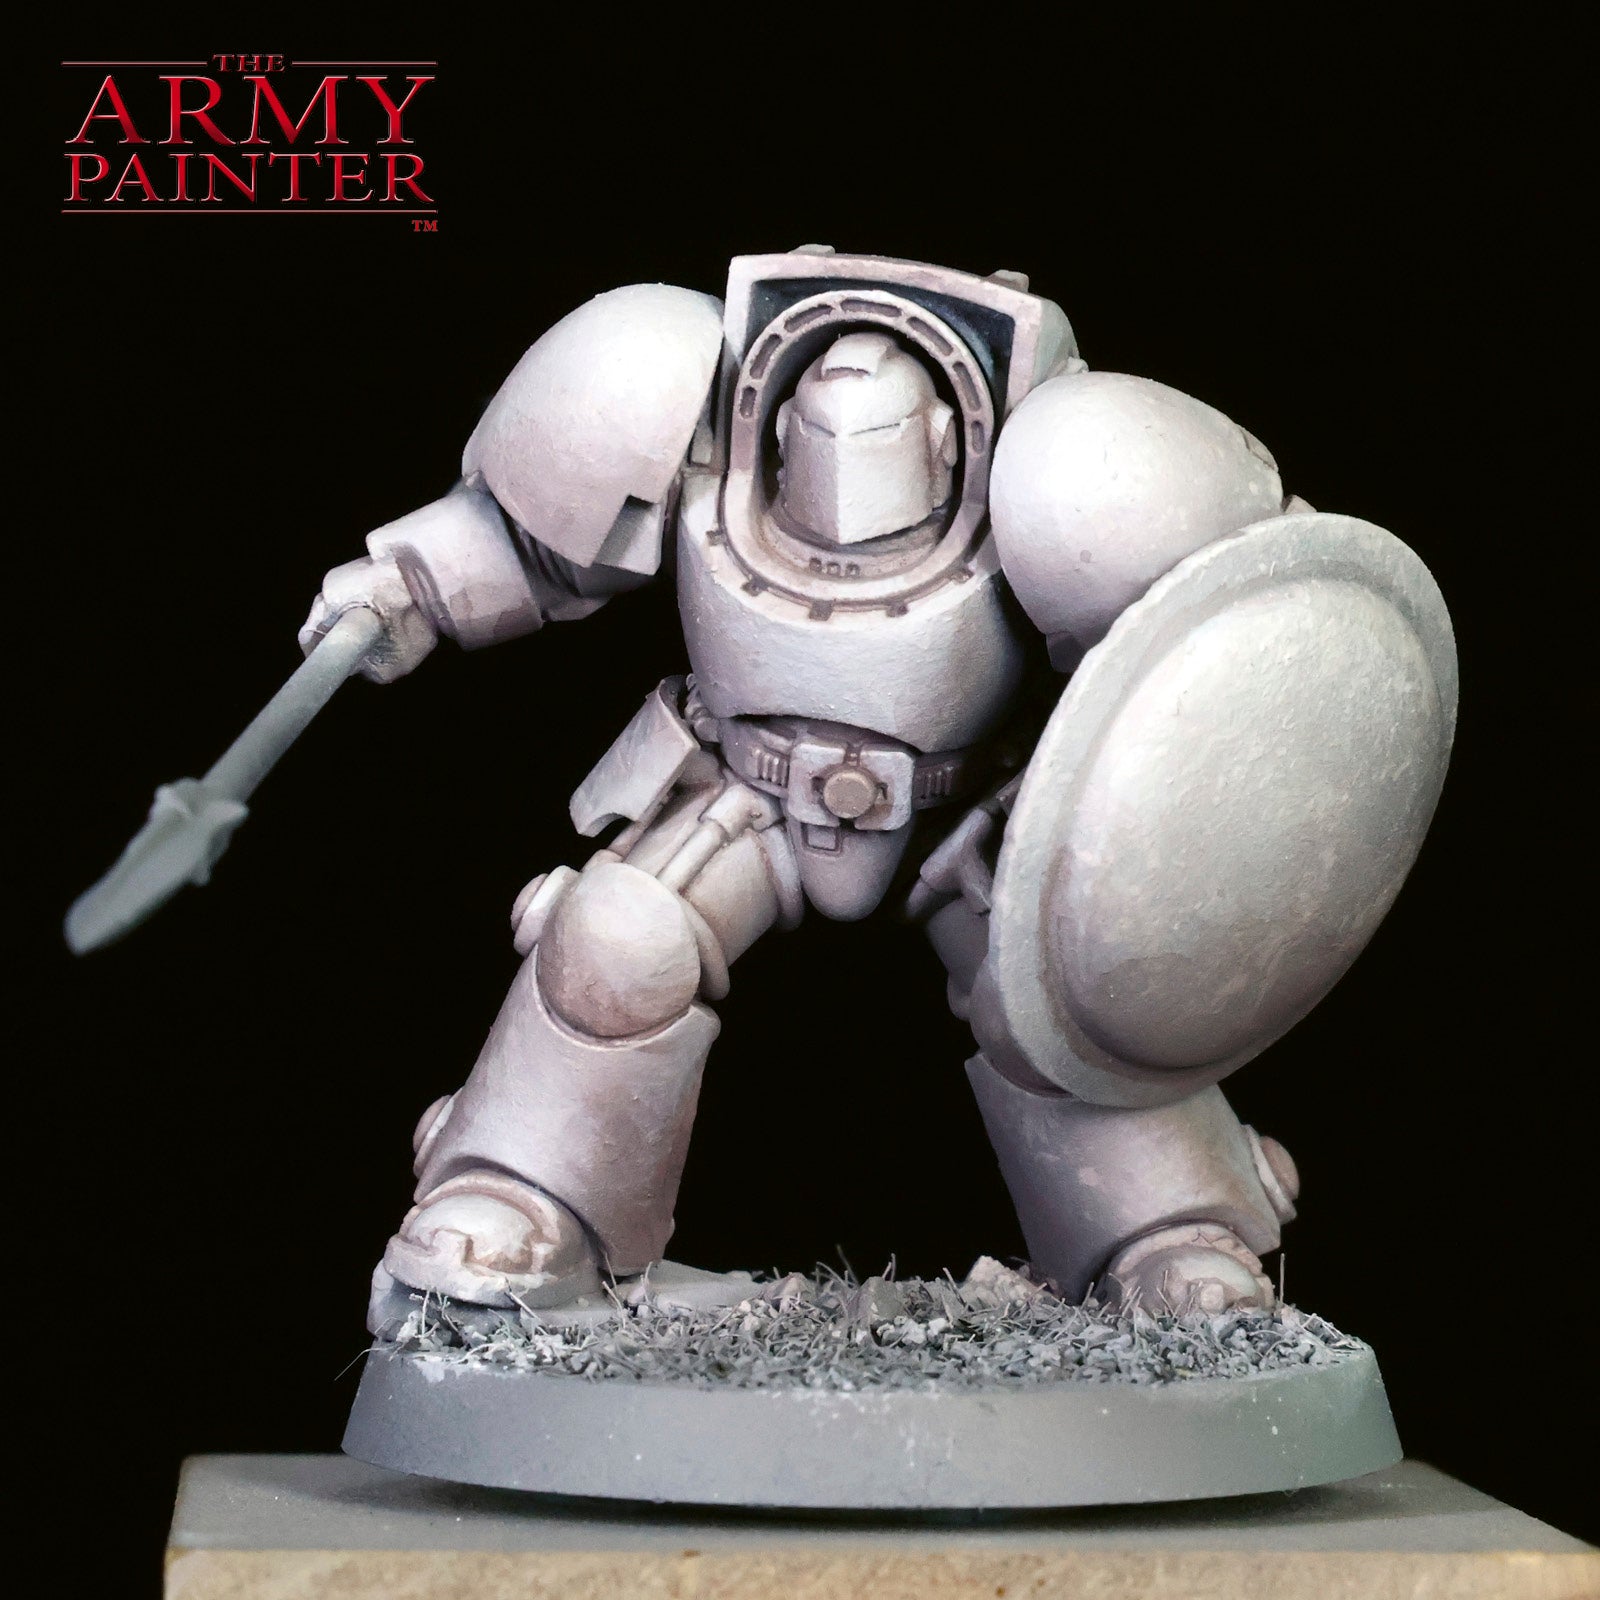
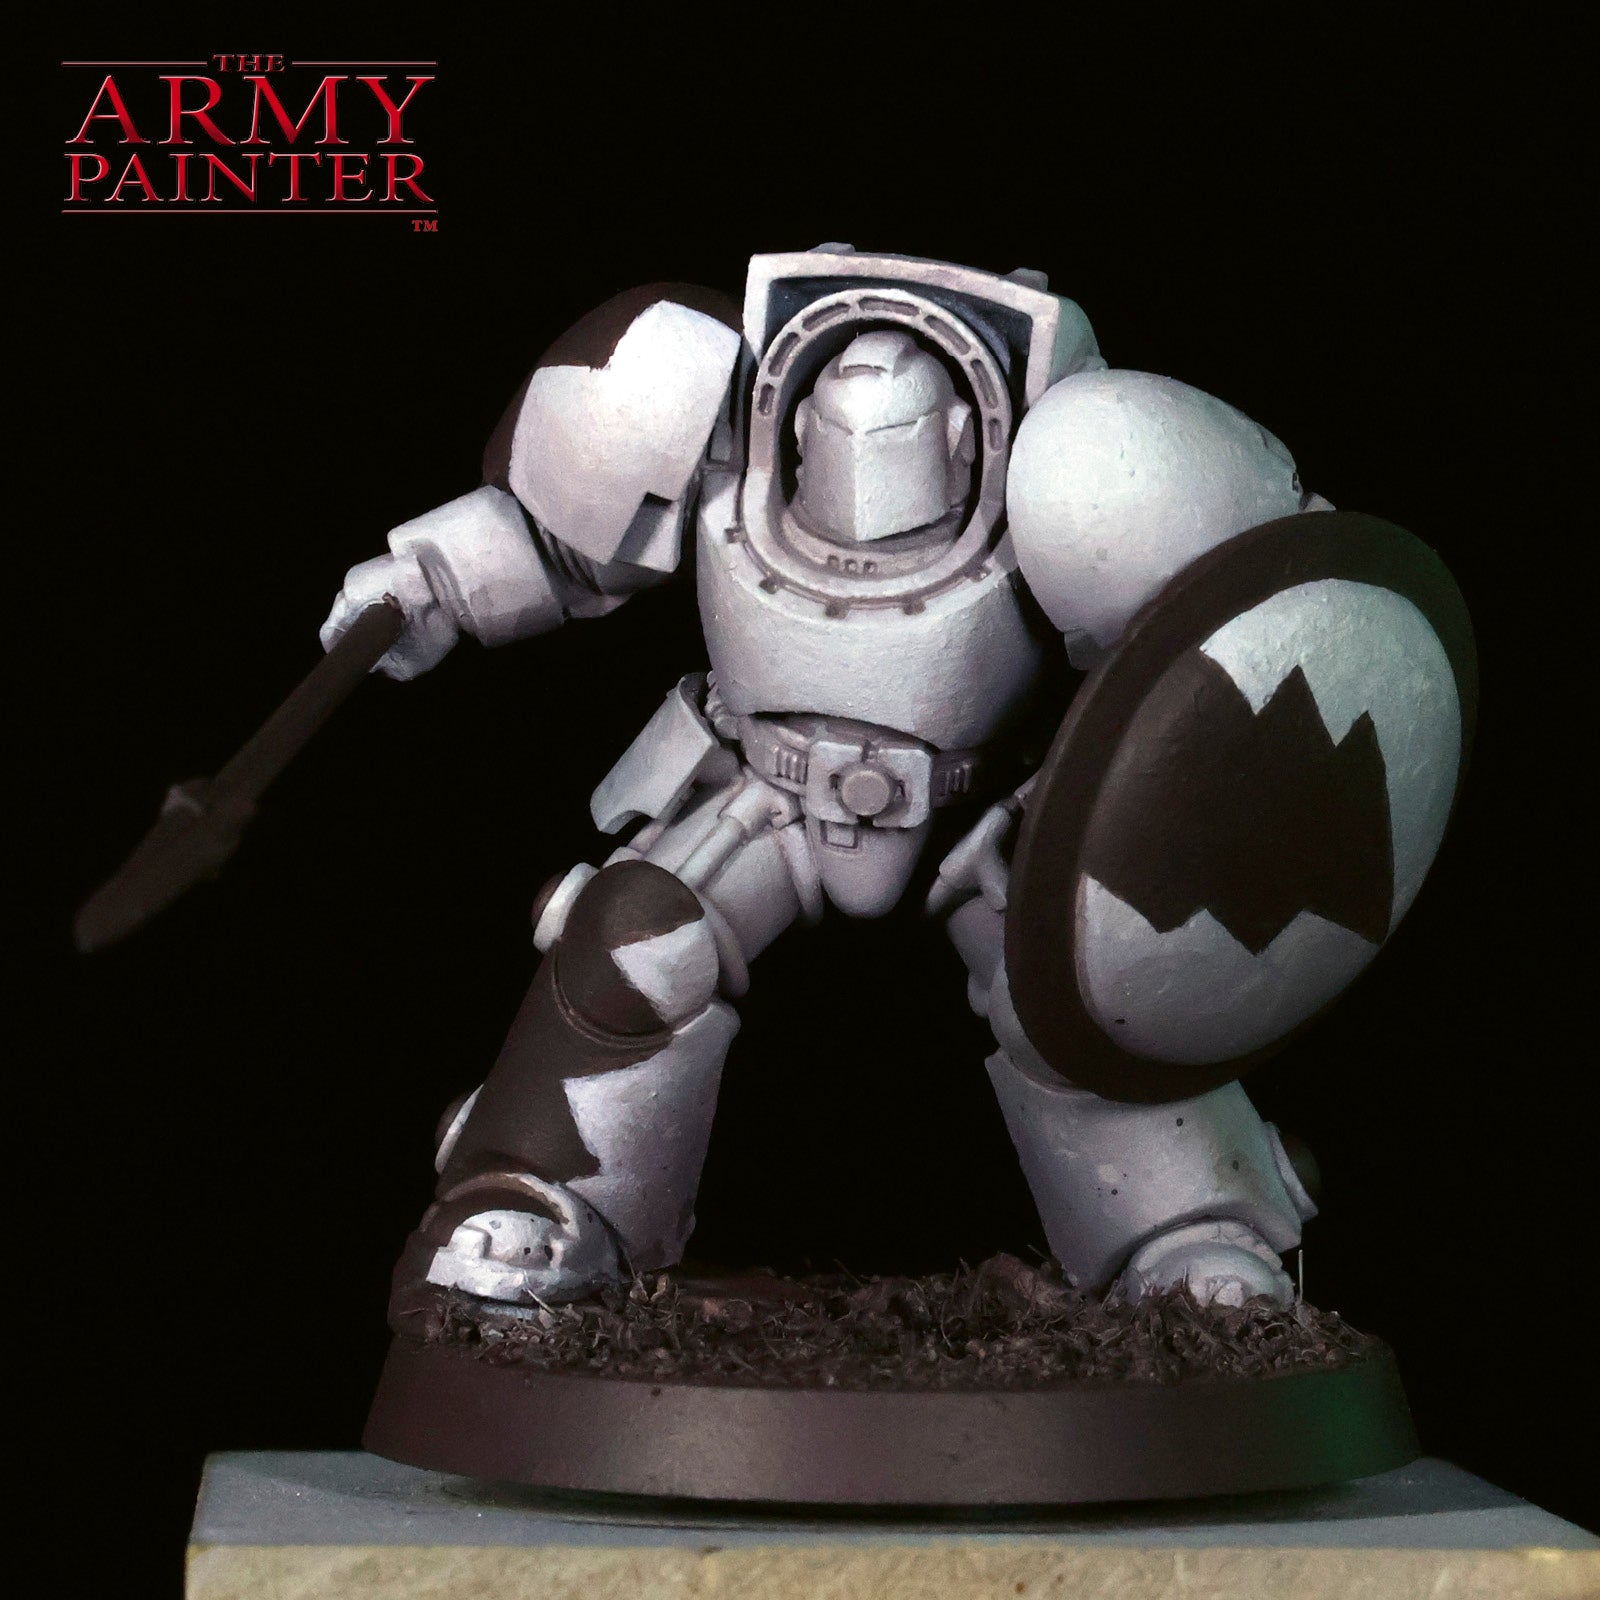
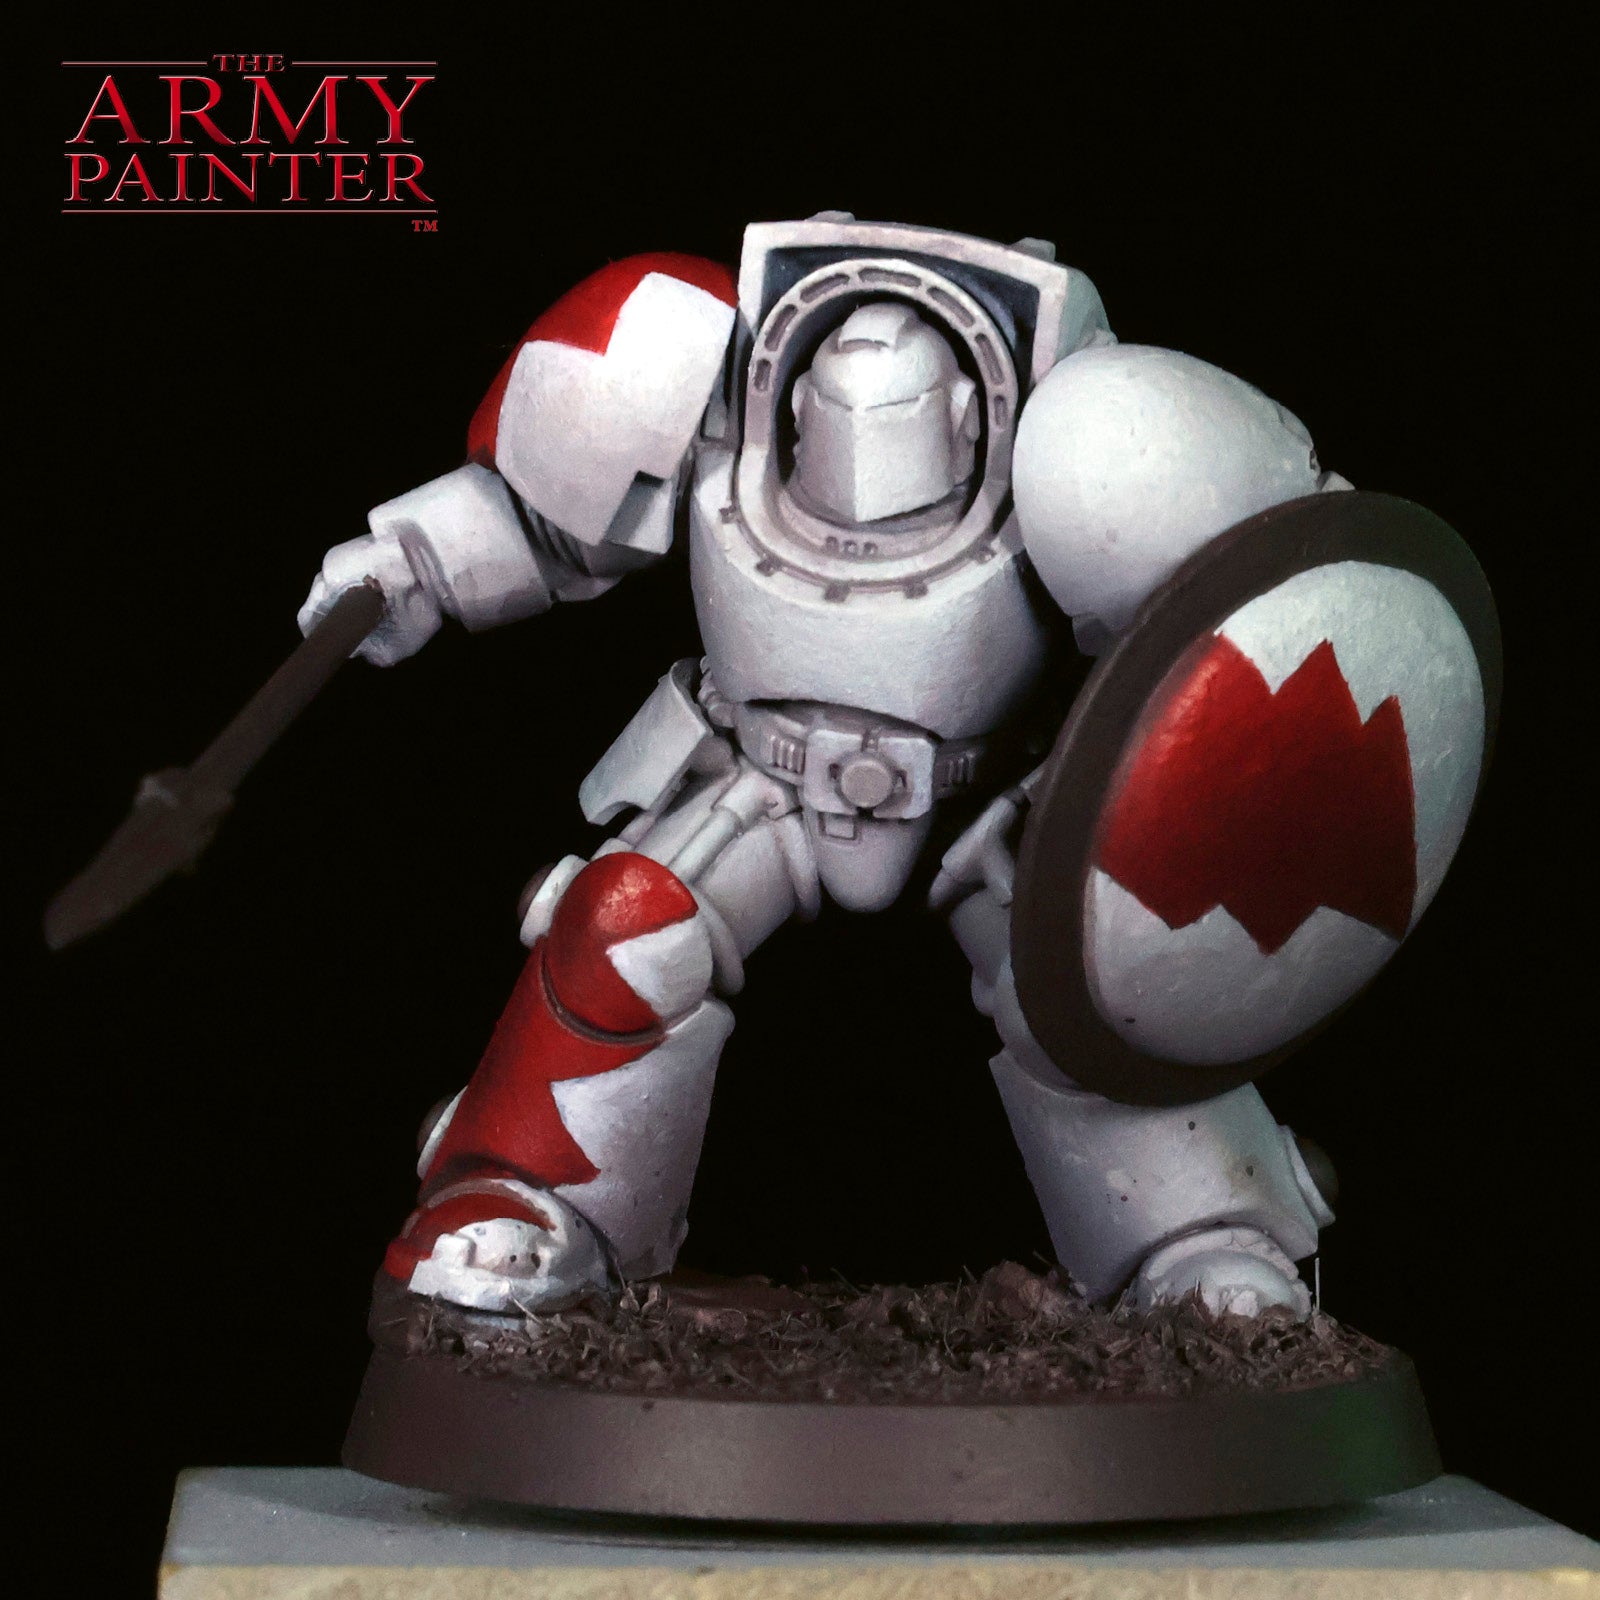
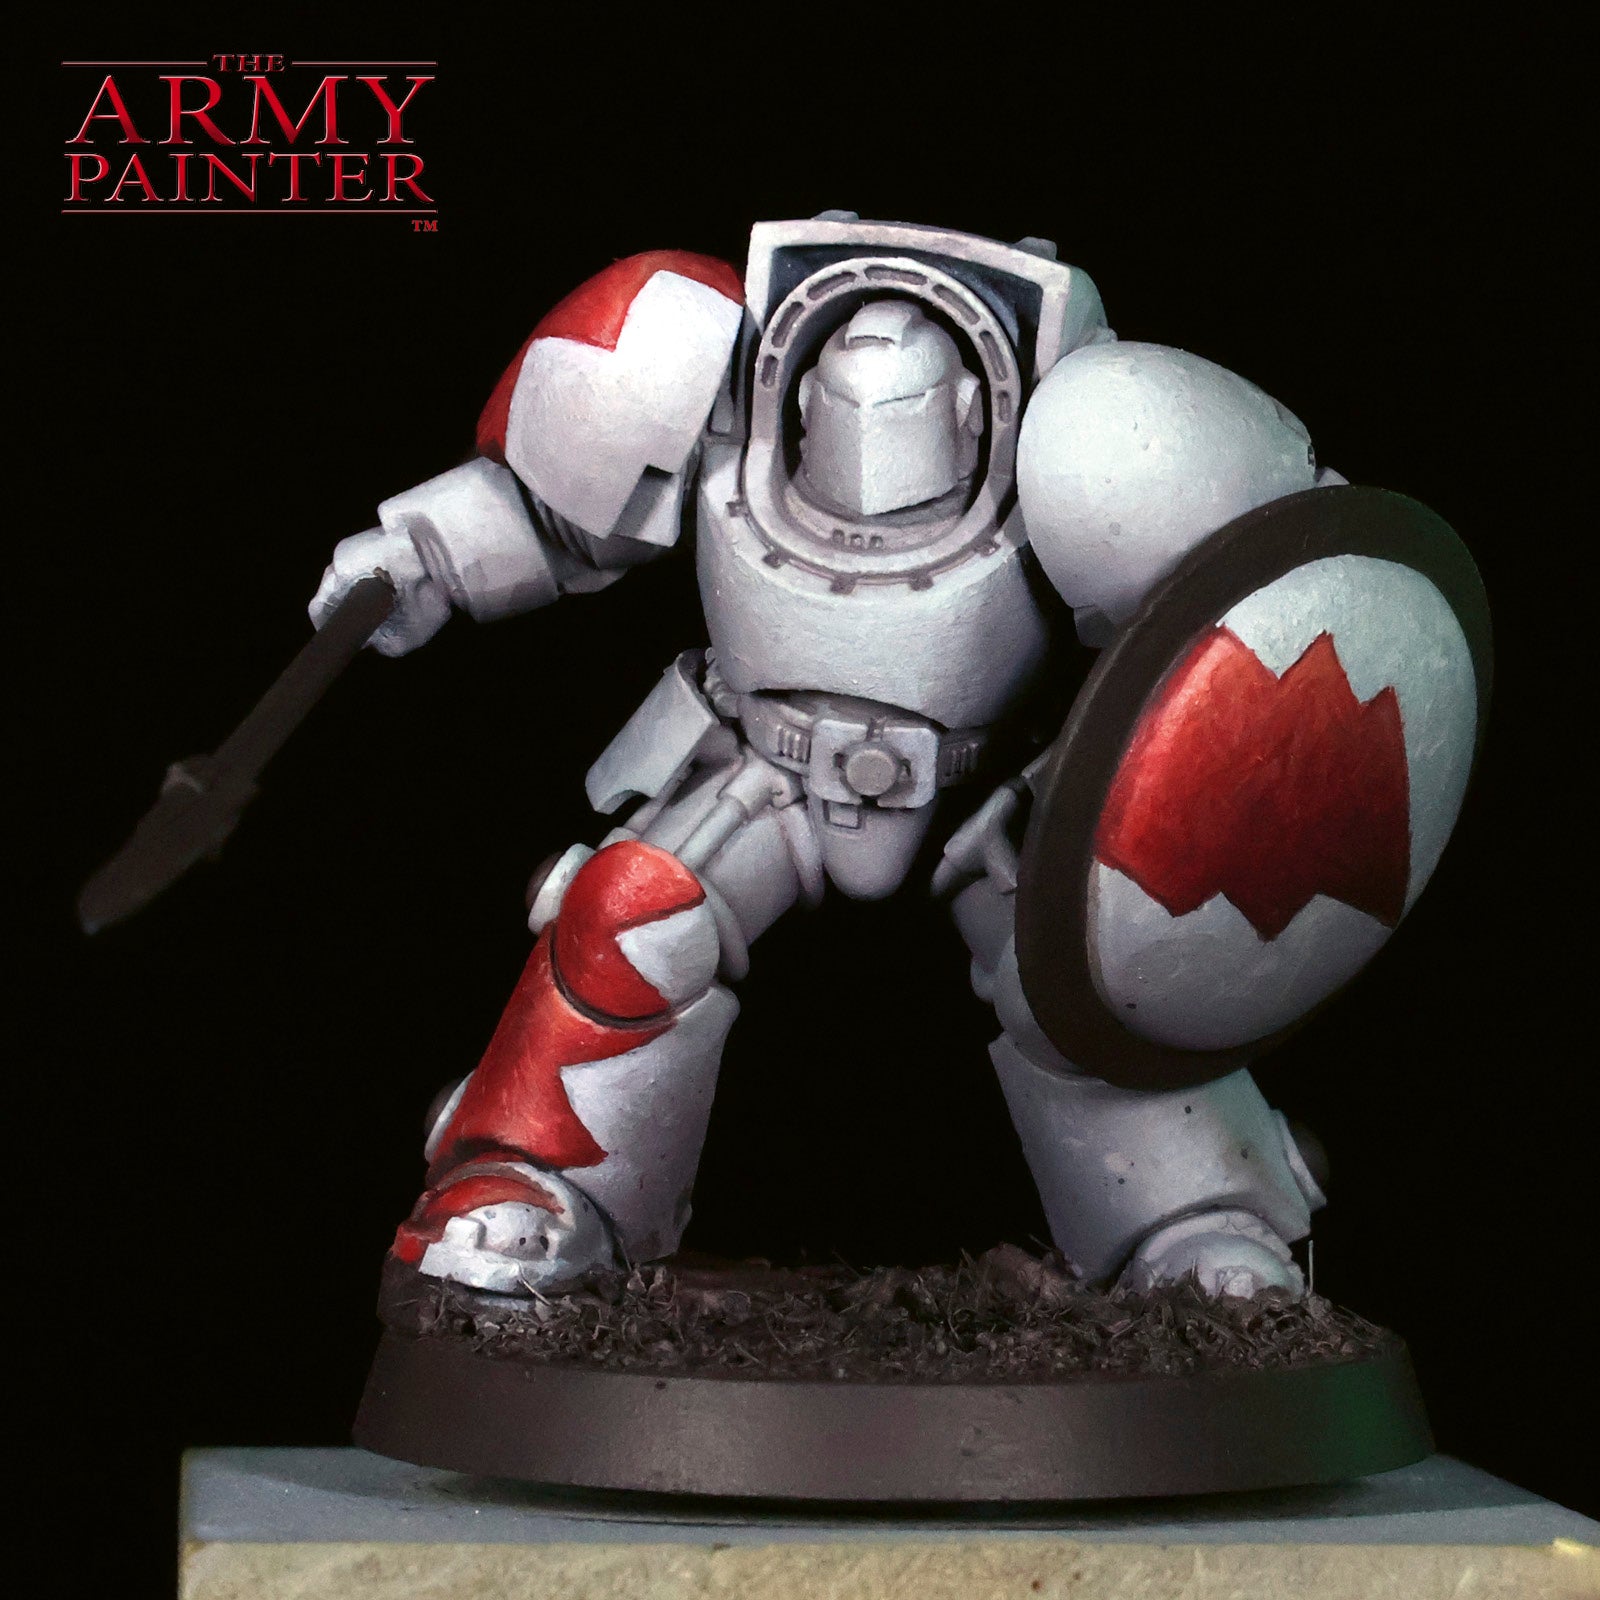
With the white armour mostly done, I move on to John Blanche Masterclass Banshee Brown to basecoat the details, metallics, and trim on the miniature. I also use this to basecoat the entire base and establish the initial patterns for the White Scar livery on the armour. In this case,I paint simple scars and lighting marks to match the lore.
Step 2
Using a Wargamer: Layering Brush, I carefully apply some volumetric highlights and initial basecoats of Warpaints Fanatic Pure Red on the livery.
Step 3
I take a brief break from the reds to thin down some Warpaints Fanatic Matt Black to apply a glaze to all of the brown trim, and as a simple one-coat option for hidden trim on the mini.
Step 4
To just about finish off the red, I add subtle highlights and scratches with Warpaints Fanatic Sacred Scarlet. It helps to have a mix of Warpaints Fanatic Pure Red and Sacred Scarlet handy to refine as you work.
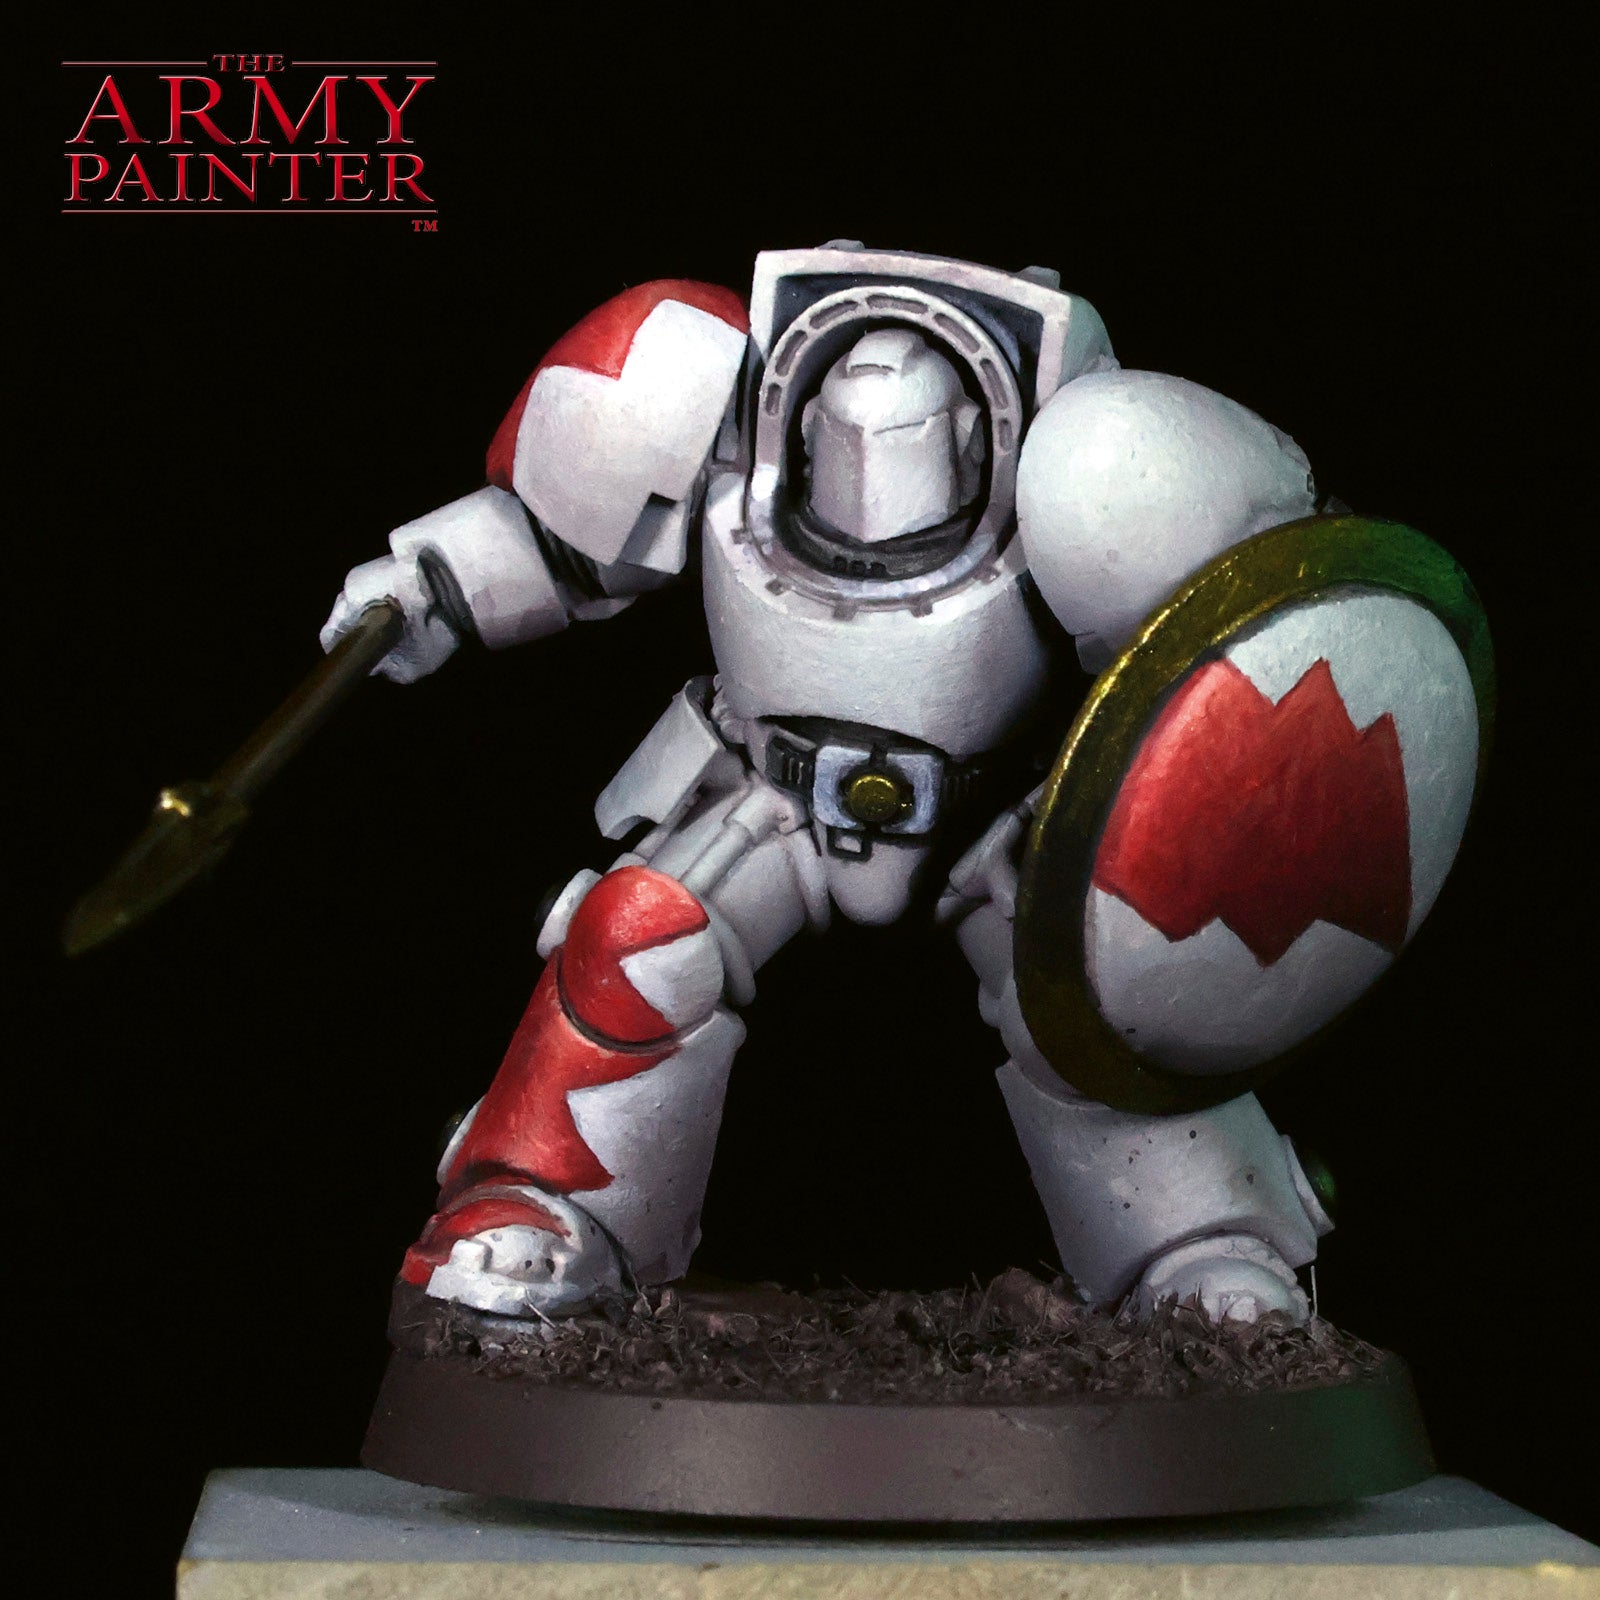
The Gold
Step 1
I am pretty famously, and proudly, bad at painting TMM (True Metallic Metal). But! I do believe I'm improving. I begin by applying another new term I just made up, a Reflection Sketch, with Warpaints Fanatic Greedy Gold to mark out where I believe the strongest metallic reflections will be.
Step 2
I mix some John Blanche Masterclass Banshee Brown with the gold to glaze and blend the less reflective areas.
Step 3
To further reinforce the contrast on the metal, I mix in Warpaints Fanatic Wash Dark Skin Shade to the previous mix and work it into the shadows.
Step 4
I go back to Warpaints Fanatic Greedy Gold to refine and reestablish the bright points.

Step 5
Optional: if you'd like to add an edge highlight to your gold, try Warpaints Fanatic Tainted Gold or mix in a silver to your Greedy Gold. At this step, I also applied Warpaints Fanatic Wash Red Tone from the bundle to the lenses and as a unifying glaze to all the red.
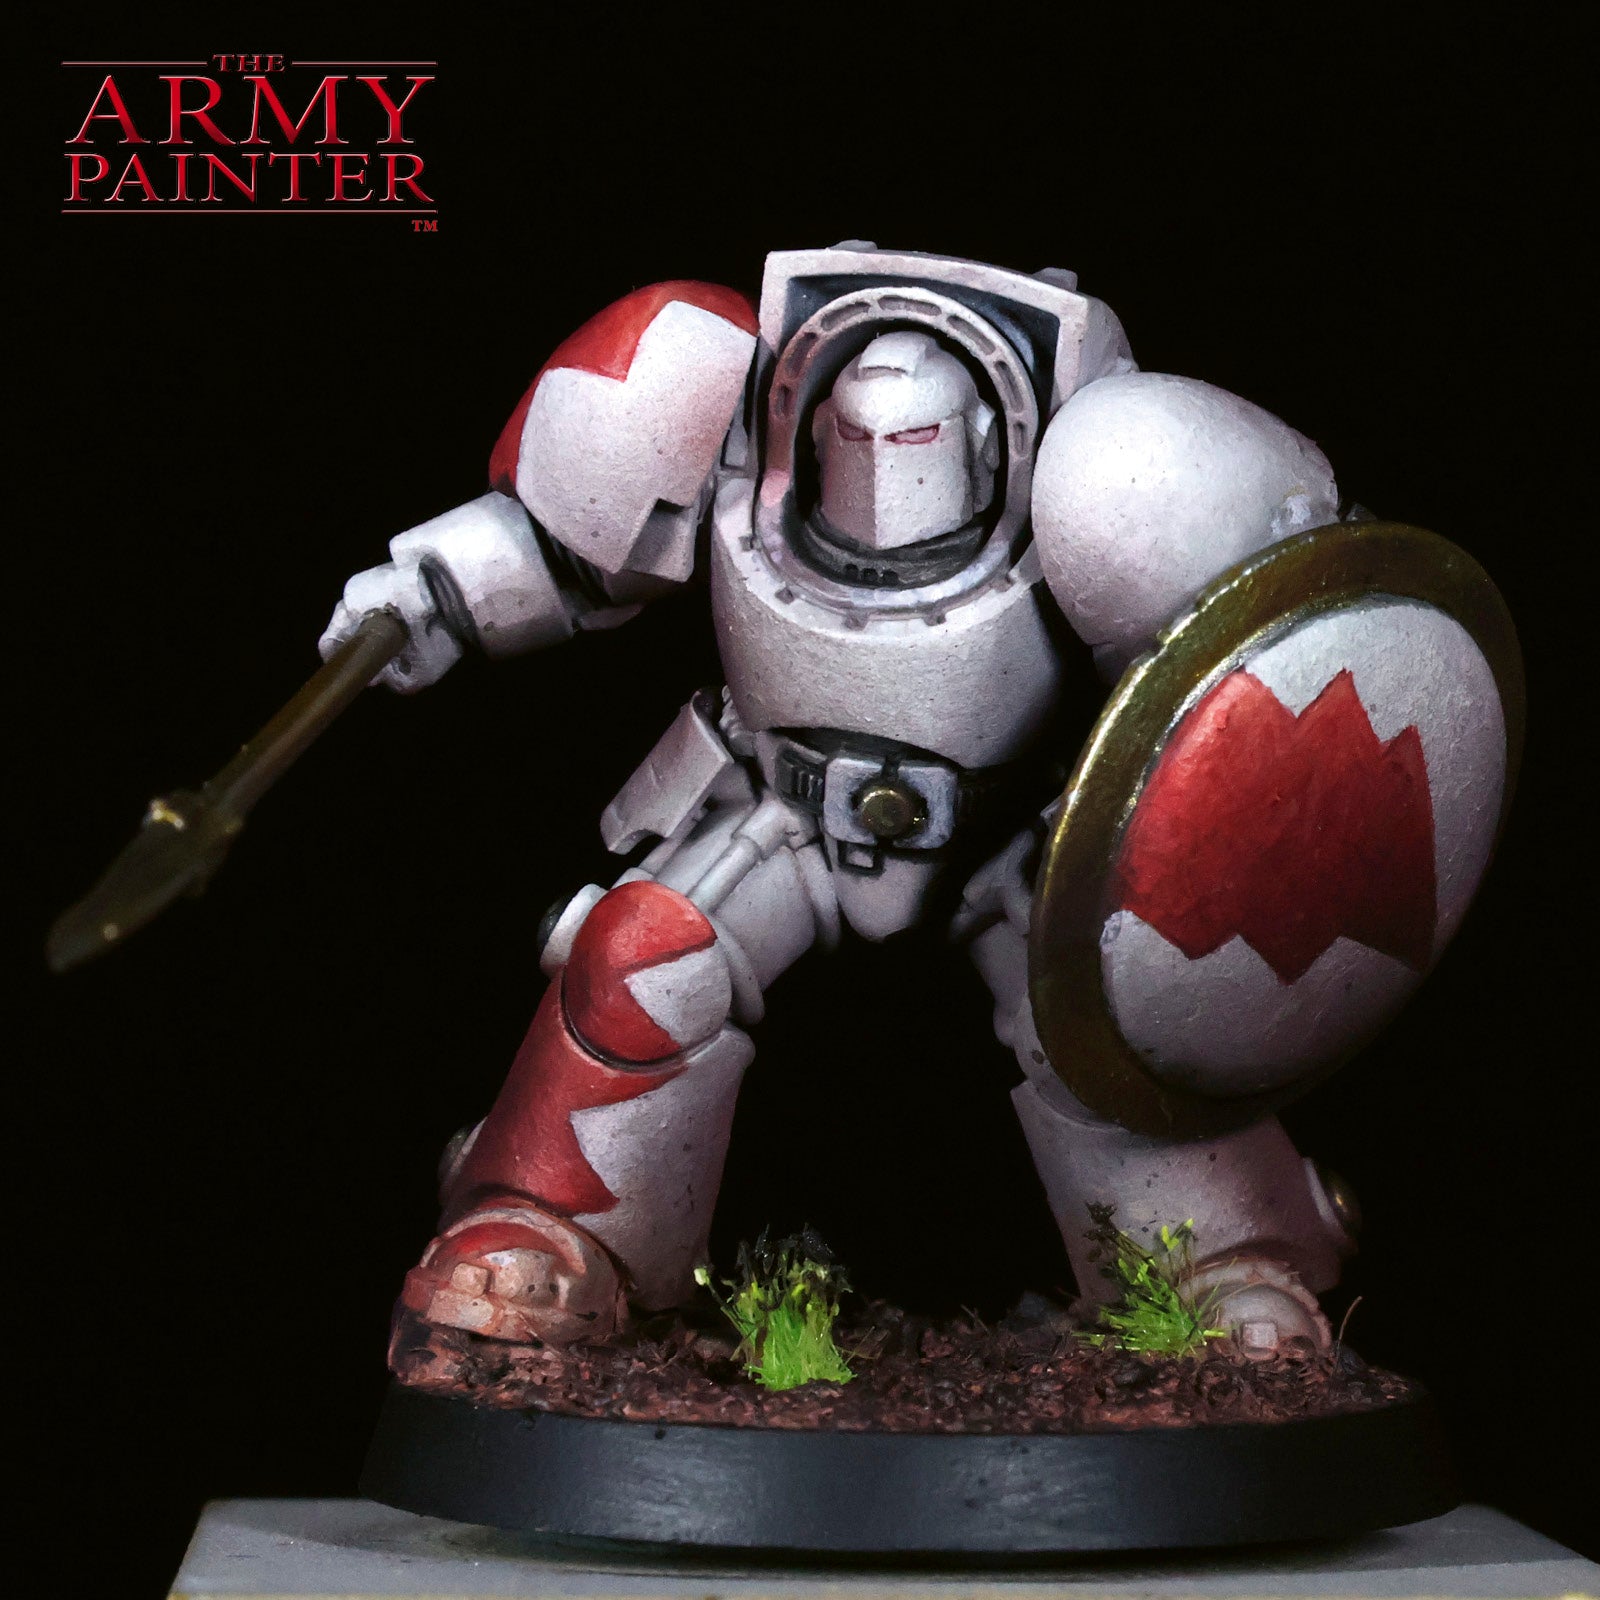
The Weathering and Basing
Step 1
This is where everything begins to come together. I thin Warpaints Fanatic Fur Brown to a wash-like consistency and apply this over the base and across the boots of the Terminator.
Step 2
Once dry, I go back to John Blanche Masterclass Banshee Brown and apply an overbrush to the raised areas on the base.

Step 3
Now, for a trick I learn from my dear friend, and Factory Team member, Sam Lenz. I apply a unifying shadow of Warpaints Fanatic Wash Dark Skin Shade through the airbrush. I spray this from the bottom up. This can also be achieved by glazing down the shaded areas on the mini. The airbrush just makes it faster and more uniform.
Step 4
To finish off the mini, I apply some Meadow Flowers tufts, then paint the rim of the base with Warpaints Fanatic Matt Black. I use a bit of the black to paint over the yellow flowers to give them a war-torn look.
Extra Credit!
But what about that cool green glow in the finished images I hear you ask?
While we limited this tutorial mostly to the paints found inside the bundle, I broke the rules a little bit to add some extra steps with a few additional colours and techniques. To see that process, check out our social media platforms in the coming week to find out how to add a little extra flourish to your own mini.
