


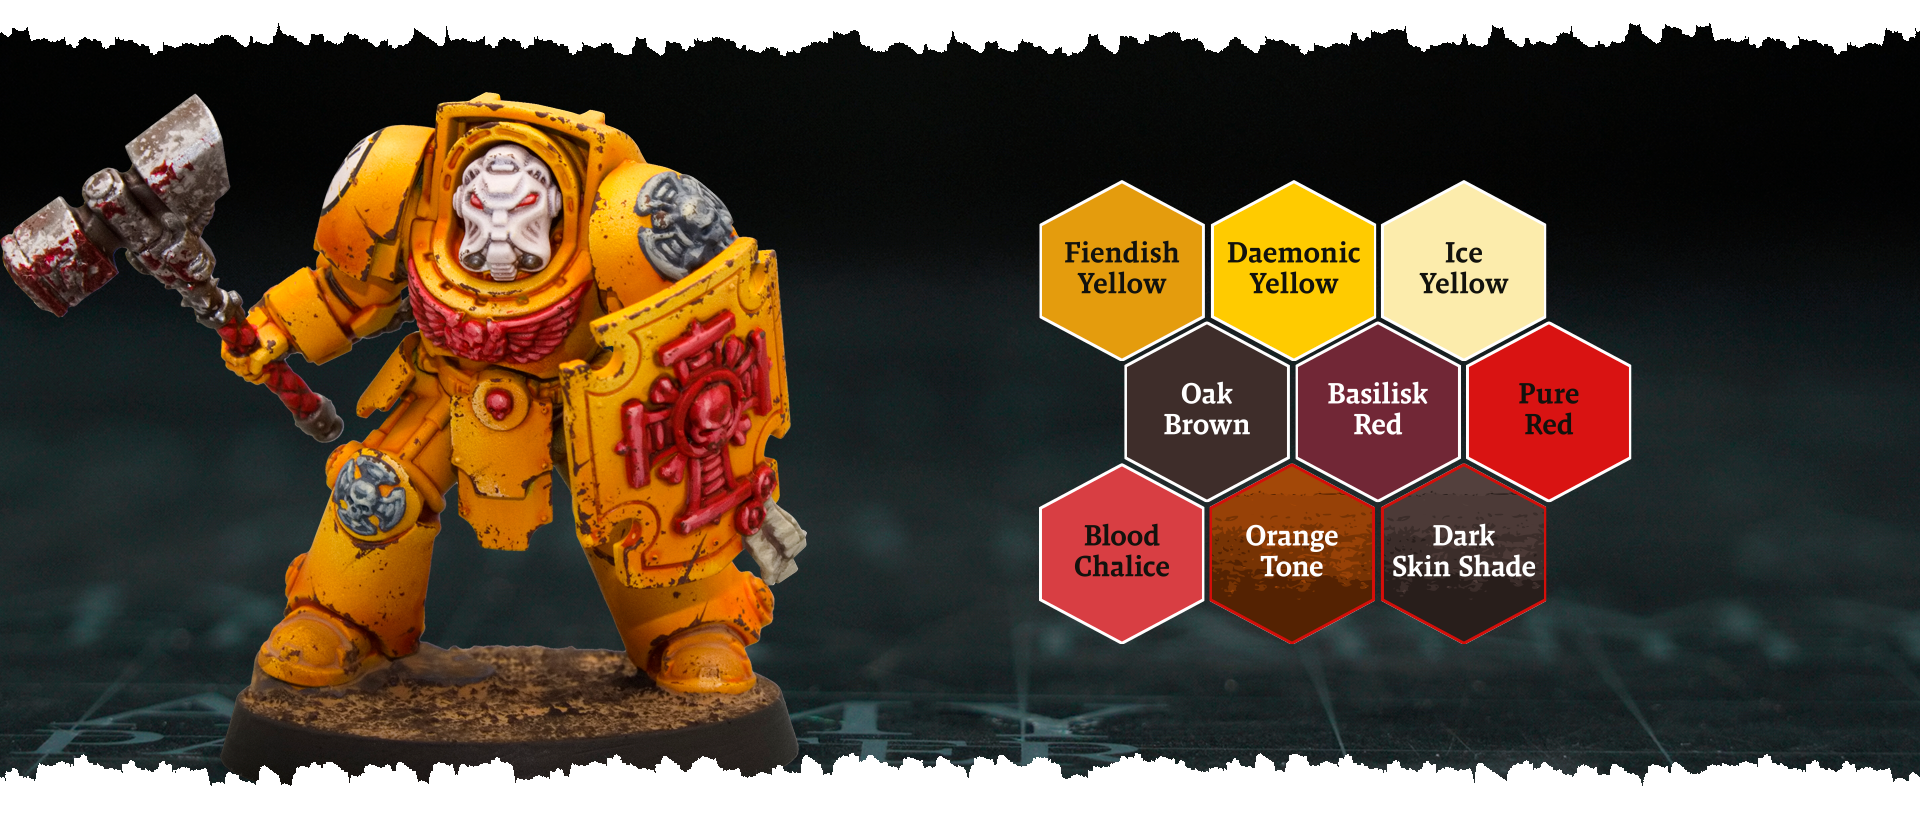
The Imperial Fists are renowned for many things: their stubborn, unbending determination in the face of overwhelming odds, their ability to overcome the defences of any fortress, and, of course, their penchant for bright, vibrant, sunburst yellow armour. Camouflage is for the week after all. Whilst yellow armour used to be the domain of masochists and those with infinite time on their hands, with today’s modern Warpaints Fanatic technology, it’s a walk in the park.
When our paint-gineers emerged from deep within the overlapping defences of the Phalanx with a nine-paint bundle worthy of Dorn himself, we knew there was only one man up for the job. Enter Rob Medwell, of Medders’ Miniatures, armed with his trusty sponge and enough yellow paint to make a Minion blush. Learn how to quickly and efficiently bring your sons of Dorn to the tabletop using his handy tutorial!

To see the paint in action, check out Rob's video above, or if reading is more your style, then continue on for a step-by-step guide.
Let's get painting!
How to Paint the Imperial Fists
Step 1: Prime the model with Matt White Colour Primer, keeping the head separate from the main body. Follow this by basecoating all the yellow armour with Warpaints Fanatic Fiendish Yellow.
Step 2: Next, coat all the yellow armour with Warpaints Fanatic Wash Orange Tone.
Step 3: Repeat this step, but with Warpaints Fanatic Wash Dark Skin Shade on the white helmet.
Step 4: Begin to layer the yellow armour with Warpaints Fanatic Fiendish Yellow. Rob achieved this using a sponge, but you can get similar results with a drybrush or even regular layering. You just want to end with a slight gradient from the orange tinted areas to the yellow.
Step 5: Next, repeat this process with Warpaints Fanatic Daemonic Yellow, but focus it on an even smaller area of the armour, allowing the previous step to show through.
Step 6: Finally, use Warpaints Fanatic Ice Yellow in the same fashion on the brightest areas.
Step 7: Repeat the sponging process on the helmet with Warpaints Fanatic Matt White.
Step 8: Next, basecoat the red areas with a 60:40 mix of Warpaints Fanatic Pure Red and Basilisk Red.
Step 9: Basecoat all the silver areas with Warpaints Fanatic Gun Metal.
Step 10: Add some shading to the red and silver with Warpaints Fanatic Wash Dark Skin Shade.
Step 11: Next, layer the red with Warpaints Fanatic Pure Red, allowing the previous layers to show through in the recesses.
Step 12: Finish off the red with a final edge highlight of Warpaints Fanatic Blood Chalice.
Step 13: After applying any transfers, use a Chipping Brush to add battle damage to the armour with Warpaints Fanatic Oak Brown, focusing on the edges. You can also go in with a Wargamer Brush to add more purposeful chipping to the edges in areas.
Step 14: Lastly, highlight the silver with Warpaints Fanatic Shining Silver, either with a drybrush or a Chipping Brush.

Buy The Bundle!
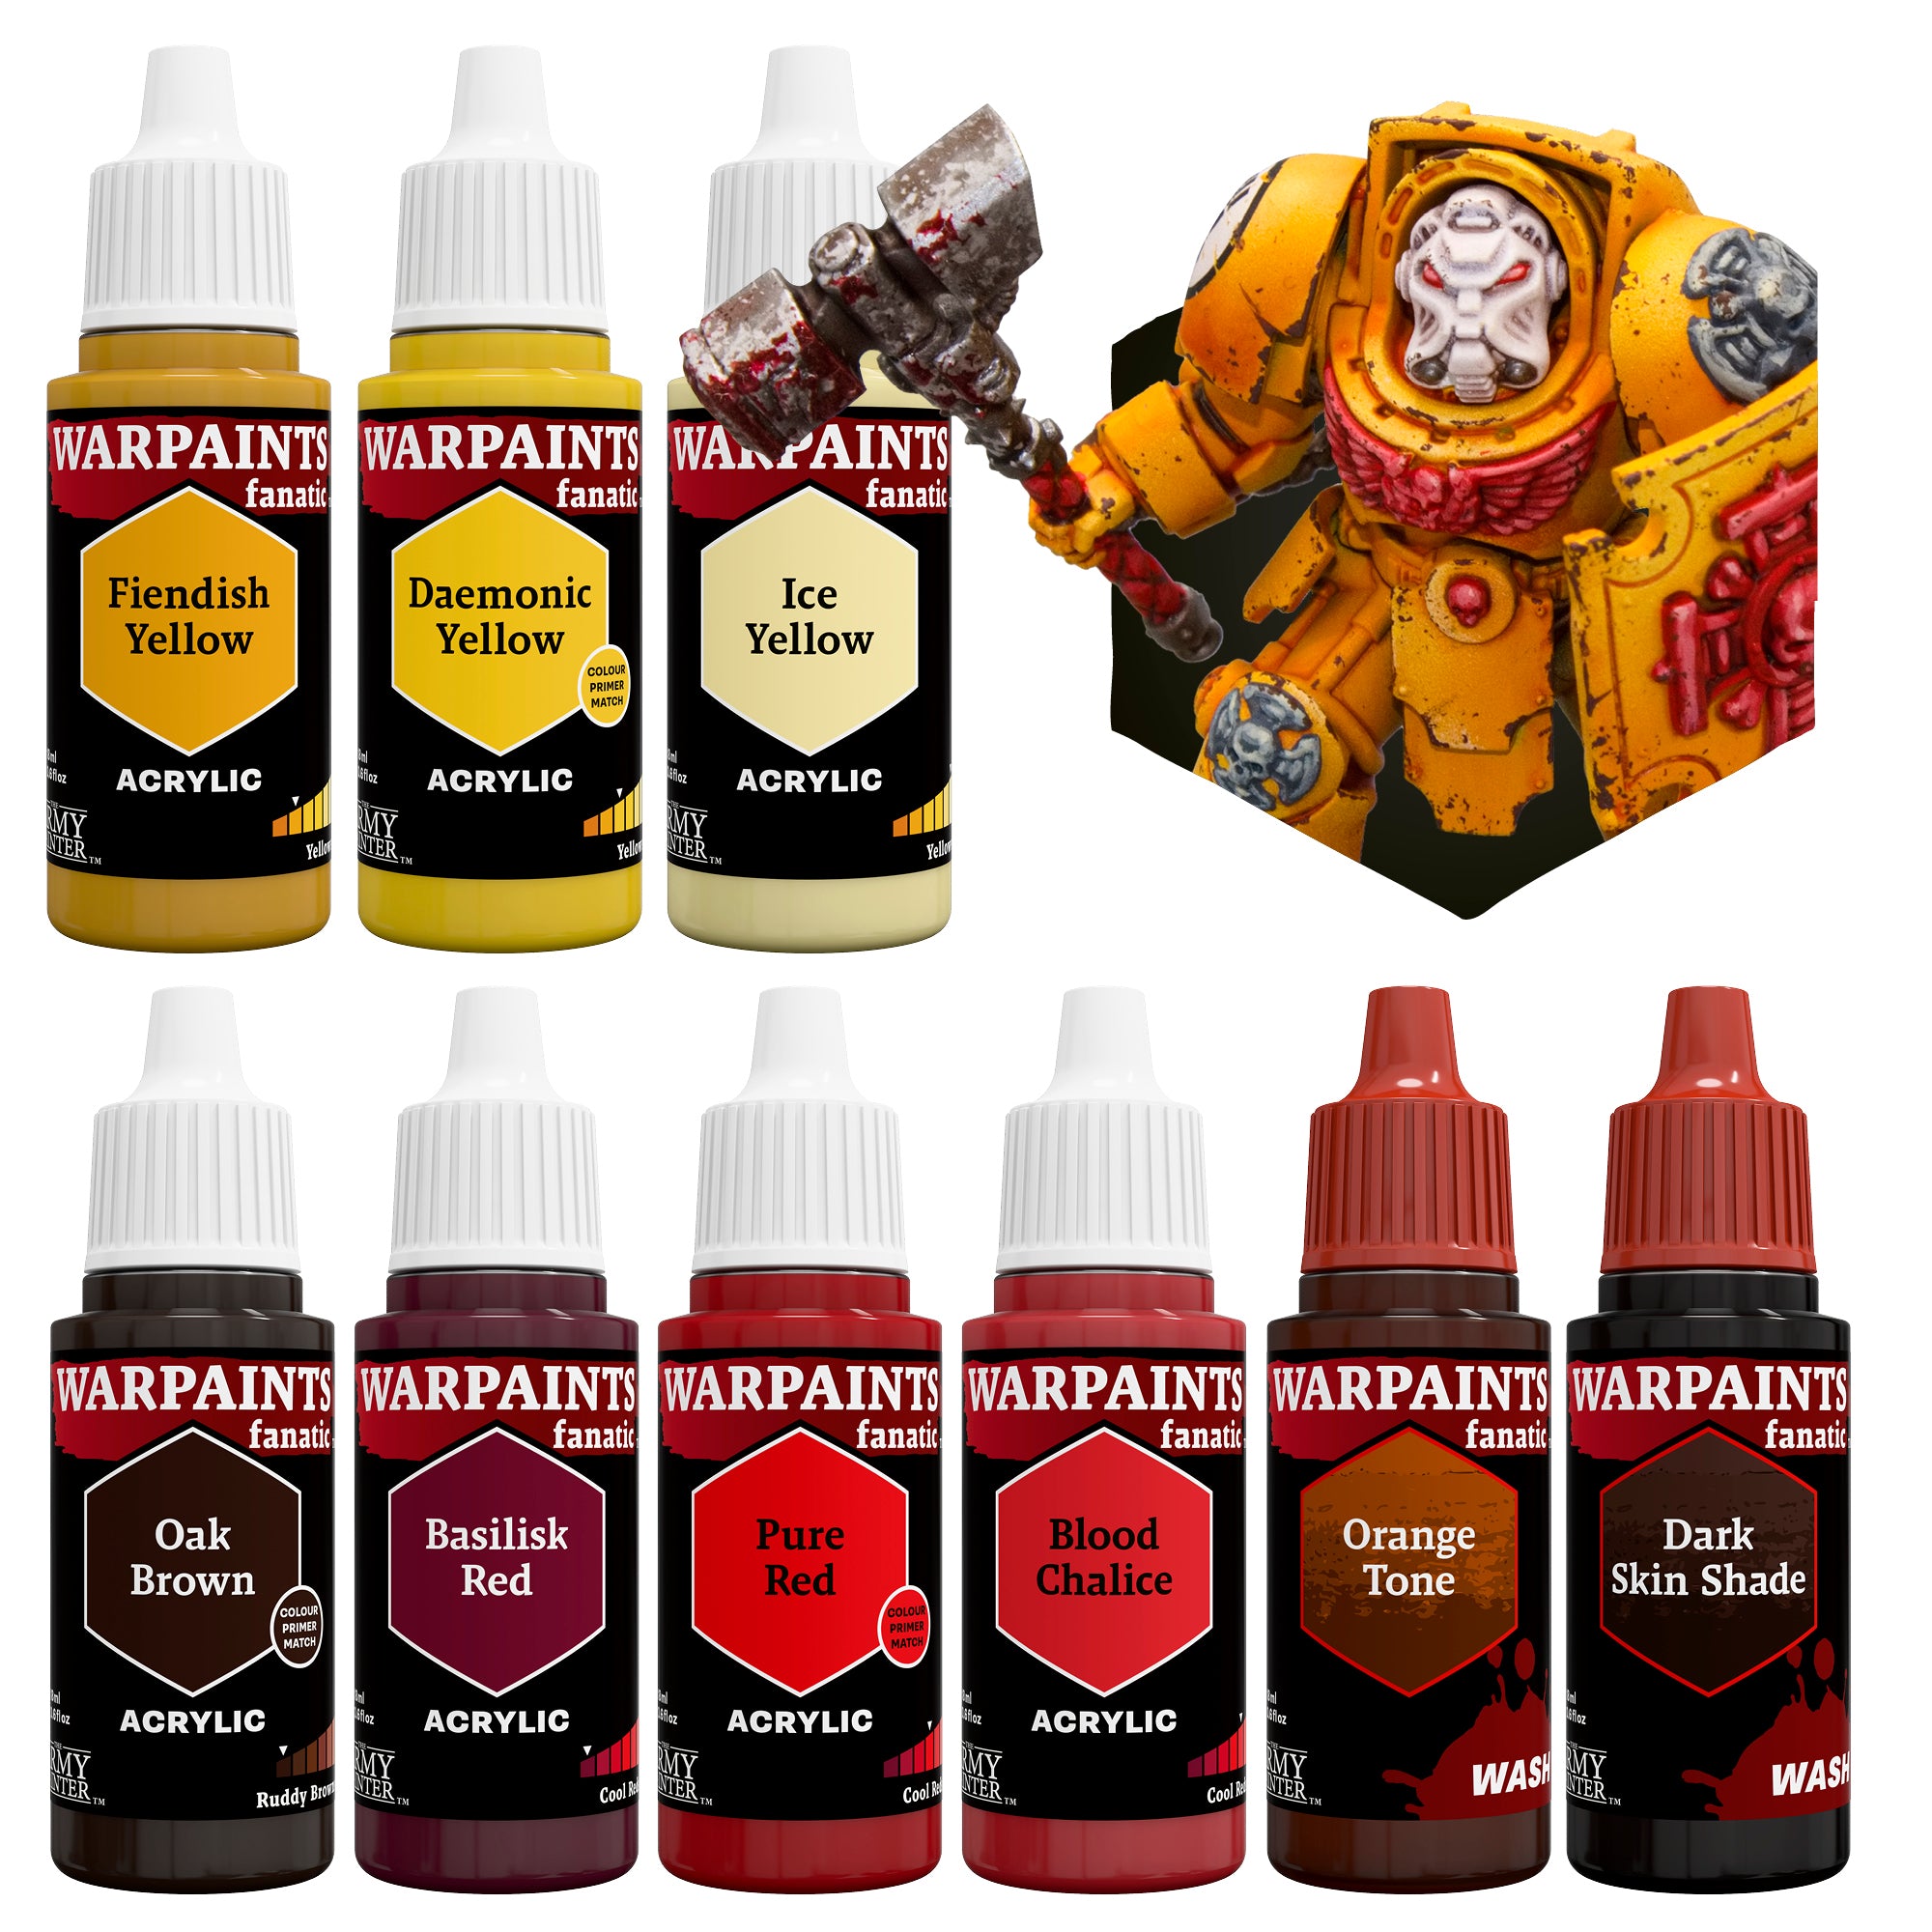
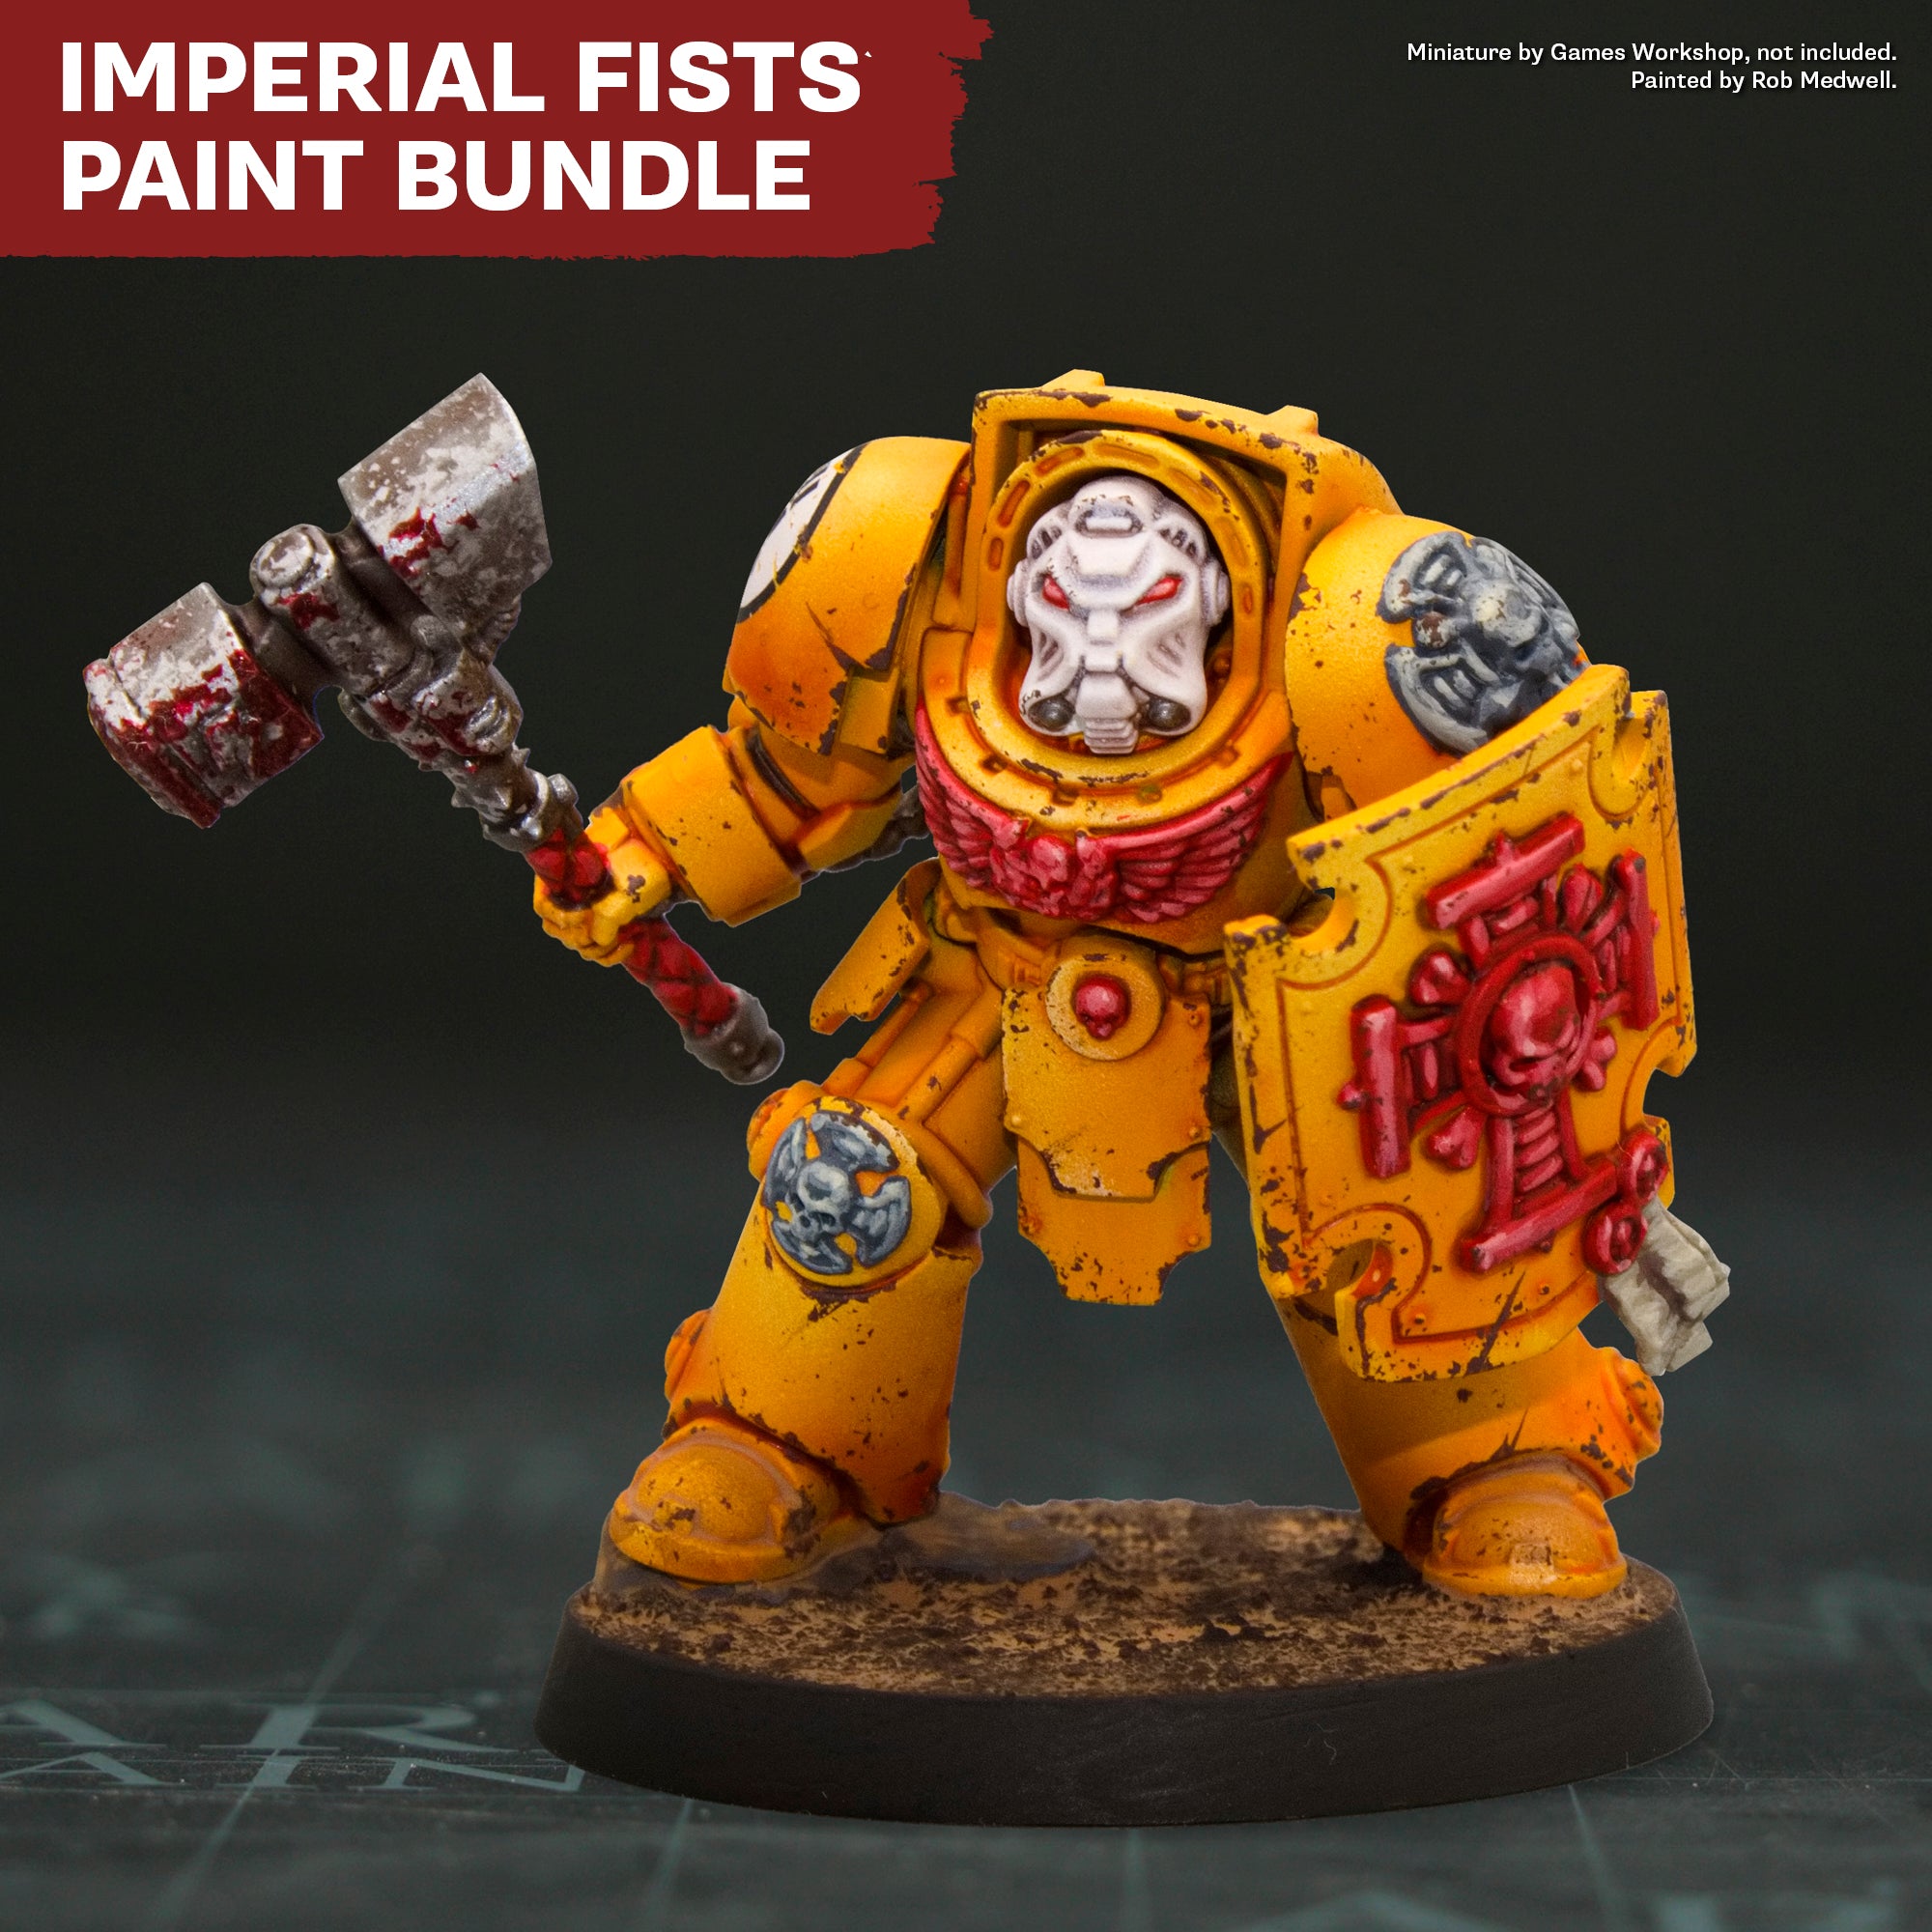
Honour the VII Legion with confidence. The Medders’ Miniatures Imperial Fists bundle brings together nine Warpaints Fanatic colours personally selected by Rob Medwell, a.k.a. Medders’ Miniatures, of The Army Painter Factory Team. This curated palette removes the uncertainty of mixing and testing, giving hobbyists a fast, reliable way to achieve bold Imperial Fists armour, deep panel work, and warm red accents worthy of Rogal Dorn’s disciplined warriors.
This bundle makes clean, striking results easier than ever. Whether you’re painting a tabletop force or a character model, Medders’ selection of paints ensures consistent results from the first coat to final highlights.
Follow Rob’s tutorial using this Imperial Fists paint bundle right here.
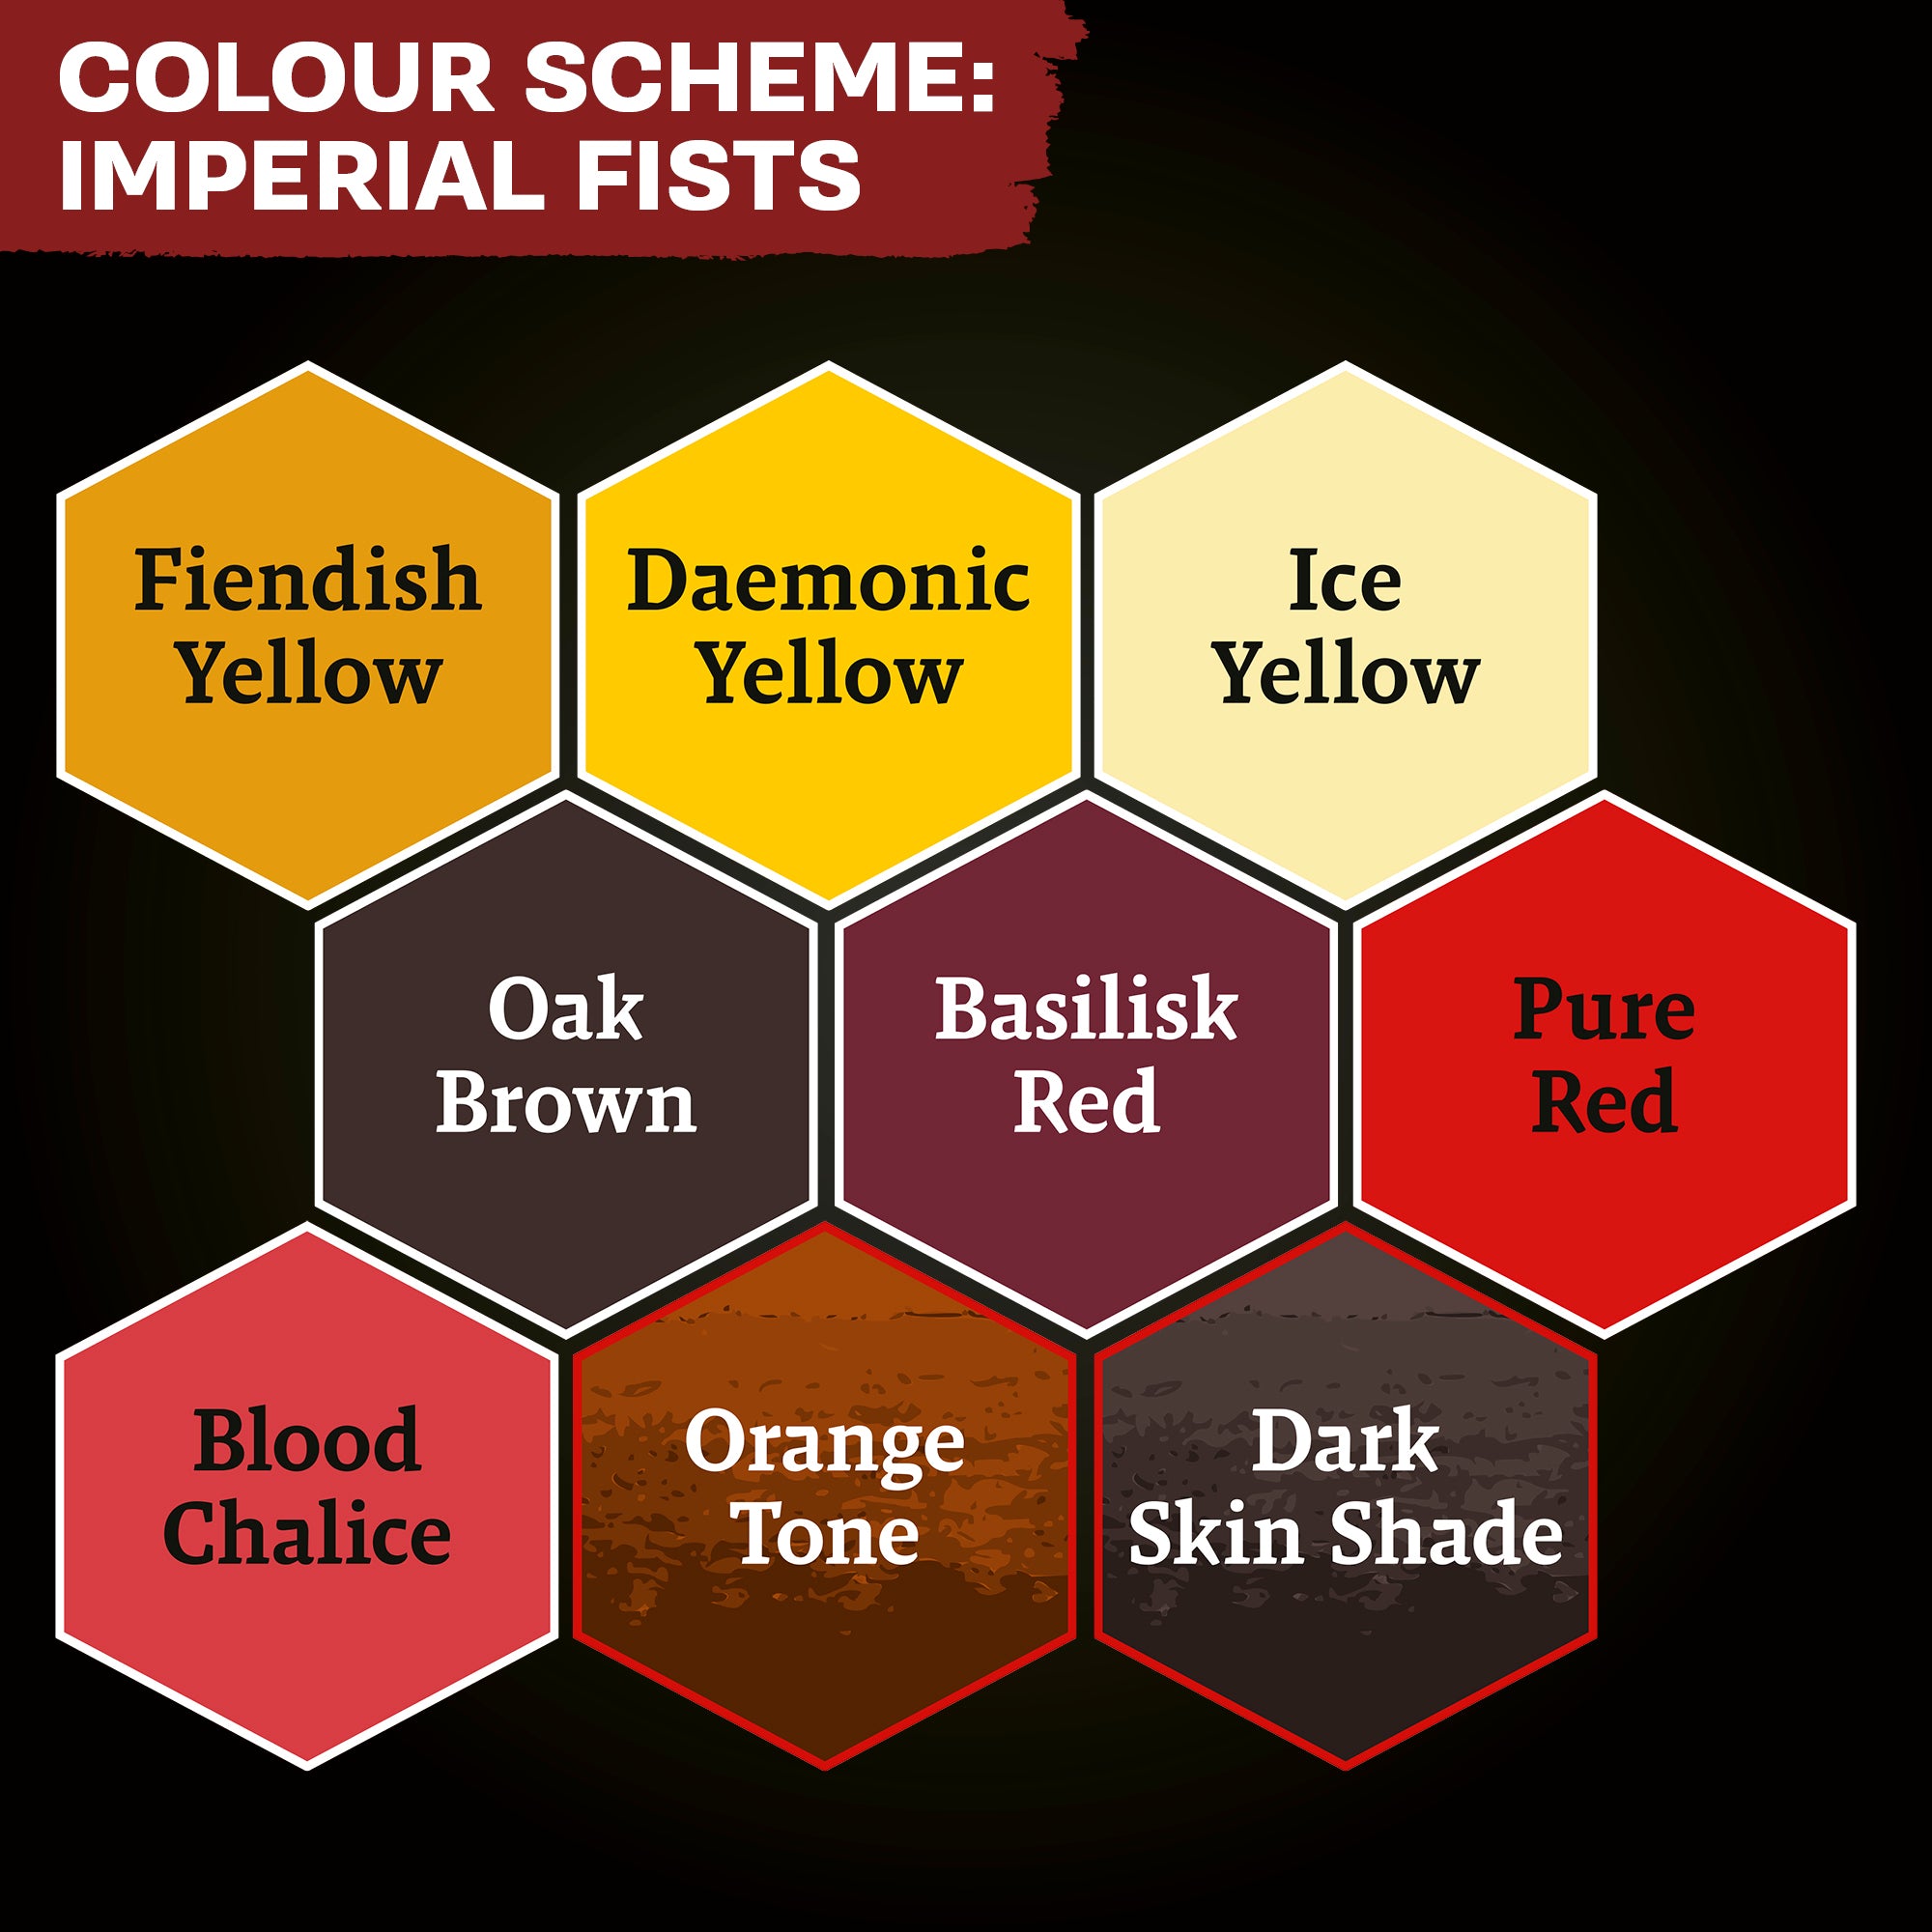
Bundle includes the following Warpaints Fanatic colours:
- Ice Yellow
- Oak Brown
- Basilisk Red
- Pure Red
- Blood Chalice
- Orange Tone
- Dark Skin Shade
- Fiendish Yellow
- Daemonic Yellow
Miniature in image is not included