


How to Paint
Non-Metallic Steel
Welcome back to The Army Painter Academy Masterclass: a series where we break down how we paint a miniature step-by-step, complete with pictures for every bit of paint applied along the way.
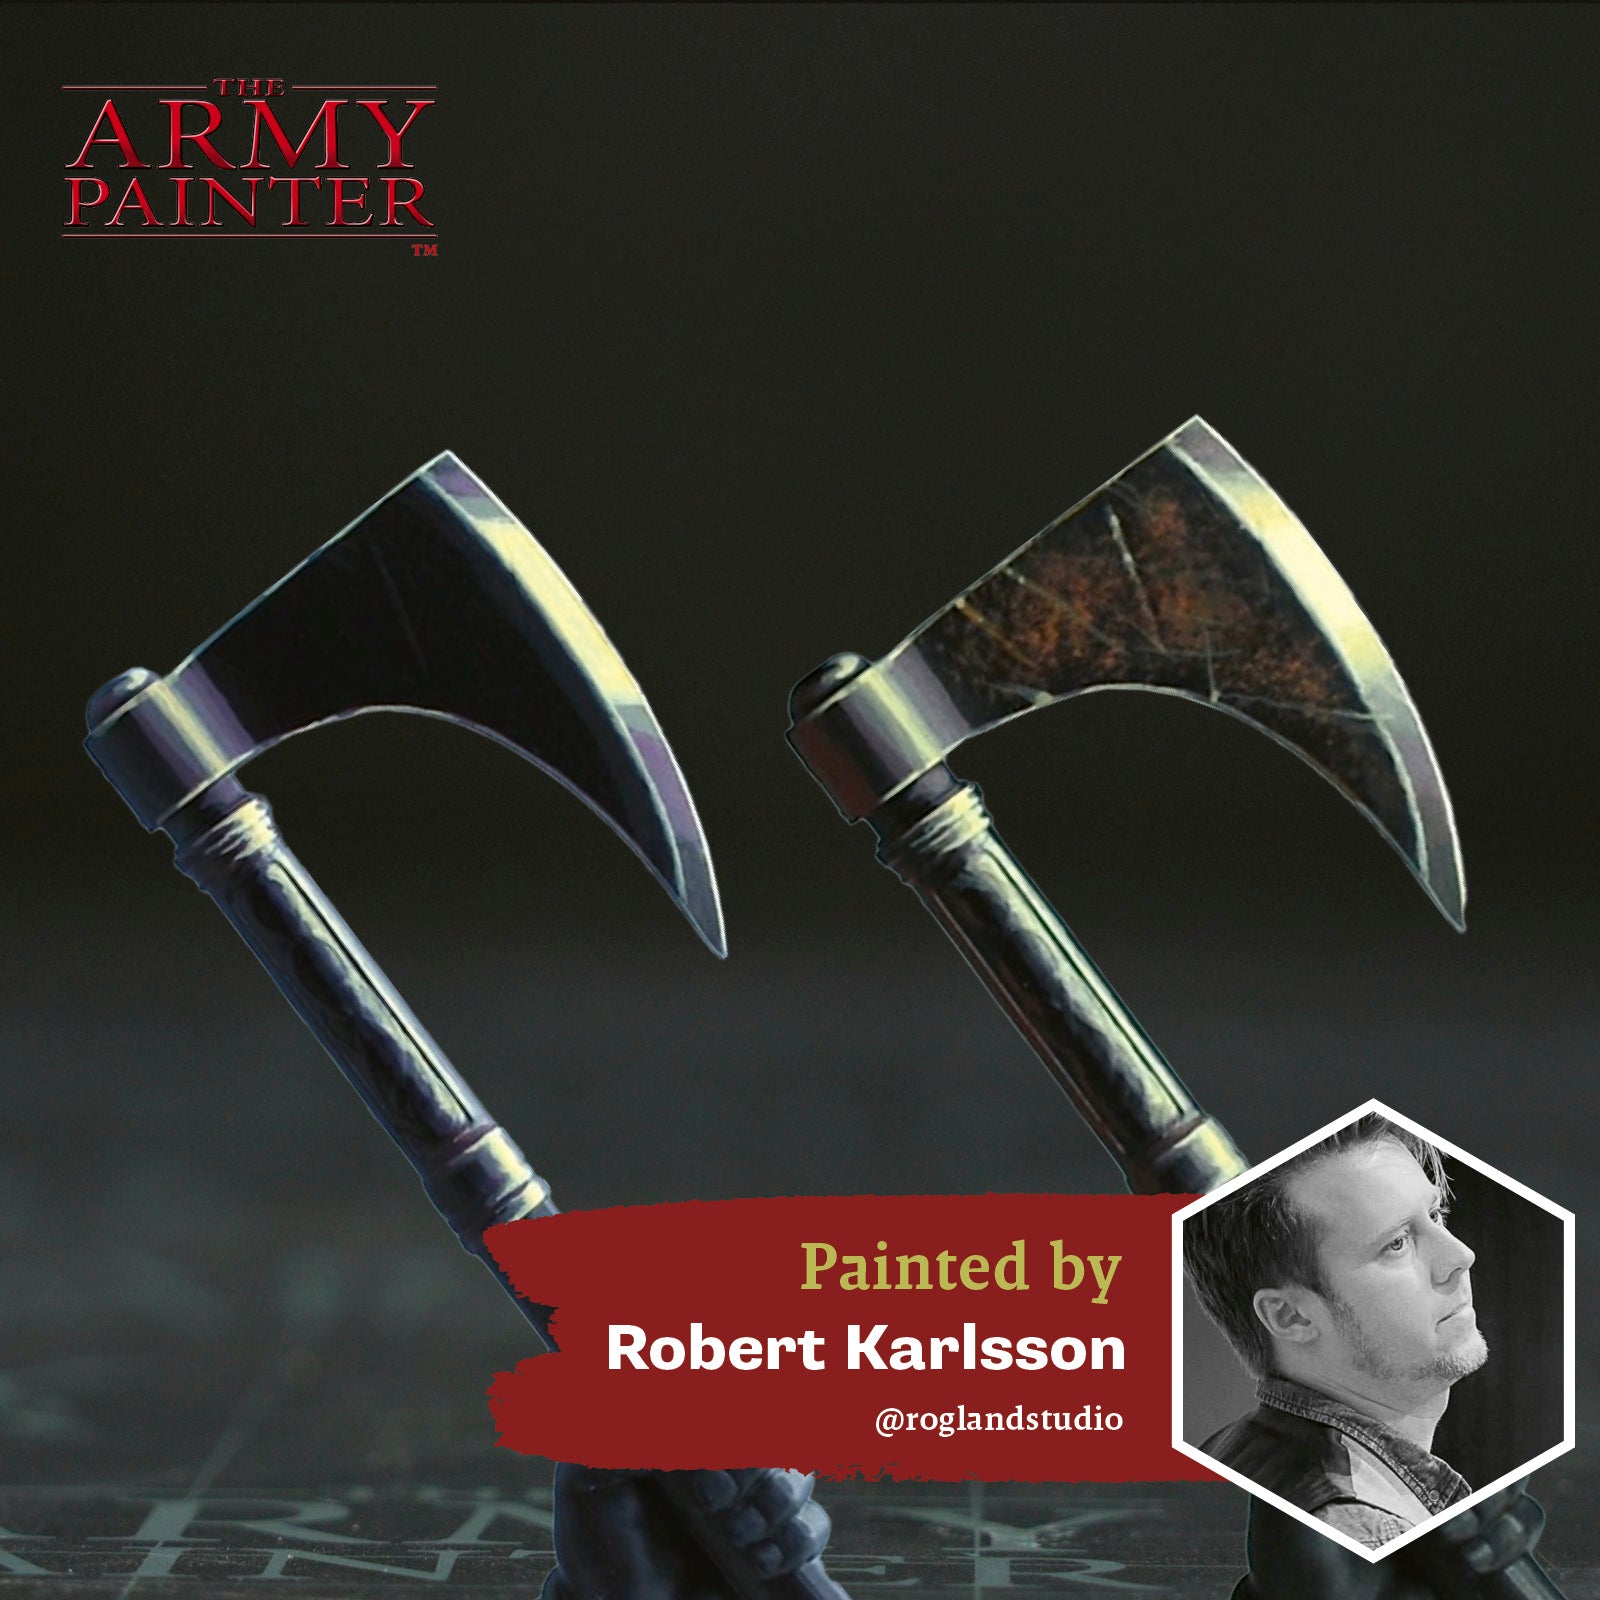
The non-metallic maestro himself, Robert Karlsson, aka Rogland Studio, is back with yet more of his wizardry after his wildly popular first instalment exploring non-metallic metals with gold. Now he tackles that most common, but ubiquitous of metals, one that appears on almost every model we paint—steel.
How do you bring a steel object to life without the use of those oh so shiny metallic flakes we know and love? This is the core of all non-metallic metal painting—wrangling your normal, matt acrylics, into that highly reflective sheen to trick the eyes. An optical illusion of the mini painting world, and one with plenty of real-world know-how to back it up. In fact, Robert not only shows you how to paint a steel axe, step-by-step, in this style, but delves into the basic theory underpinning all of it. A true scholar and a gentleman.
Non-Metallic Metal Theory
Robert: If you’re aiming for a more realistic Non-Metallic Metal (NMM) effect, it’s important first to understand the theory behind it.

Shiny and Bright
The look of shiny metal comes from balancing three main elements—the lightest area, the midtone, and the shadow.When starting out, it’s easiest to work with just these three elements. This lets you focus on blending and learning how to place light correctly.However, realistic metal usually has more complexity with multiple lights, multiple midtones, and multiple shadows.This can be from various light sources or reflections of darker objects surrounding the central object.
Keeping it Basic
It’s best to begin practising on simple forms, observing where the light naturally falls on each shape. You’ll notice that while you can place highlights and shadows correctly, they won’t yet read as metallic unless you exaggerate the contrast and reflections.
The way a surface reflects light depends heavily on its material and finish. Compared to our earlier basic-shape examples, true metallic surfaces bounce light in much stronger and sharper ways. That’s why it’s worth studying these basic forms and observing how light travels over their surfaces. This practice builds the foundation for realistic NMM.
The Finish
It’s important to remember that metal isn’t always the same, and they often have different finishes. When painting, respect both the character and the type of metal you want to represent. A battle-hardened orc would have battered, darkened armour when compared to a king, who could be shown in polished, ornate armour to fit his status.
Both polished and non-polished metals reflect light, but the sharpness and clarity of that reflection varies greatly. A polished surface will have bright, crisp highlights and visibly reflected shapes, while a non-polished one will scatter light, creating softer, more muted effects.


Colour and Tone
Metal isn’t just “grey,” it contains a variety of subtle tones, influenced by the temperature of the light source and the environment surrounding it. For example, in a snowy landscape, the highlights and reflections on metal will naturally skew toward cooler tones, while in a desert, the tones will lean warmer.
If your miniature has multiple metals (steel, gold, bronze, etc.), you should adapt their colours to the same overall light temperature, so they look like they exist in the same world. This way, the whole miniature feels cohesive, and the lighting remains believable.
Texture
Metal isn’t always a perfectly smooth surface. Age, weather, and battle damage all leave marks that change their appearance. Adding texture to your NMM helps convey these stories.
This can be achieved with small dots for pitting, streaks to mimic water runoff, scratches and chips for battle-worn surfaces, random patterns for natural weathering, or ordered patterns for man-made finishes (e.g., brushed steel).
Technique Tips
Paint consistency is also very important. If you water down your paints less, you’ll have harsher, more defined marks, whereas with more water, you’ll achieve a softer and more subtle texture.
You can also vary the look by having a bolder contrast between your layers or creating a subtle shift through careful blending. The key is experimentation — different brushes, consistencies, and stroke motions will give you different results.


Putting It Into Practice
Robert: Now it’s time to put that theory into practice with some simple Non-Metallic Metal. The great thing is—you don’t even need to know how to blend yet! For now, we’re just aiming to create that shiny effect. Smooth transitions and advanced blending techniques will come later.
In this example, the axe blade is angled toward the sun. If it were tilted differently, the approach would change a bit—but to keep things simple, we’ll stick with the easiest setup.

NMM Steel - Beginner
Step 1
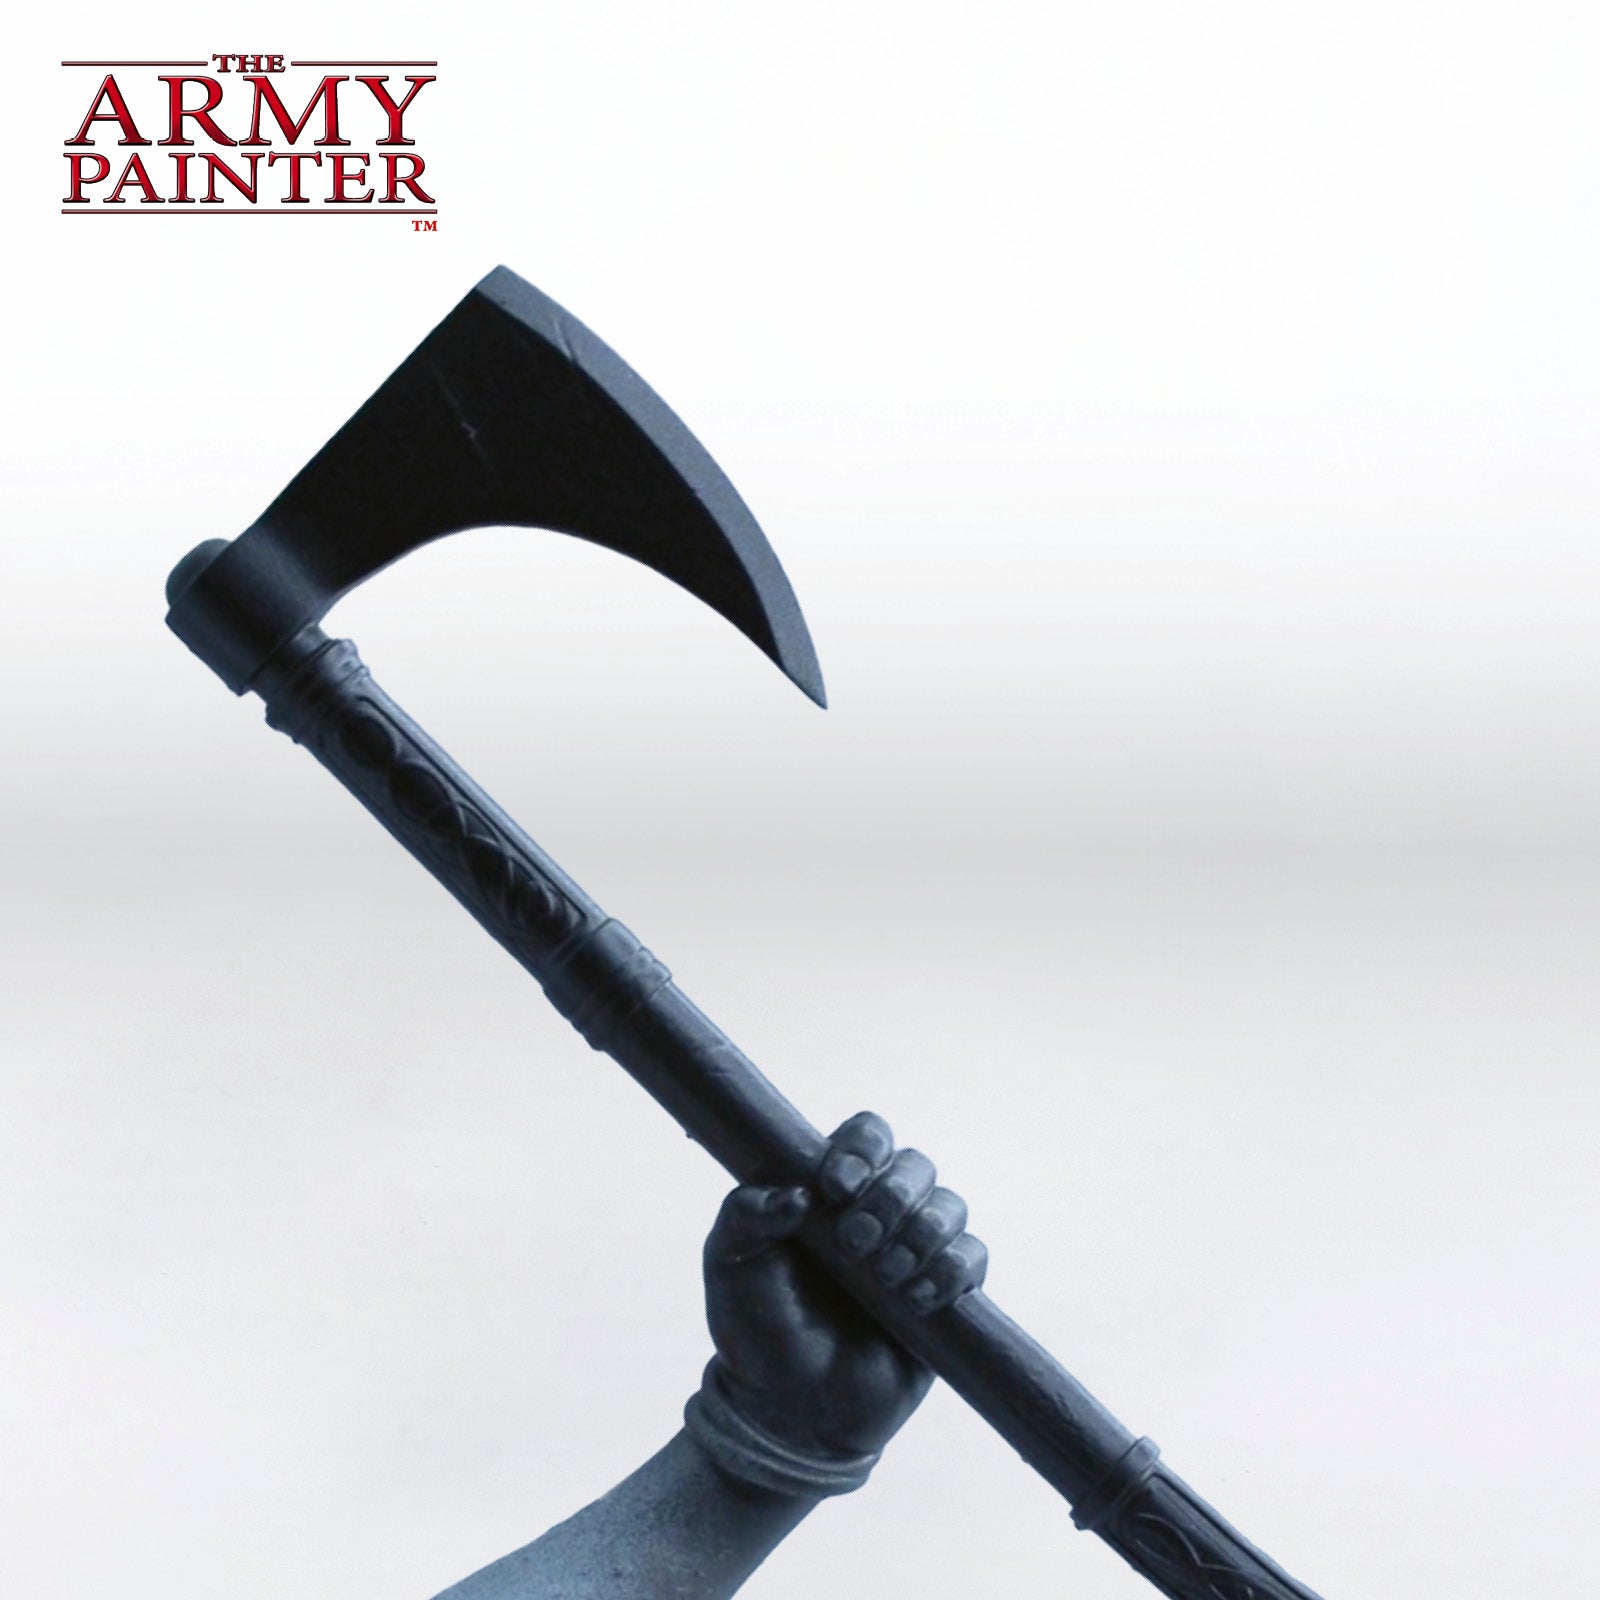
Prime the model with Matt Black Colour Primer.
Step 2
Apply John Blanche Masterclass Blanched Berry to block out the main light areas.This step is all about mapping out the shine and establishing where the light will hit.
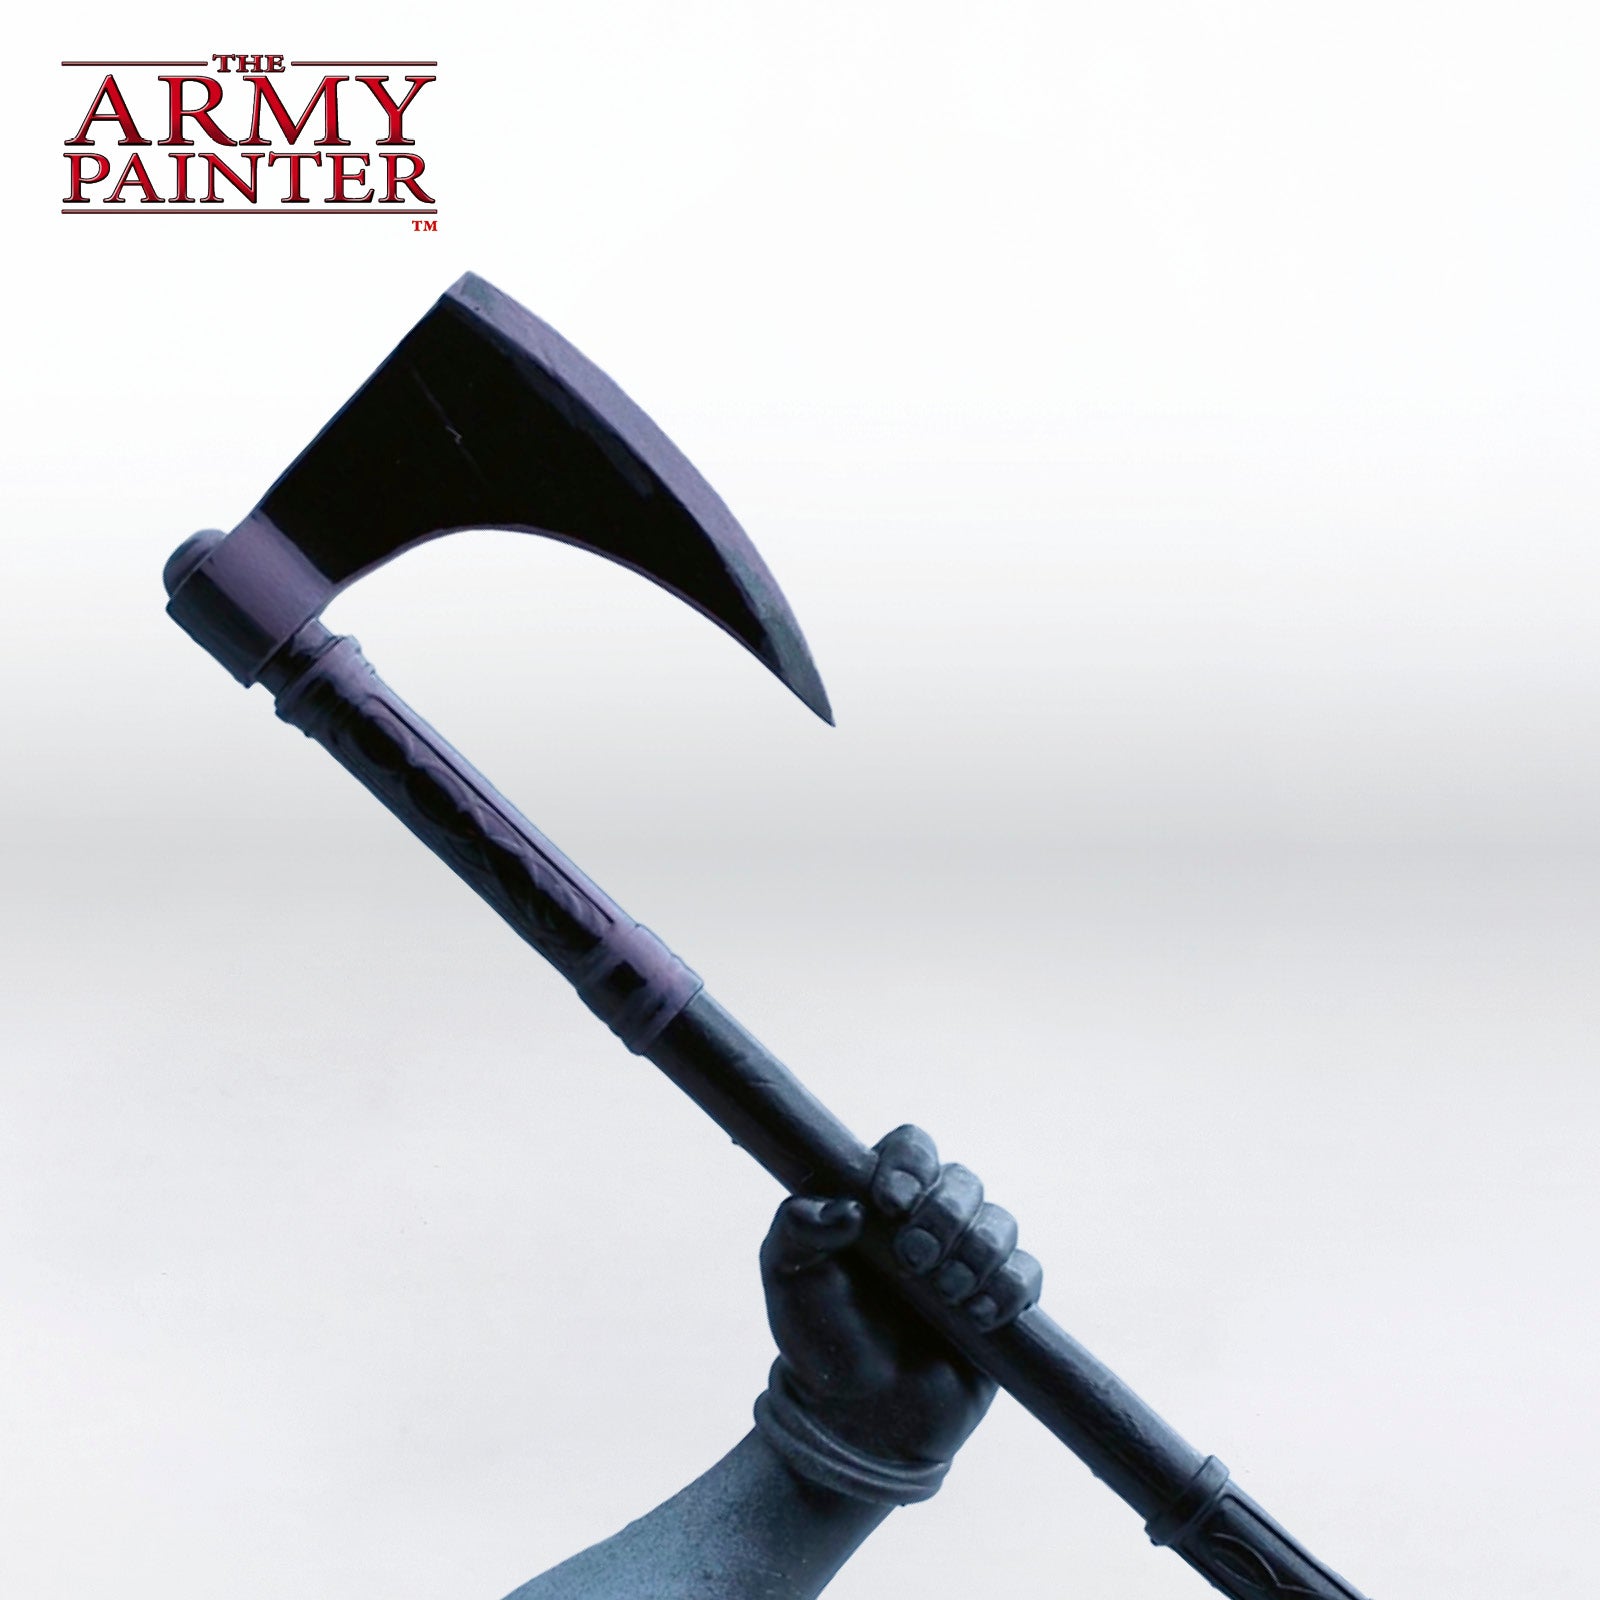
Step 3
Mix a small amount of Warpaints Fanatic Demigod Flames into Matt Black to add a touch of warmth, and then mix in John Blanche Masterclass Ivory White until you have a nice, warmer grey. Apply this within the areas blocked out in step two, making sure to leave areas of that step visible.
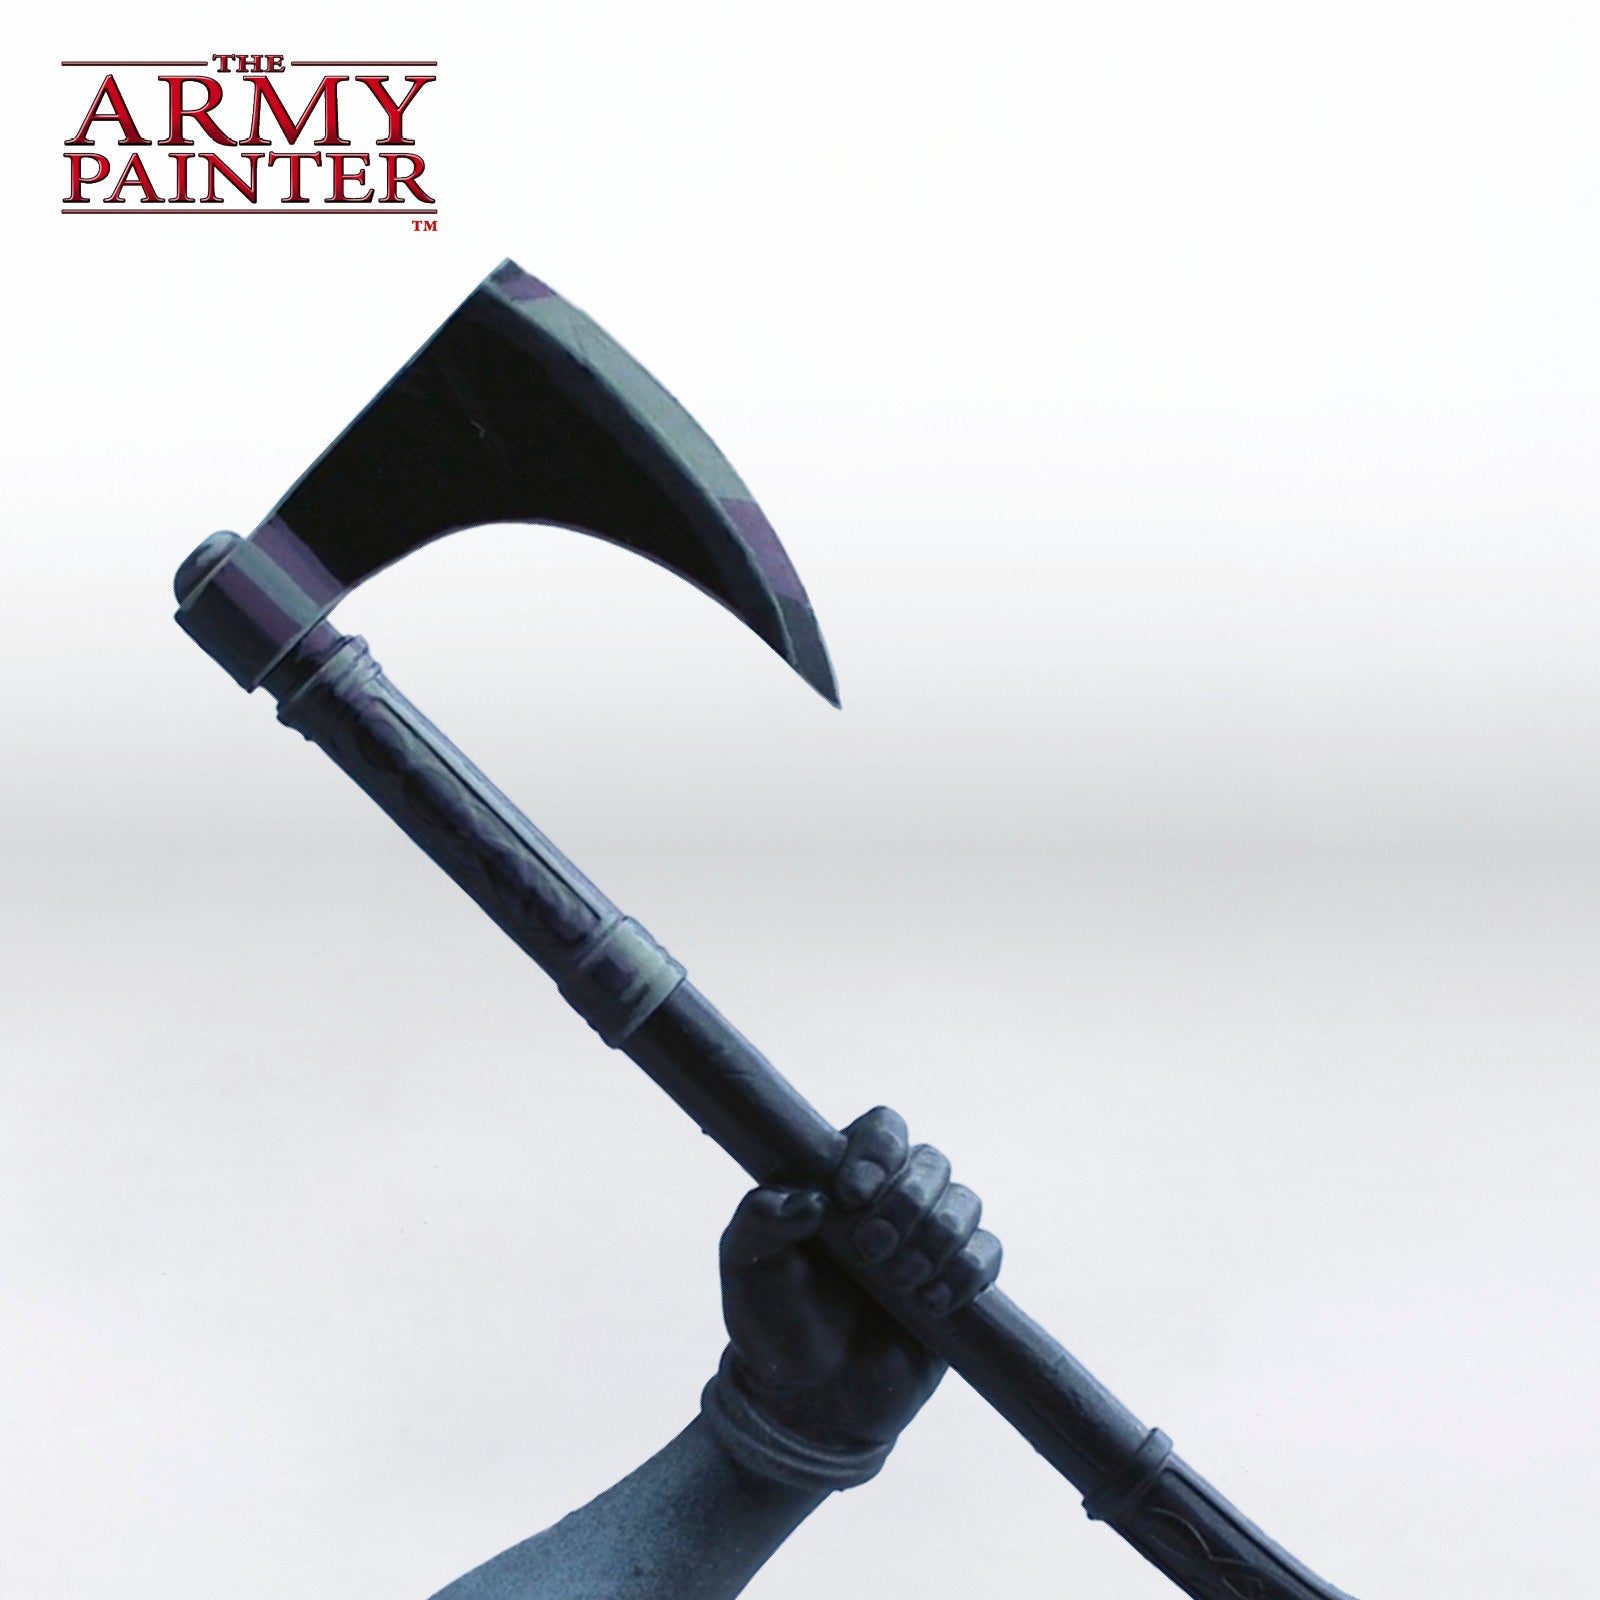
Step 4
Finally, mix John Blanche Masterclass Ivory White with a touch of Moonbeam Yellow and apply this to the lightest areas of the reflection.
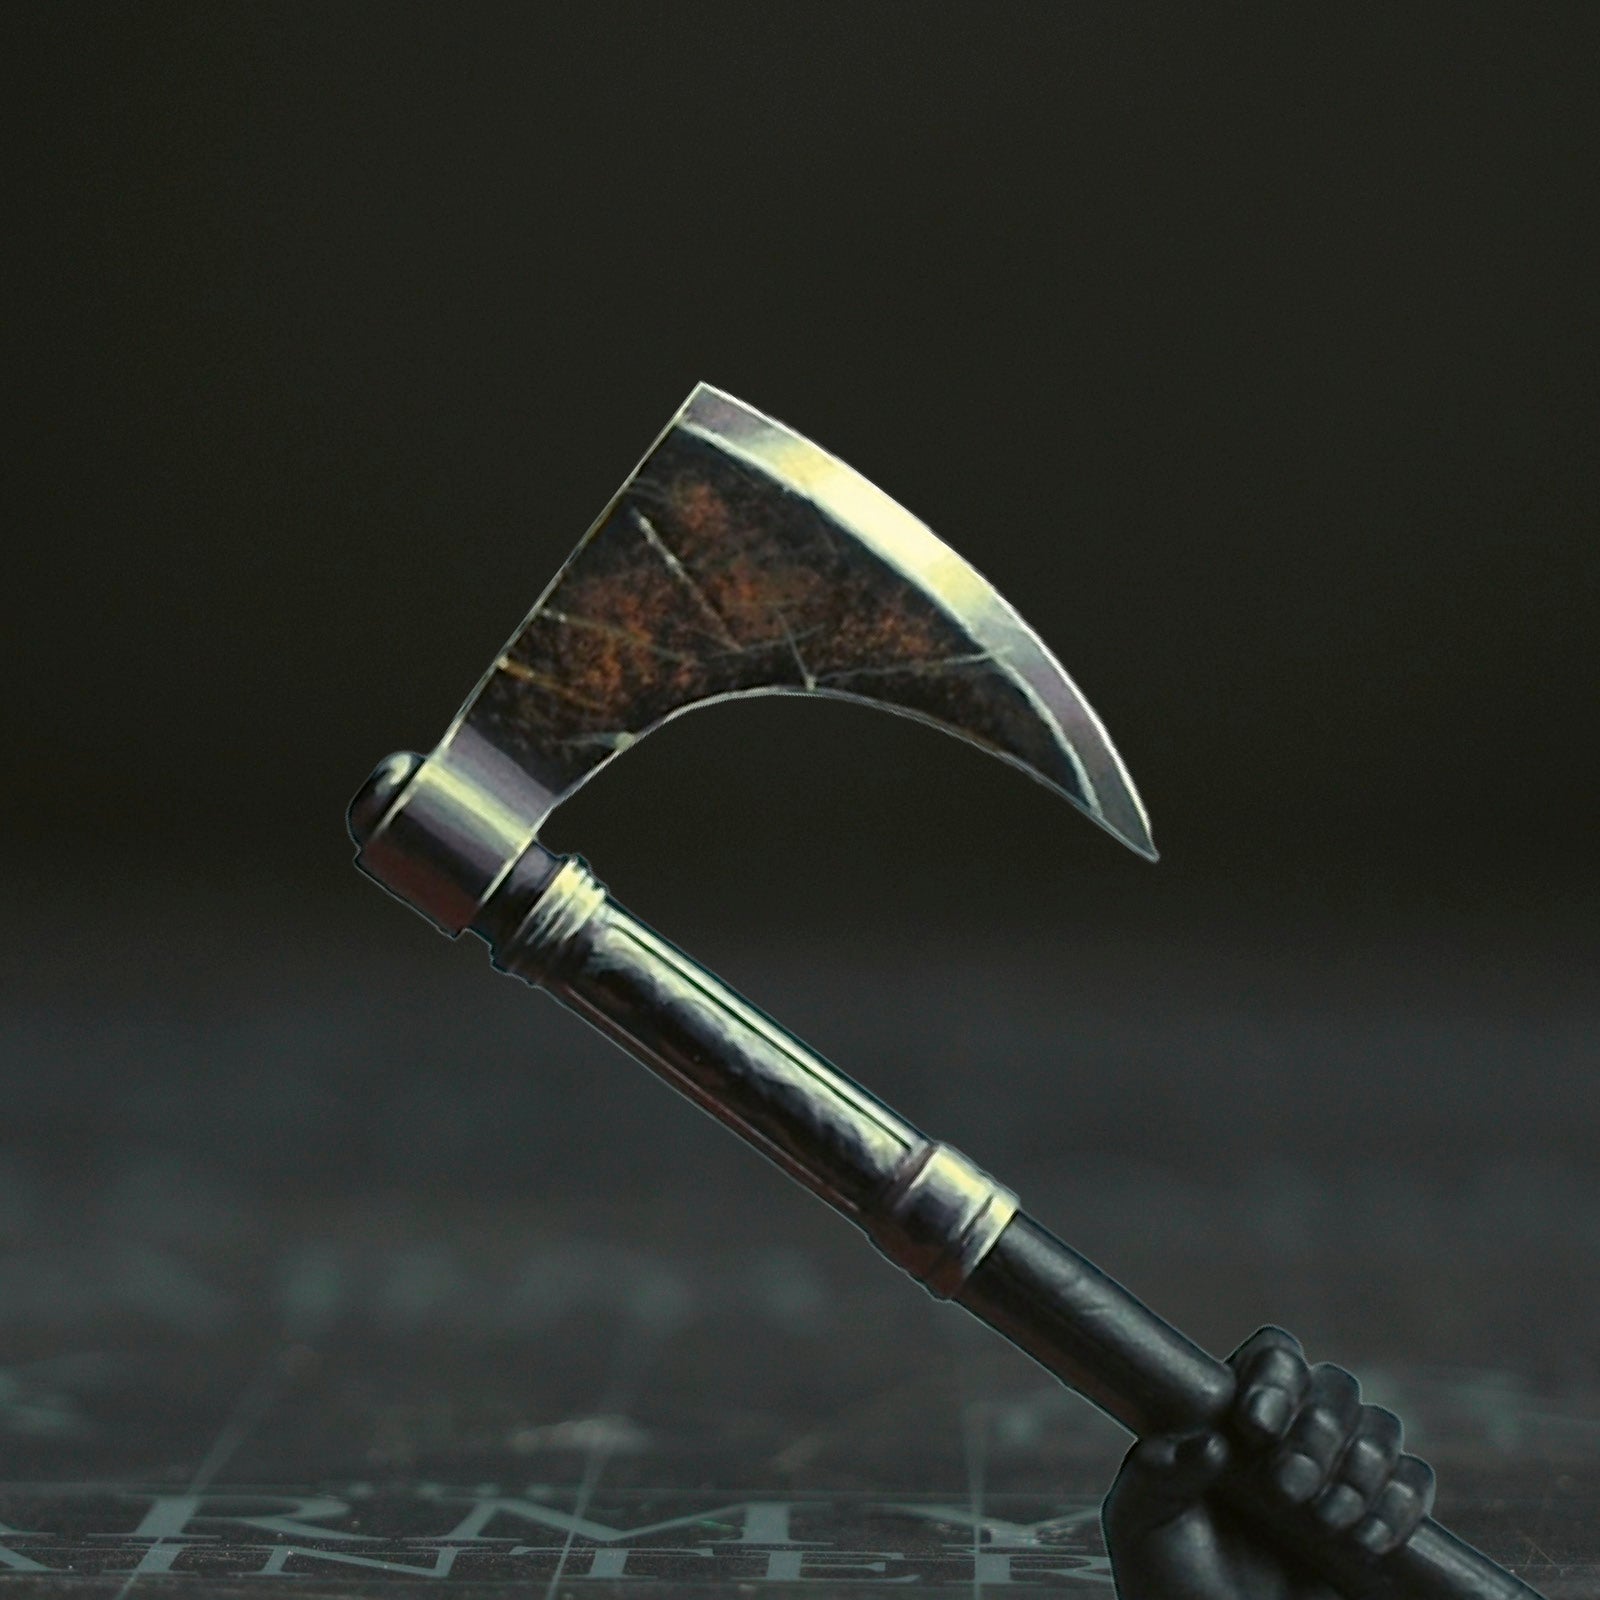
NMM Steel - Advanced
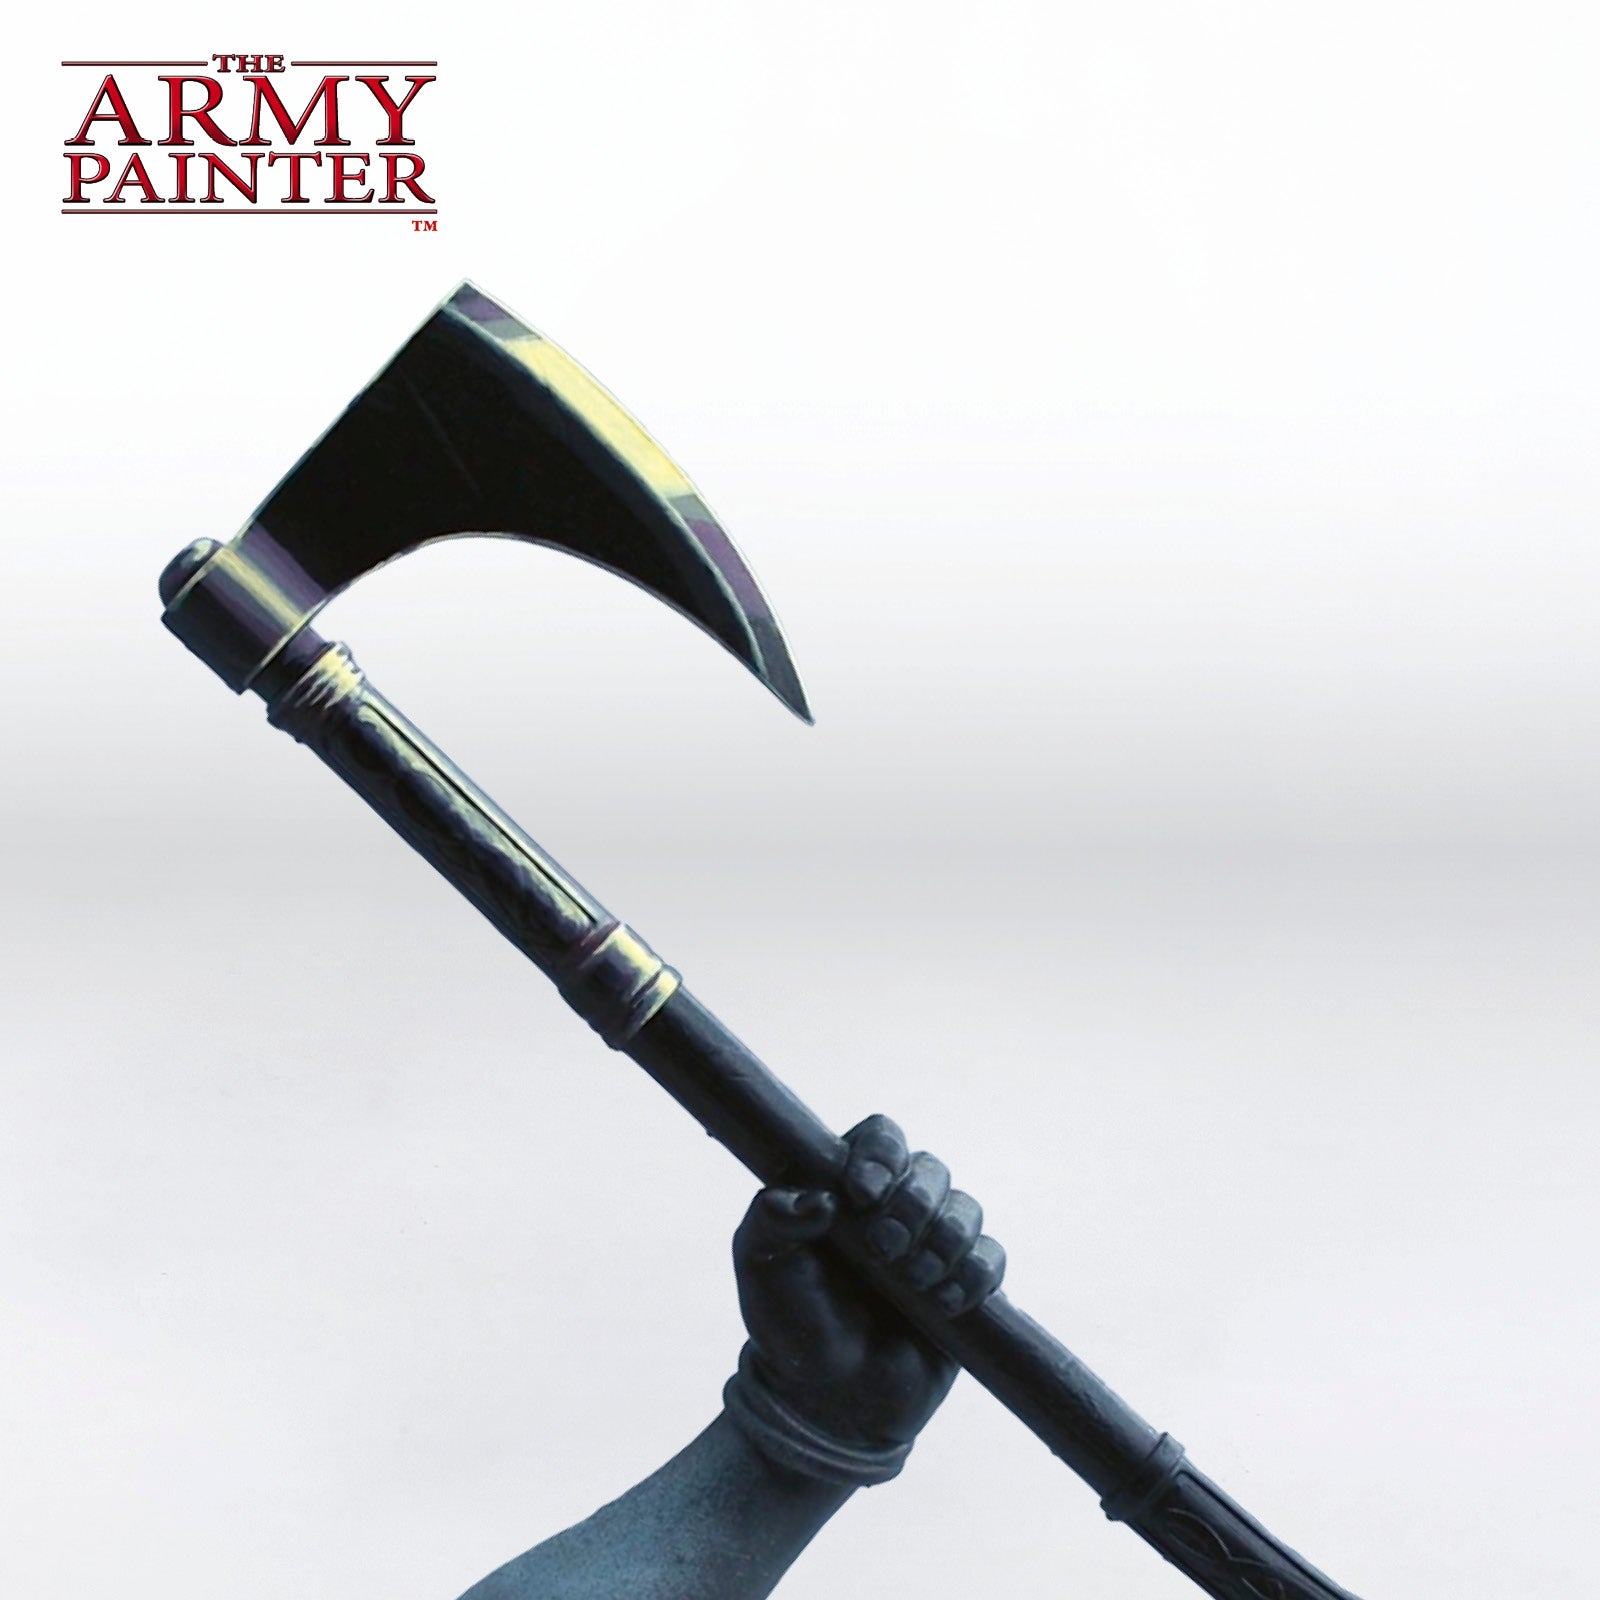
Robert: At this point, we’ve established the basic structure of the axe with our NMM setup. You should now be able to clearly see the main light areas, the shadows, and the highlights working together to suggest a metallic surface.
From here, you can start thinking about adding more interest and storytelling details. For example, a few patches of rust or some scratches across the axe head can make it feel worn and battle-tested.
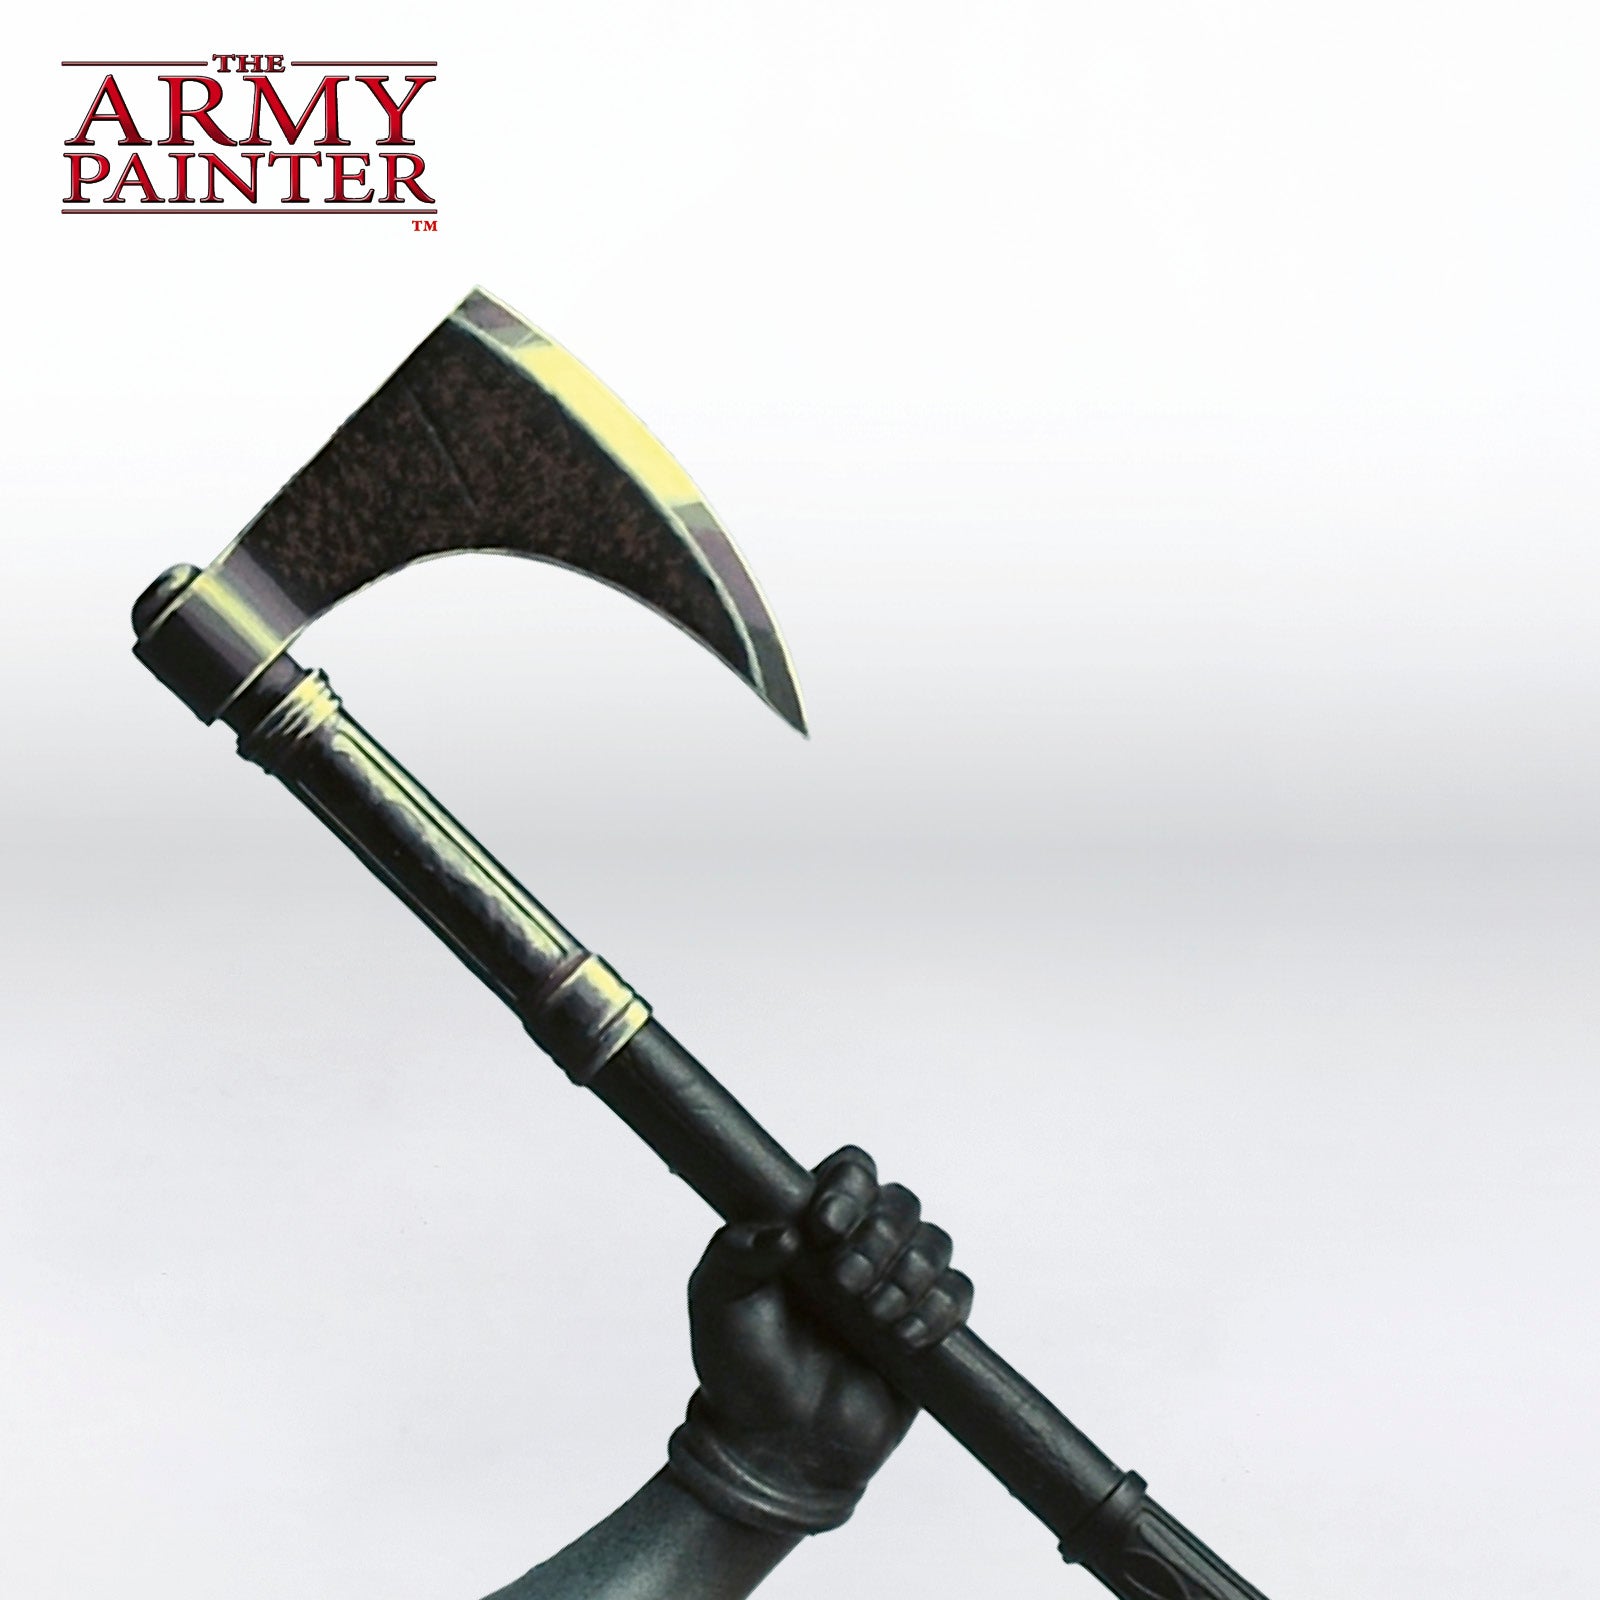
Step 1
While the Warpaints Fanatic Fresh Rust and Dark Rust Effects paints are great, for this model, we’re going to use more traditional acrylics instead. Begin by using a Large Vehicle and Scenery Brush to stipple on some Warpaints Fanatic Oak Brown. Wipe most of it off beforehand, and be sure to avoid the very edges, so you leave a darker frame around the section. This creates depth and helps the rust look naturally embeddedinthe surface.
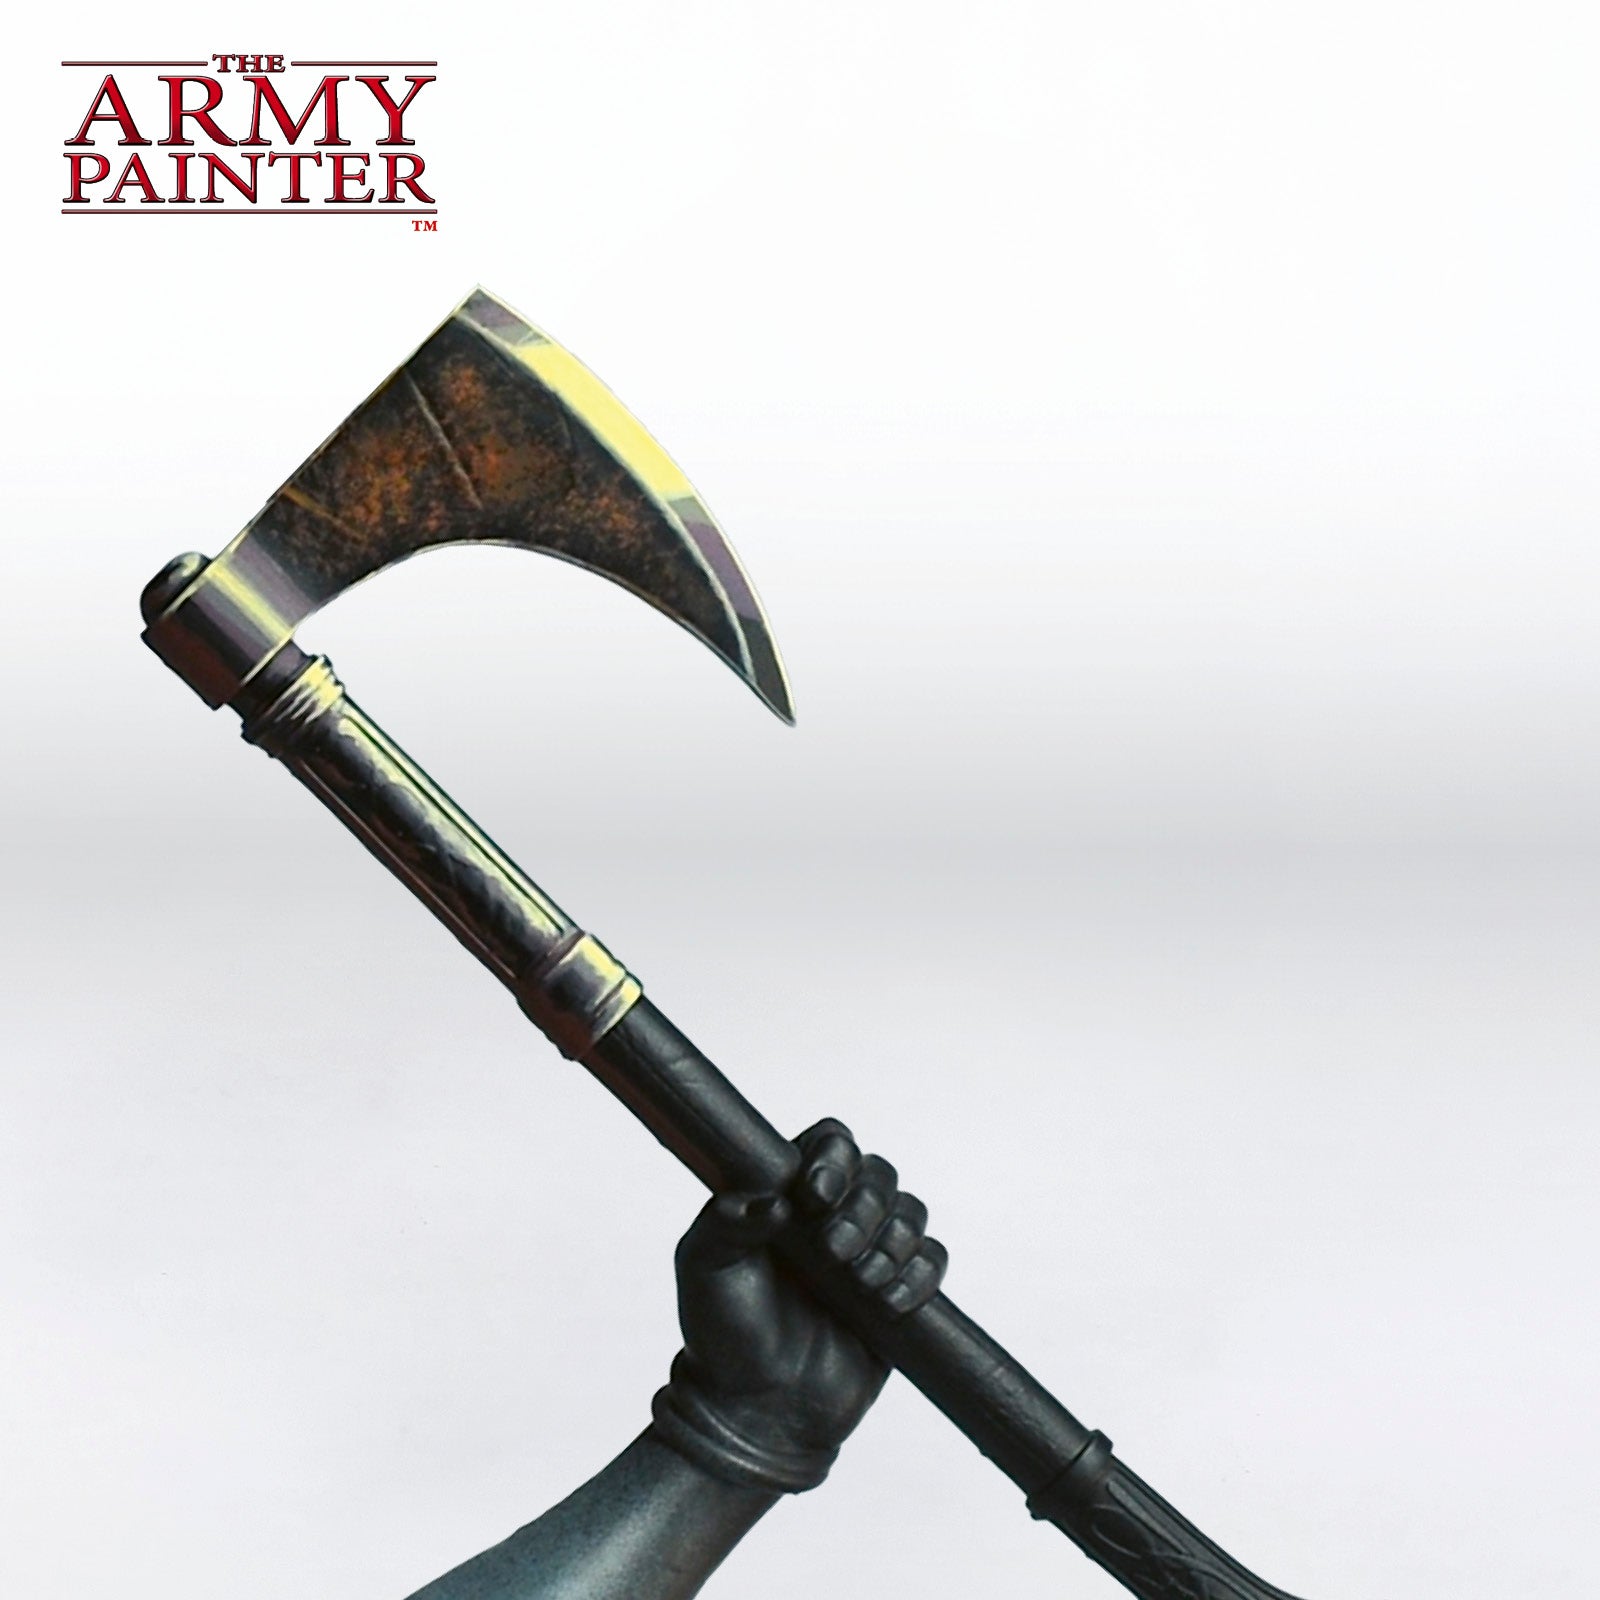
Step 2
Repeat this process with John Blanche Masterclass Ruddy Terra, but in a smaller and more irregular pattern. The contrast between the two colours will build a more natural, layered rust effect.

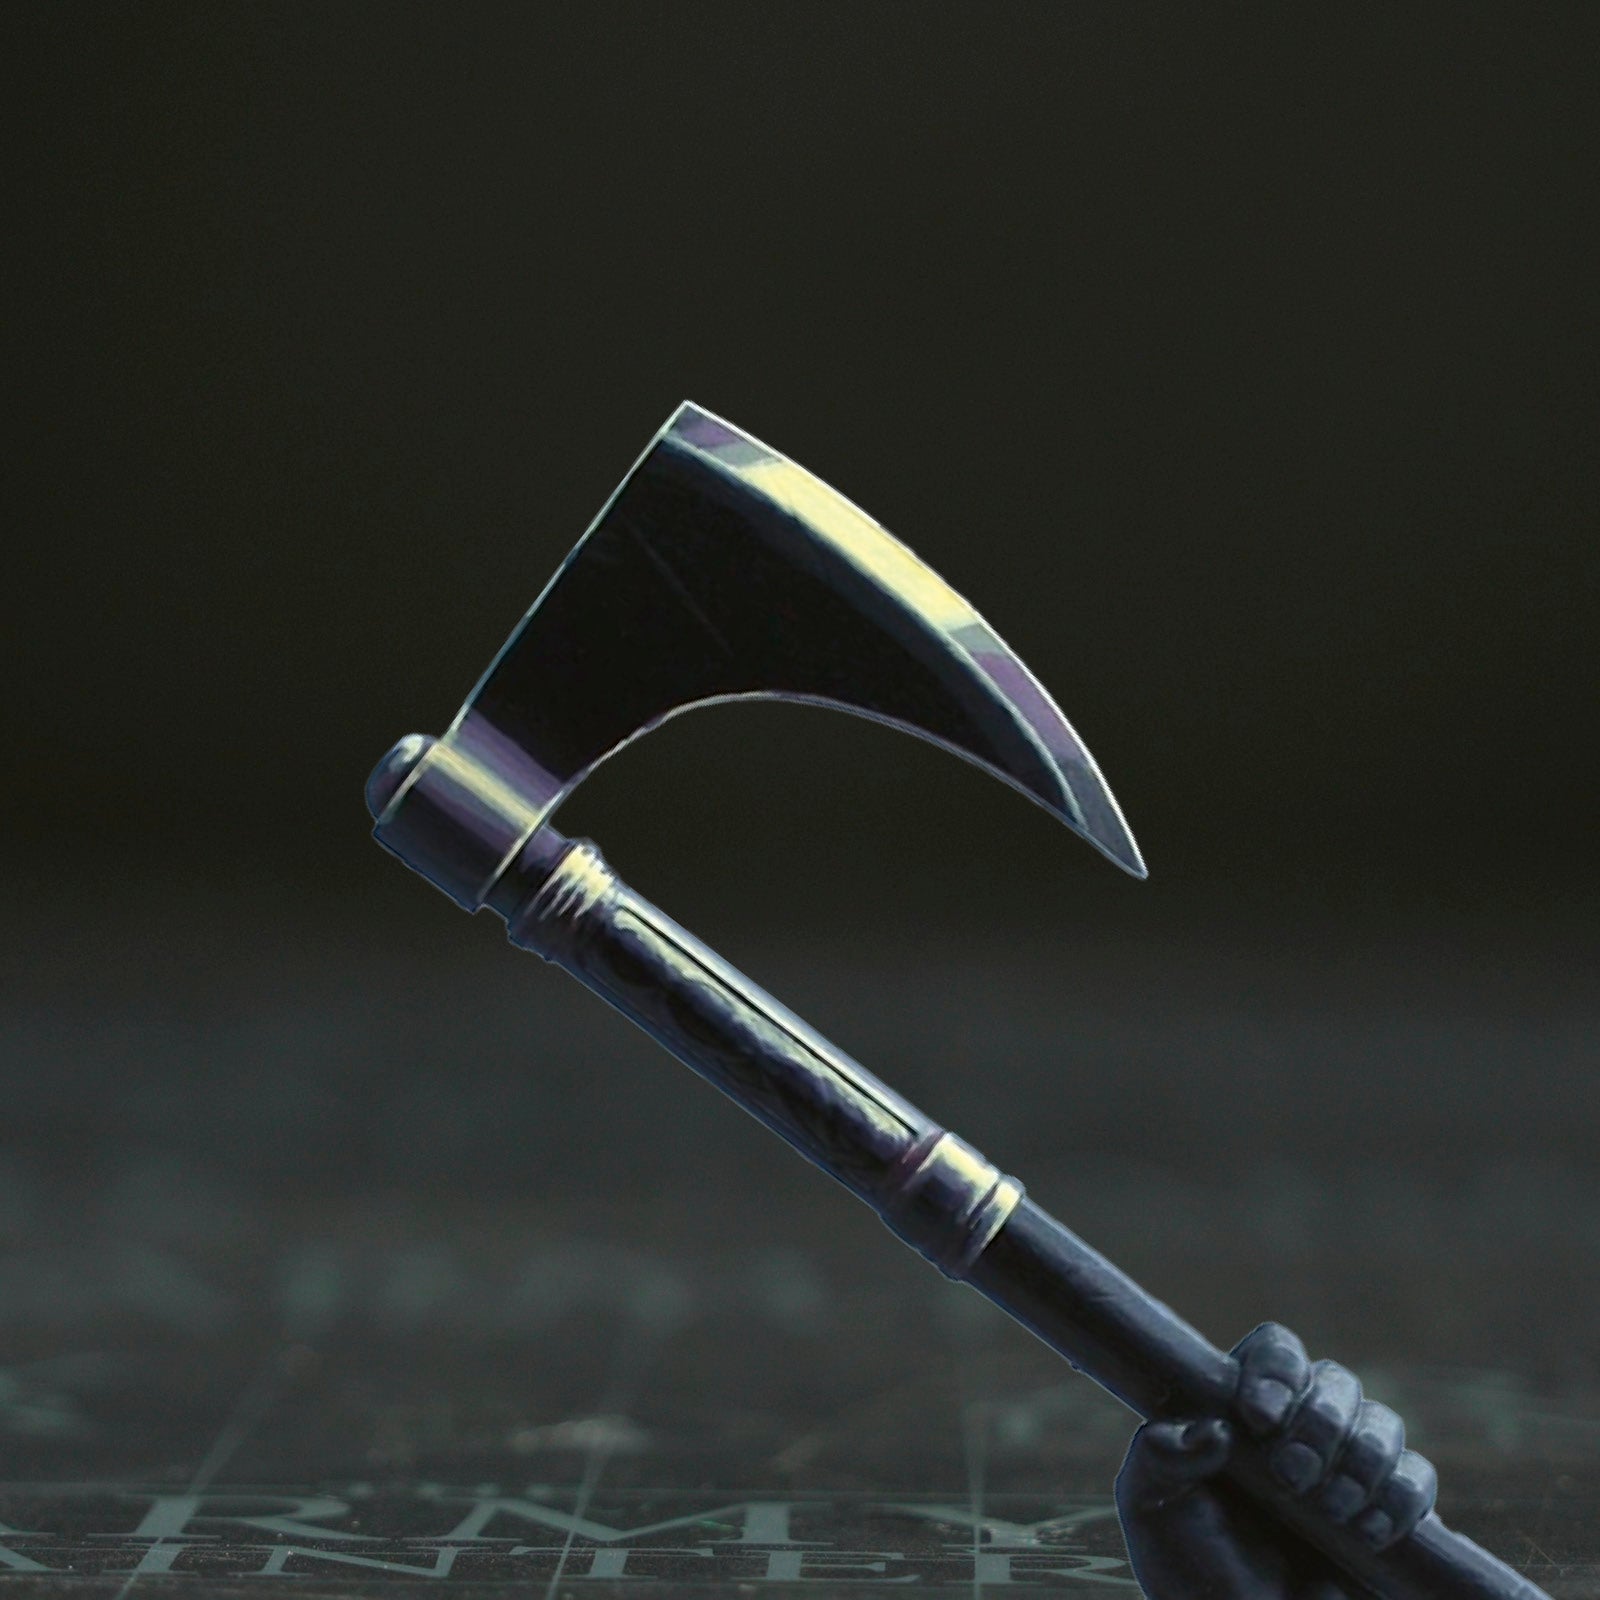
Step 3
Finish by blending the reflections on the blade to smooth out the transitions, then add a few fine scratches for extra realism. These small details make the surface feel more worn and give the axe a believable, battle-used look.
With that, your axe is done!
Be sure to tell us what you thought of this tutorial format, if you have any suggestions for improvements in the future, or even which models you want us to tackle.
If you paint your own model following one of these guides, tag it with #thearmypainteracademy to share your work!