


Regardless of what game you’re playing, or model range you’re collecting, no army would be complete without some characters to lead it. These heroes are often exemplars of what your army stands for. The entire vibe of the collection distilled down into a handful of miniatures to command both the army and your attention. It can be tempting to spend a lot of extra time and effort on these minis, as they’re often some of the coolest models in the collection. When painting up an entire army or collection to have a cohesive look (and sometimes even to a deadline) this can be a bit of a pitfall though. You want your army to look cohesive, but also want these heroes to stand out - quite the conundrum.
Luckily for us, we have a whole pool of contestants currently doing just that for the Arena of Escalation – painting up hordes of minis for a singular collection within a set time period, and yet with plenty of heroic characters mixed in. We asked our Social Media Specialist, Tyler Mengel, to take us through how he approached this for his ever-growing Astra Militarum army from Games Workshop’s Warhammer 40,000 setting.

Tyler: As a hobbyist of quite a few decades now, I have more than a couple of armies, collections, and all-around painted minis to my name. During that time, I’ve run the gamut from small warbands to large, sprawling armies of thousands of points, to one-off display-level pieces for painting competitions. Each of these often demands their own approach to how you paint them. With competition pieces, you want to lavish as much attention onto the mini as you can – sometimes upwards of 50 hours on one model! This is obviously unrealistic for a gaming army, as it would take you a decade or more to complete. Some of my other armies are painted to what I call a tabletop-plus level, something kind of halfway between tabletop and display, and while I love these armies, and continue to add to them here and there, they often took me at least two years to complete to a standard size (2,000 points or so for Warhammer players).

With my Astra Militarum army, I had less than a year to get the whole lot painted for our big game day in Denmark! That meant approaching them from a different perspective. As I’m getting older, I’m finding myself more and more drawn to figuring out ways how to get good-looking armies done quickly - a good tabletop standard within a reasonable timeframe. This lets me get painted models on the table faster and embrace my inner hobby butterfly while still completing projects. If it only takes me eight months to finish an army instead of two years, I can start up a new collection, while still having the last one to play with and expand on.

I set out with a few goals in mind for my Guard. Firstly, to utilize Speedpaint and drybrushing as much as possible on all of my infantry, and secondly to utilize the Warpaints Air range and drybrushing as much as possible on my tanks. This resulted in, what I feel, is a pretty reasonable standard for my rank-and-file guardsmen, which amount to only a handful of points per unit anyway and are sure to die quickly, as well as on my tanks, where the smooth transitions from the airbrush, and all the decals do a lot of the heavy visual lifting. Drybrushing suits the army well since Guardsmen are sure to get dirty and dusty while out in the field.
With a lot of the army taken care of in a manner faster than I’m accustomed to, it lets me spend a bit more time on characters and “elite” units. That’s the trap though. You could easily find yourself trying to make these minis stand out more by adding a ton of detail to them or switching up your painting style drastically, which, while eye-catching, won’t always mesh with the rest of the force.

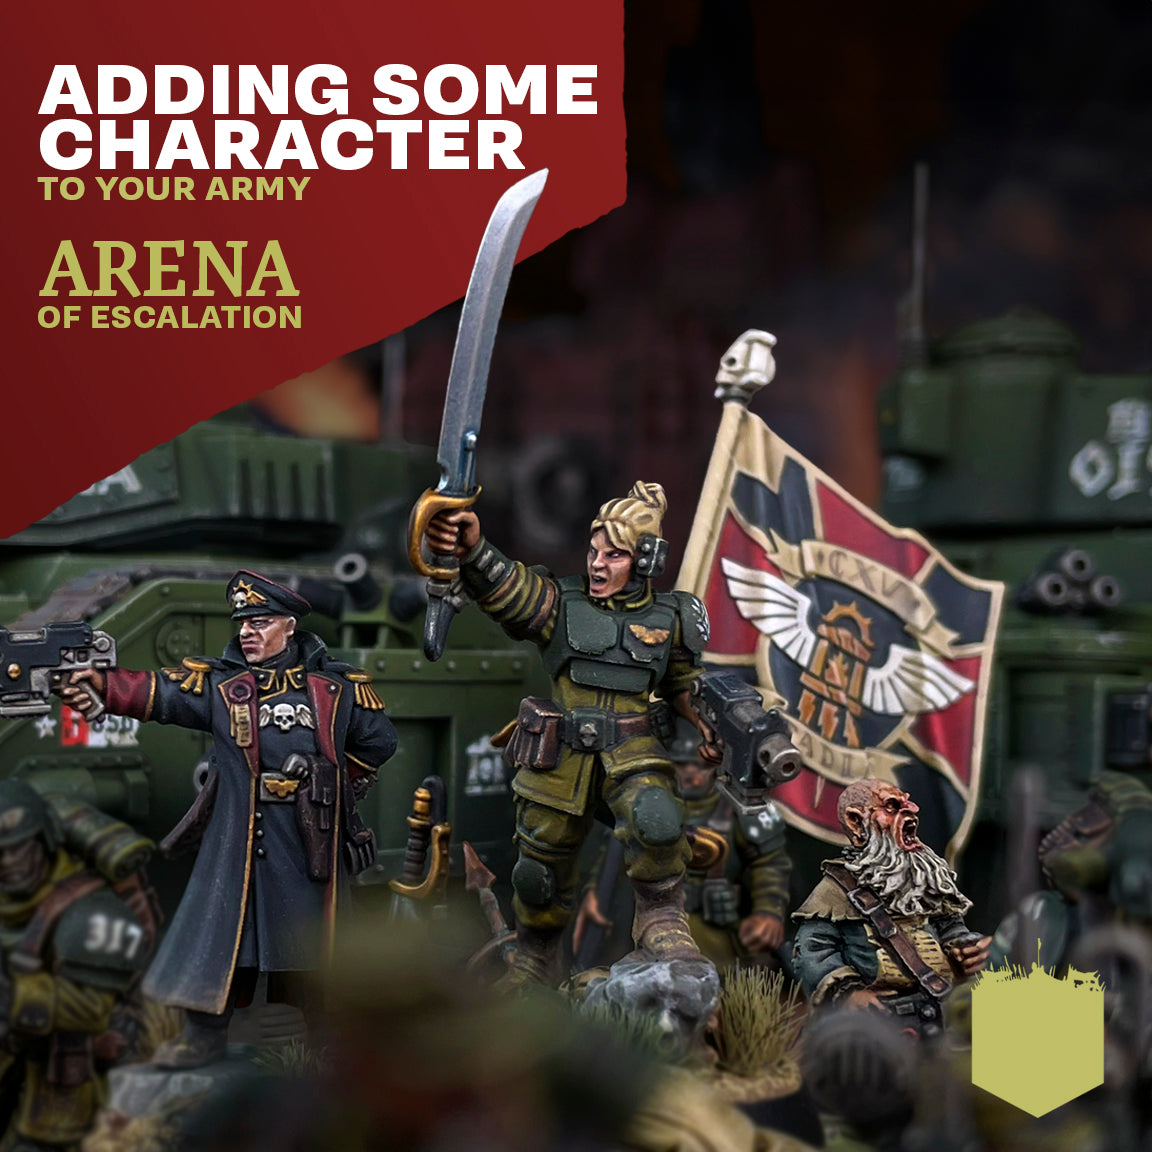
Instead, what I’ve done so far, is in general, just be a bit more tidy and careful on these models, while still using the same core techniques as the rest of the force. Here and there you can also push things a bit further. On my Castellan and Commissar, I’ve spent a bit more time on their faces – adding carefully placed highlights of Warpaints Fanatic Skeleton Bone instead of just a drybrush (though they did get a drybrush first before that), spending more time on glazing in some reds and purples with Warpaints Fanatic Magenta Tone and Purple Tone respectively, and even painting the whites of their eyes.

The Commissar got a little bit more attention above that as well, mostly due to how he was primed. Most of my infantry start out with a basecoat of Skeleton Bone Colour Primer for all of the Speedpaint to go on top of. With the Commissar’s black coat though, I instead started him out with Uniform Grey Colour Primer. This meant, for the brown leather for example, I couldn’t really use Speedpaint on top of the grey unless I re-basecoated it, so I instead used Warpaints Fanatic Brigandine Brown, Strong Tone, and a scratchy highlight of Leather Brown. I also spent a bit of time being more careful with the layers on his coat, using a bit more subtle of transitions, since the dark colours wouldn’t look as good with my standard stark shadows and drybrushing used on the rest of the infantry. I didn’t want him to look out of place though, so I sponged on some highlights to make it a bit “scratchier” and also made sure to give him an all-over Warpaints Fanatic Skeleton Bone drybrush at the end, but I just went a bit lighter on it on some areas, and overall was more controlled with it. Other areas of him though, such as the metallics, gun, gold, and red, were done more or less the same way as I would have on the infantry. This way, I pick out a few key areas to spruce up a bit more, but leave the rest at the same level as the rest of the force, tying him in. I didn’t want him to look out of place, just more defined.

On other units, you must approach them differently due to the models' physical factors. On my Ogryns for example, they have so many large, flat areas, mostly on their skin, that techniques that work on normal human-sized infantry would look too messy on them. I ended up diluting the Speedpaint used for the skin with Speedpaint Medium, and built the colour up over a few more layers. I also did a quick edge highlight of everything after the drybrush to make sure it all looked defined. Just as with the Commissar though, the darker cloth, leather, metallics, guns, and armour were all done the same as the rest of the army. They stand out a bit as having more detail, as they should for their size, but, in my opinion, still fit in aesthetically.

The trickiest prospect I’ve had so far is adding in a unit of Deathwatch since not only are they an entirely different colour scheme, but they’re also mostly hard armour instead of cloth. While I didn’t use a lot of the same techniques besides the skin, I made sure to keep the aesthetic similar with quick, “dirty” looking highlights, in this case, lots of chipping on the armour. Basing everything the same with the same level of dirt on the boots also helps tie it all together. They definitely stand out, even more so than the previous units, but I think they visually gel with the army still as well.
As you can see, by just tweaking a few of your recipes and techniques, it’s easy to add a bit more pizzazz to certain models without spending a ton of time on them or taking them to too high of a level of painting beyond the rest. With collections, it’s all about the cohesive look at the end of the day.