The Arena of Escalation continues apace here in The Army Painter offices, with many an eager hobbyist painting up model after model from Games Workshop for their burgeoning Warhammer 40,000 armies. Some of us are mostly sticking to the new Warpaints Fanatic range, whilst others are using the the alchemic might that is Speedpaint or the blending behemoth of Warpaints Air. For some though, the only path forward is to use all three ranges and play into all of their strengths.
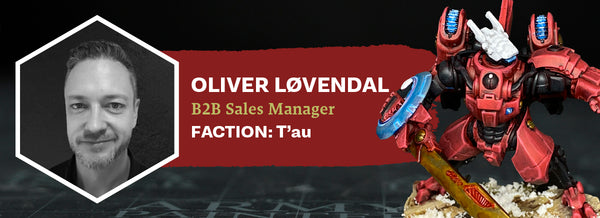
One such paint connoisseur is Oliver Løvendal, who recently completed his first test model - non other than the legendary Commander Farsight himself! Why start small when you can paint up the namesake for your army, the Farsight Enclaves of the T'au, from the very get go? Not satisfied with just one paint range, Oliver has expertly combined all three! With such an amazing start to his army, we couldn't help but ask him to share his painting secrets, and he was only too happy to oblige!
Oliver: I want to show that you can paint an army quickly - even without access to aerosol primers or an airbrush. Wanting to try different paints and techniques, I dived into it and used a mix of Warpaints Fanatic, Air, and Speedpaint. Here I will try and cover how I painted the big guy himself: Commander Farsight. I hope it can help you on your own hobby journey!
Painting Commander Farsight
Step 1
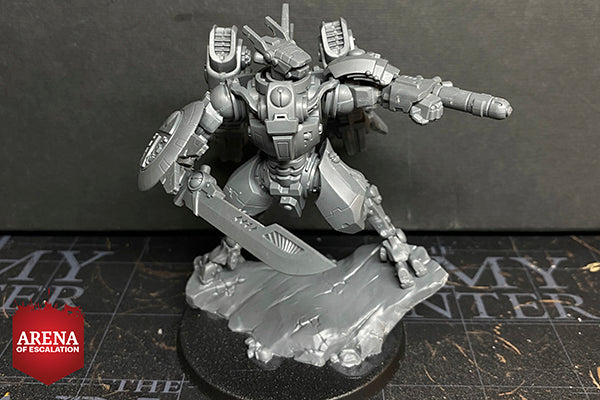
The Commander Farsight mini is an incredible model. However, I wanted to pay homage to the classic Mark Gibbons artwork, where he has his shield on his sword arm.
A relatively easy conversion, but it changes the entire dynamic of the model. A great and simple way to make the model ´my own´.
Step 2
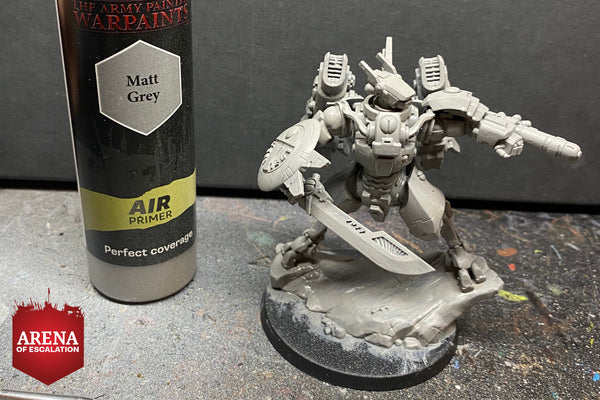
I wanted to show how an army can be painted without using aerosol primers or airbrush. There can be all sorts of reasons why those two priming options are not relevant for a hobbyist, and there are other ways to accomplish the same task.
I use our
Warpaints Air Matt Grey primer straight out of the bottle, and apply it with a
Monster Brush. You might need to go over the model twice, but I find that starting in one end of the miniature and then going over it again from that end again, it will already be dry enough, and I can paint the two layers in one go.
You can just as easily use our Brush on Primer.
Step 3
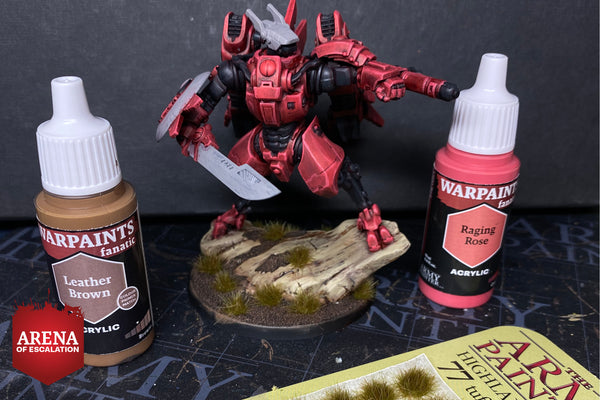
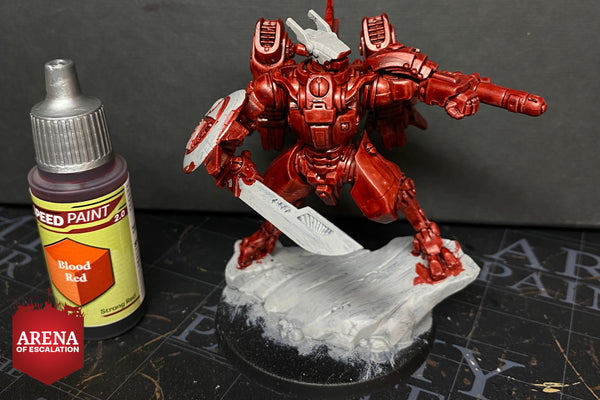
I absolutely love our Speedpaints and the way they help me speed up my painting, so I often paint the entire model with them as the first layer. Normally I use
Speedpaint Hardened Leather, but in this case the
Blood Red was more fitting.

Step 4
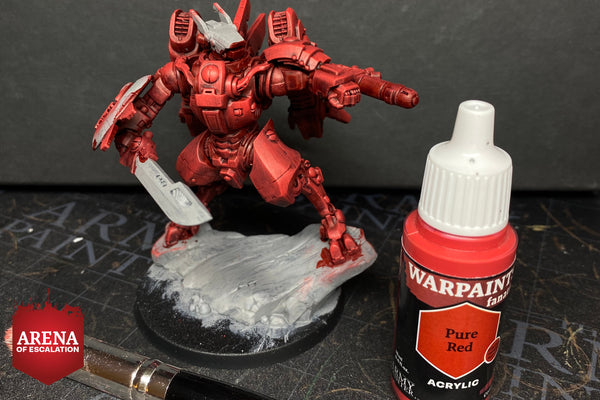
I wanted to try out the new Warpaint Fanatic range, so I proceeded to pick one of the red triads and applying it with our
Masterclass Moderate Drybrush. The Warm Reds triad would probably be the best for that classic Farsight red scheme, but again, to make the project my own, I wanted to try using the
Cool Reds triad and started with the aptly named
Pure Red.
Step 5
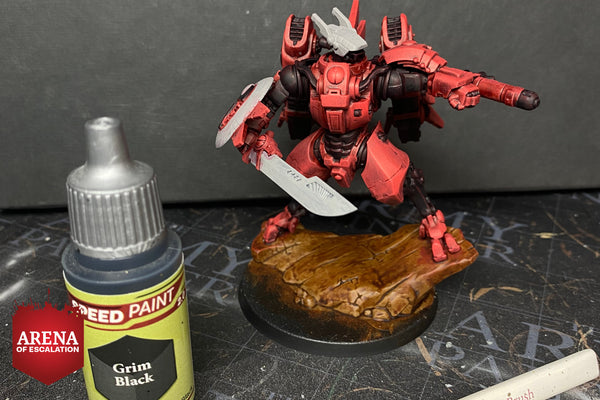
At this point I wanted to make the model more visually pleasing for my eyes, so I proceeded to block in all of the non-red areas with
Speedpaint Grim Black. This paint is such a workhorse in my toolbox, I use it every day, for every project!
Step 6
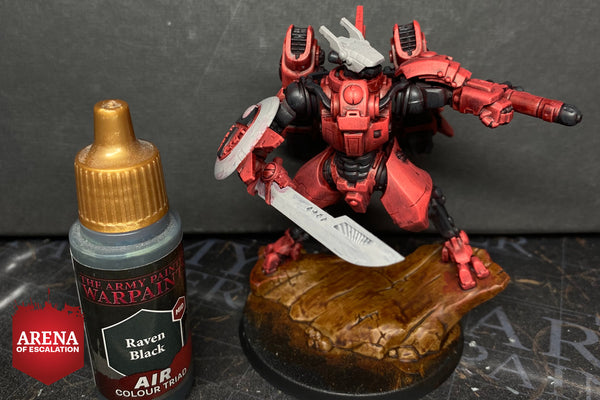
Continuing with the black areas, I highlighted them with
Warpaints Air Raven Black. This is such a nice highlight for black, and it comes pre-thinned for those thin highlights. Perfect!

Step 7
Step 8

Step 9
Step 10
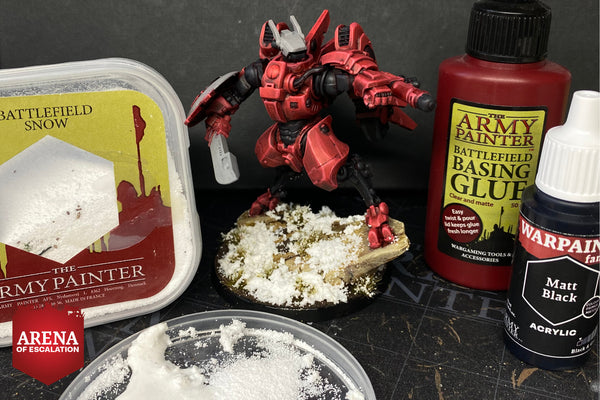
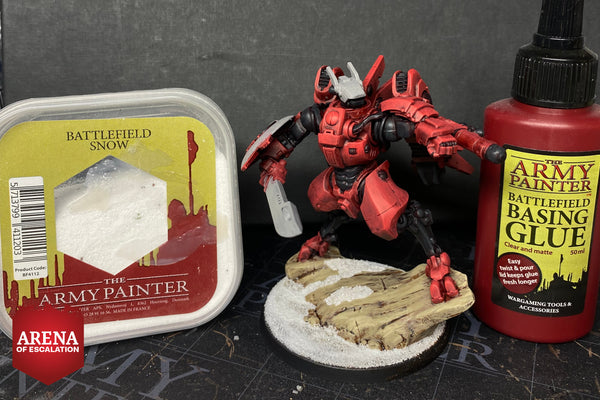
Step 11
Mixing Basing Glue and Battlefield Snow, I applied some nice snow effects.
I was in a proper Christmas mood by now with all the red and snow. Lovely!
Step 12
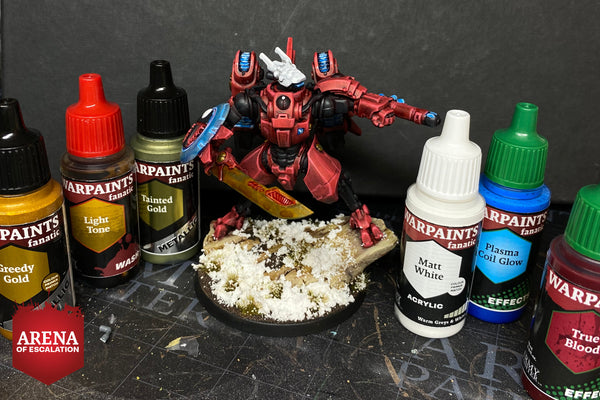
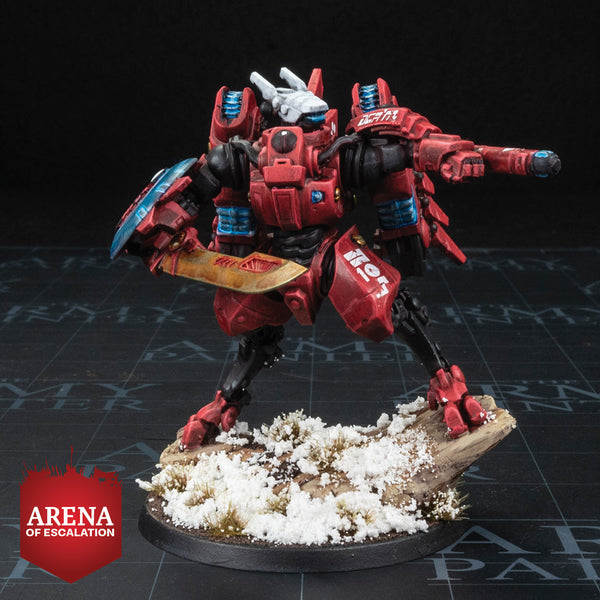
The helmet was painted with a couple of layers of thinned down
Warpaints Fanatic Matt White. The blue glow was done by first applying some Matt White, and when dry, applying
Plasma Coil Glow on top of and a little beyond the white.
This isn't quite a normal T'au blade, - but recent lore has him having visions of wielding a huge brass axe, so I thought it fitting. I added some of the new
True Blood Effects paint as well, just to give it that Khorne feel...
A big thank you to Oliver again for walking us though how he painted such a striking model! With such a promising start to the army, we can only imagine how great it will look as it continues to expand. Speaking of which, the first check in for all of the contestants is fast approaching, with the first unit and character cresting the horizon. Don't miss out on that, as well as future tutorials, hobby guides, and maybe even games from the rest of the contestants taking part.


