We’re Putting the Warpaints Fanatic Starter Set to The Test
Starting out in the miniature painting hobby can be daunting: Where do you start? What paints and brushes should you get? And what if you’re unsure of whether this hobby is for you?
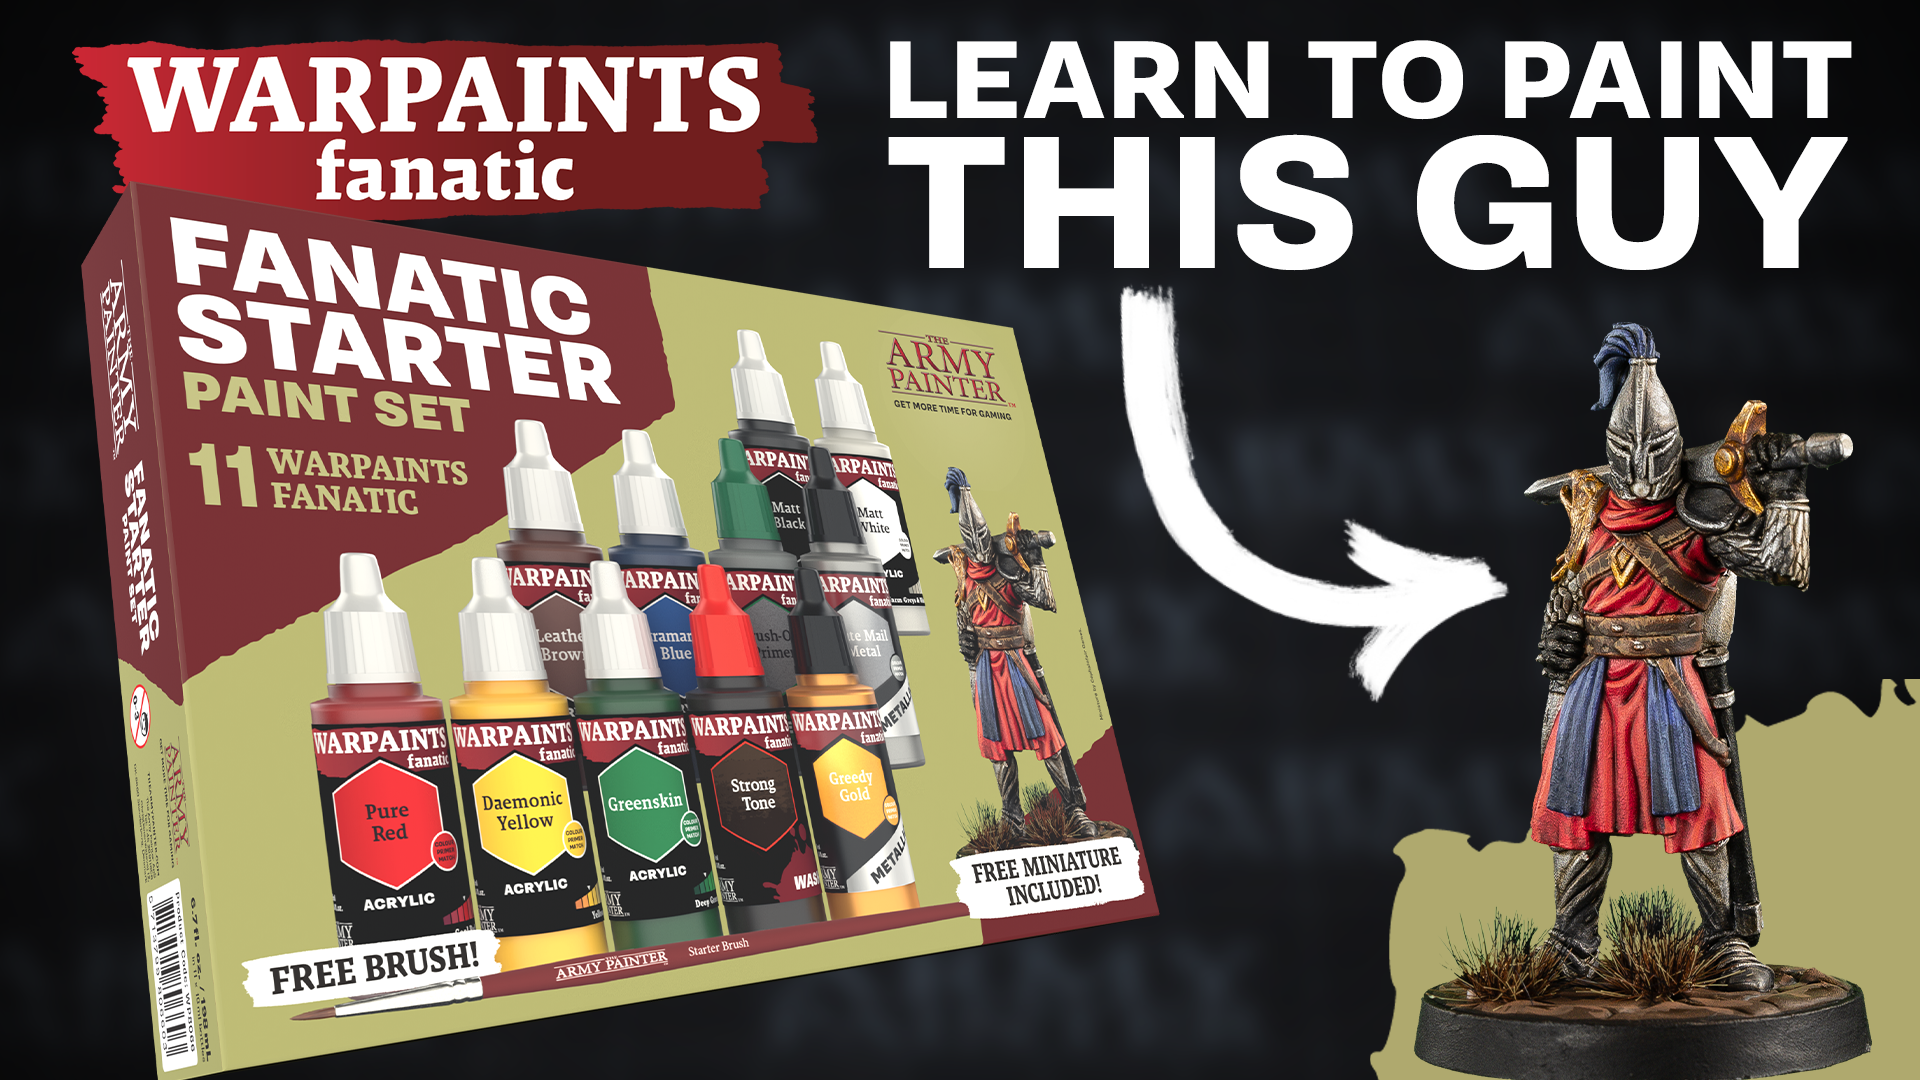
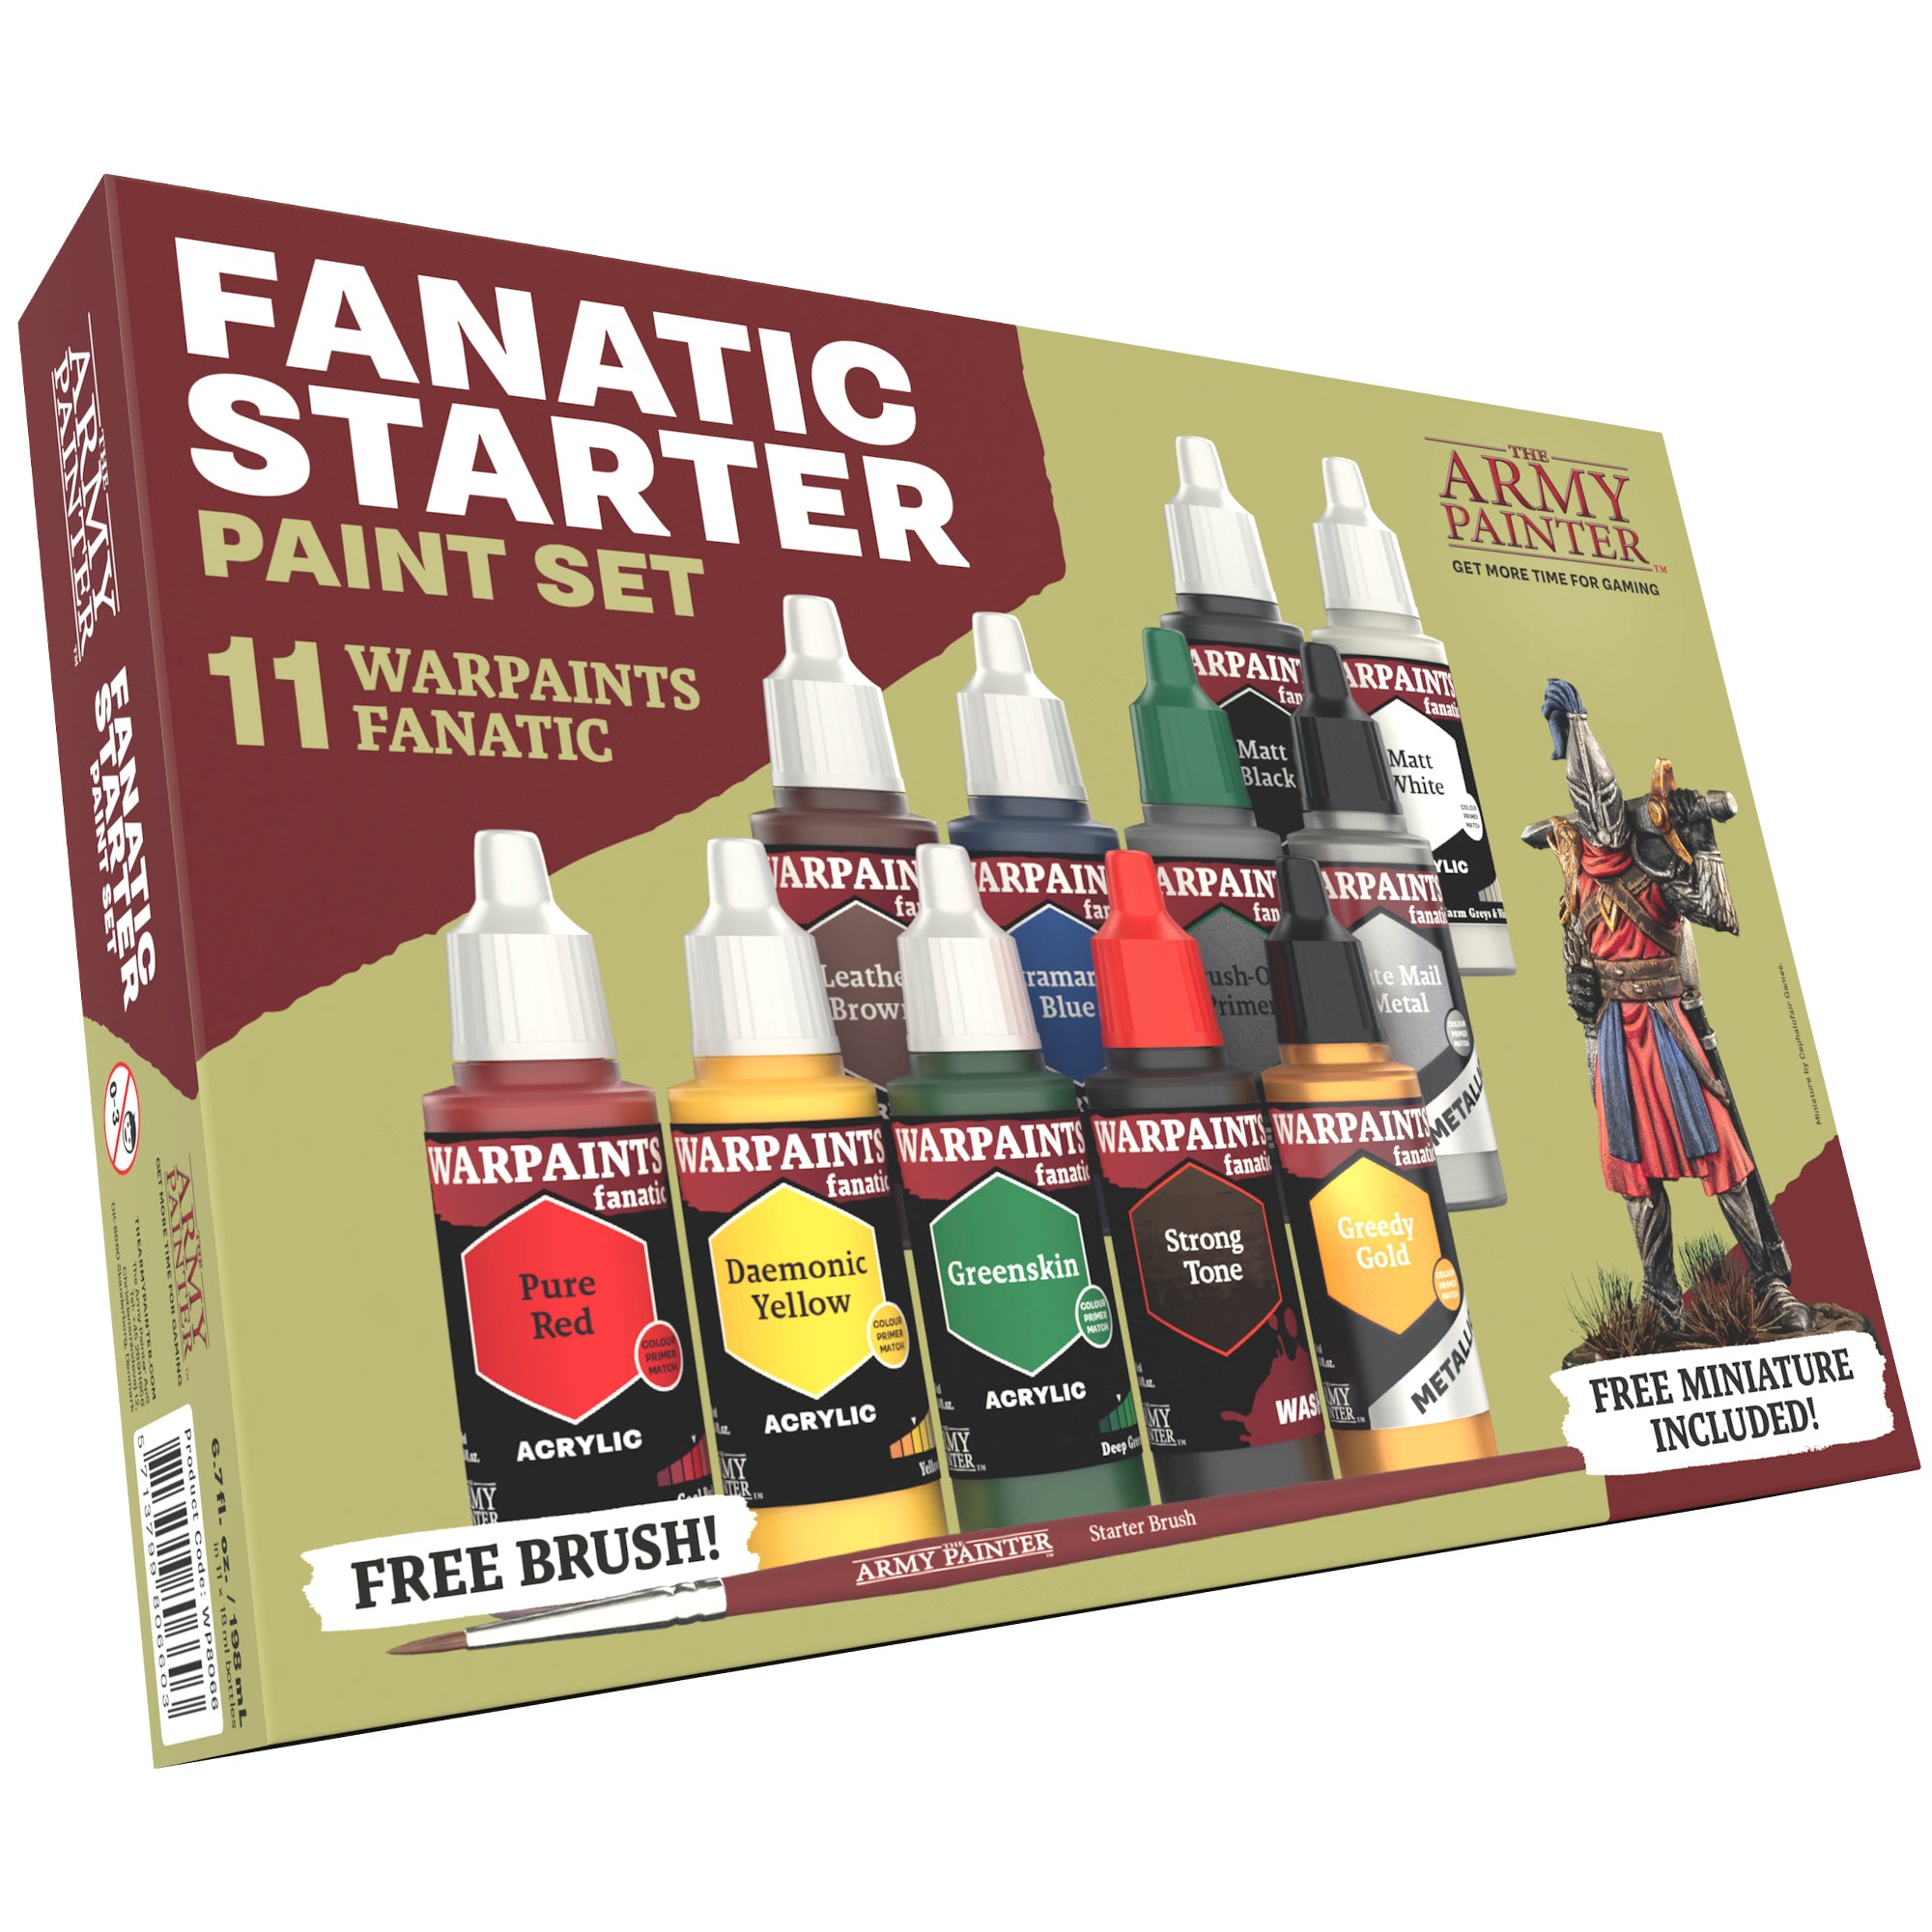
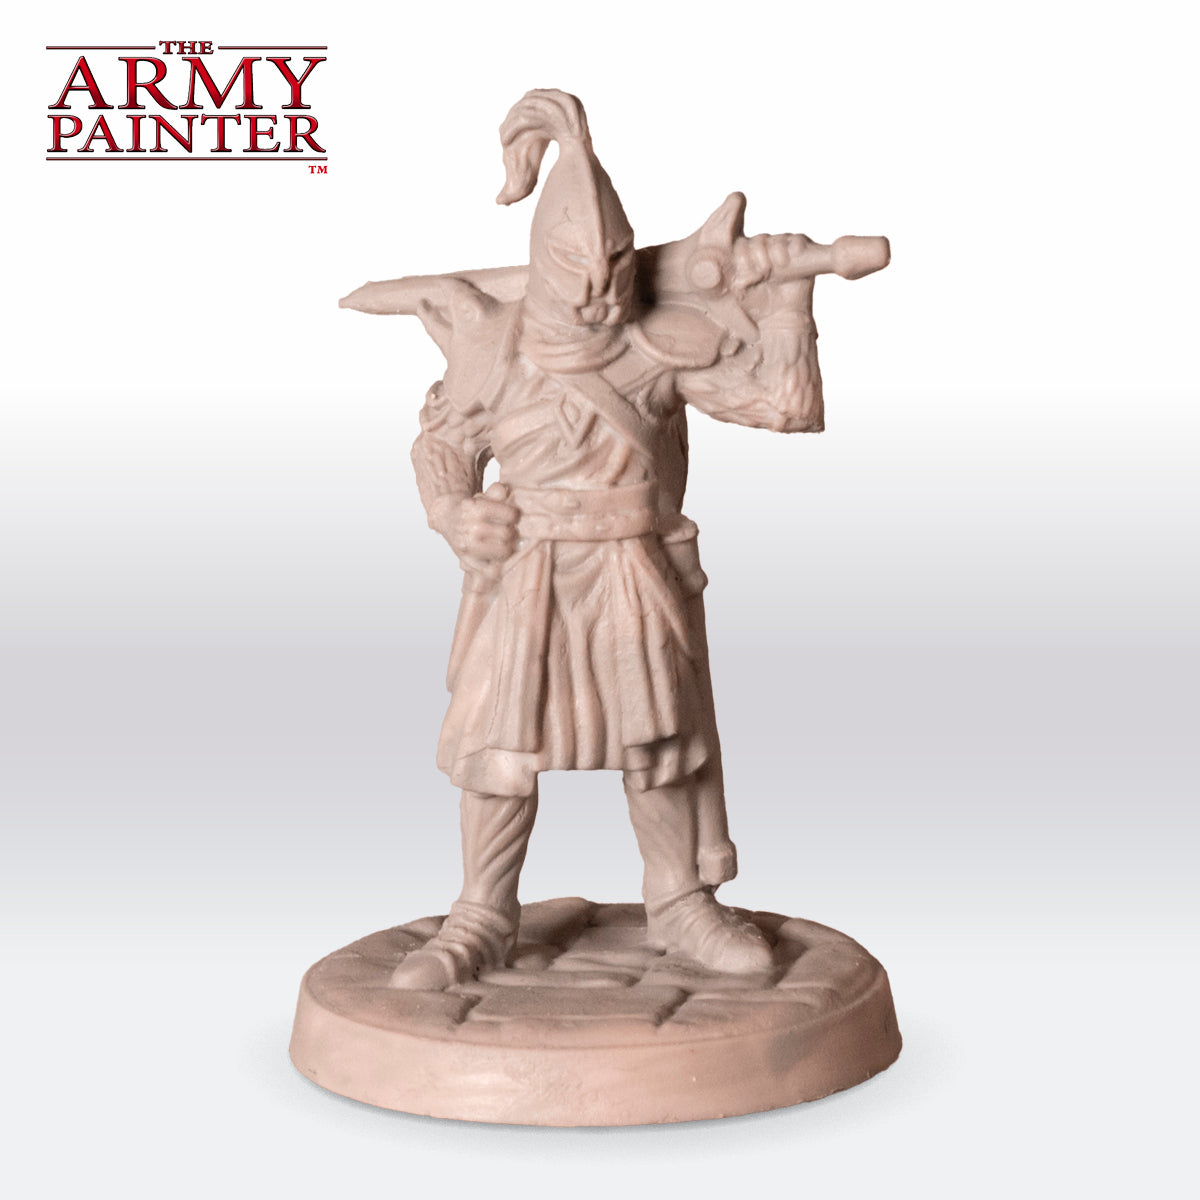
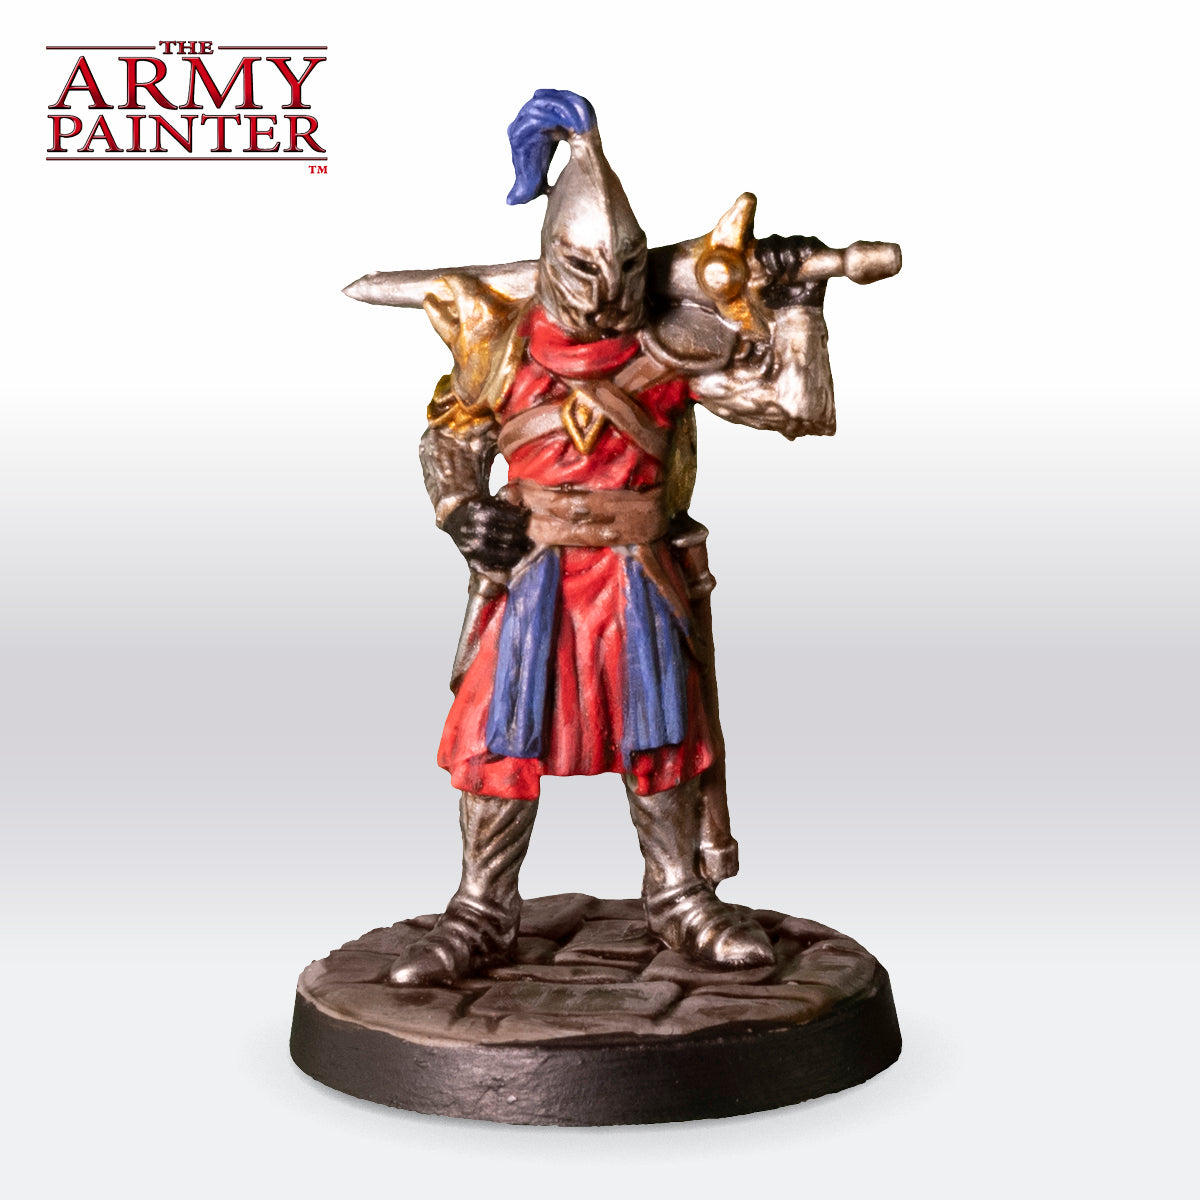
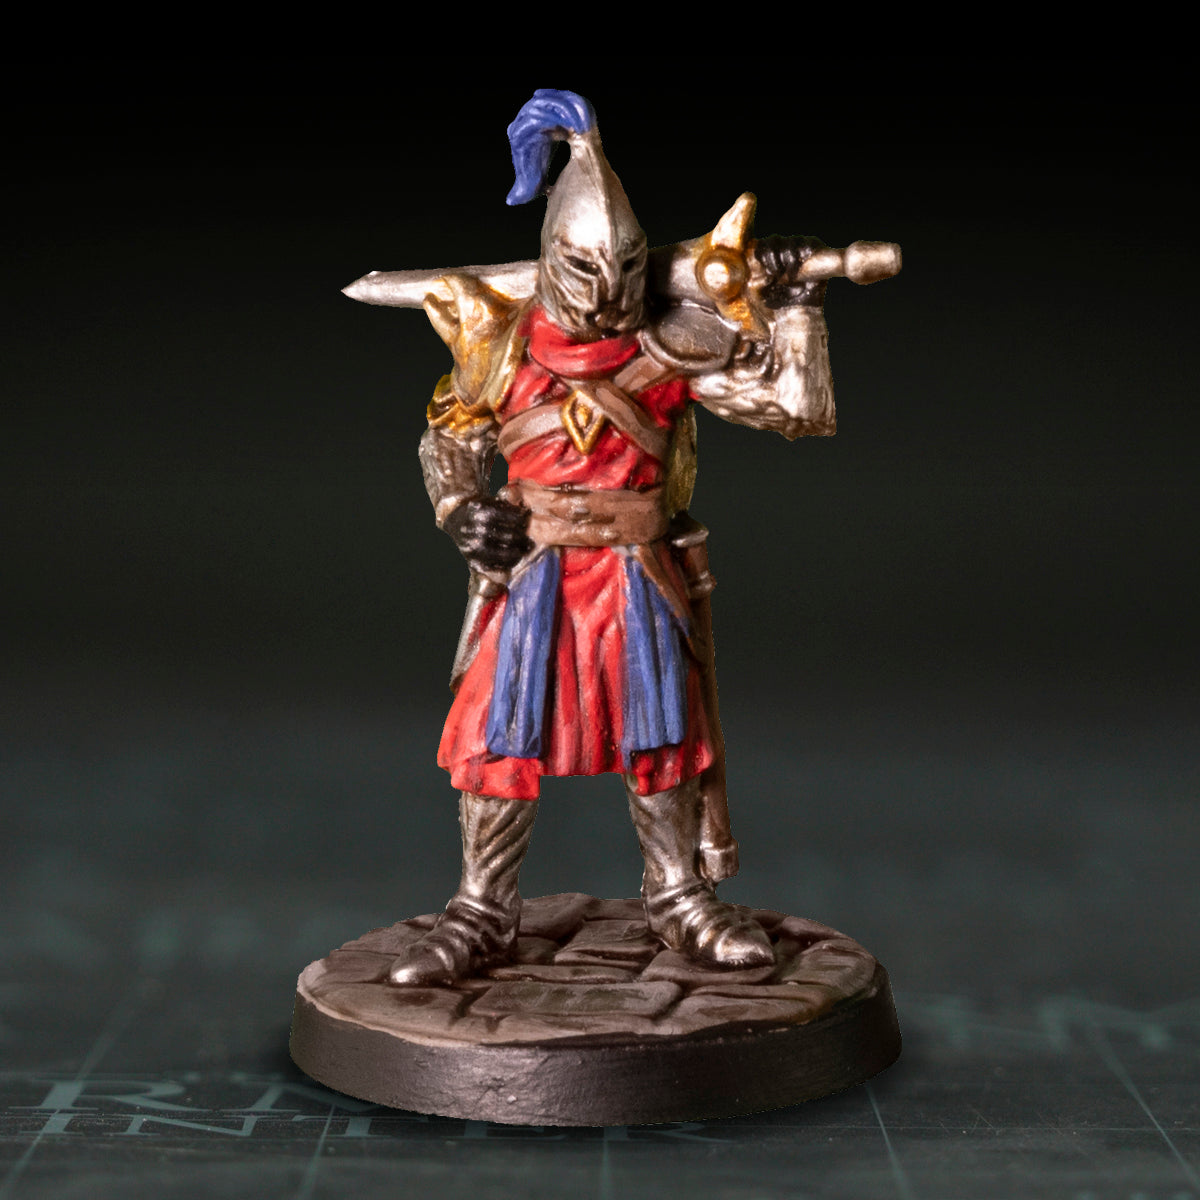
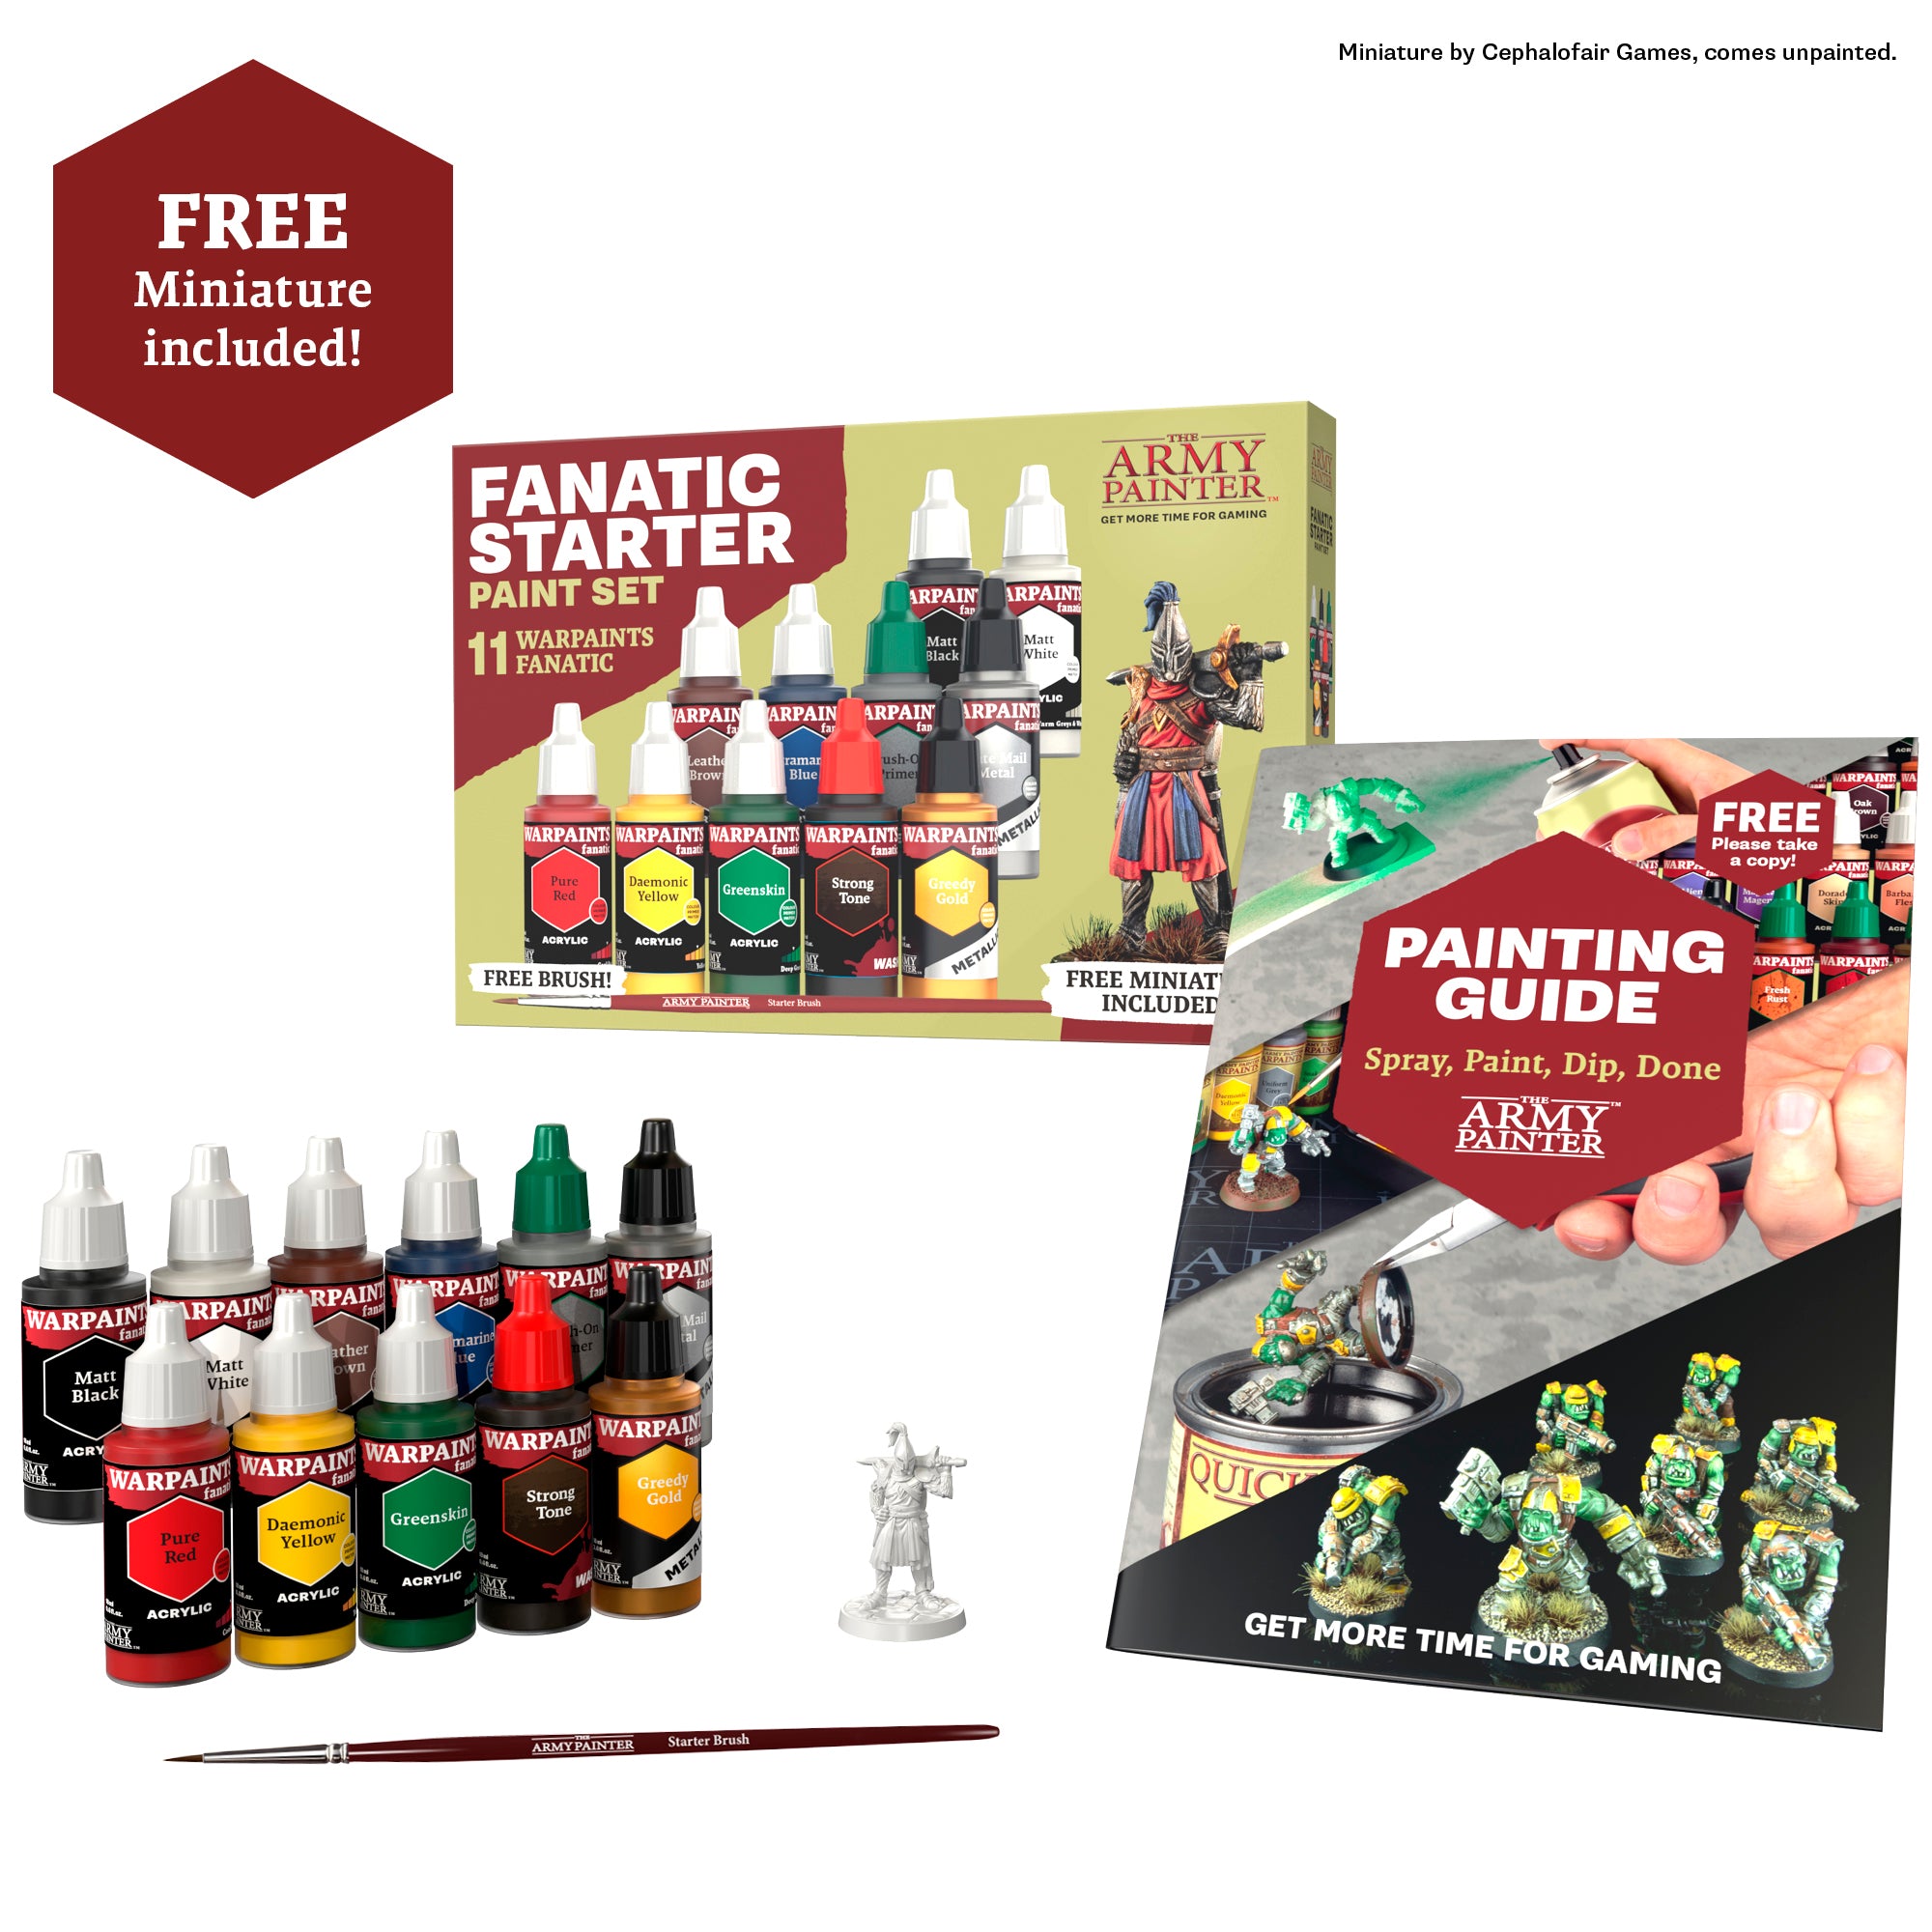
That’s where the Warpaints Fanatic Starter Paint Set comes in: A paint set specifically designed to be the perfect entry point for anyone new to the hobby. It includes all the essential items needed—paints, a brush, and a Knight miniature from Cephalofair Games—along with a QR code for an easy-to-follow painting tutorial.
But does it hold up to that promise?
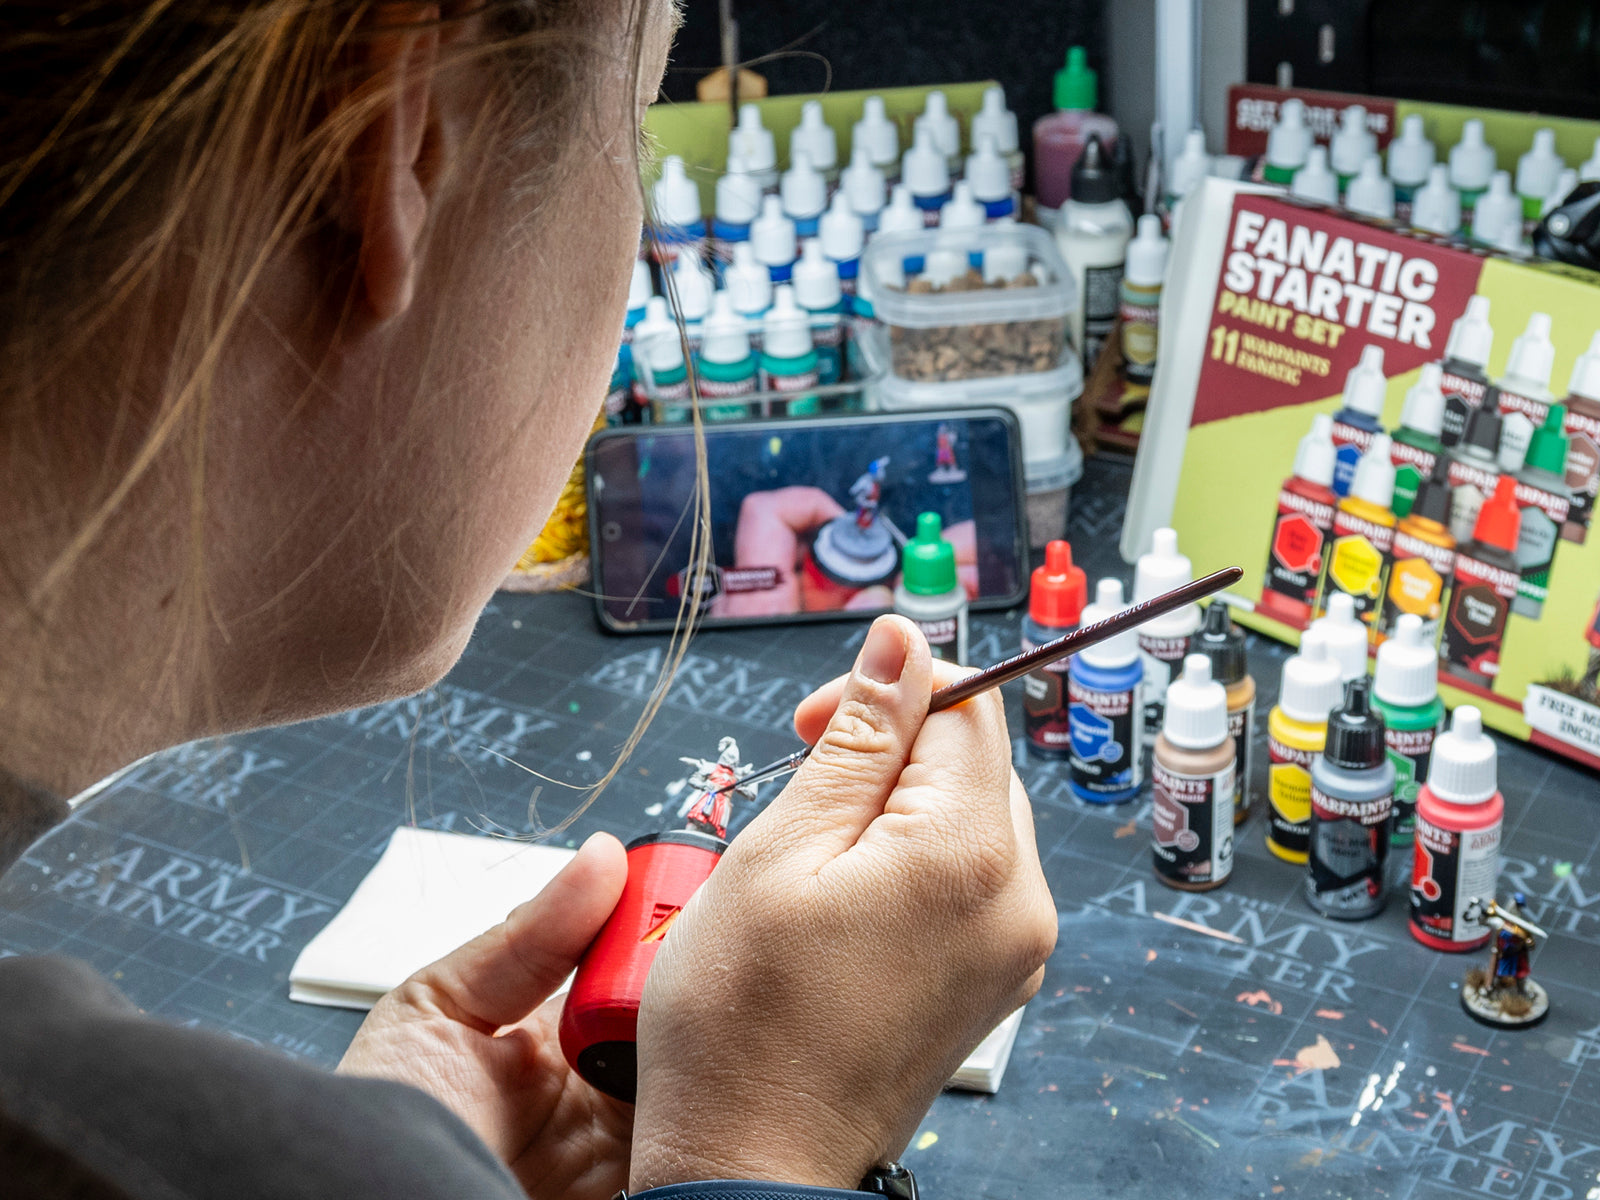
In this post, we're putting the Warpaints Fanatic Starter Paint Set to the ultimate test by having a complete newcomer to the hobby try it out.
Meet Our Volunteer
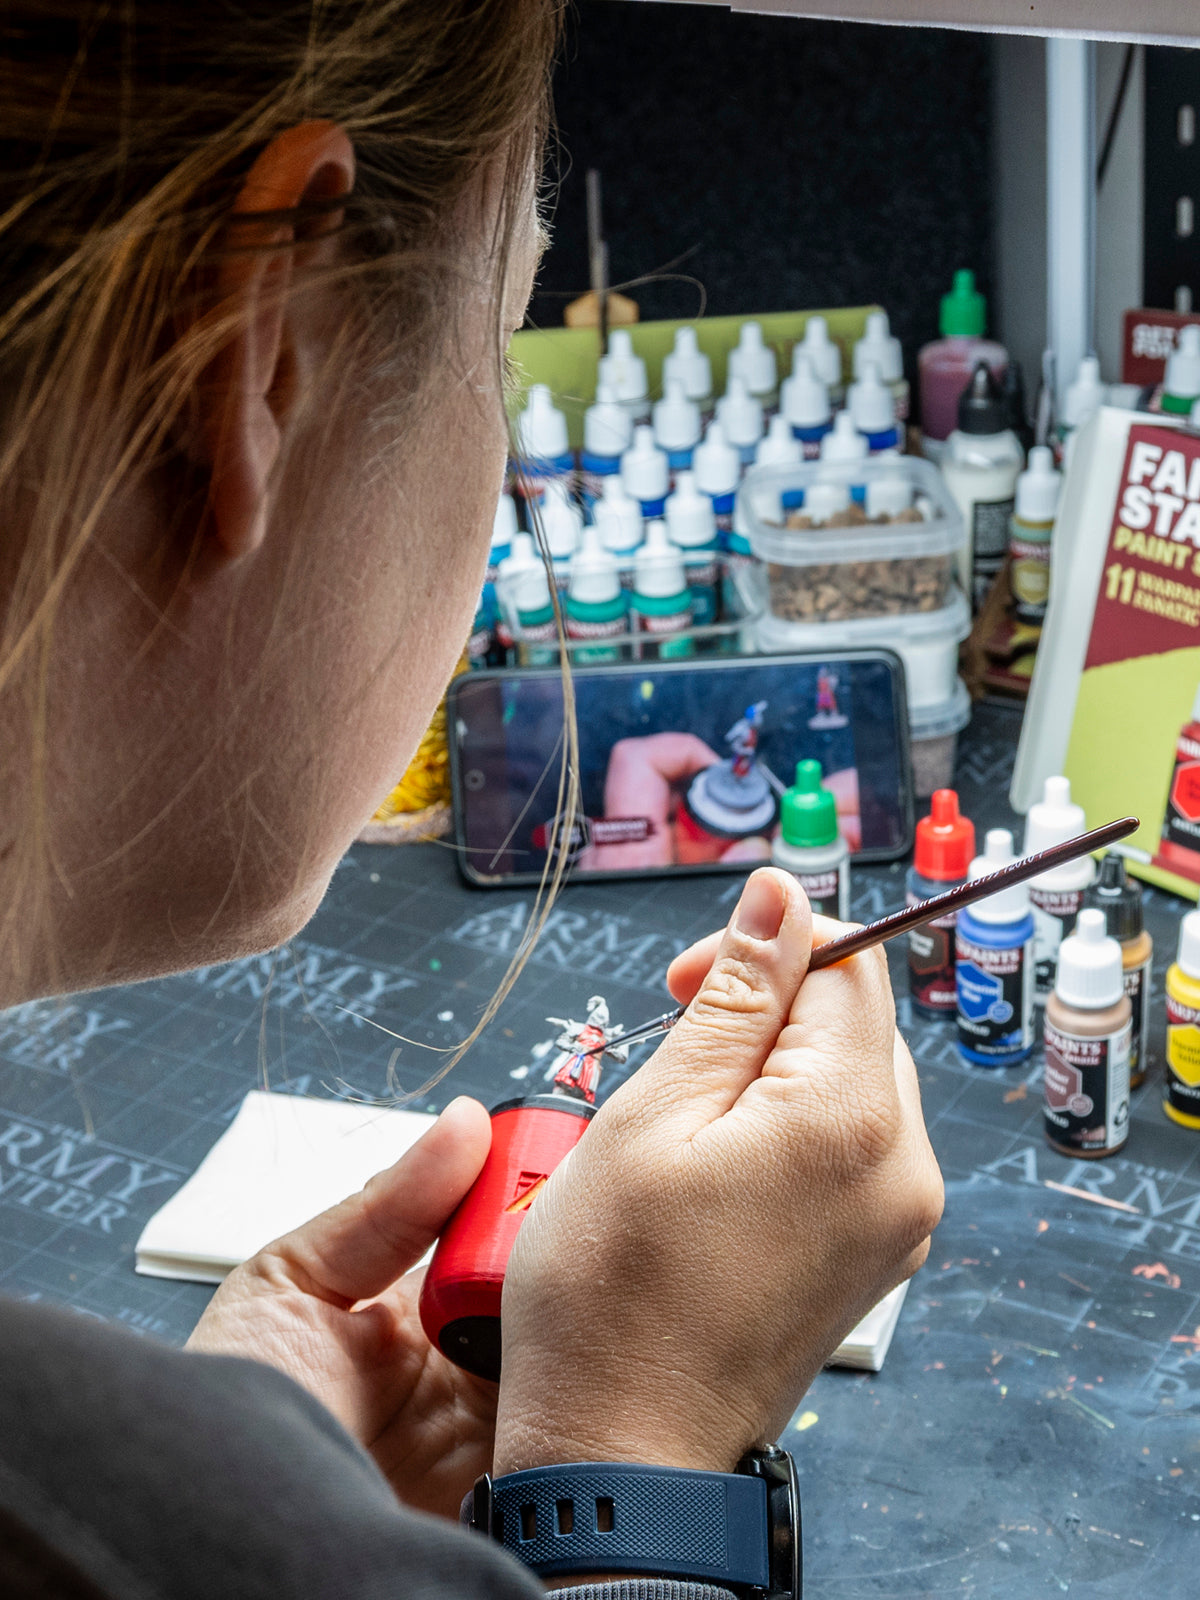
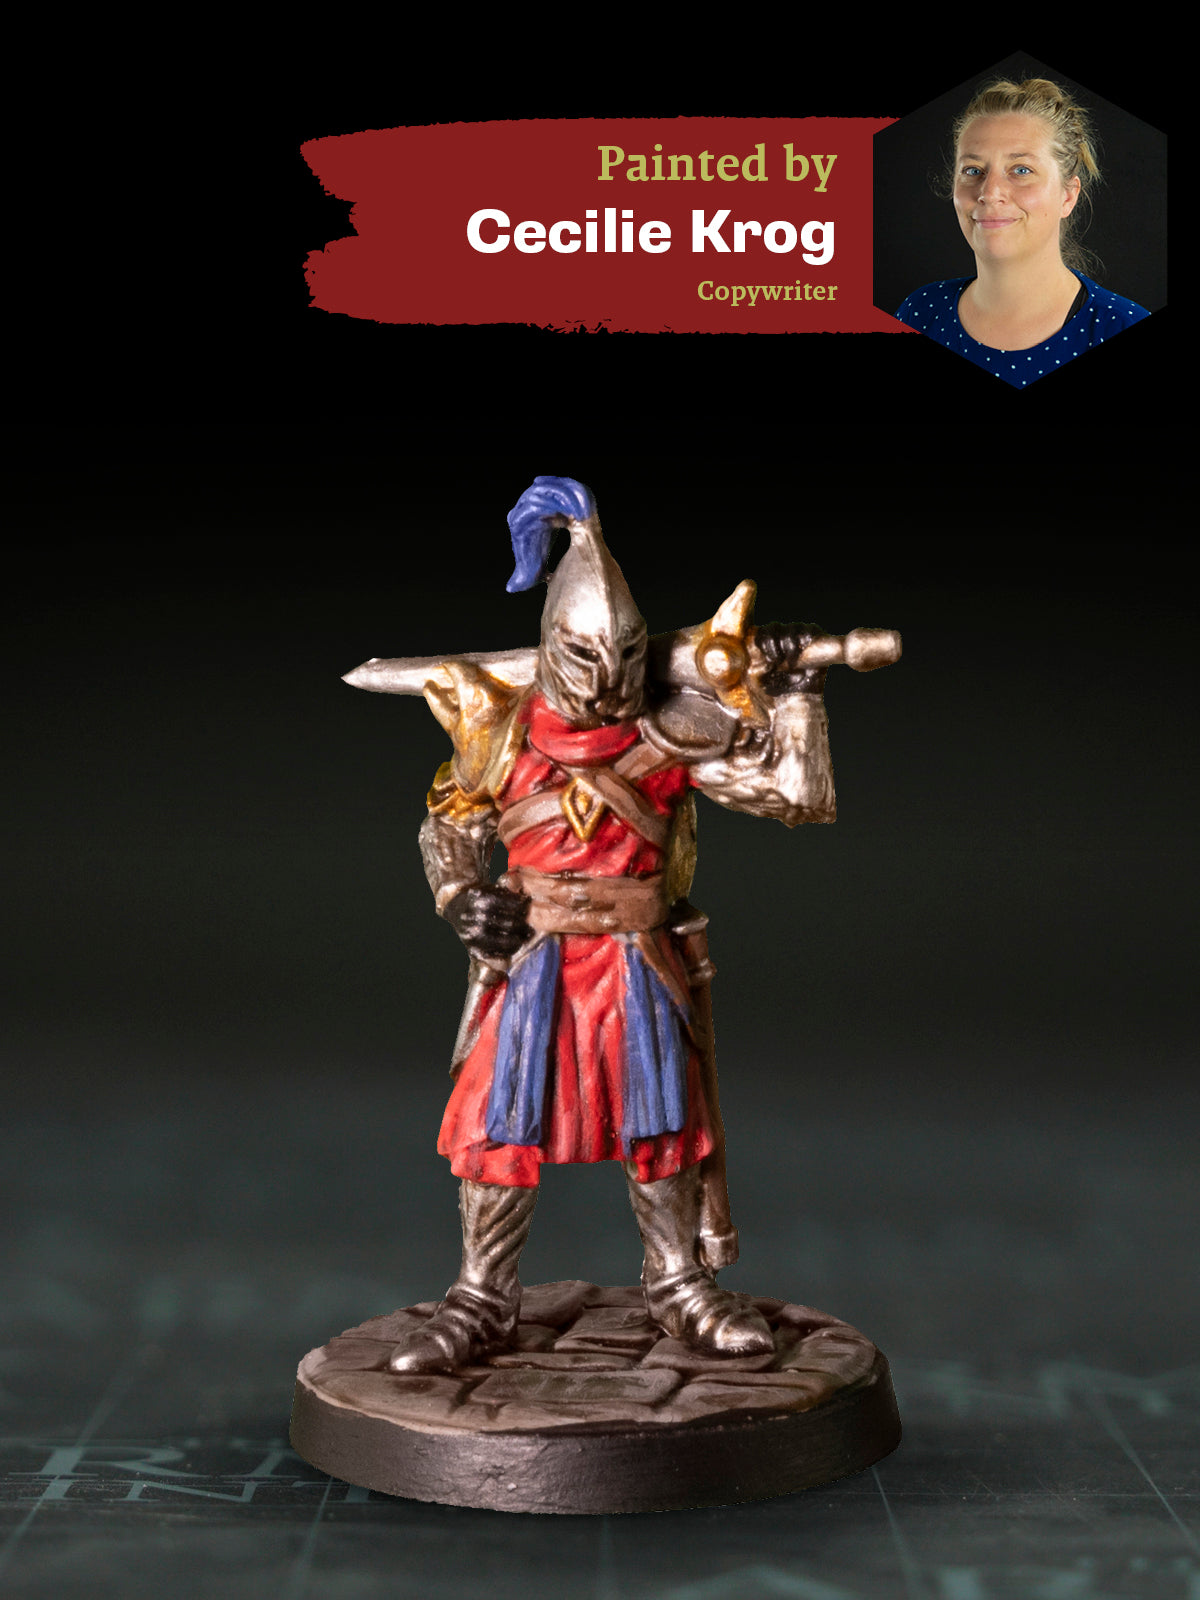
To ensure this test is as authentic as possible, we’ve enlisted Cecilie, a copywriter at The Army Painter and self-proclaimed “total newbie” to the miniature painting hobby.
Her experience with painting miniatures is limited to The Army Painter Owlbear (which is required by all new employees to paint when they begin their career at the company) – and that’s pretty much it. She is therefore the ideal candidate to stress-test the Starter Paint Set.
Cecilie will follow the tutorial video produced by our studio team and use only the products from the Starter Set, replicating the experience of a true beginner.
Follow along in her painting journey below, complete with pictures of Cecilie’s mini for each step.

Guide to Painting with the Starter Paint Set
Step 1
I started by applying a thin coat of the Brush-On Primer all over the model as it’s important to get an even coverage across the entire miniature. It’s great that the brush-on primer is a different colour than the miniature, making it easy to see when I had covered the mini and spot any places I had missed.
I was surprised at how quickly the Brush-On primer dried – this is great if you’re, like me, a bit impatient and eager to move on to the “actual” painting.

Step 2
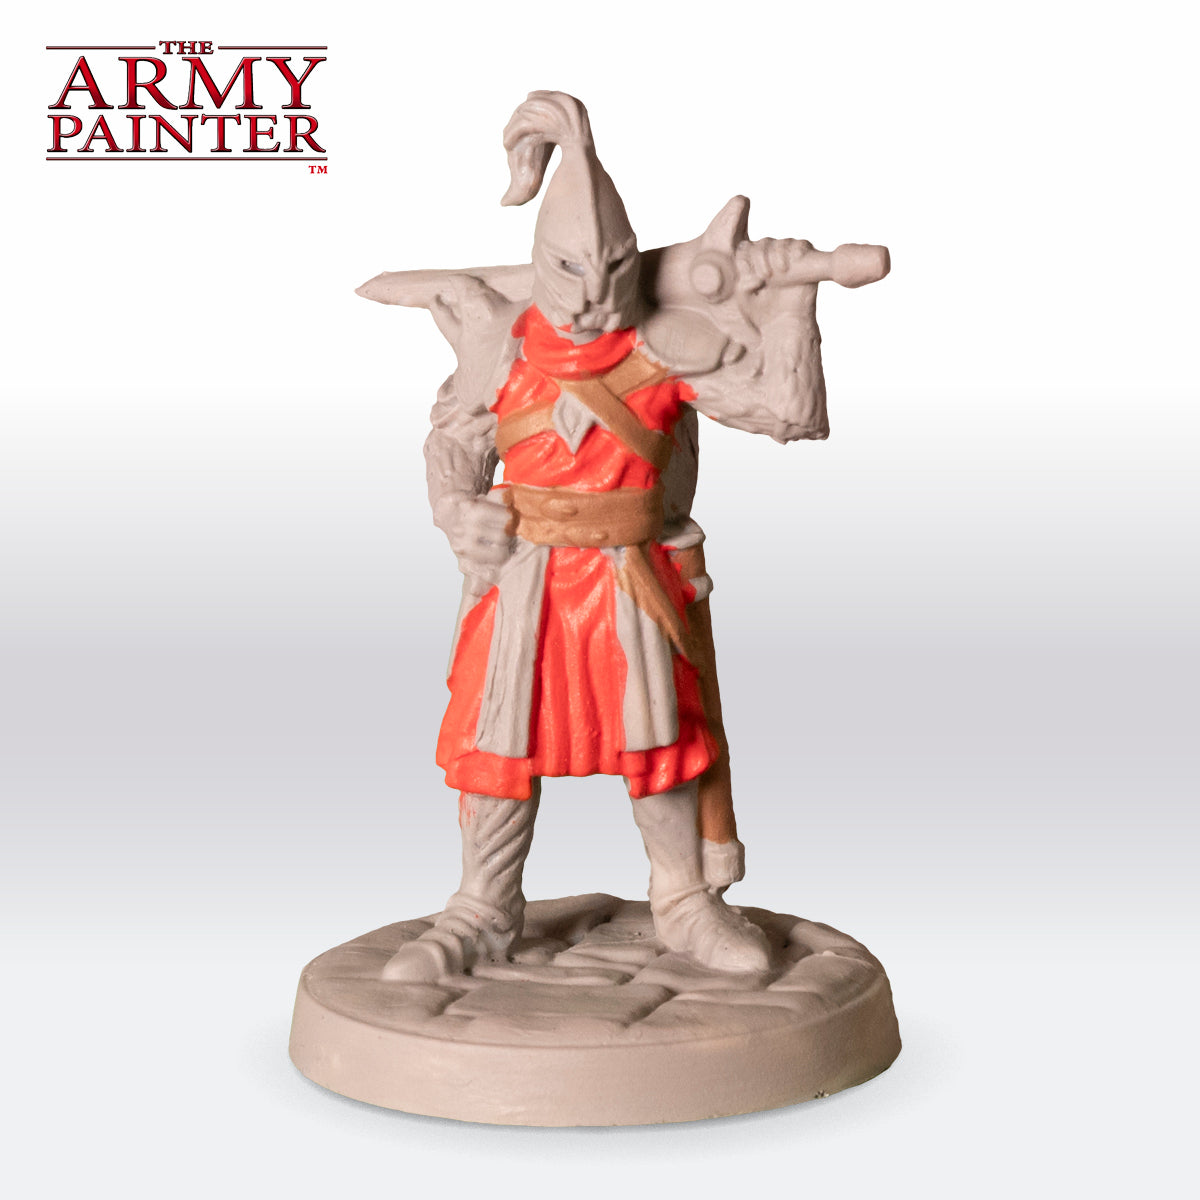
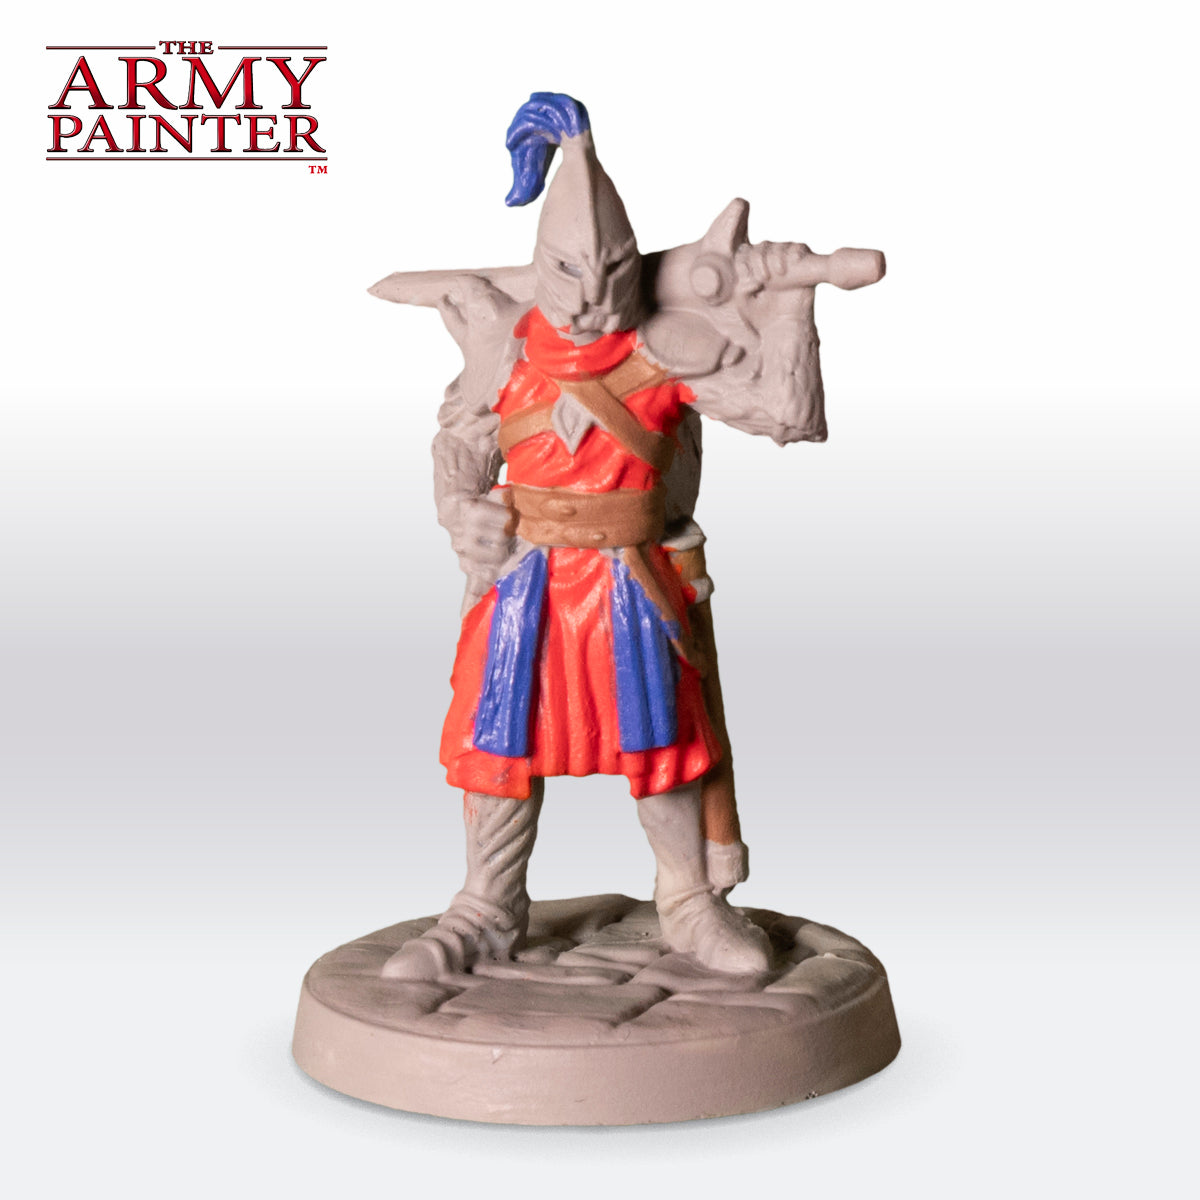
Next, I used Pure Red to basecoat the tunic and robes.
I knew that you have to thin the paints with a bit of water before painting with them, but I wasn’t really sure why. However, I quickly got an understanding of why and how much (or little) water to use so the paint got the consistency of skimmed milk. I could definitely “feel” the difference thinning makes and how it makes it easier to work the paint around the miniature.
Step 3
I then painted the leather straps, belts, and other details like the sheath with Leather Brown.
Step 4
I then picked up Ultramarine Blue to basecoat parts of the shield, some of the robe, and the feathery part of the helmet. At this point, I discovered I had accidentally painted the entire back part of the tunic Pure Red. However, because of the Fanatic paints’ great coverage, I could easily paint over the Pure Red with the Ultramarine Blue, and it only needed two coats to cover the red basecoat completely.
I don't know if it was because of the mini's size or if I wasn't paying enough attention that I accidentally painted the entire back part of the tunic, but it's "comforting" to know that such mistakes are fixable and do not ruin your paint job.
Step 5
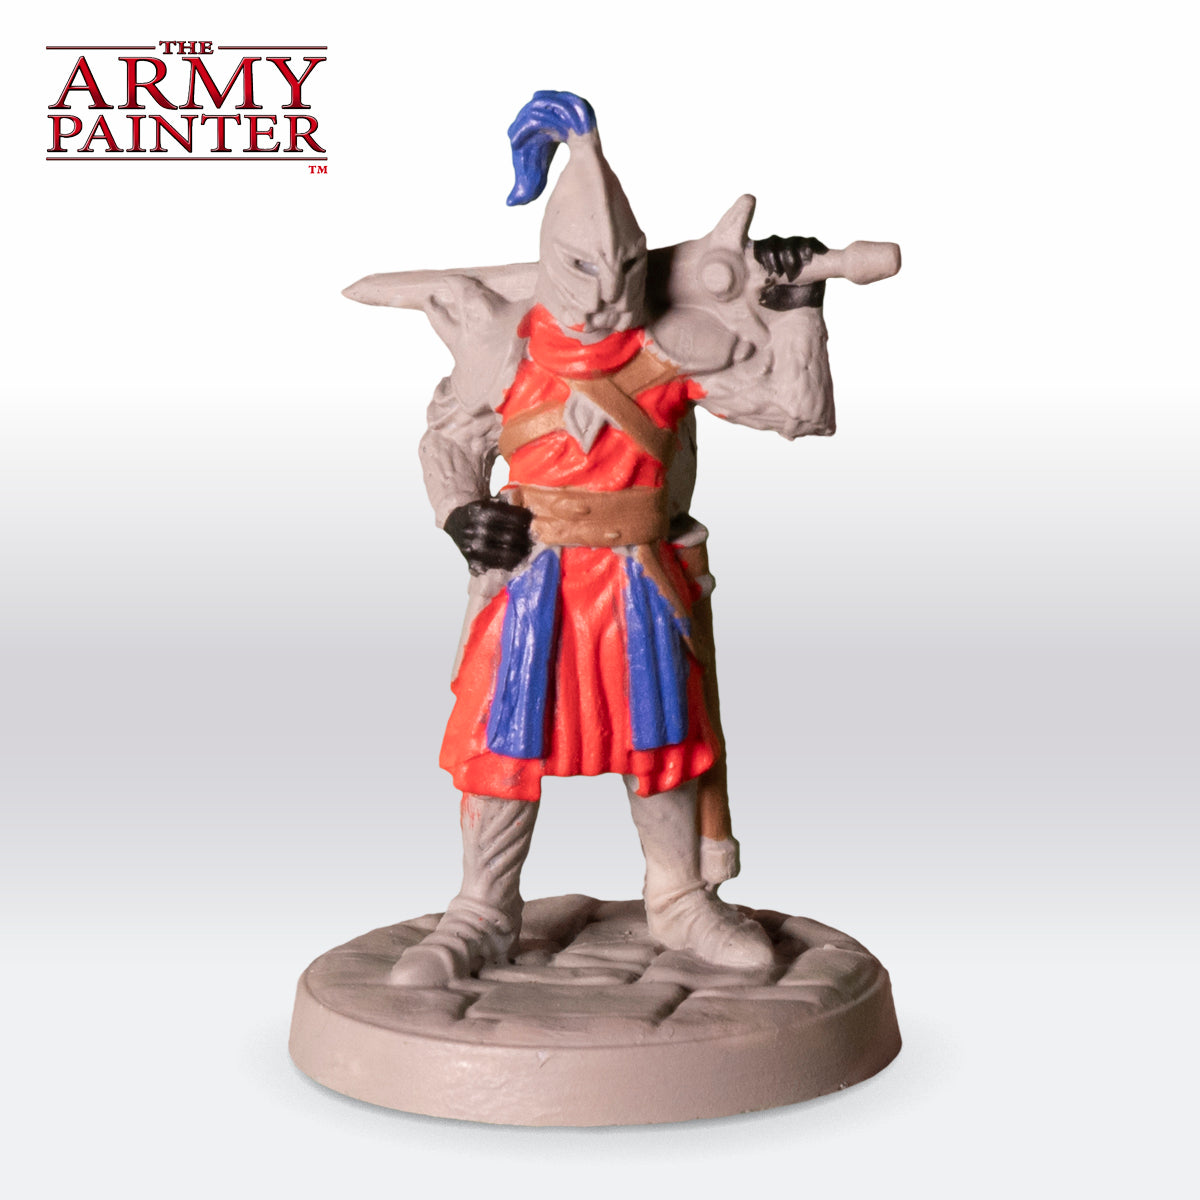
Next, I used Matt Black for the gloves. When painting the smaller and more detailed parts of the miniature, it’s important to be as neat and tidy as possible. If you’re a beginner like me and find it difficult to paint “inside the lines,” you can always grab your previous colours and cover up any mistakes.

Step 6
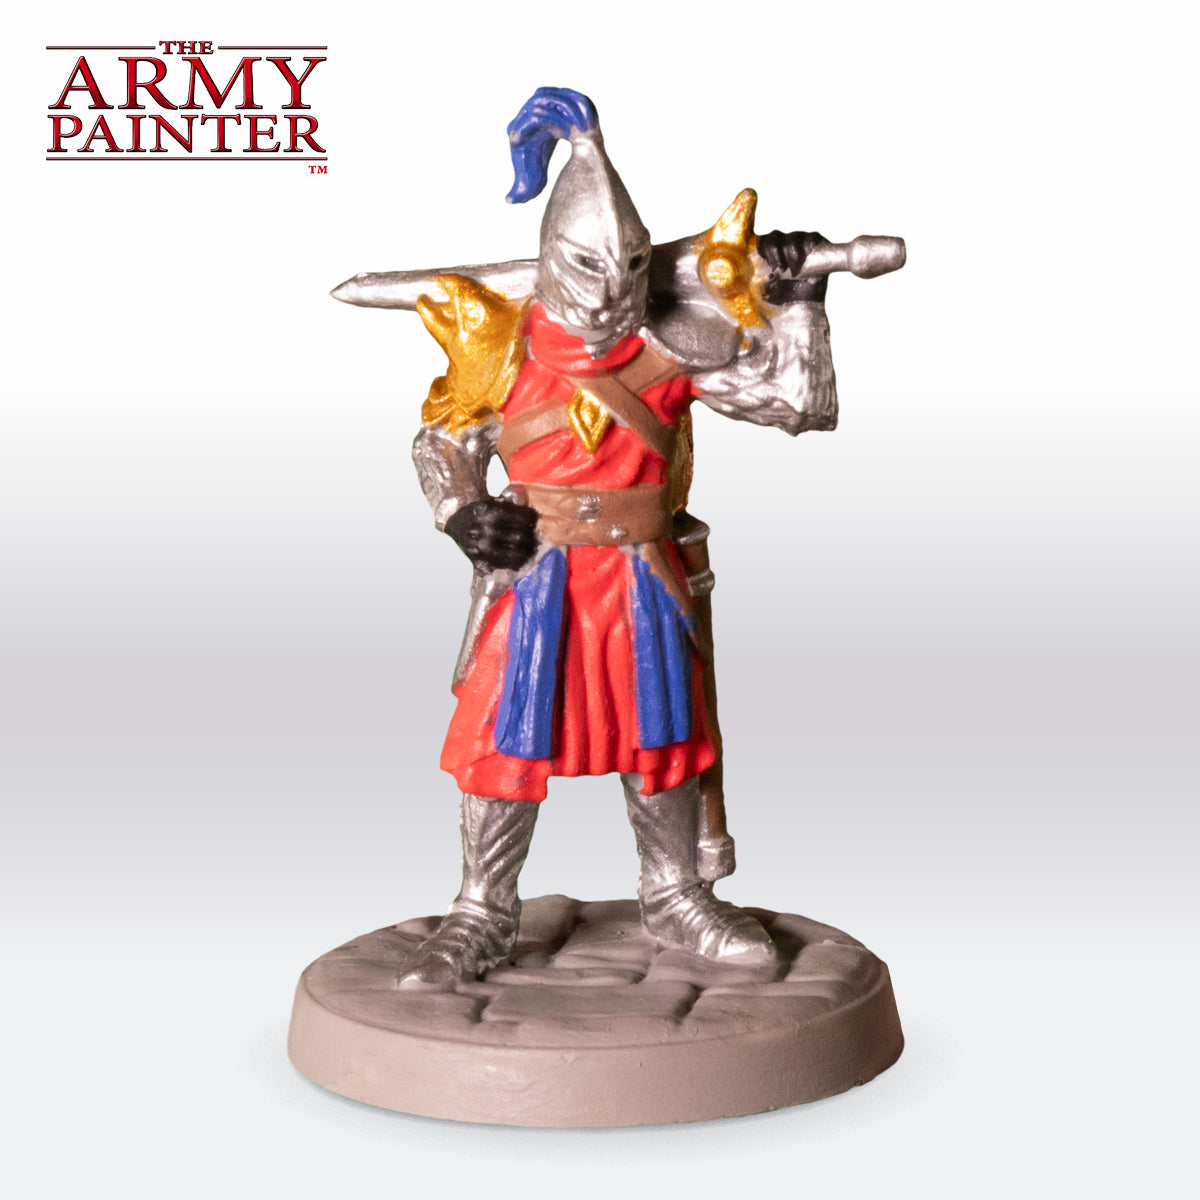
I basecoated the armour, helmet, boots, and sword with Plate Mail Metal. The Metallics in the Fanatic range utilise a combination of aluminium and mica flakes, providing great coverage and a sheen that is instantly noticeable and very reflective.
Step 7
The remaining armour and more ornate pieces on the miniature were painted with the Greedy Gold Metallic paint. Again, with the new formula, one coat was enough.
Step 8
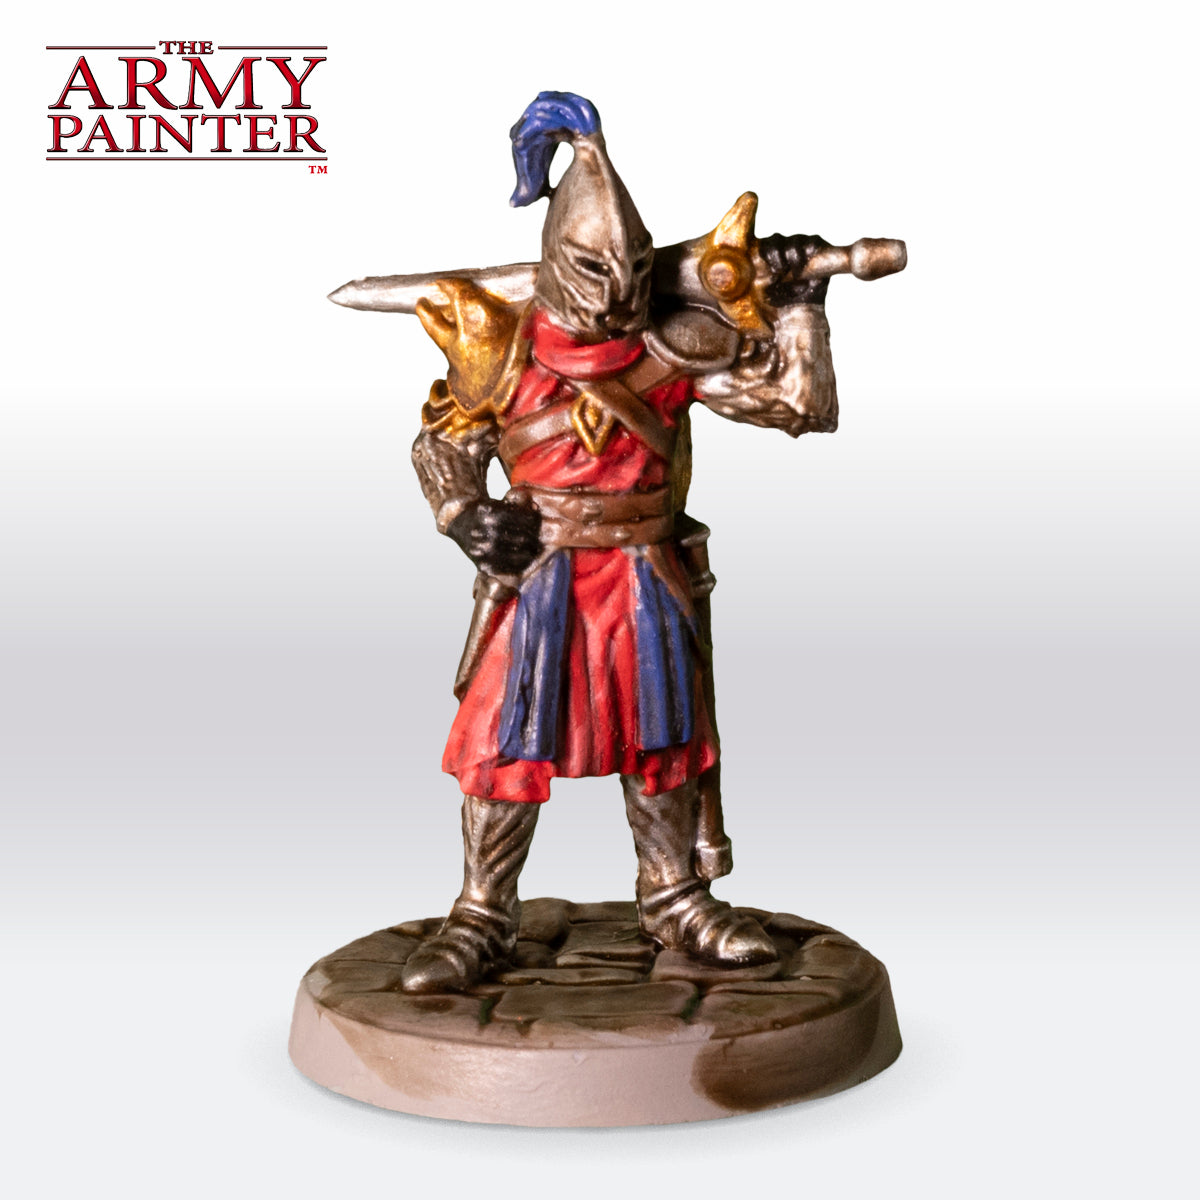
I used the Strong Tone Wash to add instant shading and definition to the miniature. I applied it generously all over the mini and watched the magic happen.
The Wash started pooling in one of the folds, but I could easily wick it away by drying the brush on a paper towel and then using it to soak up the excess Wash.
I totally get why people call Wash “magic in a bottle”. It’s incredible how it just flows into the recesses and instantly creates shadows and definitions, making the paint job look so much better.

Step 9
Once the Wash had dried, the miniature was darkened down a bit. Next step was then to add some highlights and refined highlight to add a bit more definition to the mini.
Starting with Pure Red, I reapplied the basecoats as highlights by tracing over the raised edges and areas. For the refined highlights, I applied a mix of Matt White and Pure Red.
This process of adding highlights and refined highlights was repeated with Leather Brown, Ultramarine Blue, Greedy Gold, and Plate Mail Metal. However, for the refined highlight on the Greedy Gold, I mixed in a bit of Plate Mail Metal to make the shimmer brighter.

Step 10
I used the Brush-On Primer for the highlights on the base.
Step 11
Finally, I painted the rim of the base with Matt Black.
A Beginner’s Thoughts
Overall, this was a really fun experience and definitely made me want to paint more miniatures.
I was a bit intimidated at first and unsure what to do but following the painting tutorial from our YouTube channel made things easier. The tutorial was great. It broke down each step with clear, easy-to-follow instructions. Not only did it explain the “how,” but also the “why” behind each step, like why it’s important to prime your miniature before you start painting. This is very useful information for someone just starting out with painting miniatures.
The Biggest Challenge
I was surprised at how much my hands were shaking, which made it difficult to paint “inside the lines” and stay precise. If I had been at home – and not painting a mini to be used in this blog post – I likely wouldn’t have felt as nervous about painting outside the lines.
The most challenging part was, in my opinion, painting the highlights and refined highlights because I kept questioning where to place them. If I hadn’t been following the YouTube tutorial, I probably would have skipped this step.
The thing I learned, though, was that it’s “trial by error” – sometimes you get it right, other times you don’t – so the best approach is to just try. However, I did learn that you should consider the light source. Think about where the light would fall on the miniature and which parts would be lighter and darker.
Use the Resources Available
Also, as a beginner, you may feel slightly overwhelmed and unsure of what paints you need, especially with a range like Warpaints Fanatic, where there are 216 paints to choose from. However, with the Starter Paint Set I felt like I was being guided, as other (smarter and much more experienced people) had made conscious choices about which colours are both essential and necessary for a beginner.
Based on my experience, I think the Warpaints Fanatic Starter Paint Set is perfect for someone completely new to the hobby. You are provided with everything you need to get started in one box and don’t have to buy additional products, such as tools for assembling the mini. You can begin painting as soon as you get it.
Try the Starter Paint Set Yourself
With unparalleled coverage, intense pigmentation, and smooth application, Warpaints Fanatic is easy enough for a beginner to use, fast enough for a gamer, and capable enough for the best painters in the world. And with the Warpaints Fanatic Starter Paint Set, it’s never been easier to dive into the miniature painting hobby.
But don’t just take our (or Cecilie’s) word for it – see for yourself! And if you’re ready to expand your selection of colours, check out some of the other Warpaints Fanatic paint sets and single paints.
Watch Video Tutorial